Showing posts with label Healthy Eats. Show all posts

Friday, January 30, 2015

Kale Pesto

If you follow the latest food trends, you'll know there is a new 'superfood' popping up every now and then. It seemed like everyone had jumped on the flaxseed wagon some time ago before Chia seeds stole the limelight. Then there was the barley to quinoa shift. And while spinach remains one of the most popular greens thanks to Popeye, kale has been 'the' green to consume lately! I'm not crazy about going by the latest food trends; in fact I believe in eating a variety. But adding a new green to my diet, especially one rich in vitamins and minerals, can never hurt. Another reason to eat kale is it's abundant in winter, when other vegetables are scares. I have been making an effort to eat more of it. My problem with kale though is that it can be bitter and stringy if the leaves are not absolutely fresh and tender. For that reason I had mostly been making kale chips in the oven for the longest time. Now I have found another recipe that will get me to eat more of the green. I was browsing through the cookbook that came along with my Vitamix, and came across a basil kale pesto recipe. I didn't have basil or pine nuts on hand, so I made the pesto using kale entirely, and swapped walnuts for pine nuts. The result was delicious. I tossed together some cooked penne pasta, fresh tomatoes, broccoli, and pesto for a satisfying and healthy week night dinner. The leftover pesto made a great smear for a veggie sandwich.


Kale Pesto

Ingredients:
2 Cups Kale leaves - torn
2 Cloves of garlic
1/4 Cup walnuts - you can also use pine nuts or almonds
2/3 Cup Parmesan cheese
~1/4 Olive oil
1/2 Teaspoon red chili flakes
Salt per taste

  • Wash kale leaves thoroughly. Tear the leaves off the stock. If there are any veins that are tough, remove them. 
  • Toss in kale leaves, garlic, walnuts, Parmesan, salt, and red chili flakes in a food processor. Pulse a few times until all the ingredients are combined and the leaves are roughly chopped.
  • Slowly drizzle in olive oil while grinding until you have smooth pesto. 


Serving suggestion:
Cook your favorite pasta. Add chopped fresh tomatoes, blanched broccoli florets, kale pesto, and mix well. Serve with some grated Parmesan on top. You can add any other veggies or meat you like. 

Friday, December 5, 2014

A Roasted Vegetables Dinner

All good things must come to an end. After spending three wonderful months together, and making lots of new memories, we said goodbye to my parents. I am so happy and thankful for the time my daughter got to spend with her grandparents. It's going to be difficult getting used to an empty house.

I was on the important task of eating down our overstocked fridge before mom and dad left. Monday night I took all the veggies - Brussels sprouts, cauliflower, carrots, turnip, and a leftover poblano pepper - and decided to use them up. I had originally planned to roast Brussels sprouts on Thanksgiving; it was time to do so finally. Rest of the vegetables, also roasted, went into a velvety smooth soup. The soup was made at mom's request - she kept on talking about this wonderful roasted cauliflower soup she had tried somewhere, and had been asking me to make it. The other vegetables happened to go well with it, so I tossed them in. What started as an exercise to just finish up the produce turned into a wonderful meal, perfect for the cold night we had. 


I roasted Brussels sprouts tossed in some olive oil, herbs, salt & pepper, at 400F for about 25 minutes. Sometimes simple is what you should aim for. Mom and dad, who called them mini cabbages, loved roasted Brussels sprouts, especially the crunchy outer layers.

I kept to soup low cal by using milk instead of cream for that smooth and creamy texture. The carrot and poblano helped take away the pungency of the cauliflower. Some almonds on top gave it a nice crunchy bite.This was a good filling soup. You could add potato or other winter veggies to it. This recipe is a keeper.


Roasted Cauliflower, Carrot, & Turnip Soup With Poblano

Ingredients:
1 Medium head of cauliflower
1 Medium Turnip
1 Large or 2 small carrots
1 Poblano pepper
1 small onion
3 Cloves of garlic
2 Teaspoon Italian herbs
3/4 Teaspoon cumin-coriander powder
1/2 - 1 Teaspoon red chili powder
Salt & pepper to taste
1 Quart low sodium vegetable broth
3/4 Cup whole milk (or cream if you like)
Olive oil for tossing vegetables and sauteing
Chopped cilantro, chopped chives, slivered almonds, or croutons for garnishing

  • Prepare the vegetables for roasting - separate cauliflower florets, cut turnip and carrots into cubes. Toss these vegetables and whole poblano in a little bit of oil (just enough to coat), and Italian herbs. 
  • Spread all the veggies on a baking sheet, and bake at 400F for 20-25 minutes, or until the cauliflower is golden and rest of the veggies fork tender. Take out and keep aside. 
  • On the side, chop onion and garlic finely.Heat a couple of teaspoons of oil, and saute them until onions are translucent. 
  • Add all the roasted veggies, cumin-coriander powder, red chili powder, and half the vegetable stock to the pot. Blend this until smooth and creamy. I used my Vitamix, which does a great job of making smooth soups. 
  • Pour this back into the pot, add the remaining vegetable stock, or as much needed to create the consistency you like, milk, salt & pepper to taste. 
  • Bring the soup to a boil and reduce to simmer. 
  • Serve hot, with your favorite garnish. I added chopped cilantro, and slivered almonds for some crunch. 


Monday, December 1, 2014

(Almost) Vegetarian Thanksgiving

You know how sometimes things just turn out right and everything jives together really well - You plan a party with your old friends but enjoy their company anew, or you follow a tried and tasted recipe but the dish somehow tastes better? Our Thanksgiving lunch yesterday was no different. I had planned to get together with a couple friends of mine. My friend's dad is visiting her from India. With both of our parents in town, we thought it would be nice to get together. And what fun we had! We each prepared a few dishes, mostly vegetarian. Every item turned out great, if I may say so myself. Both of our parents loved the traditional fair. We dined for a long time, amid delightful conversations. Here's a recount of our wonderful meal.


When we went over to my friends' house, they had already set up the table beautifully. I was certainly pleasantly surprised, knowing that they had just returned from a trip at 1 am!

My friends made sweet potato and carrot soup with just the right amount of cinnamon, and some heat. It was the kind of soup that makes you  feel warm inside with just one sip. Then there were deviled eggs, green beans and peas casserole with crunchy almonds on top, and a beautiful dessert turkey made of fresh fruits! I contributed by making stuffed mushrooms for appetizers, stuffed acorn with quinoa pulao for the main course; and mom made third(!) batch of her almost famous cranberry pickle to eat with the pulao. To our delight, we ended up with very little leftovers. My friend immediately claimed the leftover pickle; somehow mom managed to steal the show with just a small side dish!


I used my sister's recipe for stuffed mushrooms, with a couple of modifications. It is a simple recipe, and a favorite finger food of mine to make at holiday parties. If using large mushrooms, I make 3 per person with a few extra to go around. I kept the mushrooms stuffed and ready to go in the oven ahead of time, and baked them just before heading over to my friend's house. They reheat well - just a few minutes in the oven at 375F.


Stuffed Mushrooms With Spinach and Parmesan

Ingredients:
20 Large white button mushrooms (you can also use the brown variety)
1 Small red onion - finely chopped
1 Cup finely chopped fresh spinach
1/2 Cup grated Parmesan cheese + more for topping
3 Garlic cloves - crushed and finely chopped
1 Teaspoon Tuscan seasoning (regular Italian seasoning in lieu of it)
1/2 - 1 Teaspoon crushed red pepper
2 Teaspoons olive oil
Salt & pepper to taste
Oil spray
  • Clean mushrooms with a damp towel. If the mushrooms are very soiled, rinse them in water and pat dry right away with a towel. Remove the stems (don't discard), and clean out the brown part inside with the handle of a spoon or a butter knife. 
  • Take ~1/2 of the mushrooms stems and chop them finely. These will go in the stuffing. 
  • Heat oil in a pan and add chopped garlic. Saute for a few seconds until golden. 
  • Add onion to the pan and saute until translucent. Then add chopped mushroom stems, spinach, herbs, and red pepper flakes. Cook for 3-4 minutes on medium heat until everything comes together. Season with salt & pepper. 
  • Turn off the heat and add grated cheese to this mixture. 
  • Spray insides of the mushrooms with oil, stuff with the above mixture, top them off with more cheese that'll melt and create a crust. Once stuffed, spray the mushrooms again with oil. 
  • Preheat oven at 400F and bake the mushrooms for ~20 minutes or until the cheese on top has turned golden brown and the mushrooms are tender. 
  • Take them out of the oven, remove all the excess juices accumulated at the bottom, garnish with chopped cilantro and serve!

Stuffed acorn makes for a great vegetarian main course. It looks beautiful, is filling, and can be made quite healthy. I have always stuffed acorn with quinoa pulao with different veggies each time. I've made it with broccoli-carrot, mushroom-peas, just tri-colored peppers. This time I used sweet red and yellow peppers, and peas. To bring in a touch of spice, I added a little bit of garam masala (had to do it!). In went a few raisins to balance out the spices, like we do in Indian pulao recipes. I gauged ~3/4 cup packed cooked quinoa for each person. That was about how much everyone ate among all other dishes. I baked 3 medium acorns for 6 adults, but 2 were plenty.


Stuffed Acorn With Quinoa Pulao

Ingredients:
2 Medium sized acorns
1 1/2 Cups uncooked quinoa
1 Small red onion - finely chopped
3 Garlic cloves - crushed and finely chopped
3/4 Cup peas - frozen or fresh
3/4 Cup chopped red and yellow sweet peppers Or use bell peppers
1/4 Cup golden raisins
1 Teaspoon garam masala
1 Teaspoon Italian herbs
1 Teaspoon red chili powder or paprika
Some red chili flakes - to liking
Salt to taste
1 Tablespoon olive oil
Cilantro for garnishing

  • Clean acorns. Keep them stem side down, and cut the top horizontally about 1/4th way down. This will make them look like pots with lids. Clean out the seeds with a spoon. Spray the insides with oil. 
  • Preheat oven at 400F and bake the squash for 25 minutes or until tender. Take out and keep aside. 
  • On the side, cook quinoa according to package instructions. Keep aside. 
  • Heat oil in a cooking pan, add chopped garlic and onion and saute for a minute or so until the onions are translucent. 
  • Add peas and peppers and cook for a couple of minutes until tender. 
  • Mix in all the herbs and spices, and lastly cooked quinoa and raisins. Salt to taste.
  • Adjust the amount of spices to your liking. Once all the flavors have come together, turn off the heat. 
  • To assemble, take a casserole or a flat bottom serving dish. Spread some of the pulao at the bottom, keep the baked acorns on top, and fill them with rest of the pulao. Garnish with chopped cilantro. When serving pulao, scoop some acorn along with it. 

Here is to another great year of wonderful eats and great friends. I can't finish this post without being thankful for my sweetheart munchkin! 

I want to hear about your Thanksgiving stories!

Saturday, November 29, 2014

Quinoa Enchilada Casserole To-Go

Our Thanksgiving celebration is delayed this year. We are going to have a potluck tomorrow with some of our friends. The actual day was a quiet affair though. Husband was of town, and so were most of our friends. My parents, who are packing bags as the end of their trip approaches, and I wanted to steal the last weekend to enjoy the beautiful San Diego weather. We decided to pack some lunch and head over to Del Mar beach. Although not very picnic-y, I had just the right dish in mind. Last week I had bookmarked this Quinoa Enchilada Casserole recipe, and had (almost) all the ingredients on hand. This casserole was perfect for various reasons - it was an easy one pot, rather casserole, dish; it stayed quite hot until we got to the beach; it was easy to carry in the car; and it was tasty with all the Mexican flavors, yet fit into my mom's restricted diet plan.

A few modifications made this dish perfect for us. I added fresh poblano pepper rather than canned chiles, tossed in lots of fresh spinach instead of cilantro for a dose of healthy, and used regular instead of mild enchilada sauce. The only cheese I had on hand was paneer. Mom can't eat cheese anyway, so a little bit of paneer to bind everything worked just fine. Some ooey gooey cheese would've been nice, but we didn't miss it. Even after using regular sauce though, the dish lacked serious heat to our Indian palates. I would have certainly liked either hot enchilada sauce or some jalapenos thrown in there. We topped the casserole with fresh avocados before serving. 


Quinoa Enchilada Casserole

Ingredients:
1 Cup uncooked quinoa
3/4 Cup canned black beans, rinsed
1/2 Cup corn kernels
3/4 Cup chopped fresh spinach
1 Poblano pepper - seeded and chopped
1/4 Cup grated paneer (or use mozzarella/cheddar)
1 Bottle hot/regular/mild enchilada sauce (depending on how spicy you want it)
1 Teaspoon cumin-coriander powder
1 Teaspoon red chili powder (if needed)
Salt to taste
1 Avocado, seeded and diced
Cilantro for garnishing (optional)
  • Cook quinoa according to package instructions. You can use any kind of quinoa. 
  • Mix all the ingredients, except avocado and cilantro, in a casserole. Taste before you add salt, as the sauce is quite salty. 
  • Preheat oven at 375F. Bake quinoa mixture for 15 minutes, or until you see a crust on top. 
  • Garnish with cilantro and avocado. 

Thursday was a pretty hot day. I had expected it to be cooler by the beach, but it wasn't so. By the time we finished lunch it was too hot to be on the beach without any shade, especially for the baby. Mom and dad said their goodbyes to the Pacific, and we returned home. We made an unsuccessful trip to the mall yesterday. The lane to the entrance was blocked forever. It was black Friday..what was I thinking?? It didn't bother me much though, as we ended up taking a U-turn and going for a nice lunch instead. Somehow we circle back to food :). 

I am looking forward to our feast tomorrow. Are you done with all your feasts for the holiday? What did you gobble gobble gobble?

Friday, June 13, 2014

Gourd For You

As a nursing mother, it is very important that I watch what I eat. Babies have immature and sensitive digestive systems. It didn't take long for me to realize that tummy ache is the main culprit when my baby is fussy or cranky. It is best that I avoid acidic, gassy, difficult to digest foods. The common culprits of tummy troubles are dairy, sugar, and vegetables such as cauliflower, broccoli, cabbage, eggplants, etc. So what's good for a new mother? Gourd! Gourd and squash of every kind. I have eaten more gourds over the past three months than ever in my life. You name it - bitter gourd, ivy gourd, ridge gourd, bottle gourd, snake gourd, pumpkin - you get the idea! These vegetables are fibrous, nutritious, and easy to digest. Add some mung daal (split mung) when preparing and you have a dose of protein too. I have been preparing different gourds and squashes available in the grocery stores here using light Indian seasoning. Here is one of my favorites - butternut squash curry scented with ghee, curry leaves and grated coconut.


Butternut Squash Curry

Ingredients:
1 Medium butternut quash (~2 1/2-3 Cups peeled and cubed)
3 Tablespoons fresh/frozen grated coconut
2 Dried red chilies
1 Sprig curry leaves
1/2 Teaspoon mustard seeds
1/4 Teaspoon fenugreek seeds
Couple pinches asafoetida
1/2 Teaspoon turmeric powder
1 Tablespoon ghee
Salt to taste
Chopped cilantro for garnishing

  • Heat ghee in a cooking pan, and add mustard seeds.
  • Once mustard seeds splutter, add red chilies, curry leaves, and fenugreek seeds. Stir for a few seconds and add asafoetida and turmeric powder.
  • Add cubed squash and grated coconut to the tempering, and salt to taste.
  • Add a cup of water and mix everything well. Cover and cook on medium, stirring occasionally, until squash is cooked thoroughly and the flavors come together.
  • Garnish with fresh chopped cilantro.

Serve with hot rotis and yogurt on the side.


Tuesday, March 26, 2013

A Riot Of Colors

Holi Hai Bhai Holi Hai! Wishing all my readers a very colorful Holi!

I know the other side of the country is eagerly awaiting the arrival of spring; but I hope the colors of Holi wash away all the white and brighten up you days. Over here, spring is peeking through the pink-purple-yellow wildflowers dotting the green patches everywhere, the sweet songs of red-black-blue birds hopping in our yards, and the tender green shoots covering the bare bones of all the trees. There's a riot of colors everywhere; happy times are here again!


What colorful food will you eat for Holi? No, I'm not talking about artificial food colors. I'm referring to the bounty of veggies and fruits that add a splash of color to our plates. We've all heard our grandmas saying, "Eat your colors! They make a balanced diet." Scientific research now shows that the color pigment in different fruits and veggies results from the compounds, vitamins and other nutrients in them. Old cultures have always emphasized the importance of eating foods from various color families. Mom always taught me to pick different colored veggies/fruits/beans when planning a menu. Holi is a perfect time to remind ourselves that colorful foods are not just pleasing to the eyes, but nourishing to our bodies. Eat a rainbow every day to ensure you get the essential nutrients your body needs**. A few good articles on the benefits of colorful foods - NYTimes HealthDr. OzSFO Chronicle.

**Please note: I'm no nutritionist or doctor. But I suppose eating a variety of fruits and veggies doesn't hurt anyone :D.

Rainbow of foods

Red/Pink: Provide antioxidants, vitamin A and C.
Examples: Tomatoes, Red bell pepper, Pomegranate, Strawberries, Watermelon

Watermelon Salad
Tomato Bhaji
Orange/Yellow: Rich in vitamin A, vitamin C.
Examples: Apricots, Squash, Carrots, Orange, Papaya, Peaches, Mangoes

Green: Fiber, vitamin K, chlorophyll - a natural purifier, vitamin B
Examples: Spinach, Kale, Lettuce, Zucchini, Green bell peppers, Peas, Green Beans, Broccoli, Leafy veggies

Spinach Thoran
Blue/Purple: Anthocyanins, Vitamin K
Examples: Eggplants, Beets, Purple cabbage, Blueberries, Figs, Plums, Blackberries

Berry Trifle
Fig Barfi
May your lives be filled with healthful colors!

Friday, March 22, 2013

Lunch Club

Once every month or month and a half, a group of my colleagues and I get away from the cubicles at noon, take over one of the conference rooms, and instead of discussing statistical theories, enjoy delicious foods prepared by each other. We have a fun little Lunch Club, which has revealed many great cooks in the group. I can't tell you what feasts these gatherings turn into - we always struggle to get back to work while in food coma! It's nice not to worry about work for some time and talk about our lives outside of the office.

For this month's potluck, I made a simple make-ahead dish. It saved me the hassle of cooking early in the morning and worrying about how it would taste after reheating. A quick, tasty couscous salad which can be made ahead and served chilled.

Couscous, which is semolina flour rolled into little pearls, is softer and fluffier when cooked than semolina itself. I love all sorts of pilafs made with couscous, but my latest fad has been a cold salad with Mediterranean essentials and cranberries! I've eaten variants of this salad at many restaurants. This dish hardly requires any cooking skills; the only somewhat challenging part being the actual cooking of couscous. To make sure it doesn't become too clumpy and dense, I add a dash of oil to it while cooking. Also, it helps to be conservative with the amount of water. You can always add some warm water if the couscous is not cooked completely. And if you can help it, don't turn couscous vigorously - cooking in a non-stick pot on medium heat will help.

**Please note that the measurements in the recipe below are approximate. You can add as many or as little of the veggies/beans as you like.


Couscous Salad With Cranberries

Ingredients:
1 1/2 Cups dry couscous - the smaller variety
Vegetable stock - optional
3 Tablespoons olive oil
2 Small garlic cloves - minced
1 Small Persian cucumber - finely chopped
1 Small tomato - finely chopped
2 Scallions - thinly sliced
1/2 Cup cooked chickpeas
1/4 Cup dried cranberries and toasted almonds
2 Sprigs of basil - julienned
Juice from 1 lime
Salt & freshly cracked pepper to taste

  • Cook couscous according to package instructions. For a more full bodied flavor, use half vegetable stock and half water in cooking. Also, salt it while cooking so it mixes more evenly. 
  • Heat oil in a pot and add minced garlic and saute for a minute until golden brown. Add cooked couscous and turn gently. Then turn off the heat.
  • Add all the veggies, chickpeas, cranberries, almonds and basil. Sprinkle juice from one lime, and season with cracked pepper to taste.
  • Use a fork to mix everything together. This will fluff up the couscous while making sure it doesn't break.
You can dress up the salad with feta cheese. I find it very satisfying the way it is. The salad is not too heavy, but doesn't make you hungry just few minutes after eating it. My favorite part of the dish are cranberries that soak up lemon juice and excess moisture and become plump. Alternatively, you can add raisins or chopped dried apricots for that sweet, chewy bite. 


Saturday, February 23, 2013

Back To The Kitchen

It's been 50 days to be specific since this blog saw the light of day; and my cooking has been more intermittent than ever all this while. What have I been up to? Mostly been buried under piles of work and other commitments. But things are starting to taper off (for now =/) and I'm back in the kitchen cooking hearty meals every night. Ah, it feels so good to be eating fresh meals and experimenting with different foods again!

One of the things I like to try is substituting ingredients in traditional Indian recipes with the groceries available here. We have a steady supply of zucchinis all year around and I try to use it in as many ways as I can - in parathas, cutlets (the Indian kind ;), or sambar. Zucchini lends itself to any flavor combination since it doesn't have any strong taste on its own. Yesterday, I used zucchini in a recipe that calls for cucumber - savory Ghavan. Ghavan is a Maharashtrian style instant Dosa commonly prepared in the coastal region of Konkan. It's a popular breakfast/brunch item that can be made sweet or savory. My mom always made both varieties at the same time since I preferred the sweet version while my sister liked the savory kind. But the savory ghavans are much quicker to make. They are simple crepes made with a basic batter of rice flour and yogurt/buttermilk. My grandma used to add grated cucumber for some body and texture in the savory ghavans. Zucchini seemed like a logical choice to replace cucumbers and they worked out perfectly. Plus a dose of nutritional veggies never hurts!


Zucchini Ghavan (Maharashtrian Style Instant Dosa)

Ingredients:
3/4 Cup grated zucchini
1 1/2 Cups rice flour
1 Cup buttermilk or 1/2 cup yogurt thinned with water
1 Large green chili (or more if you like) - chopped
Handful of cilantro - chopped
Salt to taste
Oil for greasing the pan

  • Combine rice flour and buttermilk well until all the lumps dissolve.
  • Add zucchini, chopped chili, chopped cilantro and salt to taste and mix well. The batter should not be too runny or too thick - somewhat like dosa batter. You can add some water to get the right consistency. Let the batter sit for 15-20 mins. 
  • Heat a pan on medium-high flame. Drizzle a little bit of oil, pour a ladleful of batter and spread in a circular motion to make a crepe slightly thicker than dosa. 
  • Cover the pan and let the ghavan cook on one side for a couple of mins until golden brown. Remove cover and cook the ghavan on the other side the same way. 


I made my favorite peanut-garlic chutney to go with these (recipe will be up soon) yummy ghavans. But a simple coconut chutney or cilantro chutney is perfect.

Sunday, July 8, 2012

Citrus Salad

Cleaning, cooking, grocery shopping, crafting, reading and studying. That's a Saturday well spent. In between all the chores (and a big scoop of Fro-Yo), I totally skipped my lunch yesterday. When the hunger finally hit, I threw together a quick salad for..umm..Luncher(Lunch cum Dinner=?) or Linner! Salad was the perfect choice for a meal on a hot day like the one we had yesterday.


I talked about this deh-licious salad my friend made for Thanksgiving dinner. I love love love fruits in salads, which you can tell from herehere and here. I didn't have the original dressing recipe, but I knew all the important ingredients that made up the salad. It wasn't really meant to end up on the blog. The salad was so darn tasty though, that I couldn't resist posting the recipe (hence the crappy photography). This citrus-goat cheese salad with honey dressing is just perfect for a summer afternoon. The goat cheese gives it plenty of creaminess and slight pungent earthiness. And what can be more refreshing than citrus? I used tangerines - perfectly citrusy, easy to peel and separate the wedges, and full of bursting juices. The dressing comprising of two ingredients altogether couldn't have been simpler. 


Citrus-Goat Cheese Salad with Honey Dressing


To make this 'too simple to post a step-by-step recipe' salad, simply toss together chopped lettuce mix (Italian salad mix is the best), tangerine wedges cut in half and crumbled goat cheese. For the dressing, whisk together honey and red wine vinegar in almost equal parts (a little less vinegar than the honey, adjust the flavor to your liking), salt & pepper for seasoning and drizzle over the salad. 


With as little as 3 main ingredients, you have a salad bursting with flavors, textures and colors. 

Wednesday, June 27, 2012

Going Green With Dosa

Time flies so quickly when you are having fun. I can't believe all the excitement of having my parents over is about to come to an end already. My initial plan was to post all the dishes we prepared; but there was only so much time to make the most of their stay. It's been a short, but blissful month enjoying the new house, the garden, beautiful San Diego weather and fresh, tasty meals with them (I say fresh because who has time to prepare every meal from scratch on a daily basis?). I cooked quite a few elaborate meals for mom and dad.  But I've been after all the simple meals I could think of now that I cook for 4 people twice a day. Dishes that spare me time to sit and chit-chat with them instead of toiling away in the kitchen. And you can't talk about simple meals without mentioning the ever-loved dosas! Or all the cousins of the batter. The great thing about dosas is, you can make a large batch of batter and you're ready to feed an army. Nobody in my house minds multiple dosa meals. I just turn them into uttapams or stuff different chutneys inside for a new look and taste each time. The traditional rice batter doesn't fit my mom's diet though. But really, I can't give up on such a great dinner option. I made Moong bean dosas the other day to keep it healthy and mom-dad loved the simple preparation. Mom makes a batter with mixed beans and lentils sometimes. However, moong beans alone make extremely flavorful dosas. The vibrant green color doesn't get muddled with other ingredients either. They are not as crispy as the real thing, but so tasty, you won't miss the crunch. Dad declared he would switch to this dosa from now on. 


Moong Bean Dosas

Ingredients:
1 1/2 Cups moong beans
1/4 Cup rice (to add some crispiness)
Handful of washed cilantro
2-3 Small (Thai) green chilies
2-3 Garlic cloves
Salt to taste
Water as needed
Oil as needed
  • Soak moong and rice in water overnight. The beans should almost double in size. I let the beans sprout by taking out excess water and letting them soak for additional few hours. 
  • Grind all the ingredients in a mixer/food processor adding water little by little until you have a batter slightly thicker than dosa batter. Cilantro adds flavor, nutrition, and helps maintain that beautiful green color. 
  • Heat a pan on medium-high heat, grease it lightly, pour a ladleful of batter at the center and spread with the back of the ladle, not too thin. Cook until brown on the bottom. Don't coax the dosa until it's nicely roasted on one side - it'll start separating from the pan by itself when it's ready. Flip and cook until you see brown spots on the inside. 
  • I learned a trick from one of my South Indian family friends - cut an onion in half and dip it in oil. Then rub the oil on the pan with the onion. This ensures spreading oil evenly while using very little. It also adds slight onion flavor to the dosa. 

We enjoyed these yummy dosas with a chatpati chutney I recently found at the Indian store - Nirav's Rajwadi Sandwich Chutney. It's like a mango pickle meets cilantro chutney meets tamarind chutney goodness. They call it a sandwich chutney, but we've been eating it with anything and everything. 

Sending this to Show Me Your HITS - Legumes and Lentils Event, event by Sangeetha's Kitchen.

Thursday, June 14, 2012

Garden Gossip

Of all the pleasures that our new house has brought us, our lovely garden has become our joy and pride. Hubby spends 95% of his time (sometimes against my wish) in the garden, tending to the newly planted veggies, fruits and flowers. But my disappointment in his excessive gardening (instead of doing the dishes) vanishes when I look at how beautifully they are growing! Of course, I can't help but love the garden myself. That's the first place I visit after getting home from work. The plants take way all my exhaustion and freshen my mind. Mom and dad have made it a ritual to check up on plants first thing in the morning and then enjoy tea in their company. Plants are like babies - they need our care and love. And give us happiness seeing them grow and flourish. Here's a peek at what's growing in my garden this year. 

Swiss Chard  has beautiful ruby red stems and veins meshing through large velvety green leaves. A simple preparation of sauteed chard with onions and garlic makes a healthy and tasty side. I like it with roti as well. 


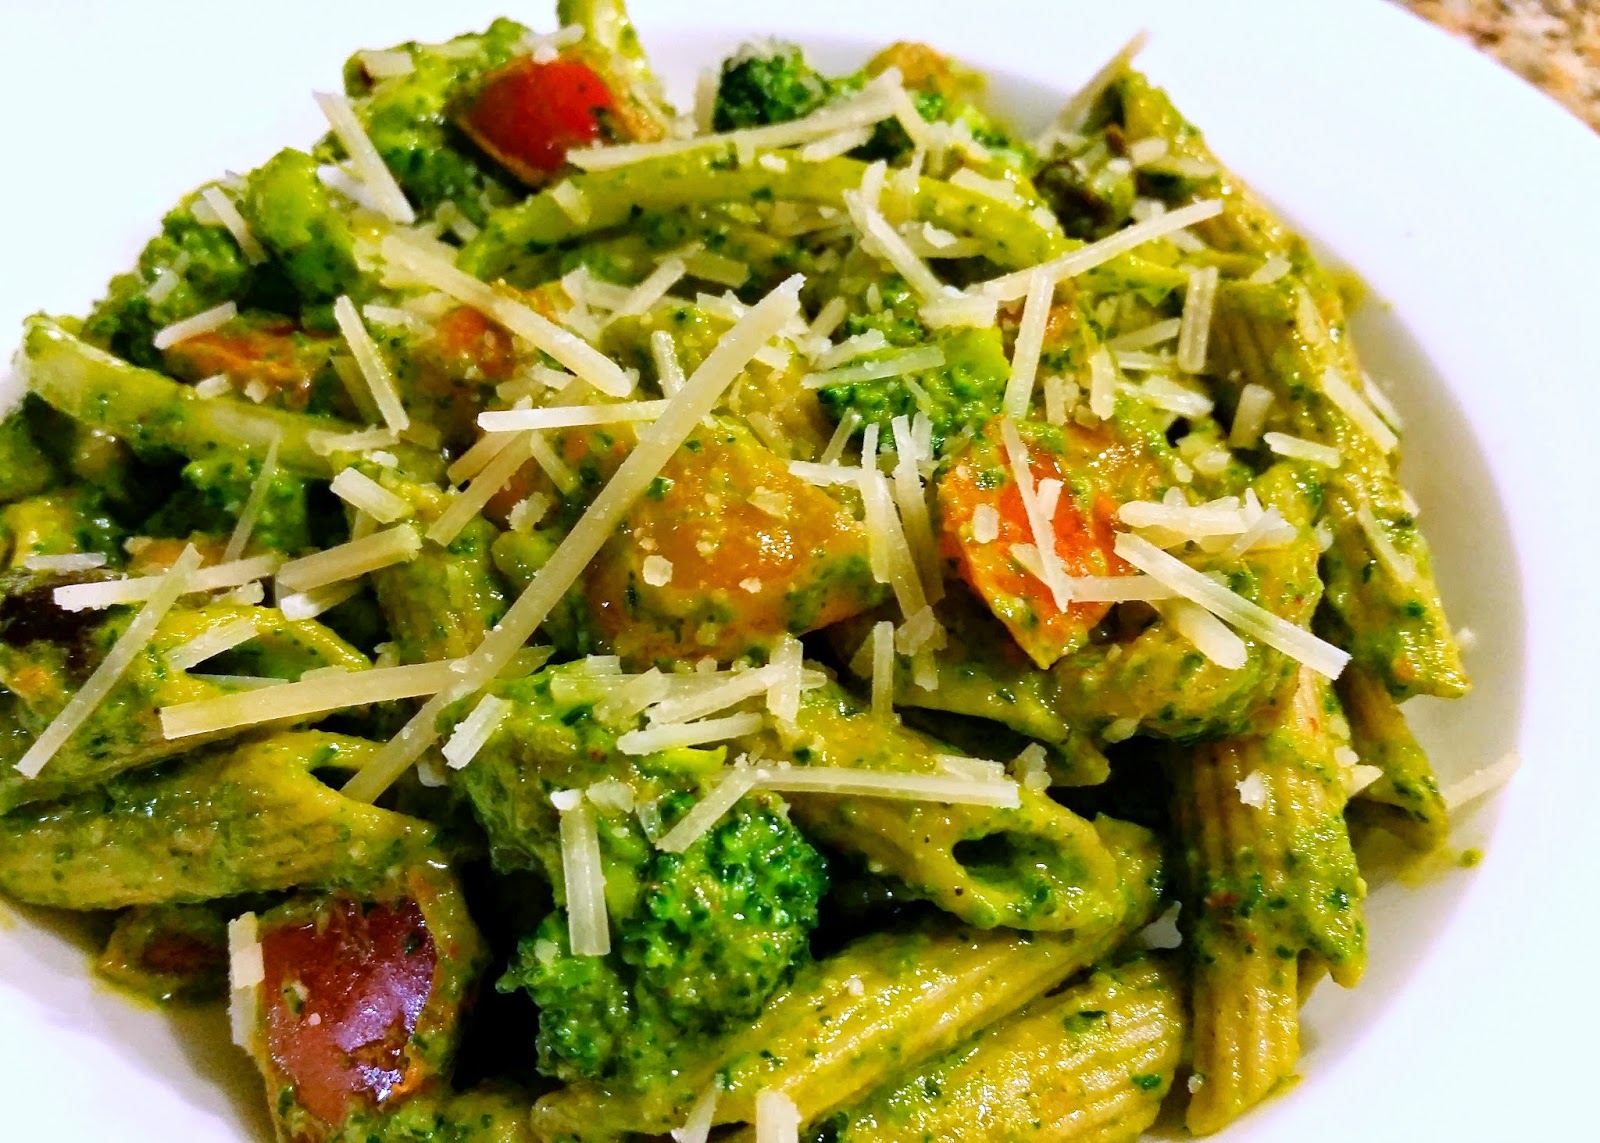
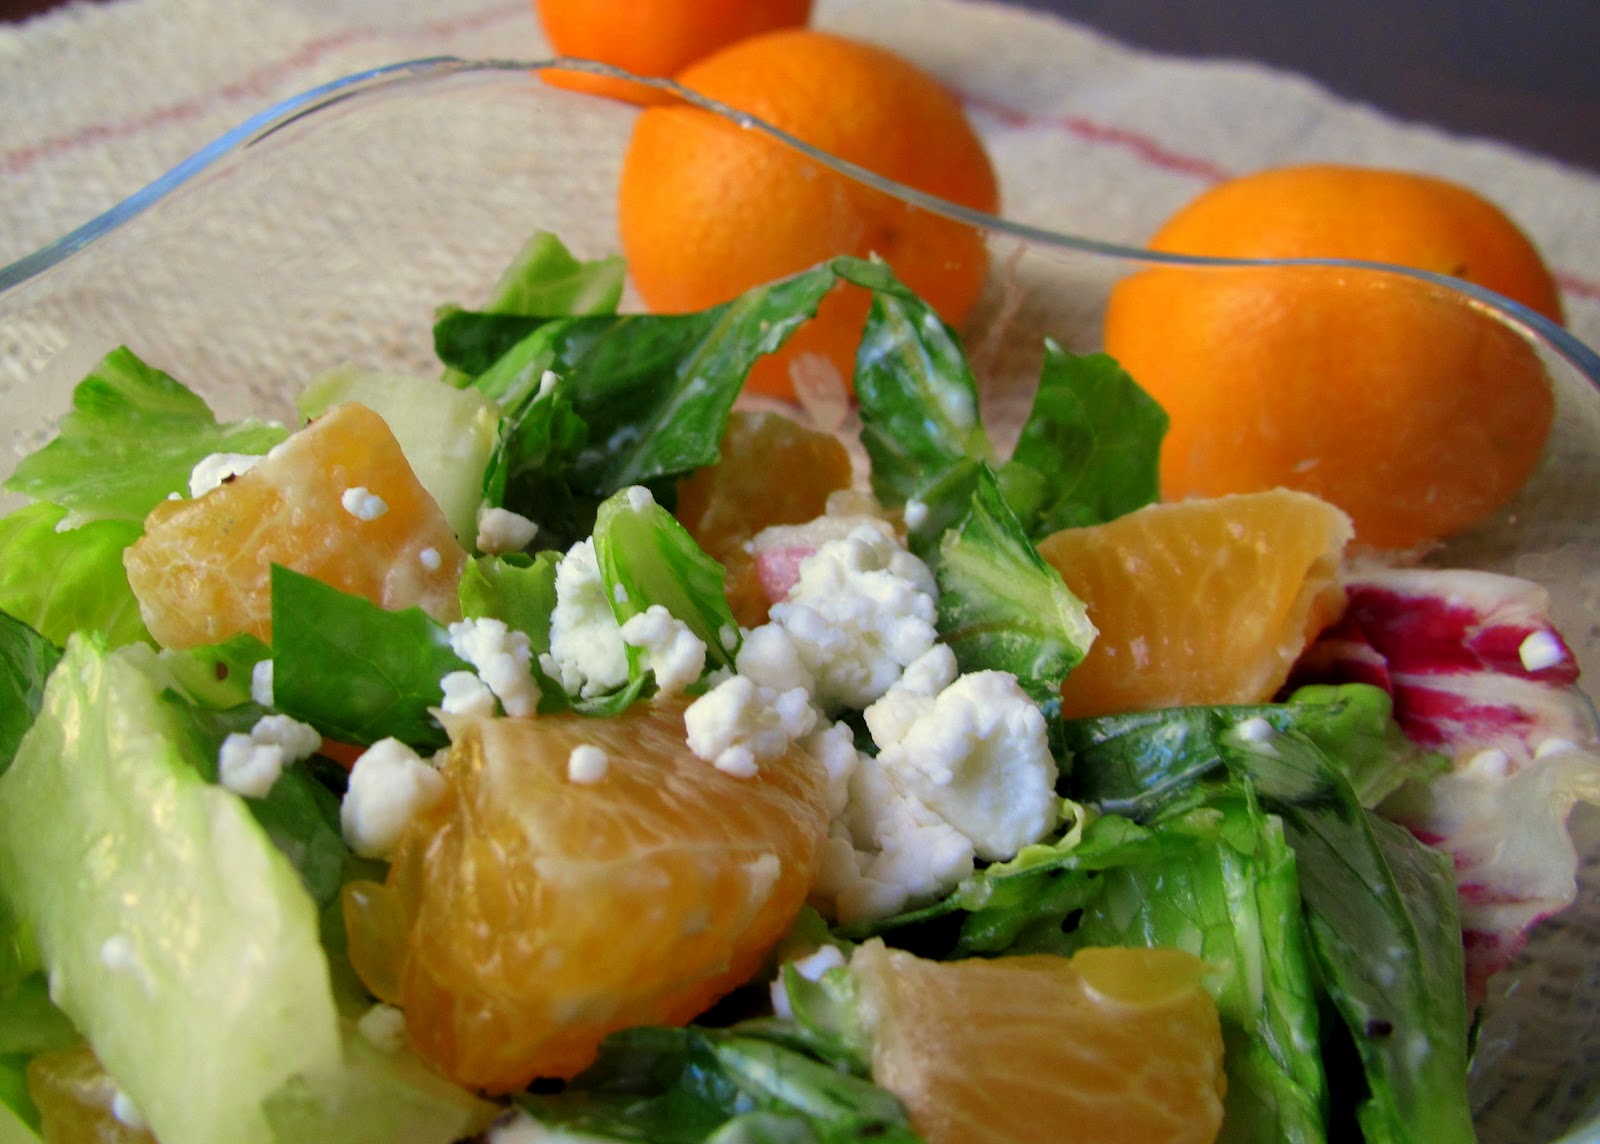
Spinach makes Popeye strong! And it's one of the most widely loved greens. I use spinach in a myriad ways - in salads, sabjis or curries, like this or this, daals, dips, pakodas and a number of other appetizers. The culinary uses of this leafy vegetable are endless.


Most people usually either love eggplant, or hate it. There's no in between. I am in the former category. I can have eggplants in any way, shape, or form. Be it chips from large eggplants, curry with stuffed small eggplants, grilled Japanese eggplant in pizzas or sandwiches, or simply bharta from large eggplants - I like 'em all. I don't know how large this eggplant will grow before I need to pluck the fruit, but there's a little eggplant peeking through the bottom leaves!


Last year was a sad year for zucchini. The golden zucchini I planted died before the first fruit was fully grown. I hope to have better luck this time. So far my 4 plants are looking good, and one of them better give me some zucchini! (Un)fried zucchini chips have been my new craze. I'll make that first thing I have a zucchini.


I have a special place for tomatoes in my heart. That was the first vegetable I grew when I started gardening in Utah and have been growing for 4 years now. Hubby wanted to plant tomatoes no matter what other veggies we planted, because they do not disappoint you. Tomatoes are extremely hardy and love bright and sunny weather. Check out these cuties! 


Poblano pepper! My jalapeno pepper suffered the same fate as zucchini last year. This year I'm trying my luck with poblano; but I hear peppers are generally late bloomers. I've been praying to the plant gods so that  I can roast my own poblanos!


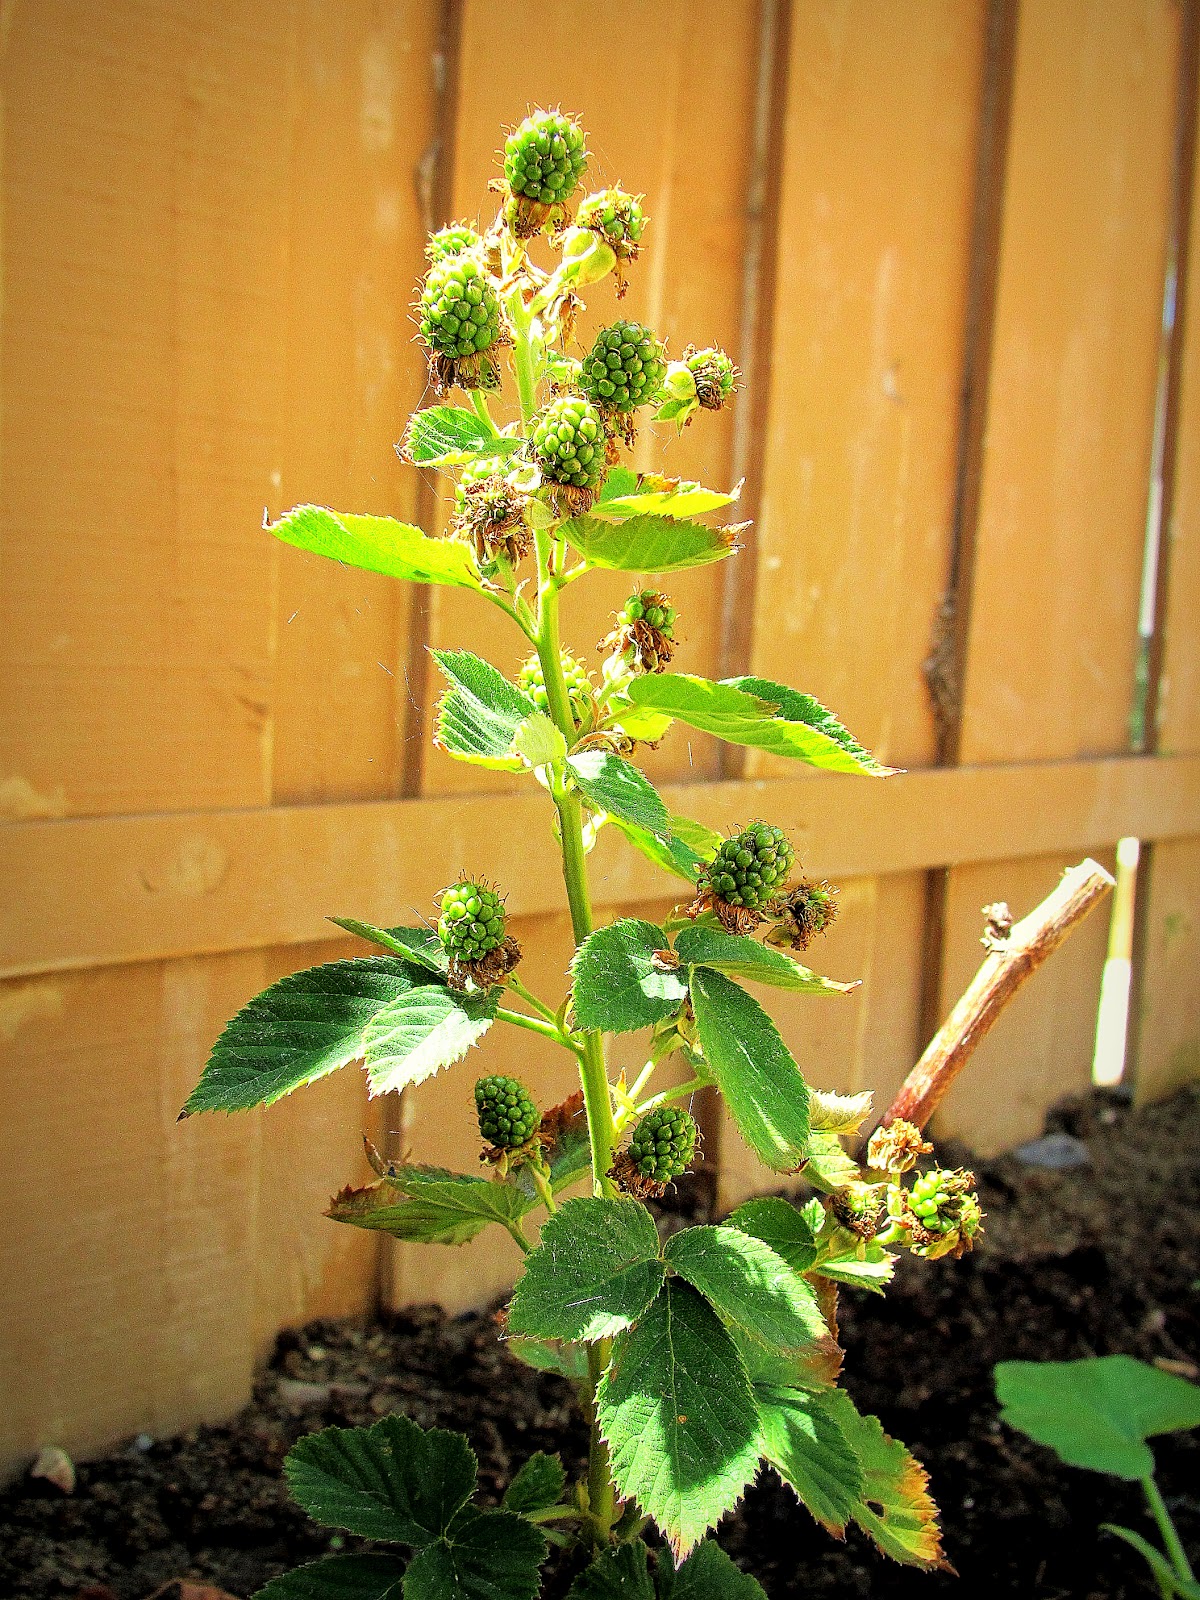
Blackberries are hubby's favorite kind of berries. Our little plant is already bearing lots of tiny fruits. I can't wait to snack on them and hopefully make some jam or preserve out of the leftovers. 


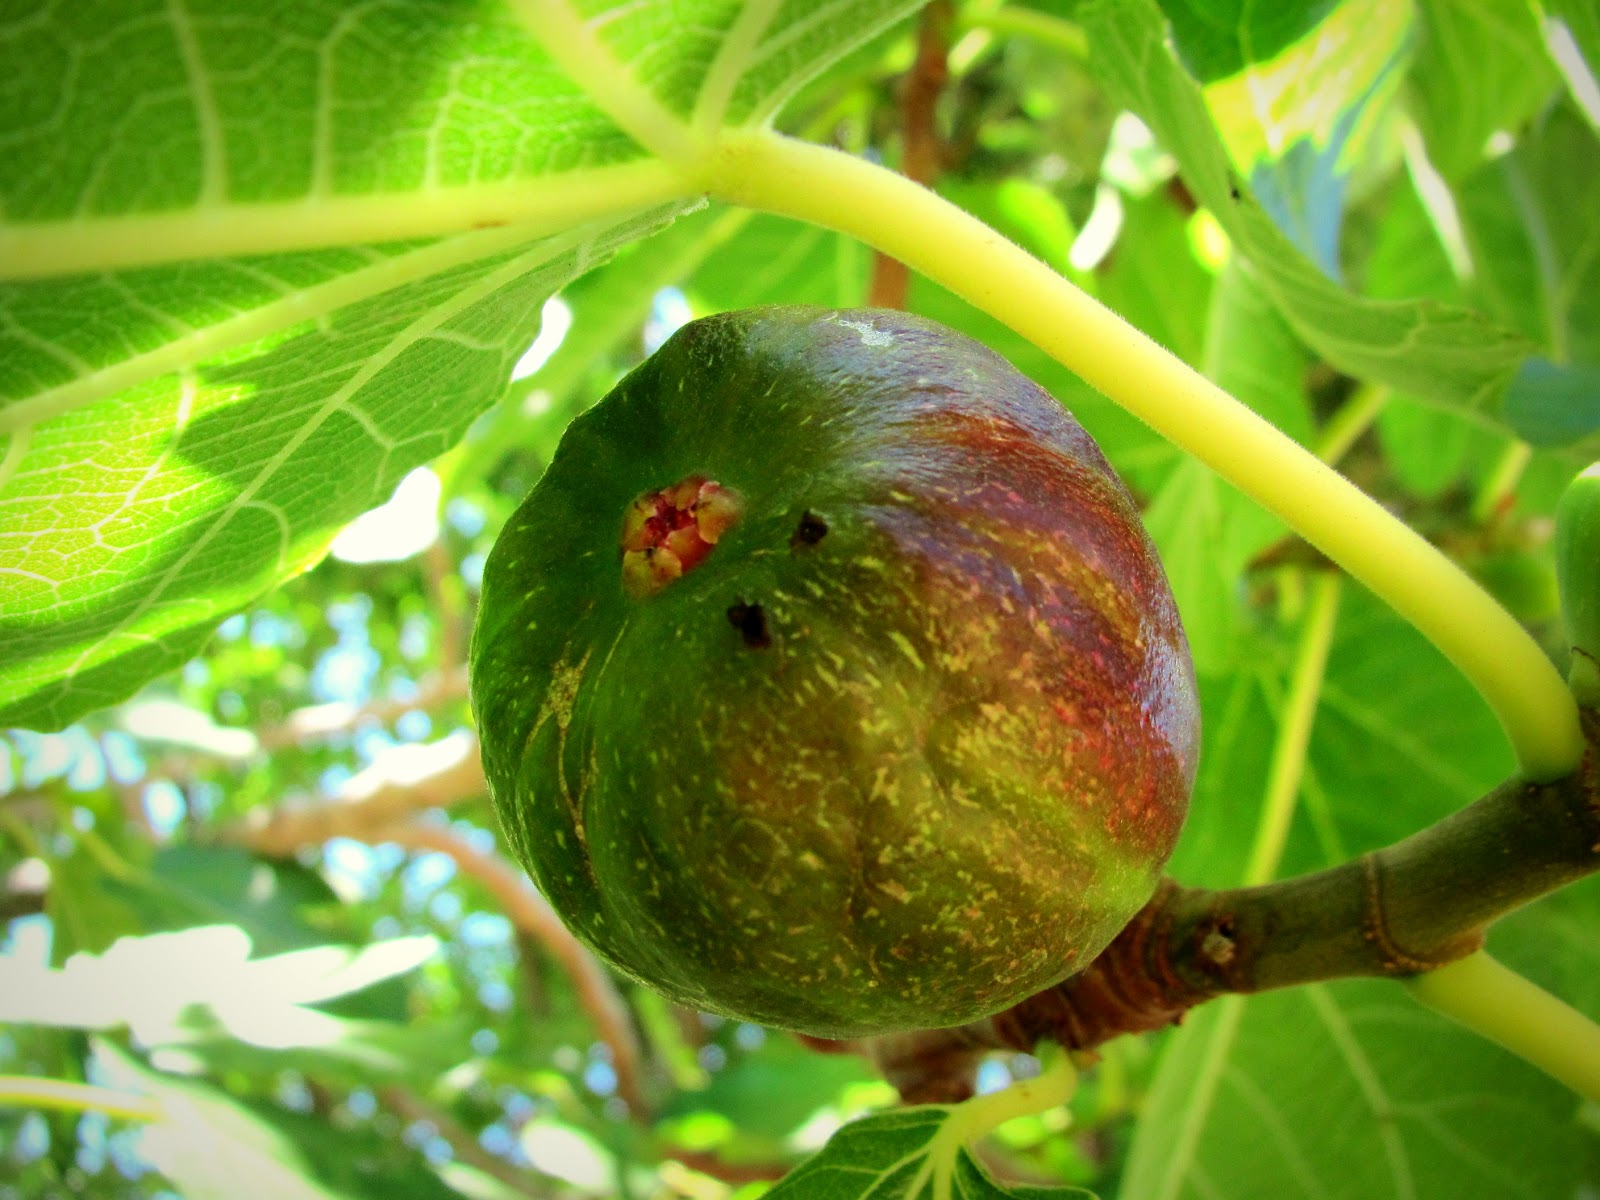
We inherited lots of fruit trees and flowers from the previous owners. I was ecstatic to see the large fig tree! Mom and I have been waiting for the dozens of figs to ripen. I am looking forward to trying some desserts and flat-bread pizzas with caramelized figs.


We had no idea there was a peach tree in the backyard! The tree is fairly small and neither of us paid too much attention to it, until recently, when the green fruits camouflaging with the leaves started turning red-orange. Peach tart sounds like a good idea.


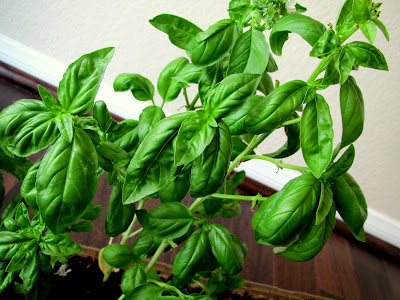
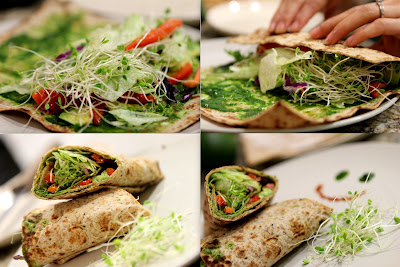
Basil has been my faithful herb. I sowed the leftover seeds from last year and they give me a big bunch of leaves every week. I love adding a few julienned leaves to pasta or making my basil-cilantro chutney for sandwiches or wraps. It adds lots of flavor and some moisture to a simple veggie wrap, like the picture below this. 


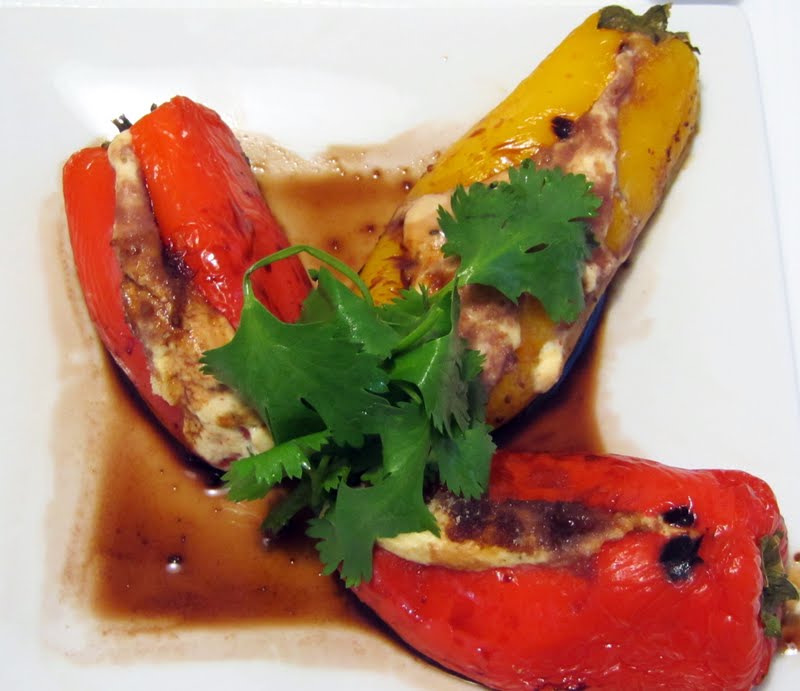
Wraps and sandwiches are our dinner favorites. Easy to put together and healthy to eat, they are quick dinner fixes. I simply use some whole wheat tortillas or flatbreads. Make a chutney by grinding basil-cilantro (2:1 ratio) leaves, garlic cloves, sometimes a spoonful of parmesan, a little EVOO, salt and pepper, and water for the right consistency. Spread this chutney generously, and add your favorite greens and veggies such as tomato, lettuce, sprouts, avocado, purple cabbage etc. My favorite among the veggies is roasted bell pepper, which adds meatiness and slight sweetness to the wraps. Simply roast red bell pepper on open flame until the skin is completely charred, cover in a container for 5-10 mins so the steam loosens the skin and then peel off the burned skin. You are left with sweet, juicy flesh. I always roast bell peppers at home instead of buying the canned ones. Wrap it all up and enjoy it with some hot sauce. 


That's about it for my garden! Have you been gardening this summer? Any recipes I should try out when I pick the veggies?

Friday, May 27, 2011

Summers In Style

Yesterday, as I was eying some tempting dishes in the spring special issue of Bon Appetit waiting for my appointment at a store, two things caught my attention about spring/summer cooking:
  1. Nothing you serve in this season needs to be 'piping hot'.
  2. The good thing about summer is you get to eat plenty of vegetables. It also means you end up with more produce than you know what to do with. 
The highlighted text was surrounded by pictures of seasonal favorites prepared with minimal treatment. That's the thing about summer time cooking - you really don't need to do much except prettying up your fruits and veggies. I'm all for just emptying a bag of salad and digging into it, but it never hurts to dress up your veggies differently to keep it exciting.

I'll be very honest, I do get greedy looking at all the fresh produce in the market around this time and stock up much more than I need to. After reading the two statements from Bon Appetit, I decided to clean out my fridge and make dinner that required minimal cooking. Being inspired by all the pictures in the magazine, I got my fancy on. The dinner comprised of watermelon salad, avocado-tomato salad and stuffed sweet peppers.

Watermelon Salad
Watermelon Salad

Last summer my GF and I discovered how to successfully use the melon baller. It turned into an all afternoon activity trying to carve the perfect ball shapes. It's really not that difficult to use a melon baller but you can quickly crush a delicate fruit like watermelon if not used properly. Dig the scoop firmly into the melon and scoop out flesh like you would ice-cream. Make sure you turn the scoop all the way around to get that perfect round shape. After scooping out the flesh, you end up with a watermelon resembling swiss cheese from Tom & Jerry :D. Now all you need to do is add a tablespoon of lemon juice + 1 teaspoon honey and drizzle it over melon balls. Garnish with chopped fresh sweet basil and your fancy looking salad is ready!
Lemon juice helps maintain freshness of the melon and honey brings out the sweetness. Mint is an excellent choice for garnishing as it goes well with anything sweet. Basil comes from the same family and I happen to love its pairing with fruits.
You can make a mixed melon salad with watermelon, cantaloupe and honeydew. The three colors look just beautiful together.

Avocado-Tomato prettied up
Avocado Tomato Salad

For a savory note, I just cut up one tomato and an avocado and placed them on a plate like a blooming flower. Sprinkle some lemon juice to stop avocado from turning brown/black. Salt and freshly cracked pepper and a little bit of feta cheese on tomato. Garnish with some cilantro. Keep it simple, keep it stylish!

Stuffed sweet peppers
Stuffed Sweet Peppers

This dish was my take on a stuffed piquillo dish I had at a restaurant in Pismo Beach. Now it's not completely cooking free, but there is no 'cooking to death' involved either. 
Season some low-fat cream cheese with Italian herbs, paprika and salt. Stuff this mixture into sweet peppers that are slit open on the top. 
Grill the peppers just for a couple of minutes until they get grill marks. 
Finish cooking these peppers in simmering red wine in a pan. Heat a flat pan, add wine and once it starts boiling place the peppers in the pan. Cover and cook for 2-3 minutes on medium-high. 
*Use a sweet wine as it'll work well with the sweetness of the peppers. I used a Port.

The peppers will absorb some of the wine and the cream cheese will ooze out. When serving, place peppers in the dish and add the reduced wine to the dish. 


All that fancy-shmancy food with practically no work! Put on your cute summer dress and call your girlfriends over for a fun backyard lunch. 

LinkWithin

Related Posts Plugin for WordPress, Blogger...