Showing posts with label Dessert. Show all posts

Tuesday, October 14, 2014

Diwali Faraal - Khajachi Karanji or Satyachi karanji

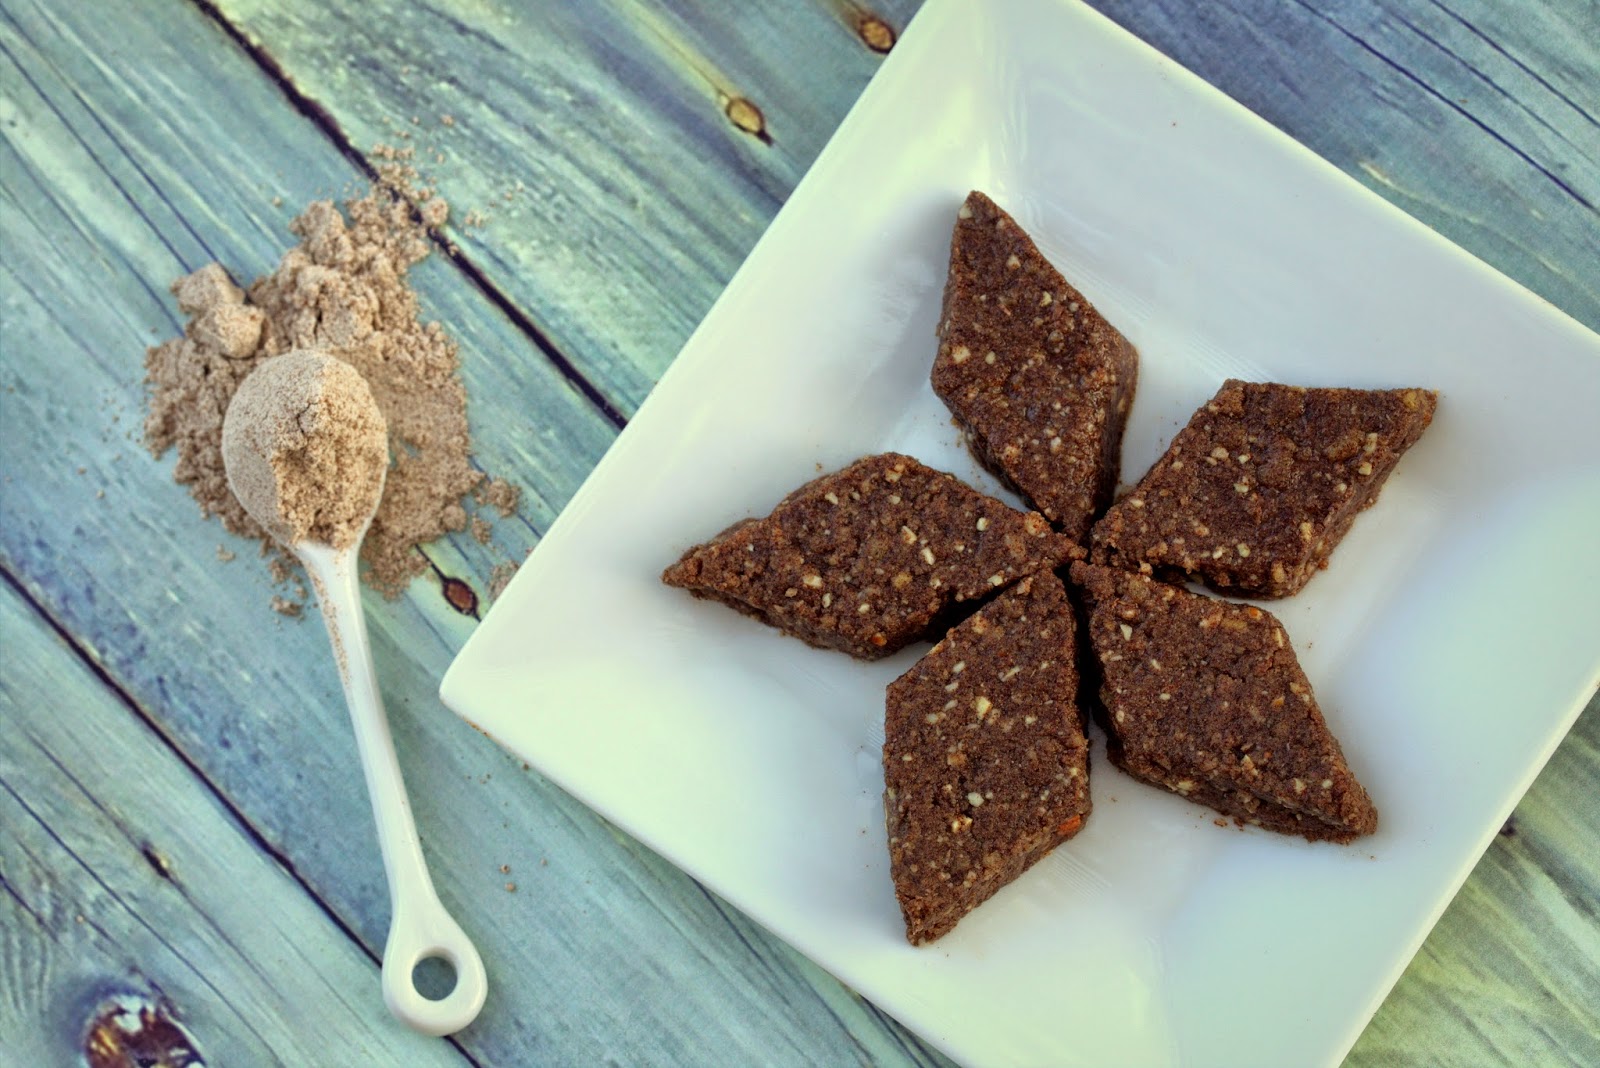
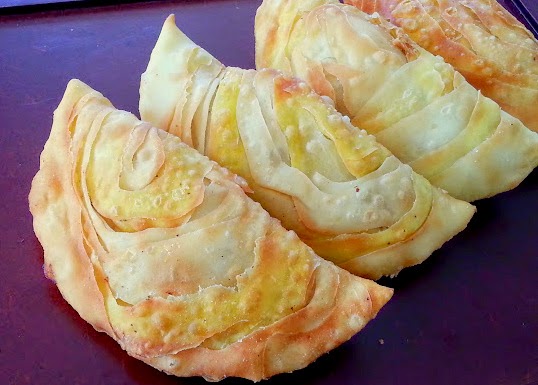
Diwali is just around the corner. And Fall has finally arrived in San Diego. What a glorious time it is to be frying lots of things and using ghee abundantly. Despite the hot afternoons, dense morning fog and crisp evening air convinces me of the changing season and the approaching festive times. I started my Diwali preps over the weekend on a sweet note with flaky, melt in the mouth pastry called Khajachi Karanji or Satyachi Karanji.


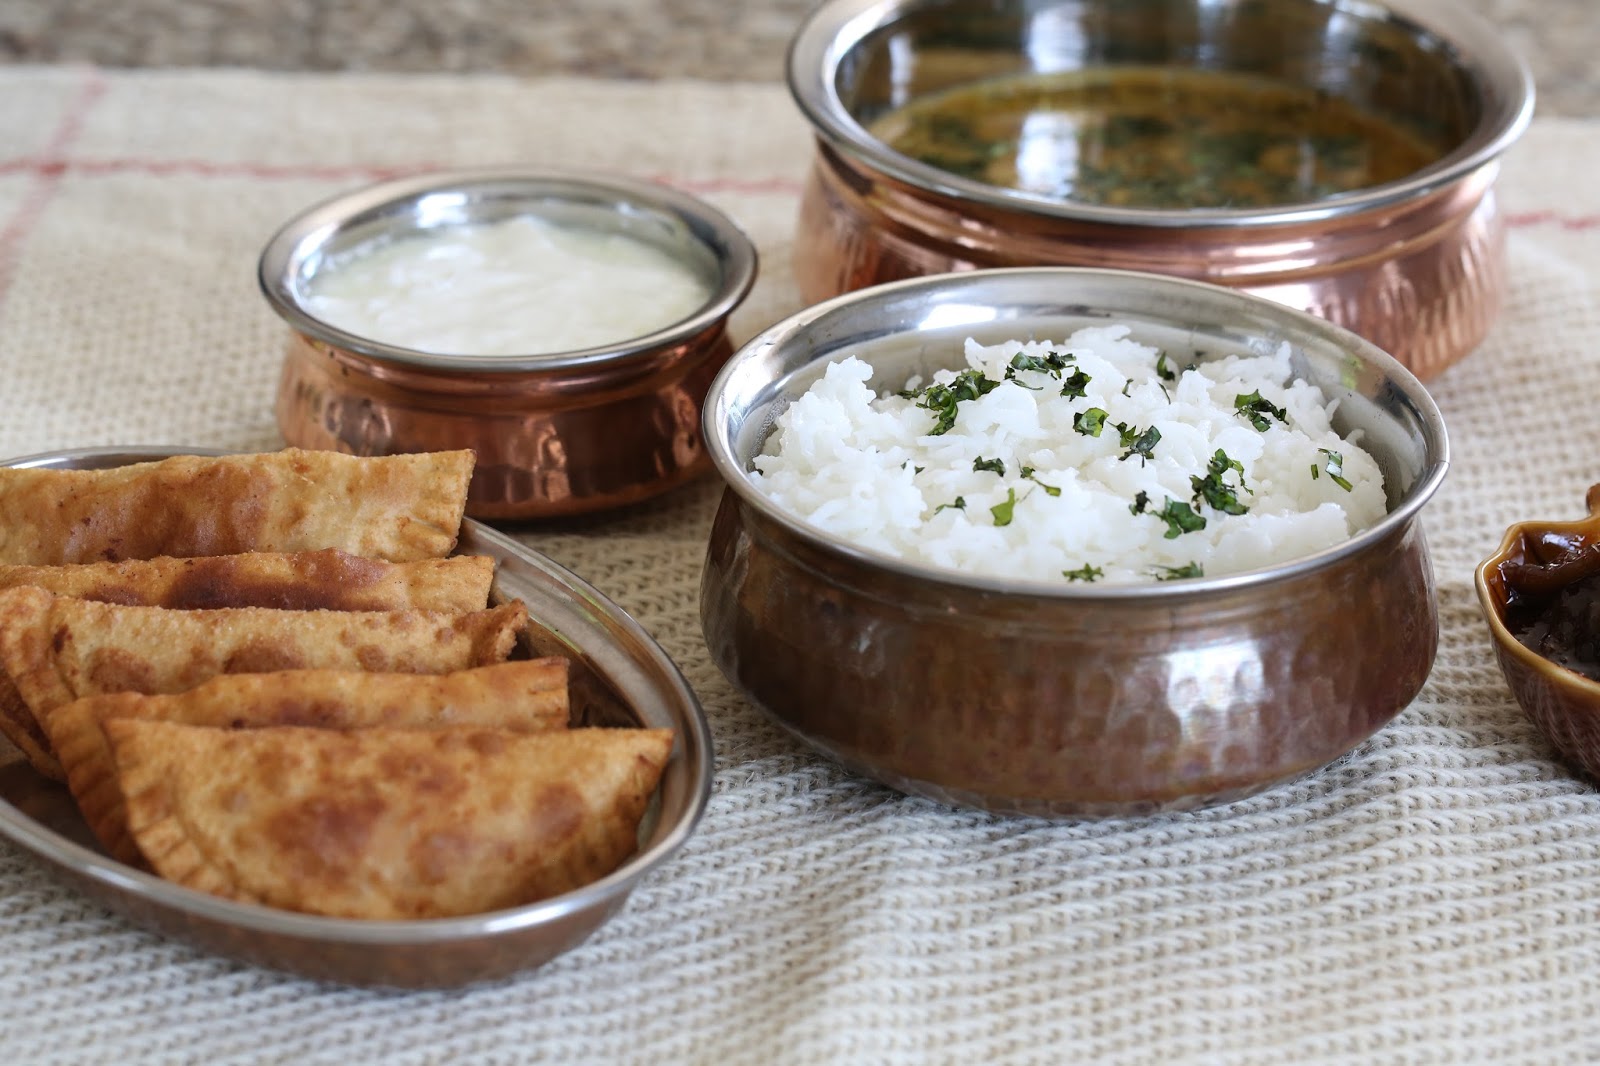
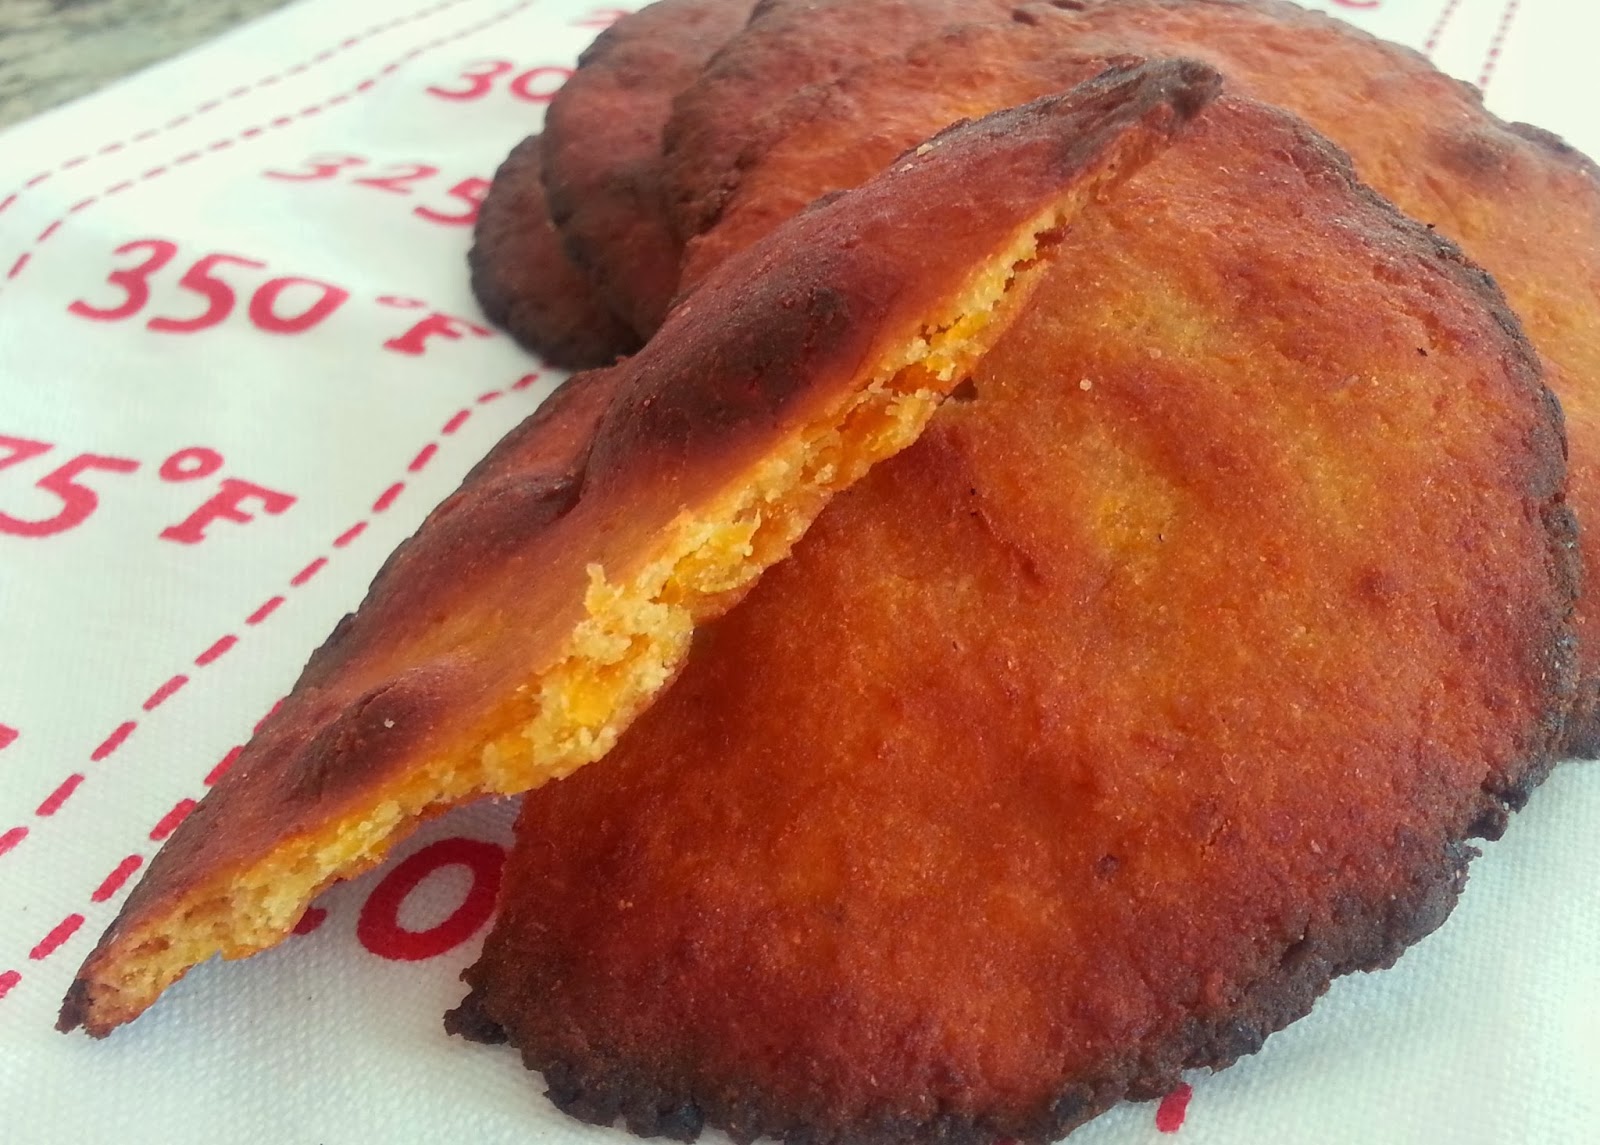
 Karanji is a fried pastry, much like empanadas, made with all purpose flour cover and some sort of sweet stuffing. Our traditional recipe has grated fresh coconut filling. My husband's side of the family makes a more fancy version of it. The cover is made by layering multiple rolled dough rotis with ghee in between. When fried, the layers separate, must like puff pastry, creating wonderfully flaky and crispy karanji. It's called Khajachi karanji for the layers resembling another sweet called Khaja. It also gets its other name, Satyachi Karanji or Karanji made with Sate, from the ghee-corn starch spread used to create layers. The spread is called Sate. This Karanji is stuffed with a fine dried coconut filling which adds to the melt-in-the-mouth quality. Some make the karanji cover using very fine rava or semolina. It needs to be pounded and requires more work. I took the easier route.


Husband specially asked me to make Karanji 'their style' since I'm making everything else using my mom's recipes. I am always up for trying something new, especially when it involves a sweet ;). I called up my mother-in-law, and got detailed instructions from her. My skills were at test, and I decided to post the recipe when husband gave me two thumbs up!

The recipe is a little tricky. And the instructions are long. But the picture tutorial should help in understanding how it's made. This elaborate preparation is worth every delicious bite!

**This recipe makes ~12 karanjis.

Khajachi Karanji/Satyachi Karanji

Ingredients:
Dough
1 Cup all purpose flour
2 Teaspoons melted hot ghee - must be absolutely hot, not warm
Couple of pinches salt
Water as needed
1 pinch saffron and 1 Tablespoon milk Or food color of choice (optional)
A little milk to seal karanji

Sate
2 Tablespoons corn starch
~ 2 Tablespoons ghee (or as much needed to create a smooth paste)
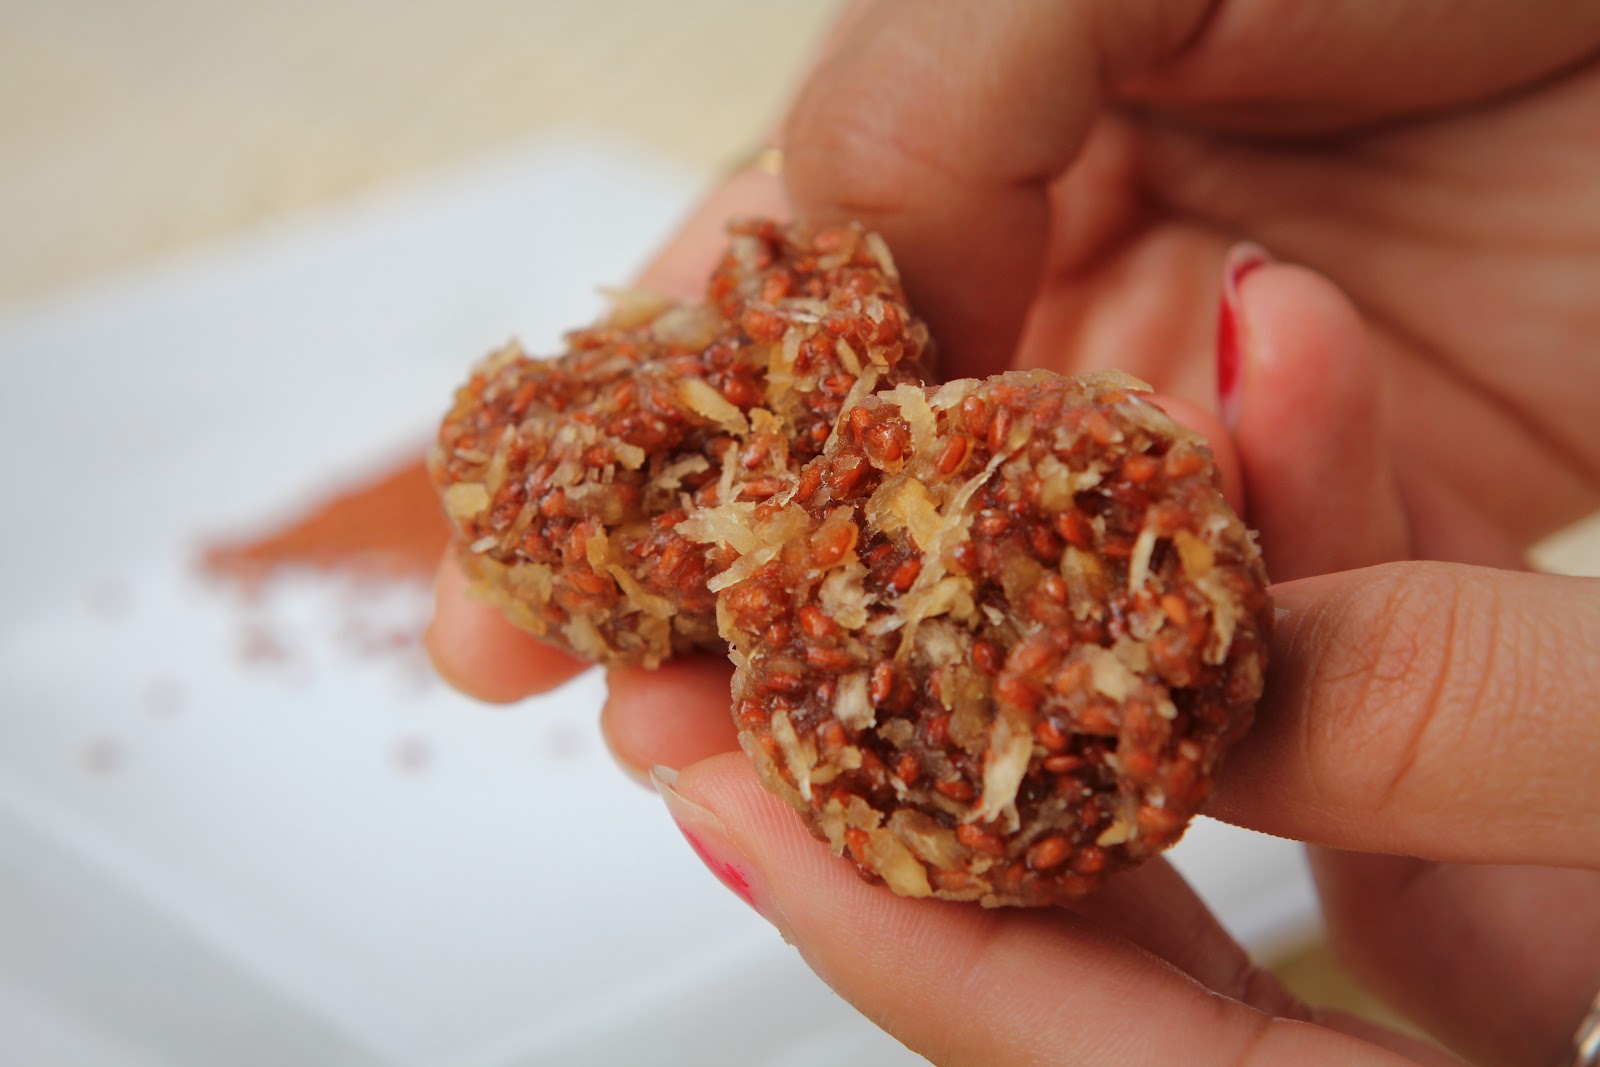
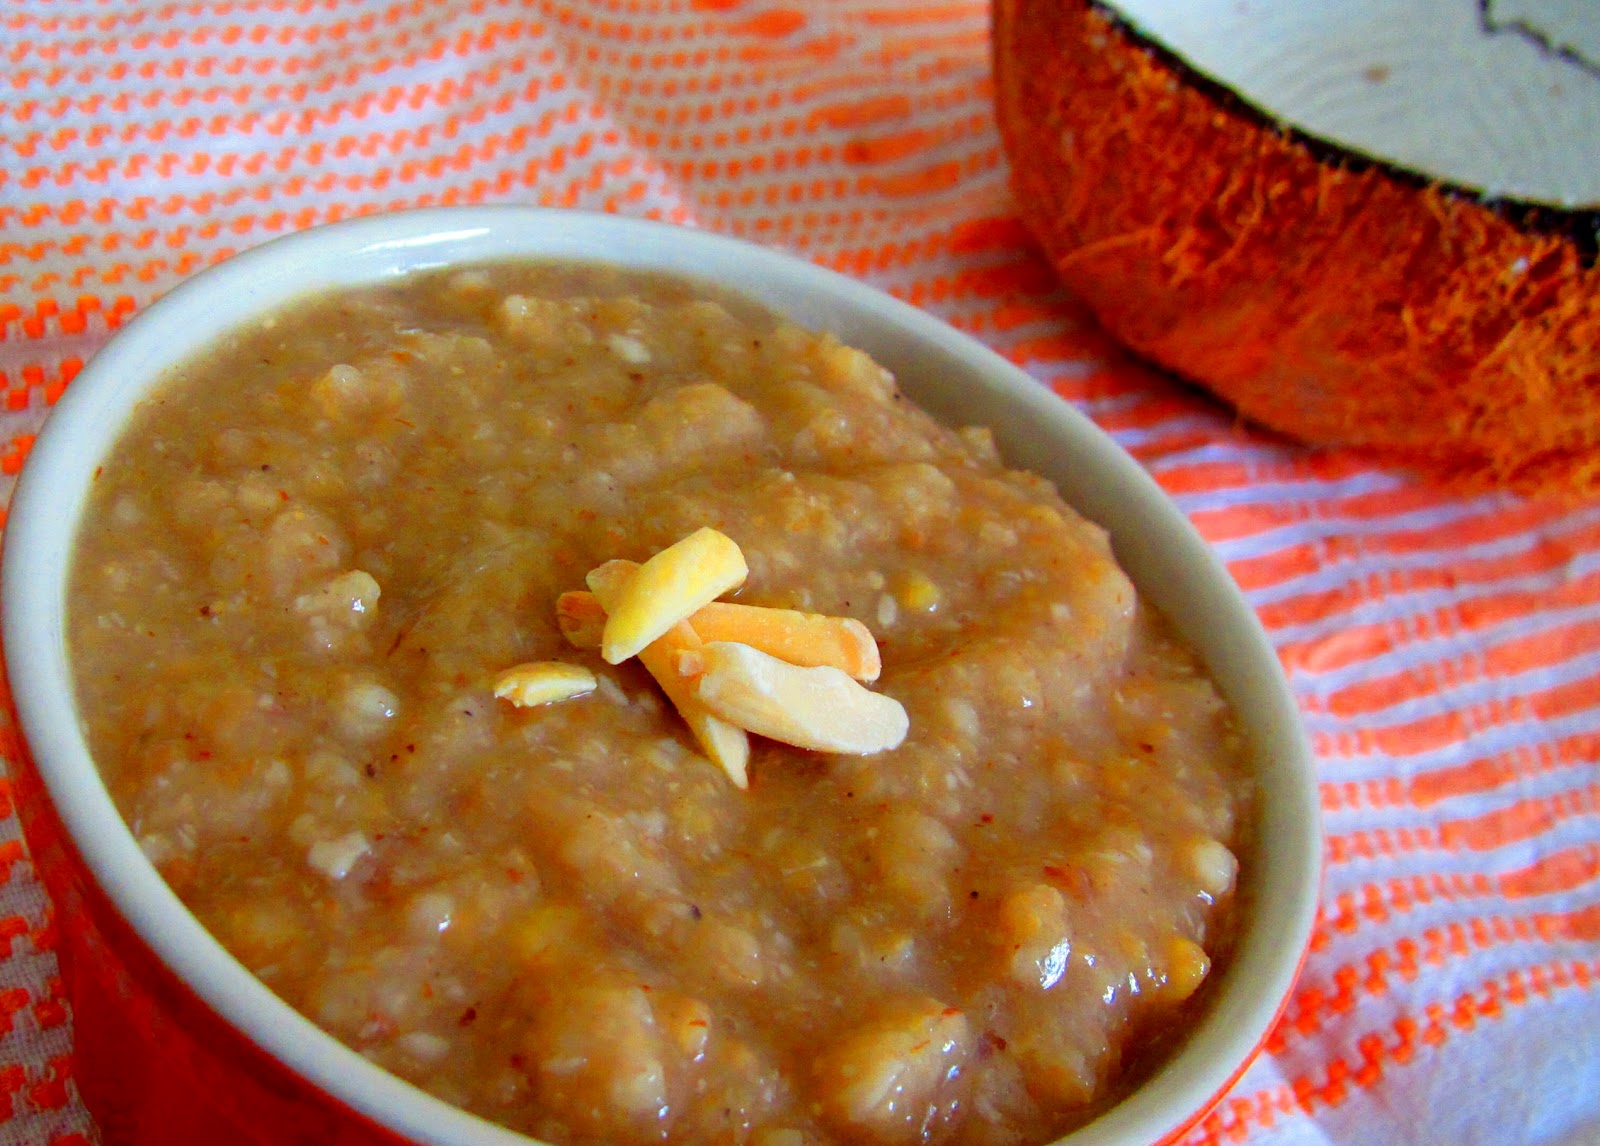
Filling
1/2 Cup dry grated coconut. If you grate an entire coconut, scrape off the black part.
2/3 Cup sugar
2 Tablespoons almonds
1/2 Teaspoon cardamom powder

To prepare the dough:

  • Mix all purpose flour, salt, and hot ghee. The ghee helps make the dough light. 
  • Add just enough water to prepare a stiff dough. It is important not to make the dough soft
  • Cover the dough under a damp cloth and let it sit for a couple of hours. 
Optional:
  • If you want to make a two-colored karanji, you can use food color. Separate 1/3 and 2/3 flour. Add one color to 1/3 of the flour, and either keep the rest white or add another color. No one in my house is a big fan of artificial food color. So I added saffron to 1/3 of the dough. I added saffron to warm milk and crushed it until the color oozed out. Then added this milk to the dough. 


To prepare sate:
  • Mix corn starch and enough ghee to make a smooth paste in a small plate/bowl. Whisk this by fingers until it's mixed well and looks creamy. 


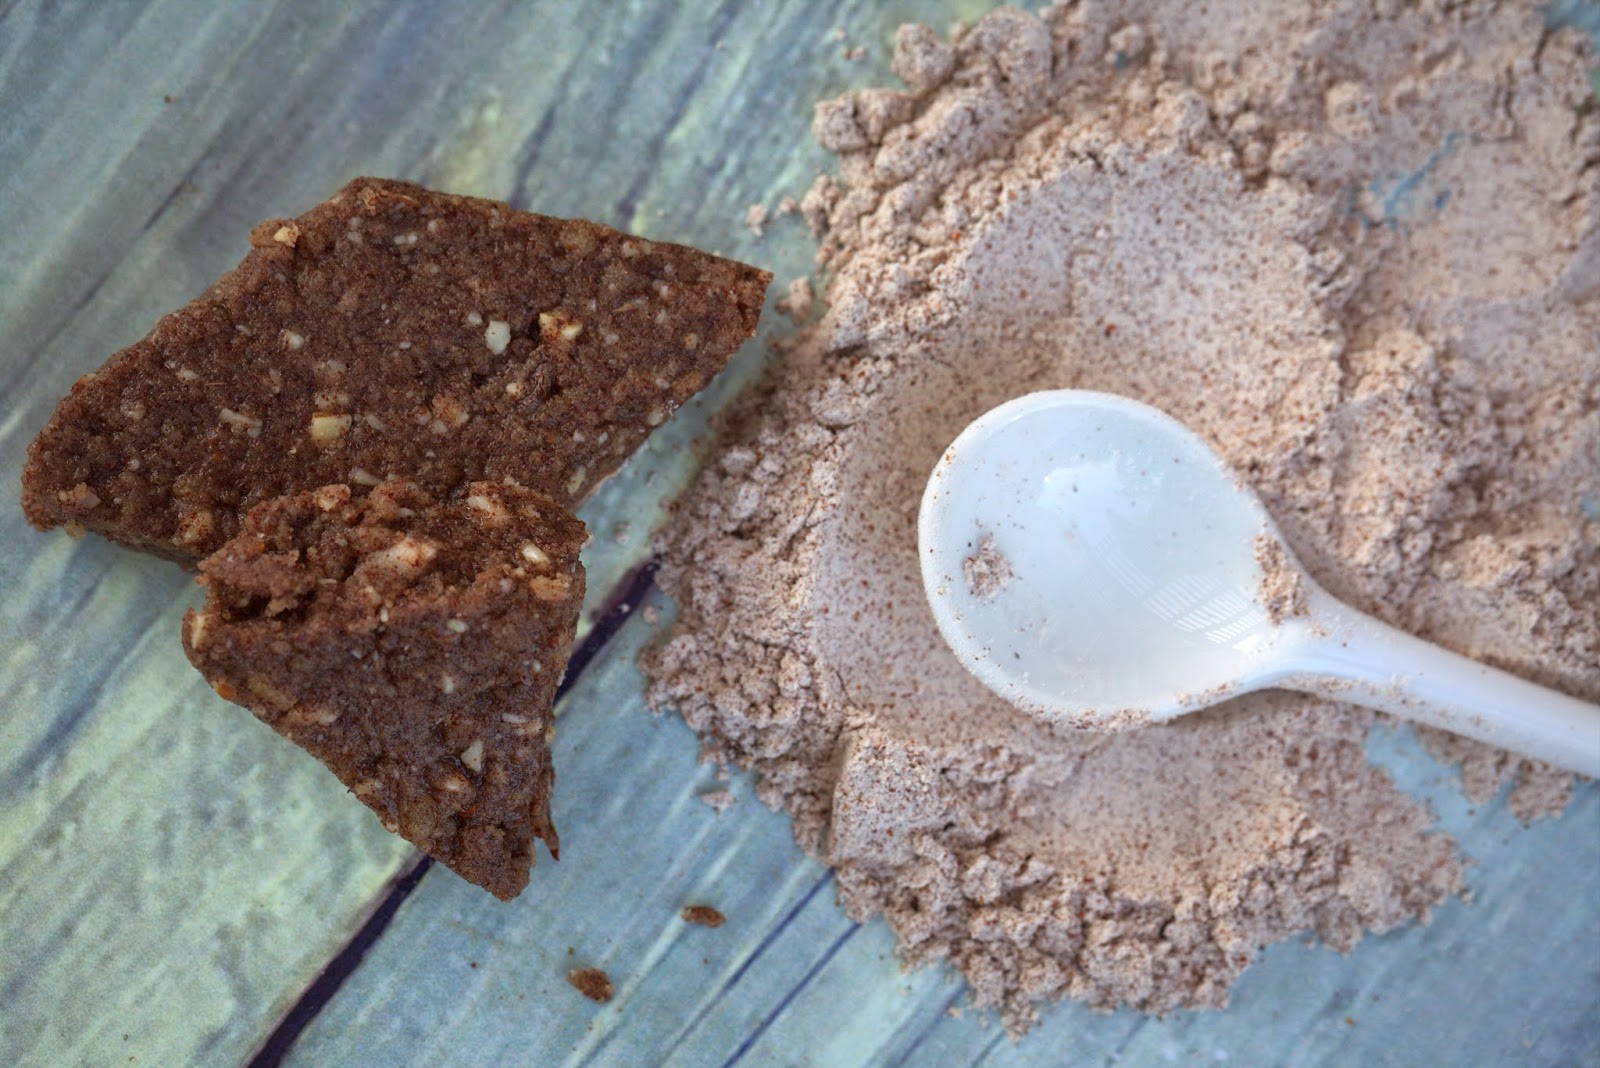
To prepare the filling:

  • Roast coconut on low flame until toasty (~5 mins). If you have sliced coconut, roast it and then grind it to a coarse powder. You don't want pieces of coconut poking through the dough. 
  • Grind sugar and almonds to a powder. 
  • Mix coconut, almond, cardamom powder, and sugar. Adjust the amount of sugar to your liking. Remember that frying tones the flavors down. Make sure the aroma of cardamom powder is prominent. Mix the filling well by hand. 


To make karanji:

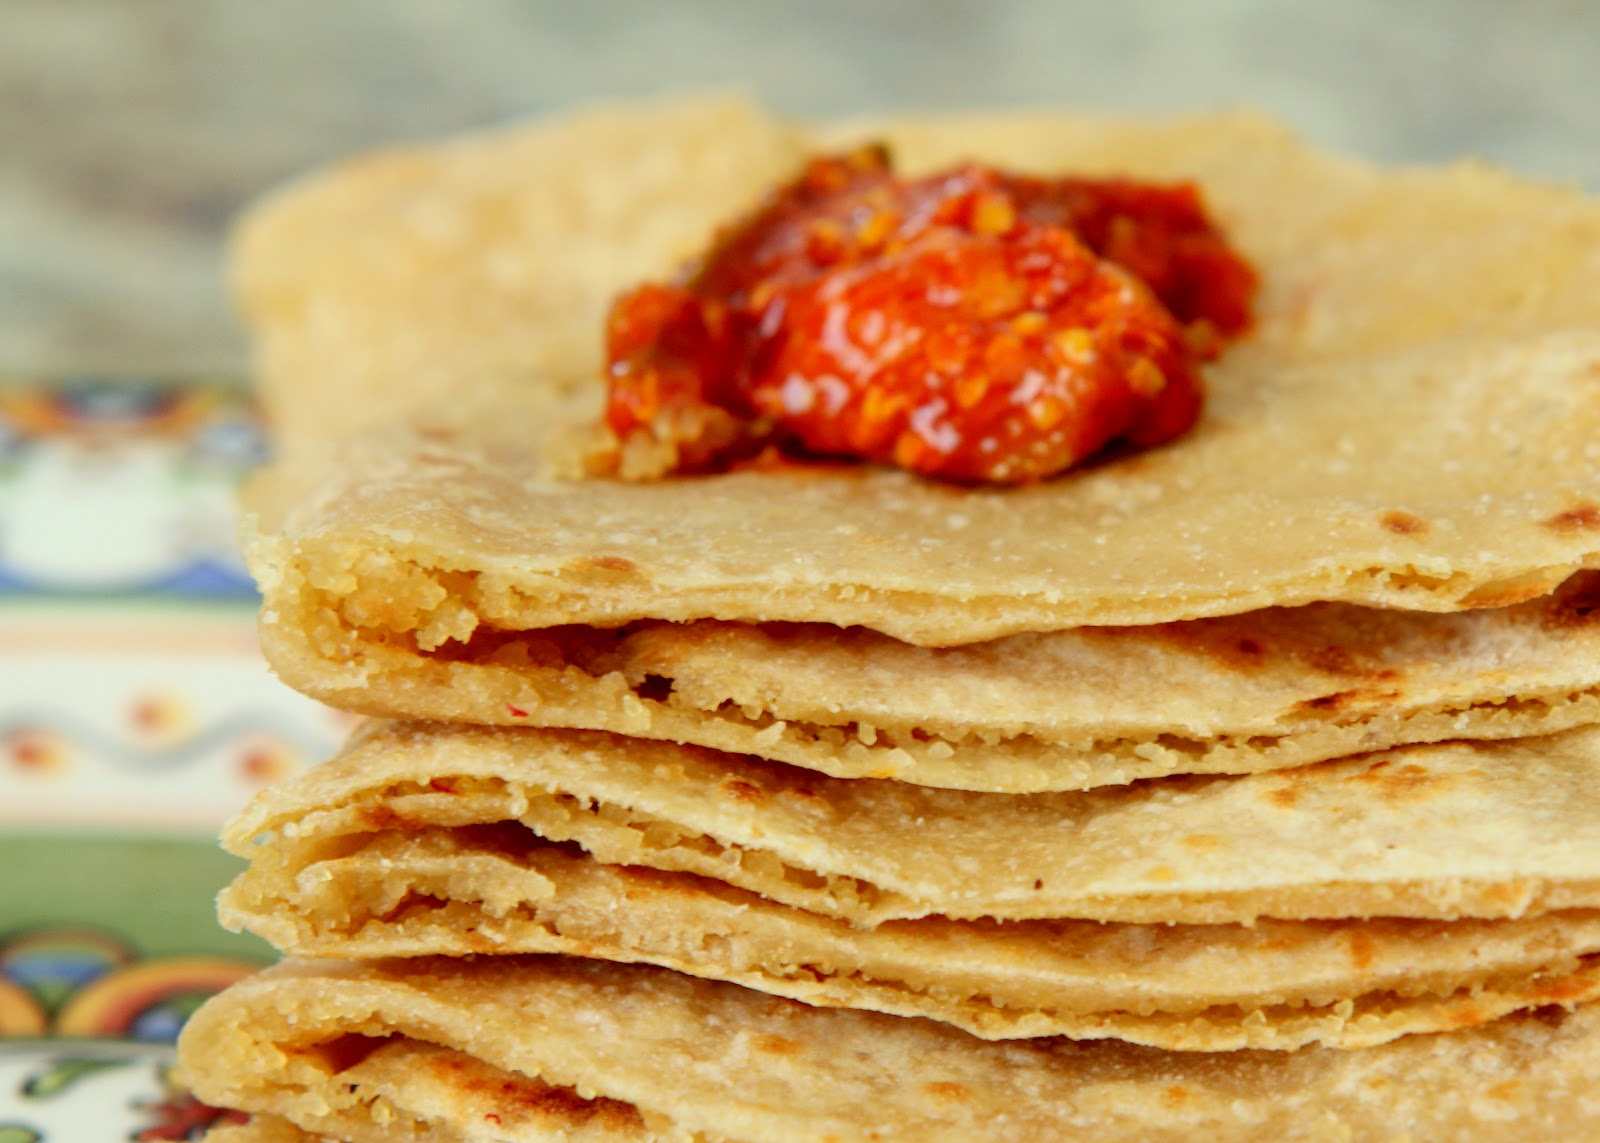
  • Knead the dough well before making karanji. Make three parts of the dough.
  • Roll out each part into a roti. Keep the dough covered under damp cloth while working on each roti to ensure it doesn't dry out. 
  • Take one roti, spread the corn starch mixture or sata by hand to create a thick coat all around. Place the second roti on top of it. Apply more sata and layer the third roti. Press gently by hand. 
  • Now create a tight roll, like a Swiss roll. Pinch off the ends to close. 
  • Cut the roll in half at an angle (as shown in the pic above). Cut each piece in half again. Now cut all 4 pieces in thirds - a total of 12 pieces. Keep them covered under damp cloth. 
  • Press each of the dough pieces by hand to flatten out. You want to flatten it from the side that shows the layers. Since they are at an angle, the layers will seal when pressed. 
  • Gently roll the dough ball using corn starch or all purpose flour so it doesn't stick. Don't roll too hard or else the layers will separate before frying - this will break the karanji while frying, spilling out the filling into the oil. You want to roll the dough like a puri - not too thick not too thin. This cover is called a paari.
  • Place a large spoonful of the filling at the center of the paari. You want a decent amount of filling since the karanji will puff up after frying. Apply a little milk all around the edge of the pari, fold it in half and seal of the edges to create a boat shaped karanji. Press the ends well so that karanji doesn't open while frying. Don't leave any air iside. You can cut the excess ends using a karanji cutter, or a knife. 
  • Heat oil in a kadhai. Drop a small piece of dough. If the oil bubbles rapidly and the dough floats to the top right away, the oil is ready for frying. Lower the heat to medium and fry each karanji until golden. Don't turn the karanji too many times else it'll break. The layers in the paari should separate while frying. 
  • Take out the karanjis on a paper towel to absorb excess oil. Let them cool completely before storing. You don't want any steam remaining, else the karanjis will turn soft. 
  • Store in an airtight container once cooled. They can be stored for up to 2 weeks. 


This is one of the many sweets and snacks I plan to prepare this year. Let me know what you're making for Diwali!

Submitting this recipe to the Dish it Out - Diwali Bash event @ Cook's Joy

Saturday, August 30, 2014

Naralachi Vadi for Baal Ganesh

My most favorite time of the year is here - Ganpati Bappa arrived in our house yesterday on the occasion of Ganesh Chaturthi, and will stay with us the next 4 days. Oh, so much joy and good eats this festival brings!


I celebrate Ganesh chaturthi with much enthusiasm and glee, while trying to stay as eco-friendly as possible. See this hand-made clay idol and decor with used cardboard boxes from last year? The celebration this year is low-key, as I hardly have time to do anything with a baby and work. But my baby's first big festival needed something to make it memorable. Keeping the tradition, I made the idol at home. As a quick and simple alternative to clay, I thought of using play dough - the perfect medium to make idol for my baby's first Ganpati! Thanks to Pinterest, I knew I could make play dough at home. I used the no-cook play dough recipe on this site, with only half the measurements. I skipped cream of tartar (used for elasticity) and glycerin (used for shine). The preparation of making the dough with all purpose flour, salt, oil, and water took  10 mins all together. The key to getting good play dough is kneading it really well. Making the idol was equally quick as I skipped adding too many details. Our Bappa looks like Baal Ganesha (Baby Ganesha), and I was quite happy with it.


Husband asked for Modak for Naivedya. But it was too elaborate a process. I went for simple Naralachi Vadi (Coconut Barfi) instead, using one of the main ingredients from Modak. I was never a big fan of Naralachi Vadi until I tried it at one of my dad's friends' place. His wife had made the best vadi I had tried, and her secret ingredient was - potato! Who would've though?! Mashed potato gave the vadi a nice bite and chewiness. I don't like too hard, sugary and crumbly vadi, and potato added just the right texture to it. When I told the husband I was adding potato to the vadi, he thought I was joking! But he ended up loving the product, and I think Ganpati Bappa liked it too :).


Olya Naralachi Vadi/ Coconut Barfi

Ingredients:
1 Packed cup fresh/frozen grated coconut
1 Cup sugar
1/2 Cup milk
1 Small potato (~ golf ball sized) - boiled and mashed
1/2 Teaspoon cardamom powder
1 Tablespoon ghee
Dry fruits for decoration - I used Charoli. Almonds or cashews would be great.

  • Heat a pan on low flame, add ghee and grated coconut and cook for 2-3 minutes. 
  • Add sugar, milk, and mashed potato. Cook this mixture while stirring every so often. Make sure you take out all the lumps from the potato so that it's smooth. 
  • Cook the mixture down until all the sugar has dissolved and the moisture has evaporated. It should stop sticking to the pan and come together in a ball. 
  • Add cardamom powder and mix well. 
  • Grease a flat surface (plate/tray etc.) and spread the coconut mixture with a spatula into a 1/4'' cake. Sprinkle chopped dry fruits and pat gently on the cake. 
  • Once cooled slightly, cut the cake into desired sized diamonds. Let them cool completely before separating the barfi. 
Hope those of you who celebrate this festival are having a wonderful, modak-filled, celebration!

Thursday, August 7, 2014

Shravan Special - Puran Kadabu

I loved the auspicious month of Shravan as a kid for various reasons. Apart from all the holidays we got, food was certainly one of the highlights. Many women in Maharashtra observe the Jivati Vrata on Shravan Fridays by worshiping Goddess Jiviti for the health and longevity of their children. I didn't know of this vrata by its particular name, but I looked forward to eating Puran-Poli on the first Friday of the month. My mom performed 'ovalane' or 'aarati utarana', for which there is no translation in English! It's a ritual performed by offerning oil lamps to a deity/person as means of worshiping or offering respect. Details apart, mom made diyas out of Puran, the sweet split chickpea/chana daal stuffing that goes into Puran-Poli, to perform the ritual. Then we got to feast on delicious polis.

This year I got to pay it forward by praying for my daughter's well-being and long life. Of course, there was puran involved. Instead of making poli though, I prepared Kadabu - Indian style whole wheat empanadas stuffed with sweet Puran. Kadabu/Kadubu are better known in South India, although the preparation is different. While puran kadabu are made with wheat flour, other versions are either made with all purpose flour or rice flour, and the stuffing is often made of grated coconut instead of chana daal. Puran Kadabu are not very well known; for that matter my husband had never eaten them. But I am quite a fan. The good thing is you don't have to strain puran through food mill to make it smooth. In fact, coarse puran with a bite tastes really good in kadabu.


I saved the chana daal broth and some daal itself to make Katachi Amati which was served with rice, ghee, sweet lime pickle, and yogurt - yes, all home made! I can't even begin to tell you how happy I am to be making fresh yogurt at home every day since last week. Our nanny got us the starter and I couldn't have been more pleased with the results. Anyway, that may warrant its own post.


Puran Kadabu/Indian Sweet Split Chickpea-filled Empanada

Ingredients:
Puran
1 Cup split chickpea/chana daal
3/4 Cup grated jaggery
1 Teaspoon cardamom powder
Couple of pinches salt

Dough
2 Cups whole wheat flour
1 Teaspoon oil
1/4 Teaspoon salt
Water as needed

Oil for frying
  • Knead the dough by combining whole wheat flour, oil, salt, and enough water to form a stiff, firm dough. Cover and keep aside.
  • One the side, pressure cook chana daal until cooked well (4-5 whistles).
  • Once the daal is cooked, remove excess water (you can save the broth to make katachi amati). Add jaggery to the daal and start cooking until most of the water evaporates, and the mixture stops sticking to the pot. Add salt and cardamom powder and mix well. Puran or the stuffing is done.
To make kadabu:
  • Make large marble sized dough ball and roll it out thinly just like you would a puri. 
  • Take a decent amount of puran, approximately a golf ball size, so that you have a handsomely stuffed kadabu. Place it one one side of the round puri and press to form a half moon. 
  • Fold the other side of puri over and press two sides gently to seal. Make sure the kadabu is sealed properly otherwise frying oil will get inside and burn puran. 
  • To make the kadabu look pretty, gently press the tip of a fork into the sealed edges, and cut any uneven ends with a knife. Alternatively, you can use a Karanji Cutter if you have one. 
  • Fry on medium heat until golden brown. Kadabu will puff up when fried. It will soften once cooled. 
Pour some warn ghee on kadabu while serving, and enjoy!

Tuesday, July 22, 2014

Four Month Birthday With Ice Cream Trifle

Our local Indian grocery store opened an ice-cream shop recently with all the Indian favorites - sitafal (custard apple), kesar, mango, pistachio etc. I excitedly tried all the flavors; and while most of them were just okay, I was certainly reminded of Indian ice-cream. It was perfectly light and airy, and not cloying sweet. I came home with a carton of one of my all time favorites - butterscotch. I made this simple trifle with the ice cream to celebrate my daughter's 4 month birthday last week (gosh, she's growing up so fast!). It was the perfect dessert for this hot summer month.


I ate this trifle at one of my aunts' place. We used to visit my dad's siblings and cousins in Thane every summer vacation. My aunt used to have all the kids over and treat us to all sorts of fun stuff - chaats, paav bhaaji, Indian desserts, and other kids favorites, like this ice-cream trifle. It was just layered pound cake, mixed fruits, and ice-cream - the easiest dessert ever - but it tasted so good! It had all the right components - dense, moist cake, fruits including the season's best mango, and good quality ice-cream. You can't go wrong with that combination! I recreated the trifle from my memory, and it was a big hit in my family. My baby girl can't eat yet, but I'll be sure to make this once she grows old enough to eat sweets (yes, I believe in spoiling kids once a while :D). I used store bought pound cake for the recipe since it didn't need much. With minimal effort, I created a great dessert everyone loved, and spent time playing with my daughter instead of fretting over baking a cake. This trifle would be great for parties - you can make it in advance, make a large batch in no time, change it up a thousand different ways to create a 'new' dessert, and appear really cool to young as well as adult guests for treating them to something this good. You can play on the flavors of ice-cream and pound cake, such as lemon cake with citrus fruits and strawberry ice-cream, or chocolate swirled pound cake with chocolate chip ice-cream, pineapple pound cake with coconut ice-cream. The combinations are countless and the joy limitless!


**Husband managed to click a few decent pictures this time. What a breath of fresh air after my rushed, poorly lit, poorly staged phone photos!


Ice Cream Trifle

Ingredients:
Good quality pound cake - I used almond flavored - cut in 1/2 inch slices
Chopped mixed fruits - I used mango, strawberry, apple, and grapes for a variety of flavors and textures
Tutti frutti (optional) - to mix with fresh fruits
Butterscotch ice-cream - softened for the ease of spreading.
Chopped dry fruits of your choice - I used almonds to resonate the flavor of the pound cake
Rectangular casserole dish, or any other flat dish, preferably glass so you can flaunt the dessert.

  • Layer pound cake at the bottom of the pan. Then spread about 3/4-1' layer of mixed fruits. On top of this, spread 1/2' (or as thick as you like) layer of softened ice-cream with a spatula. Let some of the ice-cream drizzle down into the fruits and cake. The cake tastes even better after soaking up some of the ice-cream flavor, and it ties all three components together.
  • Sprinkle a good amount of chopped dry fruits.Cover and freeze until the ice-cream is set.
  • Remove the pan from the fridge 5-7 minutes before serving so that you can slice it easily.

You can serve the trifle with some fresh fruits on the side, or a jam, or jelly, or chocolate sauce, caramel sauce. I told you - the combinations are countless!

Monday, June 9, 2014

Guilt Ridden And Snacking Guilt Free

I believed sleep deprivation, zillion diaper changes, and back crushing feedings would be some of the challenges of motherhood. What proved it wrong was leaving my entirely dependent little one with a complete stranger, to go back to work. I joined work three weeks back, and it's been an emotional challenge. The baby girl is adjusting to her nanny slowly but surely, yet my heart breaks into a million pieces every day when I see the longing in her eyes. Sure, I can quit my job, some would say. But some things are easier said than done. I just hope my daughter forgives me one day when she has a similar battle of her own, or just not remember this at all!

The only consolation in this situation is that we've found a fantastic nanny. She's a loving person with two grandchildren of her own, and treats Shreya just like she would one of them. She came with a whole bunch of cute clothes for Shreya last week for no particular reason. Isn't that incredibly sweet of her? Despite all, I am comforted that my daughter is in good hands. Aunty, as we respectfully call her, hails from Gujarat, and is an enthusiastic cook like most Gujjus. I for one am a huge fan of Gujarati food. So it's a bonus that she brings us lots of freshly prepared Gujarati delicacies almost every day. She brought me a popular sweet called Sukhdi the other day. Sukhdi is a simple wheat flour 'cake' made with ghee, jaggery, and decorated with dry fruits.It tasted like wheat flour laddus, just repackaged. I enjoyed snacking on this energy packed sweet between meals. This nursing business makes me very hungry, and I always need nutritious, guilt-free snacks at hand. FYI - a healthy dose of ghee is good for your, especially postpartum. I tweaked anuty's recipe so I could add some more elements of 'healthy' and made sukhdi with ragi/nachani/finger millet flour. I also added dry grated coconut to the list of dry fruits. Ragi flour is light and toasty, and tasted even better than wheat flour. Husband admitted that this was one of my best creations; but then again, he says that a lot ;).


Ragi Sukhdi/Nachanichi Vadi

Ingredients:
1 Heaping cup raagi/nachani flour
3/4 Cup grated jaggery (or adjust per your liking)
6-8 Tablespoons warm ghee
Handful of dry fruits, coarsely ground. I used almonds and cashews
1 Heaping tablespoon grated dry coconut

  • Heat a kadhai/pan on low flame and roast ragi flour in 6 tablespoons of ghee until the flour is fragrant and doesn't taste raw. 
  • Add grated jaggery, ground dry fruits, and grated coconut. Roast for 5 more minutes. Make sure there aren't any pieces of jaggery left.
  • Once the mixture is cool to touch, mix by hand to make it consistent. Try pressing some mixture between your palms and it should form a lump and stick together. If not, add more ghee as needed. 
  • Grease a steel plate with ghee and pat the mixture tightly on it, forming a ~1/2 inch cake. Cut into diamond shaped vadi using a sharp knife. 

Alternatively, you can form laddus of the mixture.


Thursday, April 17, 2014

One Month and a Change of a Lifetime

I've been on a blogging sabbatical the last two months. It might not have made a dent in the blogosphere; but my life has taken a 180 degree in that time! We welcomed our precious little girl, baby Shreya, into this world one month back. The past month has been a blur of feedings, changing diapers, calming a crying baby, and trying to function without getting much sleep. But it's all worth that gummy smile she's just started to give us!

My mom, the cooking enthusiast that she is, informed me to that it's customary to make Ghavan-Ghatle on baby's one month birthday. The sweet cousin of my go-to savory meal choice. She immediately looked up the recipe in her favorite cook book Ruchira. I had planned to make a cake for the little one, but this recipe was far easier to make with a baby in tow. Ghavan is a simple rice flour crepe. Ghatle is a jaggery sweetened coconut concoction to dunk the ghavan. The crepes are soft and spongy and soak up all the sweet goodness of ghatle. I couldn't not love these - they are practically deconstructed Modak!


Ghavan Ghatle

Ghavan Ingredients
1 1/2 Cups rice flour
Water as needed
Couple of pinches salt
Ghee/clarified butter 
  • Mix enough water with rice flour to make a runny, crepe-like batter (~2-2/12 cups). Add a little salt and mix. 
  • Heat a pan on med-high heat. A non-stick pan will work the best. If you're not using a non-stick pan, grease the pan with a little bit of ghee. Make sure the pan is hot before you pour the batter in order to get a porous crepe. 
  • Spread a ladleful of batter on the pan, and let it cook till golden brown. The crepe will separate from the pan once done. Turn and cook on the other side. 

Ghatle Ingredients:
1 1/2 Cups water
3/4 Cup fresh/frozen grated coconut
1/4 Cup jaggery/per liking
1/2 Teaspoon cardamom powder
2 Teaspoons rice flour 
Couple of pinches salt

Heat water on low-med heat, and add jaggery and coconut. Let the jaggery melt. 
Mix rice flour with a little bit of water and add it to the coconut mixture. The rice flour will act as a thickener. 
Add in cardamom powder and salt. Turn off the heat when the mixture thickens slightly. 

Pour warm ghee on top of the ghavan and serve with warm ghatle!

***

I spent the last few months of my pregnancy making stuff for the baby. I couldn't wait to share pictures of some of my craft work - now seems like a good time to post them :). 

Hubby asked me to make a few colorful hats for baby pics. Here are two of my favorites:

A variation of this adorable bobble stitch hat: 


A ladybug hat for my li'l bug: 


I was looking for some ideas to make a crib mobile and stumbled upon this adorable pattern! Some inexpensive felt from recycled material (source - Michaels), cotton and scrap material to stuff, and an easy clip-on mobile crib hanger (source - Babies R Us, ~$10) was all I needed to make this mobile. I drew the patterns on paper first and traced them on felt.


I couldn't get over how cute and easy to make these little toys were and made a few furry friends as well. I used various sources for patterns, many of them pinned on my board. Aren't these guys fun? I still have lots of left-over felt which I plan to use - some day!


One of my dear friends was also due a few weeks after me. She had shared yummy home-cooked food with me in my ninth month. It was wonderful having home made meals without taking any effort on my part :). As a 'thank you', and since we never return empty containers, I stuffed one container with nutritious laddus for her and one with these fellas for her little one on the way. I looked up patterns for finger puppets on google and picked four that I liked the best. 


I hope to be able to blog as and when I can. Until next time!

Wednesday, February 19, 2014

Butternut Squash Gharge

The grocery scene in my house has been quite exciting lately. Husband I have been going to the Saturday Farmer's Market like a ritual (I know, everyone experiencing horrific winter this year will be jealous - I sympathize with you all). It makes my weekend to come home with bags full of fresh produce. We also just signed up for CSA last week. Oh, I can't wait to share the details next week when I get my second box of goodies! Anyway, trying to consume all the fresh fruits and veggies, I forgot all about a small butternut squash bought from the grocery store a few weeks back. Good thing it doesn't go bad very fast, but it was about time the squash was put to use. San Diego weather hasn't exactly been calling for soup, so I used the squash in lieu of pumpkin in two of my favorite Indian dishes - one sweet (Gharge) and one spicy/savory (Parathas). I'll share the recipe I'm partial towards - the sweet, of course :).

Gharge are traditional Maharashtrian sweet puris made with pumpkin. The puris are not cloyingly sweet or dessert like - so they can be snacked on (like I did in one go on half the batch I prepared...shhh). The recipe calls for very few simple ingredients. And these puris don't require rolling out dough with a rolling pin, which makes them easy to prepare. My mom used to make gharge for after school snacks. They store well even at room temperature, so we could enjoy them all week long. Butternut squash is a close relative of pumpkin in terms of taste and texture, so I thought why not? And the gharge turned out just fantastic! With the sweetness from jaggery and the aroma of cardamom, you couldn't tell the switch between pumpkin and butternut squash. This recipe can use any similar squash, I suppose.


Butternut Squash Gharge

Ingredients:
2 Cups grated butternut squash
1 Cup grated jaggery
2 Tablespoons ghee
1 1/4 - 1 1/2 Cups whole wheat flour
1/2 Teaspoon cardamom powder
Pinch of salt
Vegetable oil or ghee for frying

  • Combine ghee, jaggery, and butternut squash in a kadhai/work and cook on medium heat. The moisture from squash will be enough to cook it thoroughly. Cook the water down until you are left with a soft, moist mixture.
  • Stir in cardamom powder and a pinch of salt.
  • Once the mixture cools to touch, start incorporating wheat flour until you have a pliable, non-sticky dough. I used about 1 1/4 cups flour. You can add more if you need to. I liked the sweetness achieved with this much amount of flour.
  • Let the dough rest for 5-10 minutes.
  • Make small lime size dough balls. With 1 1/4 cups flour, you'll get ~20 medium size puris.
  • To make the puris, grease a thick plastic bag with a little bit of ghee. I use ziplock which works perfectly. Apply some ghee on your finger tips as well, and pat each dough ball evenly into a not too thin puri. You can lay raw puris on a plate before getting ready to fry them. They won't stick.
  • Fry them on medium heat in vegetable oil until golden brown. Take them out on a paper towel to wick away excess oil. A more decadent version of these puris would be fried in ghee. I wanted to save my precious home-made ghee for other things :). 

Gharge won't puff up like the regular puris, but they are wonderfully flaky. They will be soft straight out of the fryer, but the crust will get crispy once slightly cooled, and the inside will be soft and moist. Yum!
You can enjoy gharge right away, or store them in an air tight container for about a week.

Tuesday, October 29, 2013

Hunky Chunky Cookies And Halloween Fun

Halloween decorations have crept up (literally) in my neighborhood over the past week. Our orange and purple lights are hanging on the palm tree, finally. Better late than never. The one thing that we did have out in time, our carved pumpkins, didn't survive to see the Halloween day though. Husband was quite methodical in his approach - he bought a pumpkin carving stencil book and all the fancy tools for carving. He even made a chlorine solution to prevent pumpkins from rotting. Unfortunately, the solution dried out the pumpkin a bit too much, shriveling and cracking through some of the design. The mold didn't seem to care about chlorine either. Anyhow, our haunted house and headless man managed to spook others for almost a week.


I picked up a Halloween special magazine while waiting at the grocery check-out counter a couple of weeks back - yes, I can shop all the way to the check-out line :D. I promptly tried one of the appetizers - Potatoes stuffed with herb & garlic cheese. Tell me how you can go wrong with cheese and potatoes! I am planning to make them again for my office Halloween potluck. Recipe should follow soon.


Now, what's Halloween without some lots of chocolate? Another recipe I tried for chocolate chip cookies, with a couple of modifications, was a winner! I made a fresh batch for my friends on Sunday, and also shared some with my colleagues yesterday. Everyone was all praises for the cookies, genuinely :D. The original recipe used a combination of milk, bittersweet, and white chocolate chips. I went with what was available in the pantry - bittersweet chips only. We're bigger fans of dark chocolate anyway. The cookies came out nice and big - the kind that make kids happy. So I called them Hunky Chunky cookies!


**Note: This recipe makes about 22-24 cookies

Hunky Chunky Chocolate Chip Cookies

Wet Ingredients:
1 Cup unsalted butter
2 Cups sugar (all white or half brown and half white)
1 Extra large egg
1 Teaspoon vanilla extract

Dry Ingredients:
1 Cup APF
3/4 Cup whole wheat flour
1/2 Cup unsweetened cocoa powder
1 1/2 Tsp baking powder
1 Tsp salt
1 Cup bittersweet chocolate chips

Prep: Line two baking sheets with parchment paper/aluminum file. Preheat oven to 350F.

  • In a large bowl, cream together butter and sugar with until smooth.
  • Beat in egg until the mixture if fluffy. Stir in vanilla extract.
  • In a separate bowl, sift all the dry ingredients except chocolate chips. Beat the flour into the butter-sugar mixture slowly, and fold in the chocolate chips.
  • Drop big spoonfuls of the batter on the lined sheets. I used a small ice-cream scoop to ensure the same size. Each drop was approximately the size of a golf ball.
  • Bake for 10-12 minutes. Then let the cookies cool on a rack.

I kept one of the baking sheets right at the center of the oven, and the other closer to the bottom. The center sheet cookies turned perfectly chewy. The bottom ones were more on the crispy side. Still delicious, but I wouldn't put the sheet right by the heating coils. I would like to add macadamia nuts next time - that'll make these cookies just perrrfect!

Hope you have a spooktacular, sugar-filled Halloween!!!


Thursday, October 17, 2013

Laddu Love

I find it challenging to plan for late afternoon-early evening snacks, especially when I'm ready to chomp down anything after getting home from work. But then, I don't like to kill my appetite for dinner either. It's not too much work to whip up guacamole or make veg cutlets or something else. Still, it would be nice not having to think about it every day. For quick energy boost between meals, I liked all sorts of khau (snack/treat) grandma used to keep ready - bhadang or healthy chivda to eat with yogurt, or one of her wholesome laddus made with moong, haliv (aserio) or whole wheat. How easy life used to be when mom or grandma had to worry about such things...*sigh*!

Now that I'm working up an appetite with the cooling Fall weather (and in preparation for the holiday season ;), I wanted to have something ready in the house for the occasional hunger pangs. Kanakeche Ladu (Whole Wheat Laddus) seemed to suit my mood, and the lack of enthusiasm for making anything elaborate, the other day. These laddus are quite nutritious, with golden roasted whole wheat flour, dry fruits, and a good dose of ghee. They are made with my favorite sweetener jaggery - always happy to forgo refined sugar. Most importantly, unlike besan or rava laddus, there's very little that can go wrong in the preparation. And you don't have to fret if you can't roll laddus, because the churma, or the coarse mixture, tastes fantastic by itself. Just don't tell anyone you attempted to make laddus :D.

Ladies, these laddus will be great to break your Karwa Chauth fast. Sweet, and energy packed when you are ready to faint after a long day of fasting =).

**The recipe below makes approximately 12 laddus.


Kanakeche Ladu/Whole Wheat Laddu

Ingredients:
2 Cups whole wheat flour
1/2 Cup ghee
3/4 Cup grated jaggery
Chopped dry fruits per your liking - almonds, cashews, raisins
1/2 Teaspoon cardamom powder

  • Heat 3 tablespoons of ghee in a kadhai on low flame. Add whole wheat flour and roast until golden and aromatic (~10 mins). Keep the stove on low and stir the flour so it doesn't burn. Once done, keep aside.
  • Add the remaining ghee and grated jaggery to the kadhai and heat just until the jaggery melts completely. Don't overcook. Be very careful -jaggery can really burn once hot!
  • Pour this ghee-jaggery mixture in roasted whole wheat flour. Add chopped dry fruits and cardamom powder. Mix everything well with a spatula.
  • Once the mixture cools enough to touch, break all the lumps with your hands and make golf-ball size laddus. If you find it difficult to roll laddus, add a little bit of ghee (although 1/2 cup should enough really).

If the laddus harden (because ghee can solidify in cold weather), just pop them in the microwave for a few seconds and they'll be as good as fresh. 

Tuesday, September 18, 2012

Haliv/Aliv Ladu

Hartalika wishes everyone! Happy fasting to those who are observing it today. Hartalika is celebrated by women in honor of Goddess Parvati on Bhadrapad tritiya (third day of the Hindu calendar month Bhadrapad). I used to observe the fast as a girl - to pray for a husband like Shiva! Now that I have found him, I skip the fasting bit of the celebration ;). Hartalika falls a day before Ganesh Chaturthi. My grandma would scurry around just before the big day trying to fill the pantry with sweets, so none of the visitors who came for Ganpati darshan left without plentiful of them. She made pedhas, barfis and all sorts of laddus. I always had my eye on the Haliv laddus, to replenish the depleted energy after a long day of fasting.


Haliv/Aliv seeds come from an herb called garden cress. They are also known as Aserio seeds. These seeds are rich in iron, calcium and protein. Grandma told us how good they were for women and said, "We didn't have all these energy tonics in my days. We ate haliv ladus or kheer for the essential nutrients." The great thing is, these laddus taste much better than any energy drink you've had! Haliv seeds swell up once soaked, just like sabja we put in faluda. They give a nice, chewy texture. The laddus are quite decadent with the generous use of coconut. The surprise element is the sweet, floral aroma from cloves. You can add some dry fruits if you like, but the laddus are quite rich on their own. Other laddu recipes, like rava and besan, require exact measurements and technique. This recipe is a lot simpler in comparison. The only tedious part is the cooking process.


 Haliv/Aliv Ladu

Ingredients:
1/2 Cup Haliv/Aliv seeds (Aserio seeds)
1 Cup coconut water (use regular water if not available)
1 Cup fresh grated coconut
3/4 Cup grated jaggery
2 Tablespoons sugar (if required)
3 Cloves
2 Teaspoons ghee (clarified butter)

  • Soak haliv seeds in coconut water for about an hour. The seeds start to puff up immediately and become slippery. They double in size once completely soaked.
  • Mix grated coconut (you can add some later if needed) and jaggery to the seeds and combine well. Let it sit for another hour. There should be equal or little more amount of coconut as the seeds. 
  • While the seeds are soaking, roast the cloves and grind them to a fine powder. 
  • Heat ghee in a kadhai and add the coconut,jaggery,haliv mixture and cloves powder and cook on low flame, stirring constantly. The seeds need to be cooked for a long time (~20-25 mins) until they become soft. 
  • Once the seeds are cooked through and the mixture comes together, turn off the heat and let it cool. 
  • Make golf ball sized laddus (you probably won't be able to eat a bigger laddu at one time since they are quite heavy). 

Notes:

  • The sweetness of jaggery depends on the quality. You can add some sugar to achieve desired sweetness. 
  • Soaking the seeds in coconut water adds more flavor. Use regular water if you don't have it. 
  • This recipe makes about 10-12 laddus.

Wednesday, July 25, 2012

Celebrating Shravan

Friday marked the first day of the Hindu calendar month Shravan. Shravan brings with it heavy monsoons after torturous summer heat, and the dry, deprived earth gets blanketed in lush greenery. As oceans swell and become dangerous with the onslaught of monsoon, fishing activity slows down. Everyone practices vegetarianism and gets ready to celebrate the changes in the surroundings that monsoon brings with it. Shravan is considered a holy month and probably has the most number of Hindu festivals. Many fast on Mondays to please Lord Shiva; newly married women in Maharashtra worship the Shivalinga on Tuesdays for their husband's well-being.


Shravan was my favorite time of the year for the number of school holidays we had. The days we did go to school were spent attending prayers, celebrations, and waiting for lunch breaks to attack each other’s tiffin boxes stuffed with goodies our moms prepared all through the month. We were distracted by the colorful clothes and jewelry on 'civil dress days'. Not that we didn’t dress civilly otherwise, but my school excused us from wearing school uniform every Monday and Friday of the month.  

At home, we were treated to a number of sweets and other special preparations in Shravan. My aaji (grandma) observed every fast religiously which she broke around sunset with some satvik food and sweets. Mom and the two of us sisters never fasted, but we relished the food nonetheless. Mom made fragrant ghee out of freshly churned butter to make the sweets decadent or simply poured it over warm sabudana khichadi. Among the many delicacies, Sanjyachi Poli stands out as one of my favorites. Sanja - sooji or semolina sweetened with jaggery - is stuffed inside whole wheat dough to make flaky, buttery, melt-in-the-mouth rotis, or poli as we call it. We Marathi people love our sweet rotis, like Puran poli, Gulachi poli or Khavyachi poli. Sanja poli is simpler to make compared to the others as the stuffing is not difficult to work with. It's not overwhelmingly sweet either. Some people make the stuffing with sugar, but I swear by jaggery. And as weird as this may sound, Sanjyachi poli tastes amazing with some spicy Maharashtrian style mango pickle! If you don't want to try that combination, enjoy it with some ghee or warm milk. 

**Note: The recipe below makes about 10-12 rotis depending on how big you make them. 

I'm submitting this recipe to the Celebrate Event by Jagruti, hosted by Sangeetha this month to celebrate the month of Shravan. 


Sanjyachi Poli/ Sooji Roti

Ingredients:
Sanja:
1/2 Cup Rava/Semolina
2 Tablespoons ghee/clarified butter
3/4 Cup grated jaggery
3/4 Cup water + more if needed
5-6 Cardamom pods - powdered
Couple of pinches saffron
Pinch of salt

Poli dough:
~ 1 3/4 Cups whole wheat flour
Water to knead the dough
1 Teaspoon oil
Pinch of salt
  • First, knead the dough with just enough water so you have a soft dough ball. It should be slightly softer than the usual roti dough so you can roll it with light pressure. This will ensure the stuffing doesn't get pressed out. Cover dough and keep aside. 
To make sanja
  • Add ghee to a kadhai and roast semolina on low-medium heat till it gets a reddish hue. It'll be very fragrant when roasted well. Make sure you don't over-roast it. Keep aside. 
  • Cook jaggery with water to help it melt, then add the roasted semolina, cardamom powder, saffron and a pinch of salt and cook down until the semolina is soft. Add a little warm water and cook down if the sanja is not cooked through. The stuffing should not be watery or else you'll have a hard time rolling rotis. 
  • Take a golf ball size dough and stuff sanja the size of a lime. The more stuffing you have the better. Roll the rotis gently making the sides thinner than the center. Apply a little ghee to each side while roasting. 


Sunday, July 15, 2012

Celebrating Ice-Cream!

Did you know it was National Ice-Cream day today? How cool is that?? I discovered just today that the third Sunday every July is dedicated to this frozen dessert we all love and adore. Here are some fun facts for you. I made some ice-cream to celebrate this day (duh!). The kind of ice-cream I grew up eating - simple and elegant flavors with all natural ingredients. No corn syrup, corn starch, milk powder or hydrogenated oil. Milk, cream, sugar and natural flavors - that's all you need to make some good ice-cream. 
  

I chose two of my favorite ingredients for flavoring - Kesar (saffron) and Ilaichi (cardamom). These two ingredients are ubiquitous in Indian desserts, providing sweet aroma and richness. I love the floral notes and touch of golden orange color saffron adds. My sister works for a food distributing company and gets me some of the best saffron available. Cardamom takes any dessert to a whole new level. I always make fresh cardamom powder from pods. Good quality ingredients make a world of a difference. A little bit of vanilla essence elevated those wonderful flavors in the ice-cream.


Creamy Kesar-Ilaichi ice-cream is India in a dessert bowl. This ice-cream is great by itself, fantastic with some warm gajar halwa or gulab jamun or goes great with some mango pulp, even better fresh mango. 


Kesar Ilaichi (Saffron Cardamom) Ice-Cream

Ingredients:
2 Cups whipping cream
2 Cups milk
3/4 - 1 Cup sugar (depending on how sweet you like it)
1 Teaspoon cardamom powder
1/2 Teaspoon saffron strands
1/2 Teaspoon vanilla essence
Chopped fruits for garnishing - pistachio or almonds

  • Warm 3-4 tablespoon of milk in the microwave. Add the saffron strands to warm milk to extract color and flavor. 
  • Now mix all the ingredients together, including the saffron milk and whisk it until the mixture is frothy and aerated. If using a hand mixy, whip it on low for about a minute. 
  • Chill the mixture for about an hour then churn in an ice-cream maker. 
  • When serving, garnish with some chopped dry fruits. Alternatively, you can add them to your ice-cream while making it. 

Sunday, July 1, 2012

Randomness

It's been a while since I was home alone being a couch potato, only my needle and yarn to accompany me. Mom and dad left yesterday to continue their trip at my sister's, leaving a huge void in my house. I'm quite thankful for the wonderful time we spent together though, and it consoles me that they are just across the country as opposed to the globe! Now that it's back to just the two of us, I won't need to cook as much. For now, I'll update you on all the happenings in the last few days.

No butter baked goodie - I had wondered how applesauce worked in baked goodies all this while. After a successful trial, I'm convinced of the power of apple! I baked an eggless yogurt cake for mom and dad before they left, using this easy recipe. I cut the recipe in half, used only 1 tbsp of sugar instead (for mom) and (apprehensively) substituted oil with applesauce. Boy, was I sweetly surprised at the end product?! The cake was moist, fluffy and tasty. I would recommend adding some fruits or berries to the cake though since it's pretty one tone. Mom and dad gave two thumbs up.

Float fun - I stay away from sodas; not just for health reasons but I don't like the taste at all. Ice-cream floats though are a different story though. Creamy vanilla ice-cream dunked in fizzy root beer is the ultimate summer dream. We got my dad hooked onto root beer floats while he was here. If you haven't tried them or haven't had them in a while, do revisit soon =D.

Feeling peachy - Take a look at the velvety peaches we've plucked from the tree recently! we snacked on a few juicy fruits and saved some for a tart, maybe.


Anjeer Barfi - Everyone who visits our house 'oohs' and 'aahs' over the giant anjeers (figs) in the backyard. My sister and bro-in-law love figs and asked us to save some for them. I don't know what the status will be when they visits us in fall, but I wanted to surprise them with some fig goodness. I made fresh Anjeer Barfi (a sweet made from figs) and sent with my parents. Bro-in-law only saved a little bite for my sister, but I heard they loved the barfi. I used a pretty standard method to make it:


Anjeer Barfi

Ingredients:
3 Large figs (all the ripe figs on the tree)
1 Teaspoon ghee/ clarified butter
2 Tablespoons chopped dry fruits + more for garnishing
3 Teaspoons sugar
1/4 Teaspoon cardamom powder

  • Puree figs in the food processor. If you don't have fresh figs, use twice as many dry figs - reconstitute them in warm water and puree. 
  • In a pan, heat ghee on low-medium and roast the dry fuits for 10-15 secs. They don't need to turn color. I used almonds as that was the only dry fruit I had on hand, but you can use cashews and pistachios as well. Add the fig puree, sugar and cardamom powder and cook on medium for 10 mins or so until most of the moisture evaporates and the mixture separates from the pan in one ball. It's important that you get rid of the water content. 
  • Grease a plate with ghee or line it with parchment paper/aluminum foil and spread the mixture and pat it to 1/2 inch thickness. Spread some chopped dry fruit on top and press gently into the barfi. Stick it in the fridge to cool and thicken. 
  • I made a big round barfi to send it. You can cut small 1 inch cubes. 

Babies and batwas - My BF recently delivered a beautiful baby girl (yay for her), and my cousin is expecting her second bundle of joy - a girl too - very soon! I crocheted two cute little headbands for both of them. One inspired by this simple but beautiful design, and another with a pretty little flower. The second one has reached its destination already and the mommy was simply thrilled about the handmade gift :). On my recent trip to Michael's, hubby picked this rainbow of a yarn ball for me, and I crocheted a simple batwa (pouch) with a pattern I created myself. Take a look. I'm tackling this new design now. 

Monday, June 11, 2012

Frozen Delight For Summer Night

Ever since mom and dad got here, we have been having a gala time planning meals, grocery shopping, cooking together and sitting in the backyard, reminiscing the good ol' days over dinner. The summer night breeze goes great with a veggie flat-bread pizza, a yummy sandwich with homegrown basil pesto, tacos or burritos or a simple rice and daal dinner. I pride in cooking healthy ; but I've been making an extra effort to cook low-cal to suit my mom's diabetic diet. Eat whatever you want, a summer meal enjoyed in the backyard warrants a dessert though; and what's better than some ice-cream? Mom doesn't care much for sweets, but ice-cream is something she loves and misses having; especially since sugar-free, fat-free ice-creams are still rare to find in India. So I turned to a much healthier and just as satisfying option to sate her craving - Frozen Yogurt. A delicious dessert to indulge in on a summer night without all that guilt.


Frozen yogurt is ridiculously easy to make as long as you have an ice-cream/FroYo maker. You just need some thick, strained yogurt and your favorite fruit for flavoring. Sugar is optional. You can also buy Greek yogurt; but I find straining yogurt just as simple as picking up a Greek yogurt container from the grocery store. Just hang some plain (low-fat or regular) yogurt in a cheese cloth for 3-4 hours and you are done. You can use a variety of fruits, such as berries, mangoes, nectarines, to make the frozen yogurt interesting. If you are a chocolate person, go for some good quality chocolate chips. I used apricots this time since my mom loves them, and they turned out to be a great choice. Apricots have that gorgeous mango color and the flesh is juicy, sweet and slightly tart. Whatever your choice of fruit may be, you are less than 5 ingredients away from this frozen treat!


Apricot Frozen Yogurt

Ingredients:
1 1/2 Cups strained yogurt/Greek yogurt
4 Apricots
2 Tablespoons honey
1/2 Teaspoon vanilla essence
2 Tablespoons water
  • Wash, pit, and chop apricots finely. Keep a little less than a 1/4 of the apricots on the side and add the rest to a saucepan.
  • Add honey, vanilla essence and a little bit of water to the saucepan and cook the mixture on low-medium heat for about 5 mins or until the apricots are soft. Vanilla is great to enhance any flavor. Cooking helps bring out the sugars in apricot and the consistency helps mix the fruit well with the yogurt. It gets you that gorgeous color too. If you want sugar in your FroYo, just add it to the fruit while cooking. 
  • Cool the cooked apricot mixture in the fridge for a few minutes and mix it with the yogurt. Add the remaining uncooked apricots as well. The uncooked fruit added a great bite. 
  • Put this mixture in an ice-cream maker and churn according to the manufacturer's instructions. 
There, you have a gorgeous looking, wonderful tasting, absolutely no-guilt dessert for a lovely summer night!

Friday, June 1, 2012

A Sweet Start - Broken Wheat Porridge


Desserts with coconut evoke nostalgic memories of some of the most exciting events in my life. We have a custom of breaking coconut at the start of any new venture or when inaugurating a new purchase (something really special - we don't break coconut before wearing a new dress, of course =D). The coconut would then be offered to God and turned into a delicious dessert - a barfi or sweet coconut rice, laddu or kheer. All these tasty treats remind me of my first bike, first computer, getting our first car and all the other milestones! The custom is symbolic of breaking all obstacles and achieving the sweet outcome. I love these small but meaningful traditions. Of course, I didn't miss out on this tradition when we entered a very big phase in our lives of home ownership recently. It's been a little under a month since we moved to our home sweet home! I've been caught in a whirlwind of activities - moving can be stressful. Hence the long absence from the blogging world. But I made sure to take pictures of the dessert I prepared from the coconut we offered while entering the house.


With my kitchen barely set up, I wanted to make something simple and went to one of my childhood favorites - Gavhachi Kheer or Broken Wheat Porridge. Gavhachi kheer is a very down-home, comforting, non-glorious yet delicious dessert. I love how it's no-fuss and simple to make. As long as you have good ingredients, there's little that can go wrong in the preparation. It's great as a dessert for any meal and one of the few Indian sweets that is great for breakfast.


Gavhachi Kheer/ Broken Wheat Porridge

Ingredients:
1 Cup broken wheat (or whole wheat)
1 Cup good jaggery - grated
A little less than 1/2 cup fresh grated coconut

1 Tablespoon Ghee/clarified butter
1 Tablespoon chopped dry fruits such as cashews or almonds

1/2 Teaspoon cardamom powder
3-4 Cups water or as needed

  • Soak broken wheat for 3-4 hours. This helps it cook fast. If you have whole wheat instead, soak it a bit longer and pulse in the food processor just enough so that it's coarse. 
  • Heat ghee in a pressure cooker and roast the dry fruits until golden. 
  • Add broken wheat and toast it for a couple of minutes. Then add jaggery, coconut, cardamom powder, and mix everything well. 
  • Add water and pressure cook with 2 whistles. The wheat almost doubles in size after cooking. There should be enough water so that you get a nice thick consistency. This kheer is not like the milk-based thin kheers. 
  • Serve with some ghee and more dry fruits on top.

Just 4 days back, my parents flew from India to visit us in the new house! Having a new 'field' to play around, I've been cooking my heart out under my mom's expert guidance. I'll make a point to post some of those recipes as time permits.

Have a good weekend, everyone!

Tuesday, March 20, 2012

Swirling in Chocolate

March starts a string of celebrations in my house. Some of the nearest and dearest people in my life, like my dad and sister, are March babies. And I found myself a March born husband, who grew a year older wiser last week =). My usual self would've cooked him a nice meal on his birthday and rushed to the bakery for a cake. Make that chocolate cake for the chocolate lover. But I was in a particularly adventurous mood this time and decided to bake a cake myself - a cheesecake - with chocolate swirls - and chocolate decorations!


Modern art =)

I went through several recipes of chocolate cakes online and finally settled on one on the back of Philadelphia cream cheese packet in my fridge! Sometimes you find inspiration in the most unexpected places.  The recipe only listed out the steps without going into details. So I got some tips from none other than David Overton:
  • Line your baking pan with parchment paper to get the cake out easily. You can also use aluminum foil.
  • Use water bath to get that smooth, creamy texture - although I got lazy and baked mine without one.
  • Turn the oven to high only for a short while and then turn it down to finish. Since my cake was made out of only one packet of cream cheese, I kept the beginning temperature at 350F. It was just right for the size of my cake.
  • Be patient and let the cheesecake cool for at least 4 hours. Trust me, I can get impatient, but this cake tasted a whole lot better the next day. 
Instead of the usual graham crackers for crust, I used Anna's Almond Thins. They so flavorful on their own that the crust didn't require any other spices. I had to add some chocolate to the cake. The idea of swirling some dark chocolate seemed better than adding it to the entire batter. It made the cake look much prettier as well. The only negative about the swirls was, the cake let off some steam through those swirls and ended up cracking it a little bit. Maybe a water bath would've prevented it from cracking. But the cake came out intact and the texture wasn't affected at all.


Chocolate decorations - simple embellishment! 
Cheesecake seemed like the perfect base to stick some chocolate decorations I had recently learned to make from Jean-Pierre Wybauw's book 'chocolate'. Cover a flat sheet/pan/dish with some sugar, put some melted baking chocolate in piping bag and pipe the design you like. Keep it in the fridge to cool for 20 mins or until the chocolate hardens completely. As simple as that. The chocolate shapes come out pretty glistening with sugar granules.

Happy Birthday, dear hubby!
Chocolate Swirl Cheesecake 

Ingredients:
Crust:
1 Dozen almond crackers
2 Tablespoons butter - melted

Filling:
1 Pack (8oz.) cream cheese
1/3 Cup sugar
2 Tablespoons sour cream
1/2 Teaspoon vanilla
2 Teaspoons Bailey's
1 Egg
1 Oz baking chocolate

Preheat oven at 350 degree F.
Line your baking pan (bottom and sides) with parchment paper or aluminum foil .

Crust:
  • Crush almond crackers in the food processor and mix with 2 tbsp melted butter. You can use more crackers depending on how thick you like the crust.
  • Press this mixture at the bottom of the pan using spatula or a glass. Keep pan in the freezer until you work on the filling.
Filling:
  • Combine the cream cheese, sugar, sour cream, vanilla and bailey's (optional) and beat until smooth and well blended. 
  • Break egg in a separate bowl and whisk it quickly with a fork. Beat the egg with the cream cheese mixture only until it's well incorporated. Do not over beat. 
  • Pull out the baking pan from the fridge and pour the mixture into it.
  • Melt chocolate in the microwave 30 seconds at a time until it's completely melted. To make swirls, pour chocolate thinly over the filling making zig-zag shapes or circles. Take a toothpick or a  skewer and start swirling the chocolate around gently. Don't muddle the shapes.
  • Once you have a pretty looking design, bake the cake at 350 degrees for 15 mins and then turn the temperature down to 250 and bake for another 30 mins or until the filling is set.  
  • Let the cake cool and then refrigerate for 4 hours minimum until you serve. 

Hubby was very happy with the surprise cake and couldn't get enough of it. He said he won't need to go to the Cheesecake Factory again!

LinkWithin

Related Posts Plugin for WordPress, Blogger...