Showing posts with label Curries. Show all posts

Friday, June 13, 2014

Gourd For You

As a nursing mother, it is very important that I watch what I eat. Babies have immature and sensitive digestive systems. It didn't take long for me to realize that tummy ache is the main culprit when my baby is fussy or cranky. It is best that I avoid acidic, gassy, difficult to digest foods. The common culprits of tummy troubles are dairy, sugar, and vegetables such as cauliflower, broccoli, cabbage, eggplants, etc. So what's good for a new mother? Gourd! Gourd and squash of every kind. I have eaten more gourds over the past three months than ever in my life. You name it - bitter gourd, ivy gourd, ridge gourd, bottle gourd, snake gourd, pumpkin - you get the idea! These vegetables are fibrous, nutritious, and easy to digest. Add some mung daal (split mung) when preparing and you have a dose of protein too. I have been preparing different gourds and squashes available in the grocery stores here using light Indian seasoning. Here is one of my favorites - butternut squash curry scented with ghee, curry leaves and grated coconut.


Butternut Squash Curry

Ingredients:
1 Medium butternut quash (~2 1/2-3 Cups peeled and cubed)
3 Tablespoons fresh/frozen grated coconut
2 Dried red chilies
1 Sprig curry leaves
1/2 Teaspoon mustard seeds
1/4 Teaspoon fenugreek seeds
Couple pinches asafoetida
1/2 Teaspoon turmeric powder
1 Tablespoon ghee
Salt to taste
Chopped cilantro for garnishing

  • Heat ghee in a cooking pan, and add mustard seeds.
  • Once mustard seeds splutter, add red chilies, curry leaves, and fenugreek seeds. Stir for a few seconds and add asafoetida and turmeric powder.
  • Add cubed squash and grated coconut to the tempering, and salt to taste.
  • Add a cup of water and mix everything well. Cover and cook on medium, stirring occasionally, until squash is cooked thoroughly and the flavors come together.
  • Garnish with fresh chopped cilantro.

Serve with hot rotis and yogurt on the side.


Sunday, June 30, 2013

Summer Recipe - Pineapple Curry

Ever since the in-laws arrived, we've been caved in trying to stay out of the 3-digit temperatures. The only solace has been walking on the beach in the evening dipping our feet in pleasantly cold waters, and eating cooling foods. It only helps that my MIL is a fantastic cook who has plenty of recipes I want to learn. We've been cooking up a storm already. As soon as she was out of jet-lag, we went and bought the ingredients to make Ananas Amti (Pineapple curry). A recipe I've wanted to learn from her first-hand ever since I got married. 


My first encounter with this tangy, sweet and sour curry was at my wedding! My MIL gave her mother's recipe to our caterer, who did a very good job making it on a large scale. If you're married, you'll know how trying it is to eat at your own wedding while greeting hundreds of guests. Yet, I remember the taste of this amti very distinctly. It was quite special. My MIL made it today, and it was even better than how I remembered it. Although it's called amti, the color, consistency and flavors are more like kadhi. It has a simple yet fragrant tempering of ghee, cumin seeds and green chili - the classic flavors of kadhi. The pineapple chunks are then cooked in a mixture of cashew paste and coconut milk to make a very smooth and creamy curry. Slurp! For all the richness, this amti is a quick fix, especially if you buy canned coconut milk and pre-cut pineapple. 


Ananas Amti - Pineapple Curry

Ingredients:
2 1/2 Cups fresh,ripe pineapple chunks - the success of this curry depends on the quality of pineapple
1/2 Cup whole cashew nuts (or halved in the center)
1 Cup coconut milk
2 Tablespoons sugar (or as required)
Salt to taste
Lime juice as required (optional)

Tempering:
2 Tablespoons ghee
1 Teaspoon cumin seeds
2 Green chilies - slit vertically in the center
1/8 Teaspoon turmeric powder

  • Cut pineapple in ~3/4 inch chunks. If the pineapple is not ripe/sweet enough, sprinkle some sugar on it and keep aside for 30 minutes. This brings out the juices and makes the pineapple taste better. You can use canned pineapple, but like anything else, fresh ones taste better. 
  • Soak cashew nuts in warm water so they soften. 
  • Once the pineapple and cashews are ready, take out 1/2 cup pineapple chunks and one third cashews and make a smooth paste. 
  • Heat ghee in a pot and add cumin seeds and green chilies. Once the cumin seeds splutter, add remaining pineapple chunks and a little bit of turmeric (only for slight color), and let the pineapple cook for a couple of minutes. 
  • Mix in pineapple-cashew paste, and the remaining cashews. Add a little bit of water if the mixture is too thick and let it boil for 4-5 minutes. 
  • Lower the heat, add coconut milk, salt to taste, and sugar you desire more sweetness. Mix everything well and turn off the heat. You don't want to cook this too long after adding coconut milk else it'll separate. 
  • Let the curry cool down a little, then sprinkle very little lime juice to add some tang. Taste and decide the balance between sweet and sour to your liking. Do not add lime juice to hot curry - it can taste bitter. 


Serve this amti with hot rotis or puris. It is heavenly with the decadence of cashew paste and coconut milk. The sweet, bursting pineapple is just perfect for a summer meal.


Friday, June 28, 2013

Spice Paradise

Wednesday was my lucky day. I had signed up for the Spice & Something Nice Swap event hosted by Nupur @ One Hot Stove. My fabulous swap partner, Gayatri of Double Expat, sent me a wonderful package of gifts which arrived on Wednesday afternoon. I won't mention all the details since Nupur will do a round-up with photos soon, but I must talk about the spice mix that was gifted to me. Gayatri sent me a family made spice mix called Paach Masala, or Five Spices literally. It's a smoky and hot(!) spice mix with chili powder, chana daal, coriander, cumin, and black pepper. There were two recipes sent along with this masala, of which I tried the Tikhat Batata Bhaji (Spicy dry potato curry) recipe promptly. The preparation was extremely simple and the fragrance reminded me of Masale Bhat. We devoured the bhaji with rava dosas. I see myself making many quick Indian veg stir fries and curries with it. 

To make the bhaji, peel and cube 3 medium sized potatoes. Make a tempering by heating 1.5 tbsp oil and adding 1/4 tsp mustard seeds, 1/4 tsp cumin seeds, a couple of pinches asafoetida, and curry leaves from one sprig. Once the mustard seeds splutter, add 1/4 teaspoon turmeric powder and a teaspoon of paach masala (use garam masala in lieu), and saute. Add cubed potatoes, salt, sprinkle a little bit of water, and cover the pot. Let the potatoes and spices steam together. I garnished this bhaji generously with cilantro. 


To continue the spices saga, a HUGE bag of goodies arrived from India with my in-laws on Wednesday night. Oh, the snacks and sweets and groceries and spices they brought! My stove is going to work overtime the next few months. There just aren't enough meals in a day to make all the deliciousness I want to cook! 

Here's a (very poor) pictorial of some of the goodies:

Spicy and regular banana wafers - I'd take these over potato chips any day. 
Chitale Bandhu bakarwadi - These hardly need an introduction.


Konfal chips - Purple yam chips


Jackfruit Chips - There's a small window before the rains start to get freshly made jackfruit chips.


Aamba vadi (candy made with alphonso mangoes) - If I can't have alphonso, it comes to me in this form!
Sutarfeni - Sweet noodles that literally melt in your mouth.


I love you Rasna! - I'm feeling soo nostalgic. These soft drink concentrates were our favorite, especially during the sweltering summer months. 


Sabudana - Tapioca pearls to make khichadi. I have not found good quality sabudana in Indian stores here.
Kala vatana - My the favorite usal is with kala vatana. I've looked hard to find kala vatana here without any luck.
Charoli - These seeds are used to garnish Shrikhand traditionally. Finally I can make shrikhand exactly like my grandma does!


Mumbai Ki Galiyon Se (From the streets of Mumbai)
Dabeli Masala, Sandwich Masala, Kitchen King Masala, Usal-Misal Masala, Vada-Paav Masala
Rock salt, Anar dana (Pomegranate seeds), and Garam Masala


Red Chili Powder - Freshly ground and HOT!


A taste of home!!!
Metkut - Maharashtrian style poodi chutney made by mom. There's no better metkut in the world!
Malvani Masala - Konkani style masala made by my mother's help as a gift to me. Isn't she a sweetheart!


Thalipeeth Bhajani - There's a bhajani swap going on in my house. This was made by my aunt to send to my cousin. Since I've hijacked it, my mom will be sending some to my cousin soon =D.


Sambar Masala - Also made by my aunt. This came with bhajani and stays with me as well ;).


Along with all the food goodness, my in-laws brought a whole lot of kitchen ware (the copper kadhai in the first pic is one of them). The surprise item which made me the happiest was this big, flat dosa tava. I already used it to make rava dosas and finally achieved perfectly thin and crispy dosas.


Let me know if you have any fun recipes I should try using any of these ingredients. And stay tuned for the updates on all that's cooking in my kitchen! 

Tuesday, April 30, 2013

Home Style Paneer Tikka Masala

Last few days have been full of frenzy. Husband sprained his ankle while playing tennis and isn't allowed to move his leg for a few weeks. It's been crazy running a one man show. While he spent most of the week sitting in one place under a 'house arrest' (in his words), I've been managing all the 'man' activities on top of my regular chores. Hubs feels guilty making me run around to get things done, but I'm mostly worried about his recovery. He is bored out of mind sitting around not doing anything. And I realize how many things I don't have to worry about when he's taking care of them. I thought a nice meal would add some excitement to his boring schedule. Our new patio furniture was delivered just in time for this lovely meal. Hubby quite enjoyed eating out in the yard, admiring all the plants I've been taking care of in his absence :). 


I made a nice paneer gravy for hubs - my usual choice for a 'special' meal. While most tomato-based paneer gravies taste similar, I chose to make Paneer Tikka Masala this time. Paneer Tikka, which is grilled paneer marinated in yogurt and spices, is loved widely. This dish turns the dry grilled paneer dish into a gravy. The curry base is pretty generic, but grilled paneer adds a more robust flavor. My favorite part of the gravy is karusi methi (dried fenugreek leaves) which adds plenty of fragrance and slight bitterness that balances all the tang really well. My version didn't turn that deep red color you see at the restaurants. There is nothing fancy about it - restaurants use food color which I don't care for much. We ate the Paneer Tikka Masala with parathas. I turned the leftovers into a pizza - a great way to use up all that goodness. 


Paneer Tikka Masala

Marinade:
8oz. Paneer - cut into ~ 3/4' cubes
1/2 Cup yogurt
1 Teaspoon cumin-coriander powder
1 Teaspoon red chili powder
1/2 Teaspoon chaat masala/aamchur
1 Teaspoon ginger-garlic paste
Salt to taste

Gravy:
2 Large tomatoes (or 1/4 cup tomato paste)
1/2 Small onion
2 Teaspoons ginger-garlic paste
1 Tablespoons  kasuri methi (dried fenugreek leaves)
1/4 Cup green peas (alternatively, you can add chopped green bell peppers)
1/2 Teaspoon (or to taste) garam masala
Red chili powder to taste
1 Teaspoon sugar
Salt to taste
Cream/butter - optional
Water as needed

Tempering:
1 Tablespoon oil
1/2 Teaspoon cumin seeds
1 Large bay leaf
1 Inch stick of cinnamon
1 Star anise
1/4 Teaspoon turmeric powder
Pinch of asafoetida

  • Whisk together all the ingredients for the marinade and marinate paneer cubes for ~30 mins.
  • Puree onions and tomatoes while paneer marinates. If you don't want to puree onions, chop them finely.
  • Once paneer is marinated, heat a shallow pan and drizzle some oil. Remove excess marinade from the paneer cubes and shallow fry them (keep the extra yogurt). Turn the paneer so all the sides turn golden brown. If you have a small grill or a griddle pan, you can grill the paneer cubes for a nice charred flavor. Keep the paneer aside. 
  • Heat a tablespoon of oil in a kadhai and add cumin seeds. Once they splutter, add bay leaf, cinnamon and star anise. Let the spices get fragrant. 
  • Add asafoetida, turmeric, and ginger-garlic paste and fry for a few seconds. 
  • Add tomato-onion puree, garam masala, red chili powder (I suggest adding very little at the beginning since paneer also has some), and sugar to the tempering. Sugar will balance the tang of tomatoes. Roast this paste on medium for a good 5-7 minutes, stirring constantly. 
  • Stir in the leftover yogurt marinade, kasuri methi, peas or green bell pepper, and paneer cubes, and cook for another 2-3 minutes. The yogurt will add creaminess.
  • You can add more spices and salt if you like at this point. Add some water to the gravy to get the desired consistency. 
  • Stir in a splash of cream or a pat of butter to round up all the flavors nicely. Turn the heat low and let it simmer for 2-3 minutes. 
Paneer tikka masala goes well with hot naan. Some lemon juice sprinkled on top and sliced raw onion on the side taste great. 

Submitting this recipe to Know Your Dairy - Paneer event hosted by Motions and Emotions for Jagruti's Know Your series.


Wednesday, April 10, 2013

Banana Blossom

When I made Kelphul (Banana Blossom) bhaji couple of weeks back, I thought of my grandpa - or Dada as we lovingly called him - sitting inconspicuously in a corner of the kitchen, laboring over freshly picked banana blossoms from the garden. While most men in his time didn't even enter the kitchen, Dada helped with cleaning veggies, chopping them, separating stones from the grains and anything else mom or grandma needed help with. He was the designated person for the more challenging tasks of carrying heavy containers of grains to the mill, breaking and grating coconut, straining kilos and kilos of Shrikhand through food mill for aaji's home run business and such.

Although Dada was industrious even otherwise, he probably didn't mind working in the kitchen because he was a true foodie at heart. I was left aghast when I caught him gorging on mutton at his friend's once. Yes, he was married to a who woman considered even saying the word 'meat' blasphemy! Dada winked at me and said, "Don't go home announcing it to everyone", and continued feasting. But mostly, he preferred down home, rustic, wholesome foods. Some bhakri, pithala and thecha satisfied him just the same. My grandma still gets teary eyed remembering how Dada loved my cooking, especially the Bharali Wangi I had made for him when I was 14. All the years that I remember spending with him, he didn't complain once about what was cooked in the house - it must have come from the hardships he faced as a kid having to earn for his own meals. And maybe that's why he was used to working hard, always keeping himself busy with something or the other even after retirement. The house where I grew up the first 10 years of my life, the house that Dada built himself, had a beautiful garden with lots of fruit trees. He loved spending time in the garden, working like a pro on the coconut, chikoo and babana trees. When the banana trees were laden with beautiful purple blossoms, he would take them down, clean the sap, remove the flowers and ask grandma to make bhaji. It was his style of letting her know what he wanted to eat. Never demanded anything verbally. Every time I make something that he loved, like this bhaji, I miss him dearly!

Kelphul is the large vibrant colored blossom of banana plant. Each blossom contains lots of flowers. When it's fresh, the flowers are a tender pink color with yellow tips. I have never been able to find fresh kelphul here. The flowers are always black and unappetizing looking. However, I gave up looking for good kelphul and decided to make do with whatever is available. The taste and texture didn't disappoint me. The flowers don't have a very strong flavor. The core, or the heart, of kelphul is much like artichoke heart - soft and supple. If you don't have access to fresh banana blossoms, you can buy canned hearts available widely in any grocery store. Kelphul bhaji is made with some sort of beans to provide some substance. Kala vatana, which I haven't found in any grocery store yet, is my favorite option. I decided to go with vaal daal in its absence. Turned out really well.


Kelphul Bhaji (Banana Blossom Bhaji)

For tempering:
2 Teaspoons vegetable oil
1/4 Teaspoon mustard seeds
1/4 Teaspoon cumin seeds
1/4 Teaspoon turmeric powder
A pinch of asafoetida
1 Spring curry leaves
1 Teaspoon red chili powder (adjust per liking)
3/4 Teaspoon Goda Masala (adjust per liking)

Bhaji:
1 Banana blossom
3/4 Cup vaal daal (split cutlass beans) or kala vatana soaked for a few hours
1/4 Cup loosely packed grated coconut
1 Small piece of jaggery (~1 inch square)
1 Teaspoon tamarind pulp
Salt to taste


How to clean banana blossom:
  • To begin with, have a bowl of water mixed with juice from one lemon on the side. If the blossom is very fresh, there'll be a lot of sap that can stain your fingers. You can wear thin gloves or simply dip your fingers in a little oil or lemon juice while working with it. Remove the red/purple layer. You will find a bunch of banana shaped flowers inside each one. Remove these flowers from each layer - the closer you get to the heart, the smaller and more tender the flowers will get. The heart of the blossom can not be pealed any longer and is tender and white. You will only use the flowers and the heart. 
  • Soak these flowers in lemon juice-water. Alternatively, you can add tamarind pulp or sour buttermilk. The acid will stop them from turning black (too bad, the blossom I bought was already black) and remove stickiness of the sap. Keep the flowers soaked for 3-4 hours. 
  • Each flower has one large petal like cover which is closed. Once you open this cover, you'll see multiple stamens with one matchstick like stigma. There's a waxy, translucent small protective cover at the base of the stamens, right by the stem. The only edible parts of the flower are the soft stamens excluding stigma and the large outer cover if it's tender. The stigma and the protective 'petal' need to be removed from each flower. For the outer layer flowers, you may have to remove the large petals also if they are too hard and stringy. 
Making the bhaji
  • Once you have gone through the laborious part of separating the edibles from the non-edibles, chop the flowers roughly and the heart finely. Boil these in water for approximately 10 minutes. It'll cook the blossom and take away some more of that sap. Once cooked, discard all the water. 
  • On the side, cook the vaal daal until soft. Don't let the daal overcook and break else the bhaji will be mushy. 
  • Heat oil in a kadhai and add the mustard seeds and cumin seeds. Once they splutter, add turmeric powder, asafoetida, and curry leaves to the tempering. 
  • Once the tempering is fragrant, add rest of the ingredients to the kadhai - vaal daal, the spices, cooked banana blossom, jaggery, tamarind, and grated coconut and mix well. 
  • Season with salt to taste, mix well, and let it cook on medium heat for 5 minutes or so.

This bhaji goes well with roti or bhakari. 


Wednesday, August 29, 2012

Of White & Gold

The first day of college, I entered my class with visible nervousness, and saw her reassuring face smiling at me. It was comforting to see someone giving a friendly smile in an unfamiliar place. Only I didn't know then that P and I would go on to form a strong bond of friendship that was to last all these years and many more to come. P, my BF from college, and I shared some of the best times as classmates and later as roommates in college. While I lived away from my family, I sought the love and comfort of her home. P's loving family quickly accepted me as one of them. I spent holidays at her house, had silly slumber parties, took over the basement to practice for our dance shows, celebrated many festivals there, and most of all, enjoyed home cooked food!

P is a Keralite, or Mallu, as known popularly. It was at her house that I first had a taste of Kerala cuisine. Rich with generous use of coconut, spiced with red and green chilies and scented with curry leaves, Kerala food is full of bold flavors. Every visit to P's house was filled with a delicious breakfast of dosa and a lavish lunch spread of red matta rice, beet-root or cabbage pachadi, dry veggie fry called Thoran, rich and creamy aviyal curry with a side of inji curry (ginger pickle) or chammanthi (chutney) to spice it all up. I was treated to payasam on special occasions. Imagine that all that exotic food for a college student who survived on all sorts of rice preparations. Enjoying those delicacies with the sweetest family one can have made it all the more special. 


Today, on the occasion of Onam, I cooked two of my favorite dishes. Onam is an important festival in Kerala, almost like diwali. Women dress up in the traditional white and gold settu sarees, wear jasmine garlands in their hair, adorn the door fronts with athapoo (rangoli made with flower petals), and get together for thiruvathirakali dance. The most exciting part of the celebration is the elaborate feast called Sadya. It's some serious food business! Imagine a large banana leaf filled corner to corner with one delicious dish after another.

I prepared aviyal and spinach thoran today. Aviyal is a kurma like preparation made with many different root vegetables, beans, squash and raw bananas. You can throw in anything you like, as long as the vegetables are firm and don't get watery when cooked. Thoran is any dry vegetable stir fry. I used to love thoran made with beans. Today, I tried it using spinach since I already used beans in the aviyal. Neither of these dishes use overpowering spices. They are extremely fragrant and flavorful with the use of curry leaves, coconut, shallots and chilies. Husband had never tried Kerala food. All I can say is, he is converted now :).


Aviyal

Ingredients:
2 1/2 Cups chopped vegetables - a mix of potatoes, pumpkin, green beans, carrots and eggplant
Curry leaves from one spring
2 Small green chilies - slit lengthwise in the center
1/4 Cup grated coconut
2 Shallots
1 Teaspoon cumin seeds
1/2 Cup yogurt
1/4 Teaspoon turmeric powder
Salt to taste
Red chili powder to taste
Water as needed

  • Chop vegetables into 1 inch long pieces. You can use a variety of gourds, beans and squash or yams. Make sure you choose vegetables that are firm and won't get watery when cooked. 
  • Add the vegetables, curry leaves, green chilies, turmeric powder and a little bit of water enough to cook veggies to a pot and cook until the vegetables are tender. 
  • On the side, grind the coconut, shallots and cumin seeds coarsely in a food processor. 
  • Add the coconut mixture to the veggies, mix well and cook for a couple of minutes. 
  • Add yogurt at the end, salt and red chili powder to taste, water if necessary and simmer for a few minutes. Turn off the heat and it's ready to serve.


Spinach Thoran

Ingredients:
2 Cups packed finely chopped spinach
2 Heaping tablespoons of grated coconut
1 Large shallot
1 Green chili
1 Large garlic clove - chopped
Curry leaves from one spring
2 Dry red chilies
1/2 Teaspoon mustard seeds
1/4 Teaspoon turmeric powder
2 Teaspoons oil
Salt to taste

  • Grind coconut, shallot and green chili coarsely and keep aside. 
  • Heat oil in a pan, add mustard seeds and let them splutter. 
  • Add chopped garlic, curry leaves, red chilies and turmeric powder, and saute until fragrant. 
  • Add the coconut mixture and chopped spinach, salt to taste and cook stirring regularly. 

Serve the thoran and aviyal with some long grain rice or pooris with a side of pickle and papad.


I'm submitting these recipes to the South Indian Cooking Event started by Anu.


Friday, July 27, 2012

Gongura = Ambadi!

For the longest time, I knew Gongura as the leafy green from Andhra (a south Indian state). Reddy aunty, our neighbor and family friend in NY, used to make this wonderful tangy chutney with it to go with one of her many delicious rice preparations. The Indian store here carries Gongura pretty often but I never ventured into trying it. I finally bought a couple of bunches yesterday and started looking for recipes to make that chutney. Leave the chutney aside, what do I find?? Gongura is the same vegetable we Maharashtrians love and call Ambadi! Once I got over the fact that I didn't know Gongura was my most loved Ambadi, I picked up the phone and called mom to express my joy. Mom goes, "Of course, I knew it. Don't you remember I made ambadichi bhaji in NY a few times?". I don't know why, but I don't recall it at all. The Ambadi we get in Maharashtra doesn't have stems as red as the Andhra variety, but tastes exactly the same. Sour, tangy leaves that remind you of the taste of tamarind.


Ambadi is a popular leafy vegetable, especially in the southern part of the state where I come from. The leaves are cooked thoroughly so that they get gargatta, or almost mashed. Then they are tempered with the most fragrant combination of garlic and red chilies. There are no powdered spices, garlic providing most of the flavor and smokiness. A little bit of jaggery balances the sourness of the greens perfectly. People from my hometown Kolhapur tend to use jaggery much more than sugar since it's a prime sugarcane producer.  Ambadichi bhaji with some bhakri, raw onion, garlic chutney or spicy thecha is my kind of comfort food. It's a regular lunch combination of the farmers in Maharashtra too. All the ingredients are dry enough that they can be wrapped up in a piece of cloth and carried to the farms without worrying about containers or spills. I don't have to worry about any of that, but I could eat Ambadichi bhaji every day if I had to!


Ambadichi Bhaji

Ingredients:
2 Bunches Ambadi or Gongura
Fistful of rice, toor daal and chana daal combined
1 Small piece of jaggery (~1 teaspoon grated jaggery)
3 Tablespoons oil
1/2 Teaspoon mustard seeds
1/2 Teaspoon cumin seeds
5-6 Garlic cloves - smashed and chopped into chunky pieces
3-4 Dry red chilies
1/4 Teaspoon turmeric powder
Salt to taste

  • Discard the stems of ambadi and wash the leaves well.
  • Wash the rice, toor daal and chana daal. This is just to add some body and bite to the bhaji. A fistful of the combination is enough. Take a little more of rice than the daals. 
  • Pressure cook the leaves, rice and the daals with 3-4 whistled until soft. Discard the water that it's cooked in so it takes away some sourness out of the leaves making them more palatable.
  • In a kadhai, heat oil, add mustard and cumin seeds and let them splutter. Add garlic and fry it until golden brown. Garlic smells heavenly when fried like this and adds a lot of flavor to the bhaji. Add dry red chilies cut in half and turmeric powder at the end so they don't burn.
  • Add about a tablespoon of this tempering to the cooked leaves, add jaggery and season with salt and cook for a couple of minutes, mashing with the back of your spoon.
  • While serving, pour some of that extra garlic tempering over the bhaji and enjoy with bhakari or rice. 


Thursday, June 2, 2011

Soul Food

We, humans, are constantly aspiring to create something new, something unique - be it technology or something as basic as our food. After frenzied efforts of creating new dishes in my kitchen over the past week, I just wanted to slip into my comfort zone and make what's tried and tested and passed down for generations. The food I grew up eating every day, food that defines a part of who I am. The regional cuisine of the western state of Maharashtra. Much can be said about the cusine and cultural aspects but I'm afraid I'll end up with an essay. Here is not completely comprehensive yet a decent read on the cuisine of the region I belong to. The vastness of the state and its distinguishing location between the South and North India, make it difficult to categorize the cuisine. They also contribute to influences from both sides of the country. Yet, two aspects that strike me the most and make me love the food are simplicity and balance. Don't get me wrong...I can name atleast a 100 dishes off the top of my head that only the experienced cooks can make. But everyday meals are made with sparing use of spices and are well thought out with inclusion of all the nutritional components. It's all about nourishing your soul just as much as the body.

I'm going to share a few of my favorite recipes that mom made frequently. My hubby and I enjoyed these simple dishes over the last couple of days.

The first recipe is an appetizer I love love love! I guess I made my point! Every so often when the large eggplant wasn't used for making Bharit/Bharta, my mom made Vangyache Kaap (Eggplant chips). It's made fairly commonly in Maharashtrian homes as a teat-time snack or a dinner appetizer. We had coined a new name for it as kids - Vangyache Fish (Eggplant fish) for its resemblance to Konkani fish fry. Fear not, it doesn't taste anything like fish. Funnily, it doesn't taste much eggplant-y either, as if it was made to convert non-eggplant lovers.

Toss anything in a li'l bit of flour and cook in oil - it's bound to taste good!
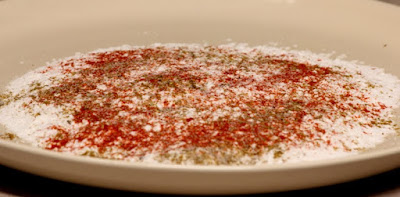
Powder and pretty 'em up
My oil-deprived eggplant wafers/chips
Vangyache Kaap/Eggplant Chips

Ingredients:
1 Large eggplant
~3/4 Cup rice flour
1 Teaspoon red chili powder
1/2 Teaspoon cumin-coriander powder
Couple of pinches turmeric powder
A pinch asafoetida
Salt to taste
Oil for cooking

  • Cut the eggplant into thin slices and keep them in cold water. This will prevent browning as well as help the flour coating stick to the eggplants. 
  • Mix rice flour and the spices to create the coating. Adjust spices if needed. 
  • Drain the eggplant slices and dredge them in the flour-spice mix. 
  • Heat a shallow frying pan and add a little bit of oil. Helps to shake the pan so the oil spreads. Cook the eggplant slices on each side for a couple of minutes until they brown. Add oil if/as needed. Don't OD as the eggplants soak up oil and become soggy. You want to keep them crispy. 
  • Once cooked, keep them in a plate with a paper towel to soak up any extra oil. Enjoy!


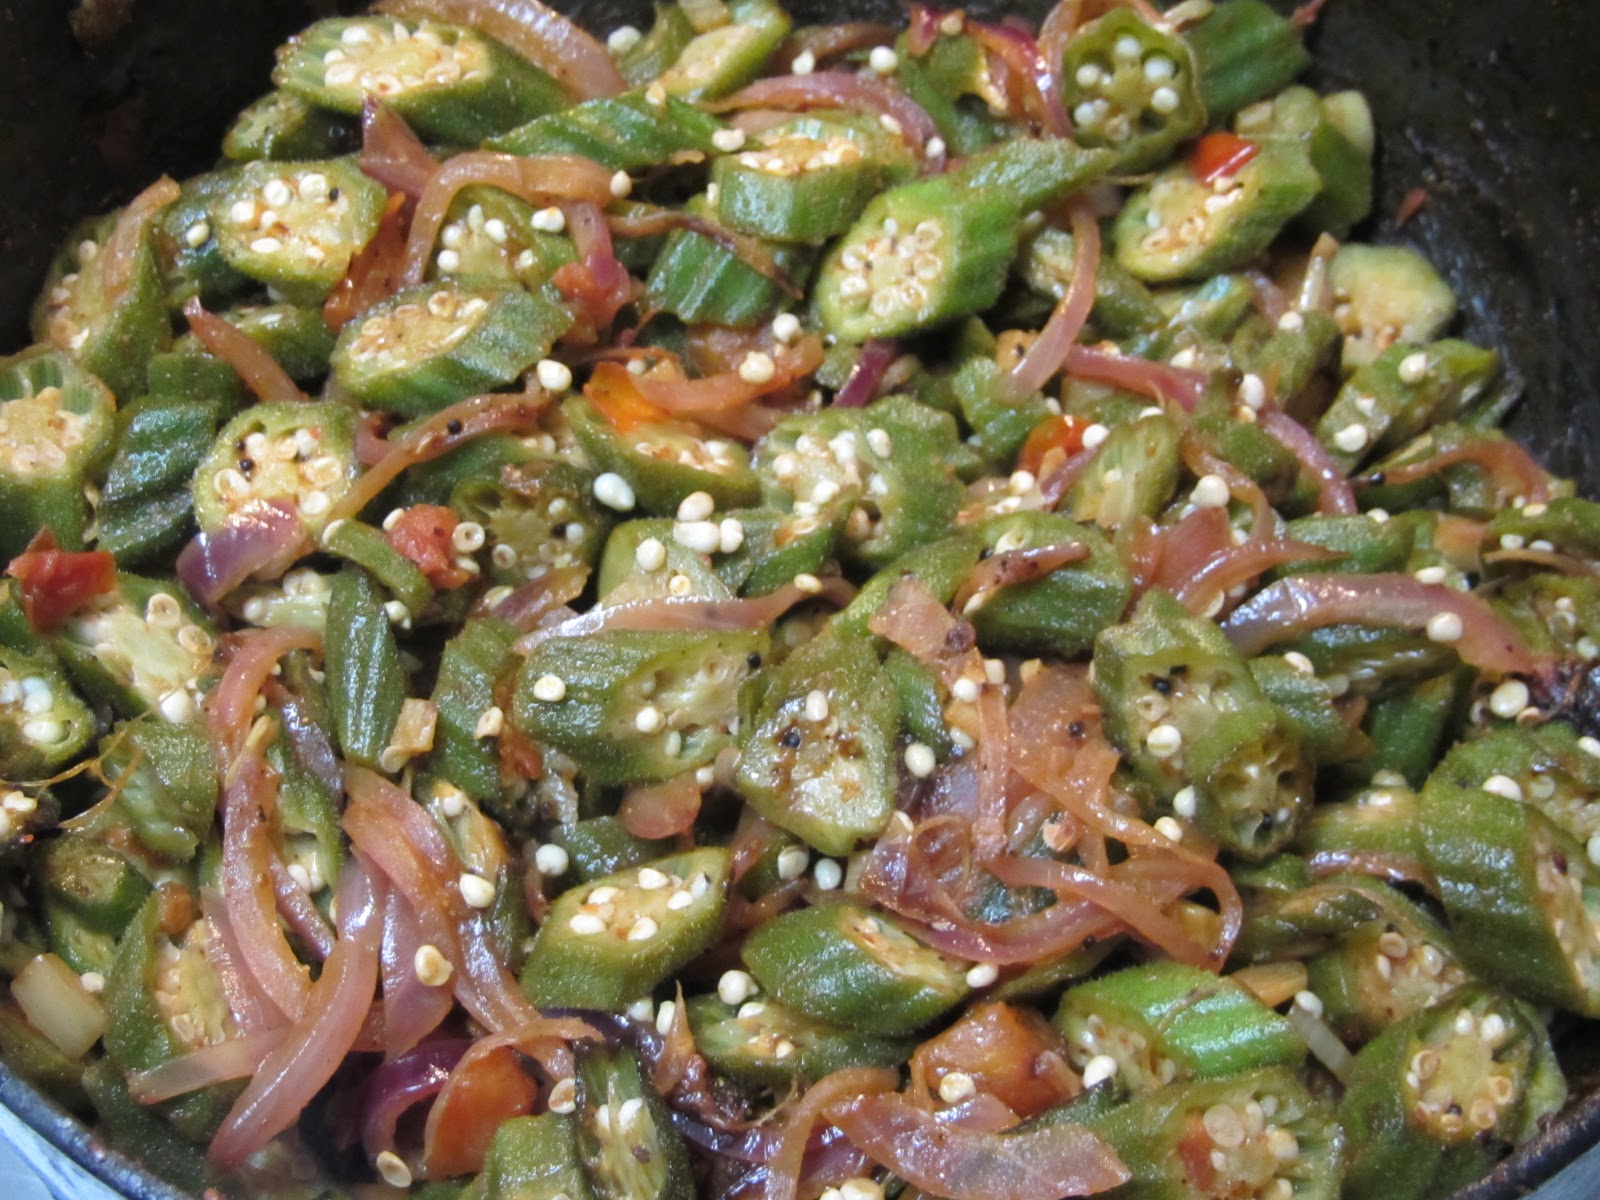
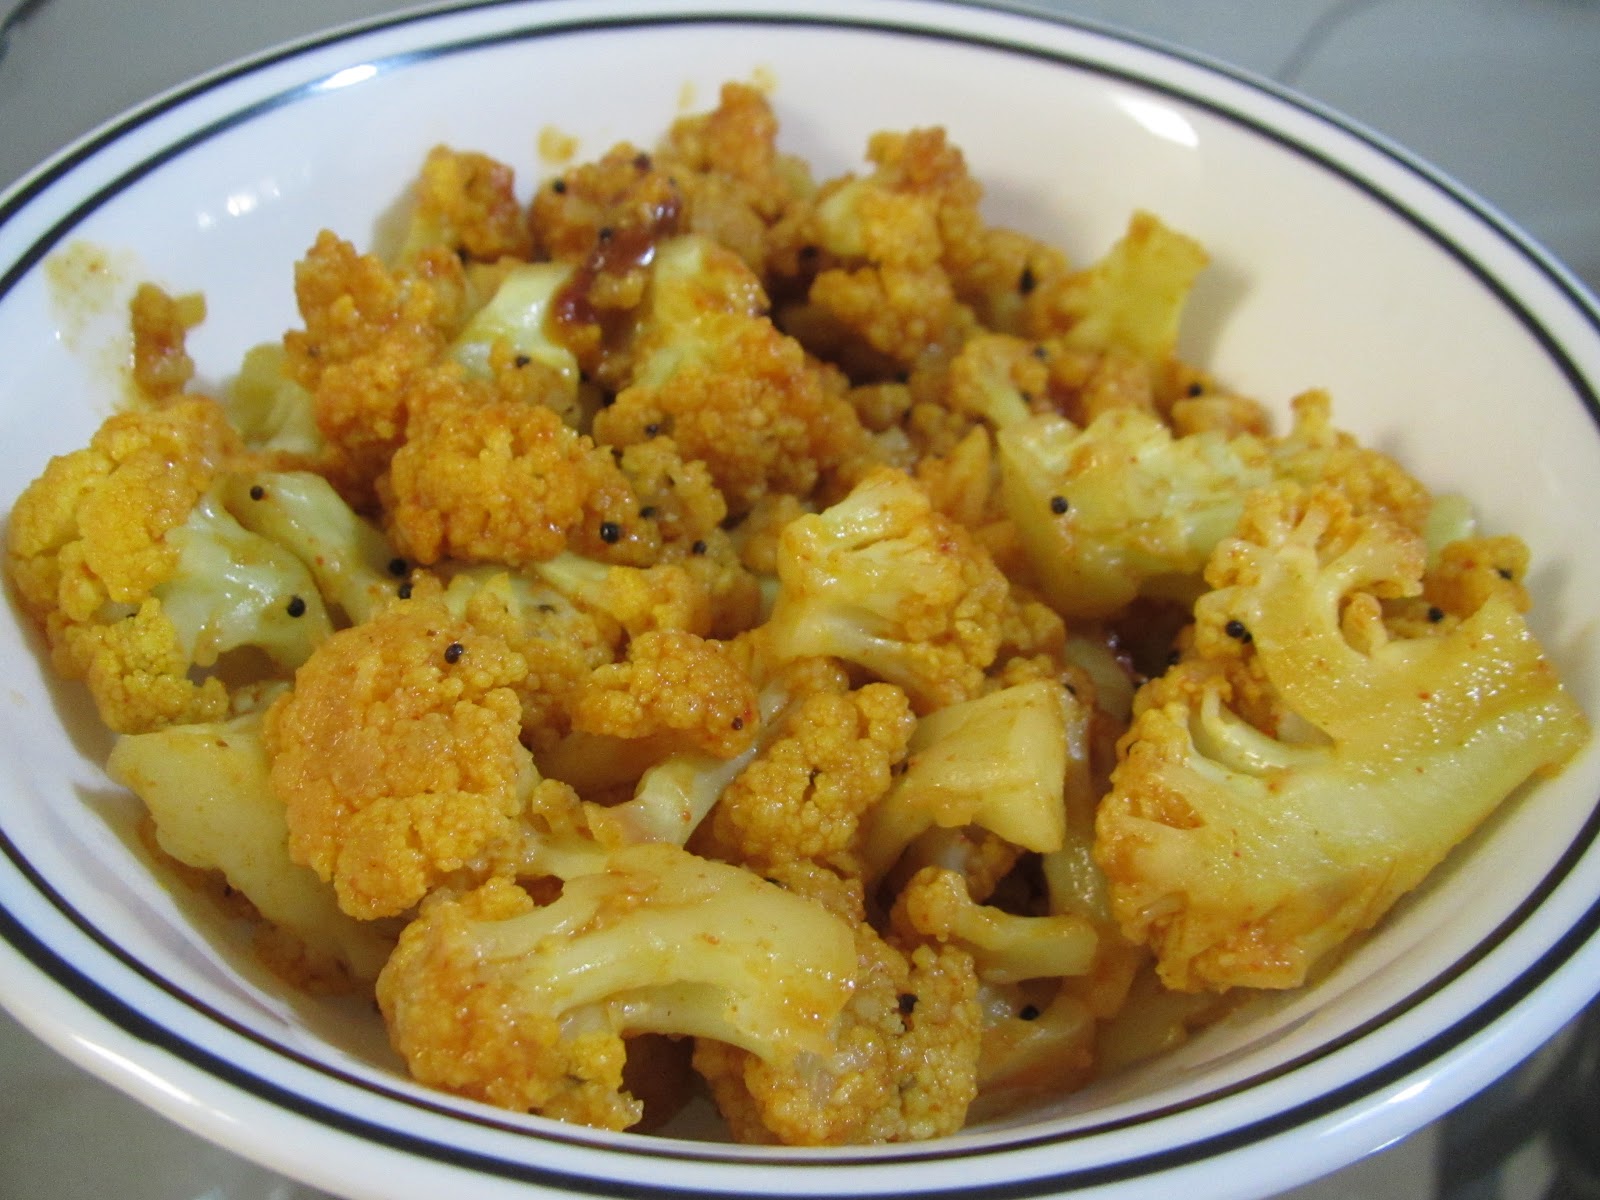
Next up is one of my most favorite vegetables ever (yeah, I say that about 90% of them..but this one is really a favorite) - Bhendi/Okra. The most common/known way of making okra is similar to one of my earlier posts. However, the community I belong to has a different method that involves tamarind and jaggery. We are very big on the use of tamarind and jaggery which tone down the spices (that are already in little quantity). This recipe is a specialty of my grandma and no matter how tasty my mom makes it, my dad just won't approve of it. Guess what...my grandma's not making a 24 hr journey to feed me. So my dad can dislike anyone else's attempt all he wants but I have to make it for myself. My husband absolutely loves okra but refused to eat any preparation of it without onions and garlic. One taste of this new dish and he's raving about it!

Bhendi/Okra curried with tamarin-jaggery
Bhendichi Chincha-Gulachi Bhaaji/Okra with Tamarind-Jaggery

Ingredients:
1 1/2 Cup fresh cut okra
1 Teaspoon tamarind concentrate/pulp
1 sq inch cube of jaggery - you can substitute it with a teaspoon of brown sugar
1/4 Teaspoon mustard
1/4 Teaspoon turmeric powder
1 Pinch asafoetida
1/2 Teaspoon red chili powder
1/3 Teaspoon cumin-coriander powder
1 Teaspoon oil
Salt to taste
Water as needed

  • Heat oil in a cooking pan, add mustard seeds and let them splutter. 
  • Add turmeric powder, asafoetida and okra to the pan and saute for a 2-3 minutes on medium-high heat. 
  • Add the rest of the ingredients, mix well. Add some water barely covering the okra and cook on medium heat until the okra is soft and cooked.
  • Eat with some roti and yogurt on the side. 


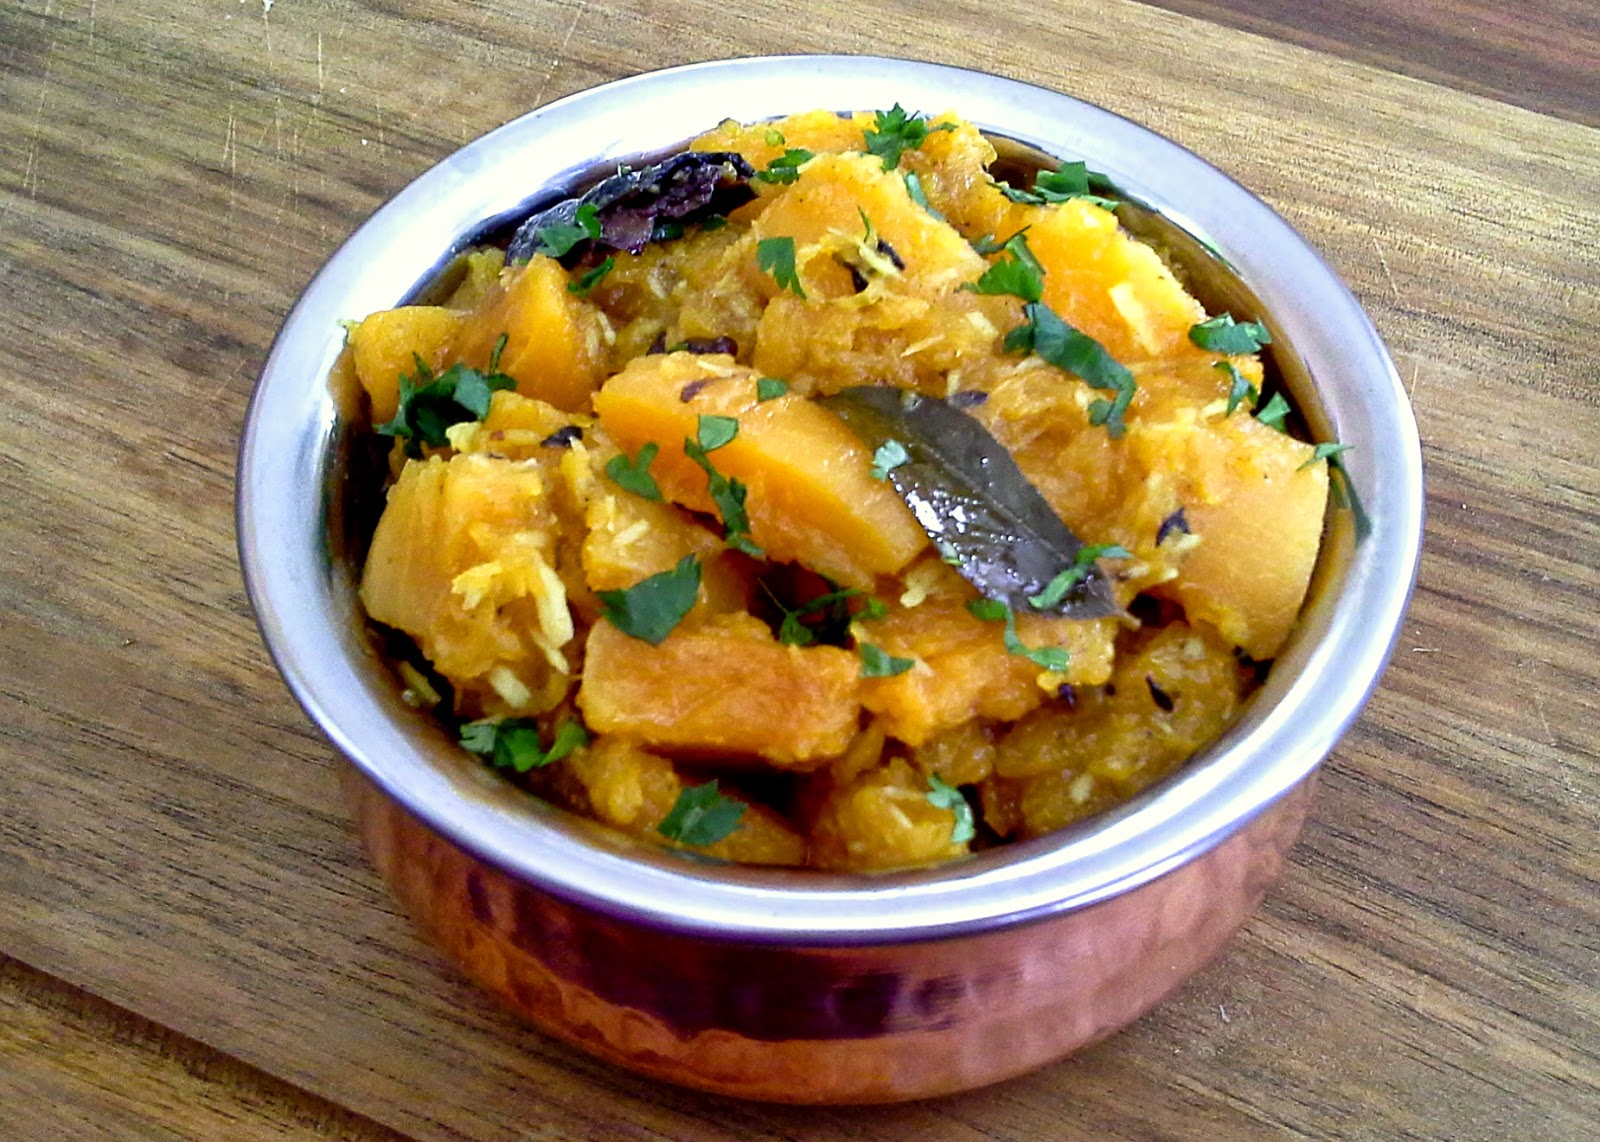
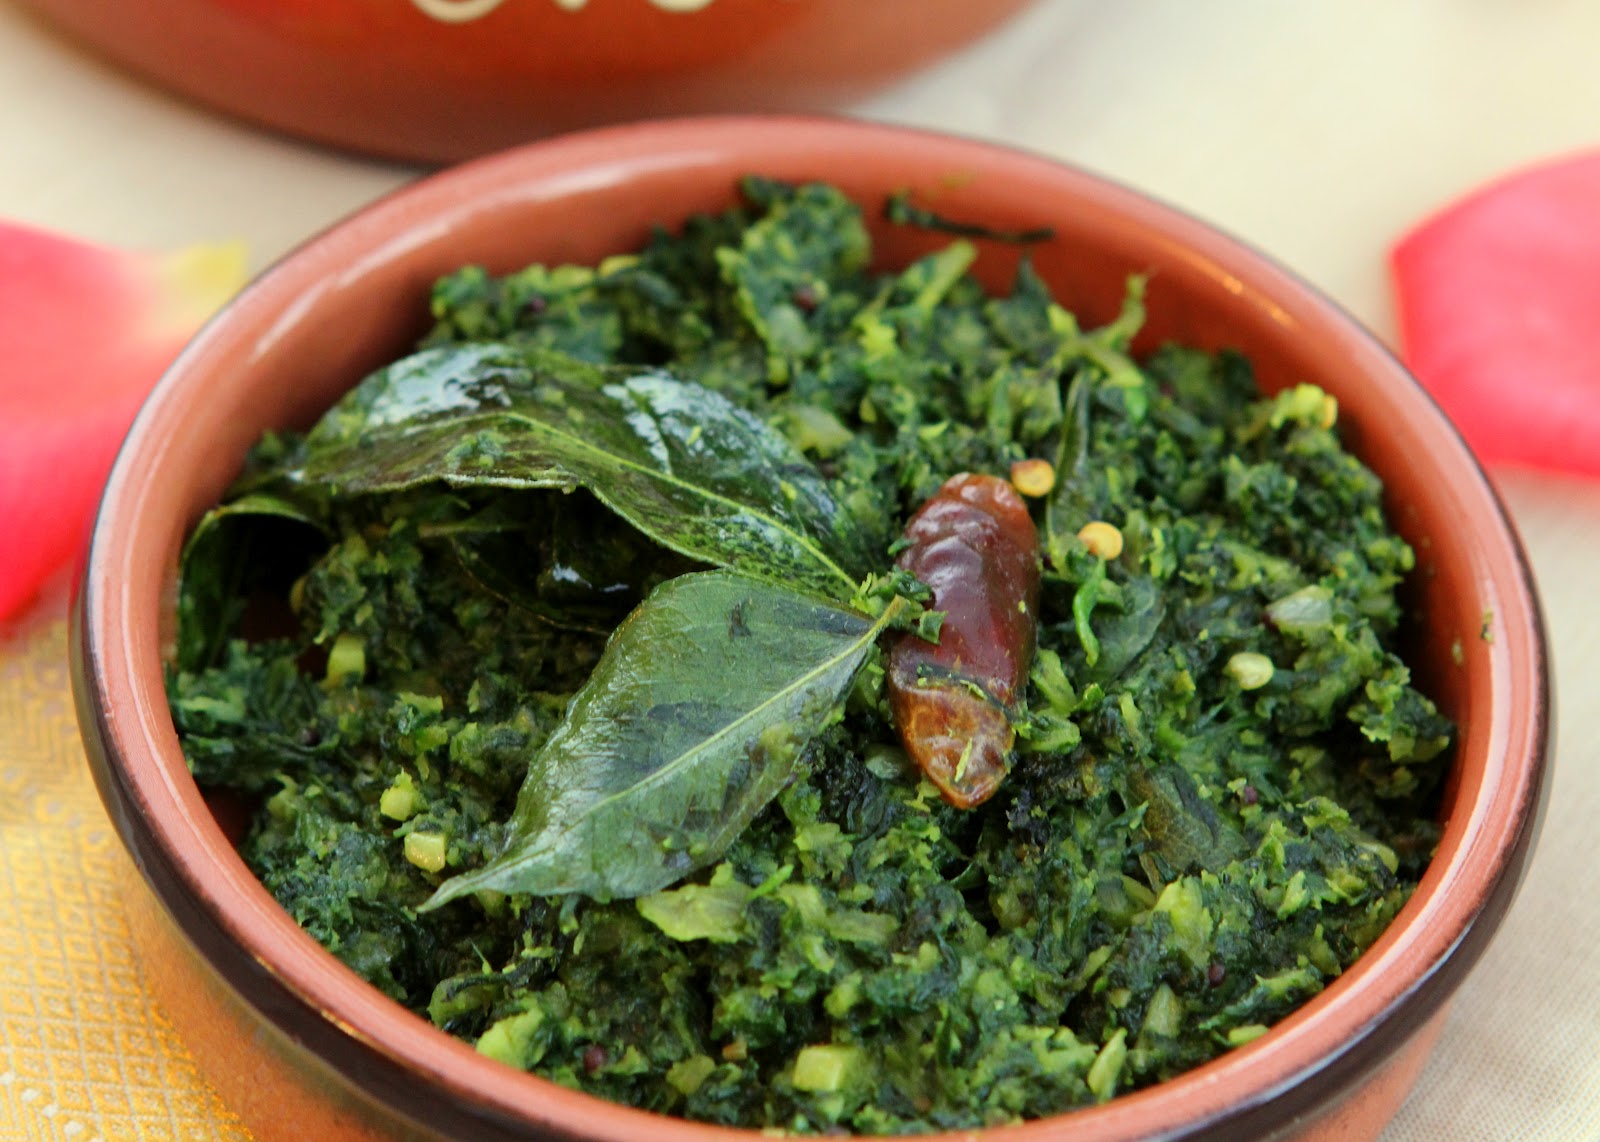
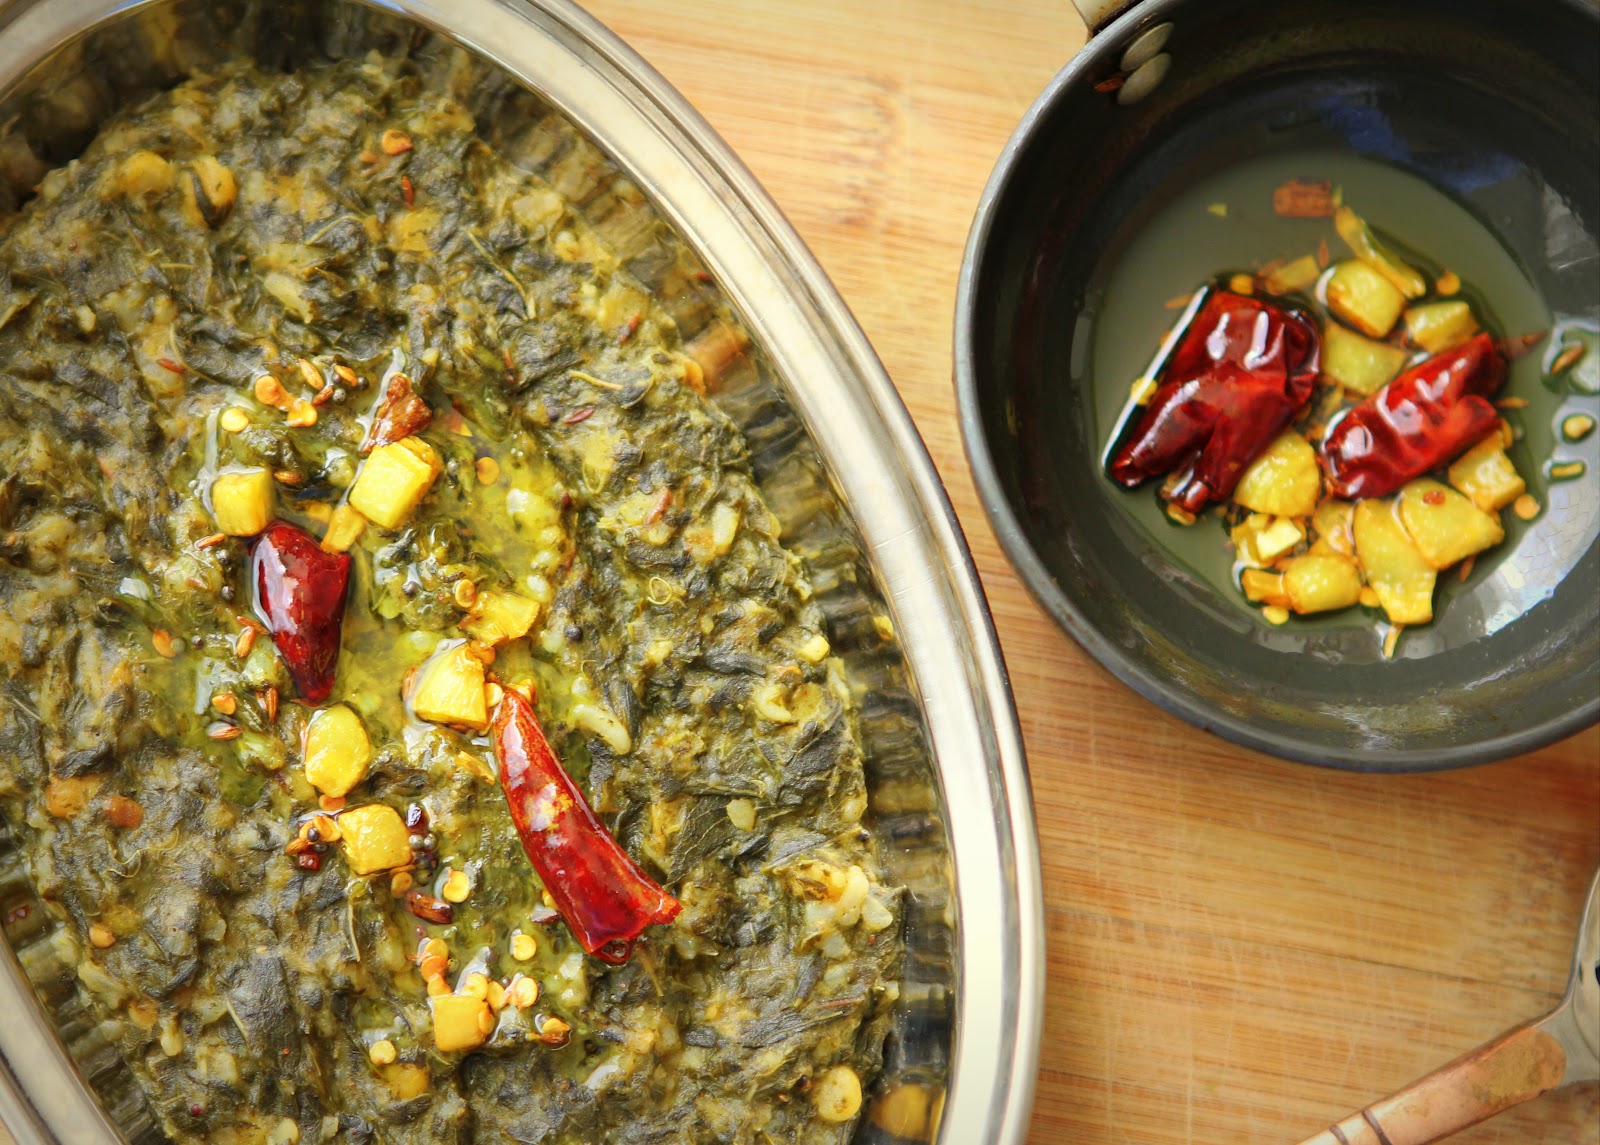
The last recipe I'm going to post serves as a vegetable to accompany roti and can also replace amati/daal to eat with rice. Tasty spinach curry that is usually made for a quick dinner (even a quick dinner constitutes of atleast 3 items). Spinach shrinks up quite a bit once cooked so this recipe is good to bulk it up - useful especially when my mom had to feed a family of 6. This light, non-spicy dish is great for dinner when you shouldn't be eating anything too heavy. The curry is also made with alu/taro leaves.
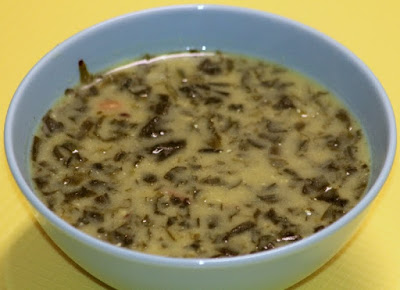
Spinach Curry

Palakachi Takatali Bhaji/Spinach in Buttermilk Curry

Ingredients:
1 Bunch spinach
1 Serrano pepper/Thai green chili
1/2 Cup thick buttermilk/ 2-3 Tablespoons yogurt
1 Tablespoon besan/chickpea flour
1/2 Teaspoon cumin seeds
7-8 Curry leaves
A handful peanuts (or more if you are like me)
Turmeric powder
Asafoetida
1 Teaspoon oil
Salt to taste

  • Chop fresh spinach and one green chili and pressure cook (1 whistle). If you are cooking in an open pot, just cook for a few minutes until the spinach softens. 
  • On the side, whisk some yogurt and water and add besan to it. Make sure the besan is completely dissolved. 
  • Heat oil in a pot, add cumin seeds, curry leaves, turmeric powder, asafoetida (you probably know the deal with seasoning now) and add the cooked spinach to it. 
  • Toss in a handful of peanuts. This is another common ingredient in Maharashtrian cooking. Peanuts, whole or ground, are used in many of the traditional dishes. I personally am a sucker for them so I always add a little more! They plump up and become soft after cooking - yum.
  • Add the buttermilk/besan mix. Add some water if needed and let it boil for a few minutes. The spinach is already cooked so you just want to boil until it all comes together. 

Have the bhaji with some roti or rice or by itself. It will taste good no matter what. So so good!

There are numerous regional recipes on my 'must have's list. This is a good start. I will post more in the future. For now, I must get back into the 'experimental' mode and prepare for tomorrow's BBQ party :)

Thursday, April 28, 2011

Back To Basics

It took me a couple of days to catch up with work and house chores after the weekend trip to Seattle. Although Gods blessed us with an unusually sunny day in Seattle, we spent most of our time indoors eating at fabulous restaurants! The friends we were visiting are big foodies and took us to quite unique places. The most notable being Poppy, which serves fusion dishes in Indian Thali style! We had lightly spiced batata vada and eggplant fries for starters and I chose the vegetarian thali with beetroot-yogurt soup, seasoned fiddleheads, oyster mushroom risotto and other dishes creatively infused with Indian spices. The most amazing creation of Poppy was their Rum Curry drink - a delicious mojito style cocktail made with rum, coconut water and curry leaves! Who would've thought of that!! Well, someone clearly did..and that, my friends, was a winner.

The weekend food was a treat. But I was ready for some good ol' Marathi food after coming home. I made two traditional dishes last night - Bharli Vangi & Kothimbir Wadi. There couldn't have been anything else to make me feel more at home than these two dishes. Bharli Vangi (stuffed eggplants) is a very typical Maharashtrian sabji, more so in my home town Kolhapur, where we get the famous 'Krishna kathachi vangi' (eggplants grown on the Krishna river banks). Kothimbir wadi is a snack made with cilantro - lots of it! It's usually fried, but I always make a healthier non-fried version of it. 

Bharli Vangi
Bharli Vangi

Ingredients:
Stuffing:
4-5 Purple Indian/Thai eggplants
1 Small bunch cilantro - chopped
2 Tablespoons grated coconut
1 Tablespoon ground peanuts
2 Teaspoon red chili powder - or less
1 Teaspoon cumin-coriander powder
1 Teaspoon goda masala
Seasoning:
1 Tablespoon oil
1/2 Small onion - thinly sliced
1/2 Teaspoon mustard seeds
1/4 Teaspoon turmeric powder
1 Pinch asafoetida
1 Teaspoon jaggery powder/brown sugar
Salt to taste
Water as needed 
  • Wash the eggplants, leave just a little bit of the stem along with the green leaves where the stem starts. Make two slits on the top of the eggplants so that they open up like a flower with four petals. The eggplants will hold lots of stuffing. Keep the eggplants in water so they don't turn brown until you work on the rest of the stuff.
  • Combine ground peanuts, coconut, chopped cilantro, red chili powder, cumin-coriander powder and goda masala and mix well. Stuff this mixture into the eggplants and keep them aside for 15-20 minutes. You can adjust the spices in the cooking process if needed.
  • Heat oil in a wok/kadhai and add mustard seeds. I usually use very little oil for seasoning but this sabji tastes much better with a little extra oil so - a whole tablespoon!
  • Add onions, asafoetida and turmeric to the oil and saute for a minute or so. Place the stuffed eggplants in the wok and let them roast for a few minutes on all the sides.
  • Add some jaggery, salt to taste, adjust the spice if needed, about 3/4 cup water, cover and let the eggplants cook thoroughly until tender. 
  • Garnish with some more cilantro and fresh coconut and serve hot.


Un-fried kothimbir wadi :D

Kothimbir Wadi

Ingredients:
1 1/2 Cups chopped cilantro
3/4 Cup Besan/chickpea flour. I often add a little bit of rice flour for lightness. 2-3 tablespoons would do.
2 Teaspoons red chili powder - you can also use green chili paste alternatively
2 Teaspoons cumin-coriander powder
1/2 Teaspoon goda masala
1 1/2 Teaspoons tamarind concentrate
1 Tablespoon sesame seeds - toasted
Salt to taste
Water as needed
  • Combine all the ingredients except water. Add water little by little mixing well until you have a thick paste-like batter.
  • Grease a flat pan (the kind that goes into the pressure cooker, like a small round baking pan) and pour the batter into it. Don't fill more than 1.5-2 inches.
  • Steam the batter in pressure cooker (add some water to the cooker, keep the pan inside, close the lid without the whistle) or over a regular steamer for 25-30 minutes or until you can poke a knife and it comes out clean. Keep an eye during the steaming process so the water doesn't evaporate completely burning the wadi.
  • Let this cool and take the 'cake' out with the help of a knife. Slice them into medium sized pieces (I cut them triangular shapes but a square is just fine).
  • Heat a pan and brush it with a little bit of oil. Roast the pieces on both the sides until light brown. This is my healthy alternative to the fried version.  
  • Garnish with some more toasted sesame seeds, or add a tadka of sesame seeds and green chilis (like the tadka on dhokala).
Bharali vangi taste all the better with some bhakari, raw onion and lasun chutney. I, however, just enjoyed it with home-made rotis.


Tuesday, March 29, 2011

Holi Re Holi, Puranachi Poli - II

Katachi Amti - soup made from the broth of chickpea lentils cooked to make Puran.Katachi Amati is our special occasion daal and every woman prides in her own version of it. I decided to cut down on the efforts a bit and make a simplified version using all the same ingredients.


Katachi Amti/Amati

Ingredients:
4 Cups chickpea lentil (chana daal) broth
3/4 Cup cooked and mashed chickpea lentils
Khada masala (whole spices) - 1 bay leaf, 1 inch cinnamon stick, 2-3 cloves, 3-4 black peppercorn
Fodani/Tadaka - Mustard seeds, pinch of asafoetida, turmeric powder
5-6 Curry leaves
2-3 Tablespoons fresh grated coconut
2 Teaspoons Maharashtrian Goda Masala - My mom makes it fresh at home and sends me a big packet every year :)
1 Teaspoon cumin-coriandar powder
Red chili powder
2 Teaspoons tamarind pulp
1 Small pice of jaggery (~1 inch cube)
Oil
Salt to taste
Cilantro for garnishing
  • Cook chickpea lentils in lots of water when making puran. Drain this broth to make amati. Save some of the lentils as well.
  • Heat oil in a cooking pan and add mustard seeds. Add the whole spices and curry leaves when the mustard seeds splutter. Add asafoetida and turmeric powder at the end so they don't burn.
  • Add grated coconut and roast the spices along with it for a few minutes on low-medium heat.
  • Once the coconut it nice and toasty, add the lentil broth and mashed lentils and the rest of the ingredients - tamarind pulp, jaggery, goda masala, cumin-coriander powder, red chili powder and salt. Let it boil on medium heat for a good 20 minutes. This is what makes it taste good by bringing out all the flavors and making amati a little frothy. *There's a difference in the taste when you add goda masala & chili powder first instead of adding it to the broth. This recipe calls for adding it later and letting the flavors come out in the boiling process*.
  • Turn off the heat, garnish with lots of chopped cilantro and serve hot.
Although not a big amati person, I love this sweet-tangy-spicy combination of flavors. It's great to drink by itself as soup or wonderful with some rice. You can use this recipe with toor daal/split pigeon pea lentils when you don't have chickpea lentils and I'm sure it'll taste wonderful.

Thursday, March 10, 2011

The Joy of Cooking!

Bhendichi bhaji - in the process of cooking.

I've been deprived of cooking for the past week or so. As much as I enjoy eating out, one week away from the kitchen was enough for me to start craving some home cooked food. The good part is, I have a new bigger and better kitchen to play around! We just moved into a new apartment and I'm loving my kitchen with an attached patio opening to the garden. A perfect place to make some snacks and enjoy them with a cup of tea sitting in the patio listening to the birds chirping.
The Indian grocery store is just minutes away from my new place which means easy access to the otherwise hard to find vegetables! One of the rare vegetables in the US is Bhendi or Okra. This was going to be the first vegetable to be cooked in my new apt when I found fresh okra in the store yesterday. I hope this sets the trend and ensues good cooking in the new house :). The most important part of making a good okra sabji is finding fresh okra. How do you know if it's good? Always look for the dark green okra as opposed to the pale green color, small in size and supple. If it's hard, it'll most likely be very chewy and tough once cooked. It should not break easily/pop if you try to press.
There are a number of recipes for making okra sabji. I went for a simple recipe I learned from my mom.

Bhendichi Bhaji/Okra Sabji

Ingredients:
2 Cups of cut fresh okra
1/2 Medium onion
1 Small tomato OR 1/2 medium tomato
3 Cloves garlic
3/4 Teaspoon tamarind paste
1 small cube of jaggery/couple of teaspoons of sugar
1/2 Teaspoon mustard seeds,
Pinch of asafoetida
1/2 Teaspoon turmeric powder
2 Teaspoons cumin-coriander powder
Red chili powder
1 Tablespoon oil
Salt 

  • Cut the okra in small pieces about 1/2 inch thick. I cut them slanted holding the knife diagonal to okra to make it look pretty.
  • Slice the onion thinly, chop the tomato and chop the garlic.
  • Heat oil in a pan and add the mustard seeds. 
  • Once the mustard seeds splutter, add asafoetida, turmeric, garlic and onion. Stir until the onion is tender. 
  • Add the tomato, tamarind paste (the tamarind paste enhances the tangy taste of tomato - alliteration, ha!), jaggery/sugar and stir for a couple of minutes. 
  • Add okra, cumin-coriander powder, red chili powder, salt to taste and mix well. Cook on medium-high heat for 7-8 minutes until the okra is tender and cooked thoroughly, stirring occasionally. The okra will be slimy initially, but it starts to separate as it cooks. Don't add any water as the moisture from the okra is enough to cook it. 
  • I keep the heat on high for a couple of minutes towards the end to let the okra get charred a little. This is my favorite part of the dish! Once cooked, it's ready to serve. 
Eat the sabji with some roti. I know many people hate okra for the sliminess, but when cooked right it's absolutely delicious! 

Sunday, January 9, 2011

Reliving childhood


I have a bunch of recipes to post before I go on adventuring more…and what better way to start than write about one of my childhood favorites?

My mom made a simple cauliflower sabji (seasoned/spiced vegetable) and made it fun…not that I didn’t eat my veggies but this is a great dish if you are not a big cauliflower fan yet want to eat healthy.

Crunchy Cauliflower with Ketchup!

Ingredients:
1 ½ cup Cauliflower florets
1 tablespoon Ketchup
1 teaspoon oil
Mustard seeds for seasoning
1 pinch Asafoetida
1-2 pinches turmeric powder
½ teaspoon cumin-coriander powder
Red chili powder
Salt
  • Heat oil in a pan, add mustard seeds and wait till they pop. Add a pinch of asafoetida, turmeric powder and the cauliflower florets immediately so the turmeric powder doesn’t burn. 
  • Add the cumin-coriander powder (you can find this in Indian grocery stores. Cumin or coriander powders are sold separately or blended) and red chili powder per your spice tolerance. 
  • Sprinkle some salt for taste…be conservative since ketchup has a lot of sodium. Mix well, cover the pan and let it cook for a few minutes on medium heat. 
  • Cauliflower is watery in nature, so you may not need to add any water. And remember, the title says ‘crunchy cauliflower’ so don’t overcook it. 
  • Uncover and add the star ingredient of the dish – ketchup! Ketchup seems out of place in a sabji but believe me, you’ll love the sweet-tangy taste.  Cook for a couple of minutes until the flavors marry and Tadaaa(my lame attempt at giving a sound effect!) Your dish is ready. 

Simple, tasty and on the healthier side. You can enjoy this sabji by itself or eat it with some roti – Indian whole wheat tortilla.

Make this for your kids if they don’t get their full serving of veggies!

LinkWithin

Related Posts Plugin for WordPress, Blogger...