Wednesday, September 21, 2011

Tea Time

Fall has finally made its first appearance. Even in my ever warm city, every sign says the long bright days we take for granted are not here to stay for long. The days have begun to start with dense, dreamy fogs and the cool night breezes have forced us to pull out those dusty jackets. And more than anything else, my body has warned me about the change in season already. I've got flue - hmph! But there are two things that console me even when I've got burning eyes, sore throat and body ache:

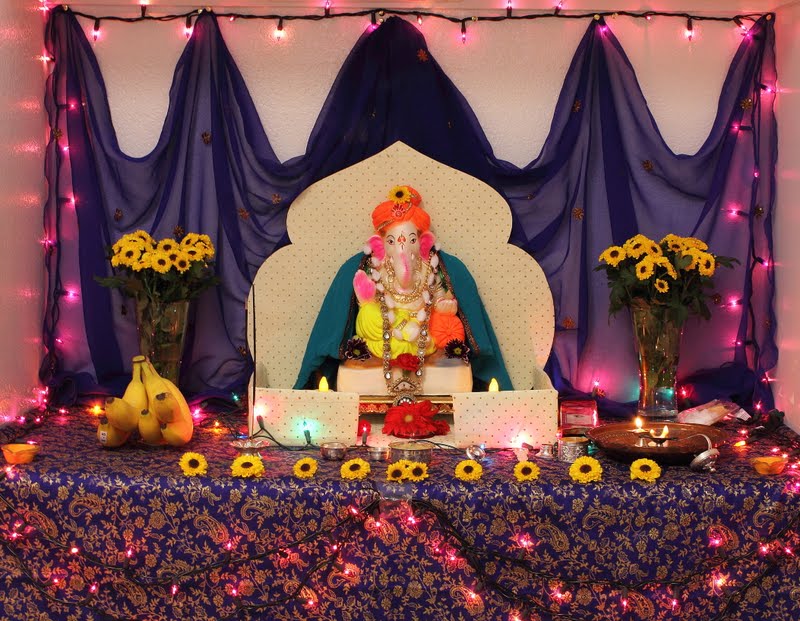
1. Fall sets the mood for a multitude of festivals.
2. I'm all ready to tackle the cold season with a few heartwarming baking recipes under my belt!


This kind of weather (and a sore throat) makes me crave a super soothing cup of Indian tea with lots of ginger and some cardamom. But what's some tea without a few crispy cookies biscuits to dunk in it? Of course, my already scarce supply of Good-Day had vanished last week and I was left with an unsatisfied craving for some tea-biscuits. Well, what do you know - I pulled my baker's hat and made a batch of nutty, crispy, crumbly Nankatai biscuits to go with my tea!


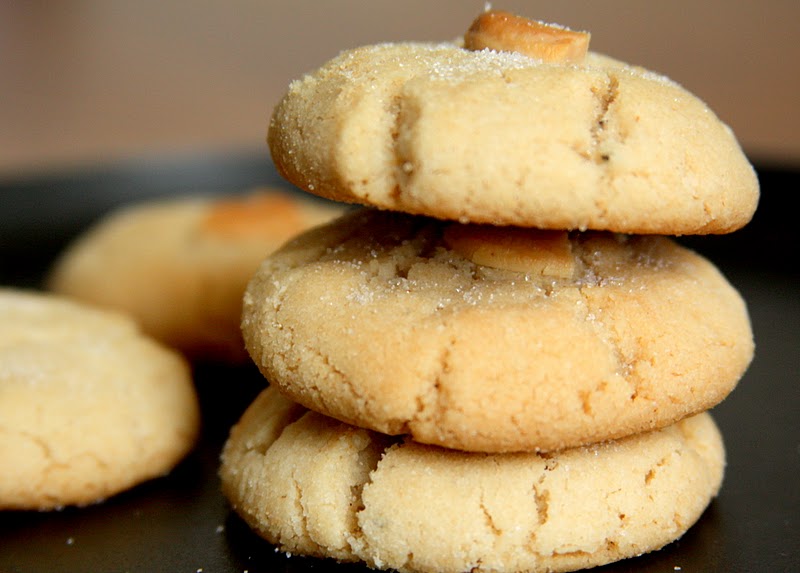
Nankatai is a simple Indian sugar cookie, except it's toastier and crispier and doesn't have eggs. I remember our local bakery in India carrying home-made nankati neatly stacked in a tight jar, sitting right in one corner of the counter. Every time we ordered the cookies by the grams, the owner would remove them with utmost care, not breaking any, and pack them in a brown bag for us. You could smell the wonderful buttery aroma infused with cardamom powder and toasty nuts all the way to the house. They came with a variety of nuts, such as pistachios, cashews or almonds, or sometimes a few golden orange saffron strands. Then my mom would make us some tea, which none of us really cared to drink otherwise, and we would most usually finish the cookies with one cup of tea.

My mom never cared to bake, but I remember my aunt baking nankatai at home. I would hardly call it Baking, because they are so ridiculously simple to make! The overall preparation + baking time is hardly 15-20 minutes. The cookies crack open to let out that buttery whiff of steam as they bake. You can add a little more butter to make them softer, but they can break easily. I like the crispy ones with my tea much better. This recipe makes about 10-12 cookies.

This recipe is going to the Friday Potluck hosted by Vatsala of Show and Tell.


Nankatai - Indian Sugar Cookie

Ingredients:
3/4 Cup All purpose flour and whole wheat flour (half and half)
1 1/2 Teaspoon semolina
1/3 Cup Butter
1/4 Cup sugar - or a little less based on how sweet you would want them
1/4 Teaspoon baking soda
2-3 Pinches cardamom powder
Couple of teaspoons chopped nuts - I used cashew + few for garnishing

  • Preheat oven to 375F
  • Beat butter and sugar together until soft and creamy. 
  • Sift the flour and baking soda and all the ingredients to the butter+sugar mixture. Mix well until the dough comes together.
  • Make round balls of the dough and flatten a little and keep them on a baking sheet. Press a piece of cashew on top for garnish and sprinkle a little bit of sugar. 
  • Bake for 12 minutes or so or until the cookies turn golden. They may still feel a little soft in the center. Take them out and let them cool for a few minutes. The cookies will harden perfectly while cooling. 

The whole wheat flour makes nankatai very toasty, what I would call 'khuskhushit' in Marathi. That touch of semolina provides a wonderful bite. These are perfect with a cup of tea or warm milk!

Friday, September 16, 2011

Time For Some Chocolate!

Every girls needs her share of princess-like treatment. Ladies, I see you nodding your head in agreement (and the men can roll their eyes all they want). Between office-cooking-cleaning-entertaining-cleaning some more-cooking again, it is only fair that we crave the occasional pampering. It can be something as simple as shutting the kitchen and going out for dinner or as fancy as a day at the spa. Whatever your choice of activity, kick off your shoes and enjoy some 'you' time once in a while.

I was in a 'happy zone', as I call it, after an awesome spa treatment yesterday. It was just what I needed after a grueling week at work. As I was sitting there, getting pampered, I could think of nothing but some chocolate! A decadent chocolaty treat and maybe a glass of wine following the spa treatment would've been the epitome of self-indulgence. Maybe a chocolate dessert with alcohol - what a great idea =D.


After a few minutes of browsing my favorite bloggers' pages and some others, I settled on this recipe. It seemed like the perfect five-ingredient-fix, with my addition of the sixth to make it a little naughty ;). A rich chocolate cake with a warm, ooey-gooey chocolaty surprise in the center is pure bliss! I've always been a sucker for molten chocolate cakes. How can one resist a decadent personalized chocolate cake with some berries on the side or a big scoop of ice-cream melting on top. Then you take a bite, and there it is - a pool of pure deliciousness. Rich molten chocolate oozes out of the cake - that molten chocolate muddled cake is the best surprise package ever! If I knew this cake was so easy to make, it would've made frequent rounds of my dining table. Molten chocolate cake it was, spiked with equally delicious Baileys Irish Cream. Talk about pampering!


The original recipe made 6 individual cakes. I cut the proportions in thirds to make enough for the two of us.

Molten Chocolate Cake

Ingredients:
2 oz. Semi-sweet chocolate (2 Baker's chocolate squares)
3 1/3 Tablespoons butter
1/2 Cup powdered sugar
1/6 Cup all purpose flour
1 Whole egg
1 Egg yolk
2-3 Teaspoons Baileys Irish Cream (based on how spiked you want it)

Pre-prep:

  • Preheat oven at 425F.
  • Butter two ramekins or custard cups and keep aside (use plenty of butter so the cakes come out clean). You can also use a parchment paper to line the cups. 

Method:

  • Melt chocolate and butter in a bowl in the microwave for about 2 mins. Stir to mix well. 
  • Add sugar, all purpose flour, one whole egg, one egg yolk and Baileys and whisk together until you have a smooth batter. No hand mixie required! 
  • Pour half-and-half batter in the greased ramekins and bake for 14-15 minutes. Make sure the top of the cake is baked so it doesn't break while taking out. 
  • Let it sit for 3-4 minutes. Run a knife around the edges of the cake to remove it easily. Place the dessert plate on top of the ramekin and turn it upside down quickly. This way, your cake will come out in one piece. 

Sprinkle some powdered sugar. I had nothing to garnish the cake with, but you can serve it with some strawberries or raspberries, walnuts, chocolate sauce, caramel, berry sauce or your favorite ice-cream. The serving options are endless and the result is thoroughly satisfying.

Have a great weekend!

Monday, September 12, 2011

Lights Off

All hell broke lose as a massive power outage left San Diego in complete darkness last Thursday night. No electricity...what? Is the world really coming to an end?? What used to be an ordinary event in India wasn't so ordinary here. We somehow made it home through the crawling traffic with all the traffic lights out. A painful drive, a torturous hot day without a fan, no cell phone service and a lottt of pending work for a big event I had on the weekend - not the kind of Thursday night I look forward to. To add to all of this, I had not really prepared for a power outage (since, you know, that's not the first thing on my mind every morning) and my fridge and pantry were essentially empty - at least as far as cooked foods were concerned. 

I have never really been thrilled about the electric stoves in my kitchen. A power outage just reinforced the feeling! How would I cook and what would we eat?? No one was going to keep the grocery store or any restaurant open for me. I looked at the slab of paneer I had intended to grill on the labor day, but never got around to doing it. Uncooked paneer, and the fridge out of work - perfect! It would just get spoiled. Oh... but...wait. Paneer (a light bulb went off in my head) - that WAS perfect. How did I not think of my lovely grill??? Grill & paneer - that was all I needed to save the dinner. 


Luckily, my fridge is always stocked with some simple everyday ingredients. A fresh green bunch of cilantro was just the ingredient to create a bright and light dish fit for a warm summer night. I turned to my trusted mortar-pestle to grind up some ginger-garlic-chili-cilantro, created a yummy yogurt marinade with the paste and the paneer was ready to roll. Yogurt is always a great base to marinate paneer. It keeps the paneer extremely moist and adds a great tang. 


We got out in the patio and saw the hoards of people, getting some fresh air and soaking in the bright moon light. With dinner on my plate and some outside fresh air, I soon started appreciating the beauty of that night and forgot all about the million unfinished tasks for the weekend event. I'm not foolish to pass an opportunity of an unexpected break, after all. We enjoyed the delicious paneer tikka, played cards in candle light, went out for a walk and cooled off near the pool. The moon light had never seemed so  bright before - it was such a beautiful night! That bright green, juicy paneer tikka was quite the picker upper. 


Hara Bhara Paneer Tikka

Ingredients:
12-14 Oz Paneer - cut in 1" cubes
1 Small green bell pepper - cut in bite size pieces
3/4 Cup yogurt
1 Small bunch cilantro
1 Serrano chili
2-3 Garlic cloves
1" Ginger piece
1 Teaspoon cumin-coriander powder
Salt to taste
Lime juice
Cooking spray/oil

  • Grind ginger-garlic-chili-cilantro into a fine paste. I always find that using a mortar-pestle brings out some oils and flavors a mixie just can't! But go by whatever is convenient for you.
  • Mix the paste with yogurt, cumin-coriander powder (for some smokiness) and salt to taste. Remember that grilling will tone the flavors way down, so your marinade should be a little strong. 
  • Toss the cubed paneer and green bell peppers into this marinade and let it sit for 30 minutes or so. It really doesn't take a long time for paneer to soak up flavors. 
  • For the best results, lay a piece of aluminum foil on your grill, poke some holes in it and spray some cooking oil on it. 
  • Put the paneer/bell peppers on skewers, spray some more oil on them and grill. The foil keeps paneer from sticking to the grill and the holes allow just the right amount of heat and flame to get the perfect charring. 
  • Once grilled, sprinkle some lime juice and enjoy the unbelievably moist, bright and smoky paneer tikka!


Tuesday, September 6, 2011

Ganpati Bappa Moraya!

Like every year, I anxiously awaited beloved Ganpati Bappa's arrival. And like every year, it was time to bid Him adieu before I knew it. The festivities came to an end yesterday as we sang the last aarati (prayer) and immersed the idol in the pool with teary eyes. Along with every Maharashtrian, Ganesh Chaturthi - a festival celebrating the elephant headed God Ganesh/Ganpati - is close to my heart and Ganpati is my favorite daivat (diety). Who doesn't like 5 days of non-stop festivities, aaratis-prayers, visits by family and friends and delicious food?! Decorating the house with family, planning long lists of menus, scheduling time table for aarati at every friend's place and making sure Ganpati Bappa's 'stay' is as comfortable as possible brings a lot of joy to me! 


Ganesh Chaturthi was made popular by Lokamanya Tilak in an effort to bring people together to exchange ideas and bring a sense of community. Over the years, the social aspect has gained more significance than the religious and ritualistic part. Back in India, every community or locality erects beautifully decorated mandaps with different themes depicting mythological stories, social messages or famous structures in the world. Large clay statues of Ganpati are welcomed in a procession of dhol-tasha (drums) with chanting and praises on Chaturthi - fourth day -  of the Hindu calendar month Bhadrapad. Ganpati is hosted communally for 10 days until Anant Chaturdashi when it's finally time for immersion, only to wait for his next arrival. The whole atmosphere during those 10 days is spiritual and celebratory and there’s nothing but happiness in the air!
Ganpati in my house


At home, we observe the festival for 5 days by installing a beautifully sculpted clay idol in a decorated space with colorful flower garlands, shimmery papers, fabric and lights.My heart was filled with joy as we celebrated the festival as a married couple for the first time this year J. Having my dearest friend Shraddha visit us for Ganpati was just the cherry on top! What is better than having your loved ones with you on such a special occasion?


Of all the reasons, I love this festival for the delicious food I get to cook and eat - especially Ganpati's favorite Modak! Modak is a steamed sweet dumpling made of rice flour covering with a sweet coconut filling, shaped like a garlic/onion. Another version of it is made of wheat flour covering and fried golden brown. While anything 'fried' sounds better, ukadiche (steamed) modak are far more popular, and require a lot more deft and skill. However, with some (mental) preparation and quality ingredients, you can make the most delectable modaks, perfectly soft and thin outside with a 'khamang' toasty sweet filling. The success of modaks largely depends on the quality of ingredients; so make sure you have absolutely fresh rice flour and soft jaggery. Since modaks are an inextricable part of the celebration, I'm submitting this recipe to the FSF Janmashtami & Ganesh Chaturthi event in a series of Festival Series Foods

**Note: The recipe below makes 10-12 modaks depending on the size. 


Ukadiche Modak/Steamed Modak

Filling:
¾ Cup packed grated coconut
¾ Cup jaggery – shaved, cut into small pieces for ease of cooking
½ Teaspoon cardamom powder
1 Teaspoon poppy seeds
1-2 Tablespoons milk (optional)

Cover:
1 Cup water
¾ Cup rice flour
1 Teaspoon Ghee/clarified butter
Pinch of salt
Oil/Ghee on the side as needed
  • Combine grated coconut, jaggery, cardamom powder and poppy seeds and cook on low flame until the jaggery melts completely and the mixture comes together. If you are using frozen grated coconut as opposed to fresh, add just a tablespoon or two of milk to re-hydrate and soften the coconut. Keep aside.
  • Now the most important part - the ukad (cooked rice flour dough for the covering). You must work very quickly with the rice flour as it can overcook easily and form lumps. Keep a plate lightly greased with oil/ghee ready to knead the dough. Have some oil/ghee available on the side.
  • Sift the rice flour to remove any lumps and grit.
  • Heat water in a pot with a teaspoon of ghee and a pinch of salt. Take it off the flame just at the brink of boiling. Ghee makes the dough soft.
  • Add the rice flour right away to the water whisking vigorously so lumps do not form.
  • Transfer the dough to the greased plate and knead the dough really well until smooth and soft. You can use the back of a spoon to remove lumps and then work with your hands. Make sure you grease your palms as well so the dough doesn't stick. The dough requires kneading while it's still hot. Gloves or even zip-lock bags will work for protection. If you are like me, you'll just suck it up and dig your hands in :D. 


  • Take a golf-ball sized dough ball and start flattening it to form a cup shape, working border in. Keep dipping your fingers in oil/ghee to avoid sticking/breaking of the dough. The center should be tad bit thicker than the border so the modak doesn't break. 
  • Once you have a thin cover, fill a spoonful of the coconut-jaggery mixture and pinch the borders of the covering to make petal-like shapes. The more petals you can make, the better.
  • Start pulling the open end together carefully without flattening the petal shapes. Pinch the end on top to close it  completely. 
  • Steam these modaks in a greased pan for 5-6 minutes on high heat. I keep the modaks in idli-patra and steam them in a pressure cooker. You can also use pessure cooker flat pans. 


Enjoy the modak with a drizzle of warm ghee!!!

LinkWithin

Related Posts Plugin for WordPress, Blogger...