Showing posts with label Holiday Foods. Show all posts

Monday, December 1, 2014

(Almost) Vegetarian Thanksgiving

You know how sometimes things just turn out right and everything jives together really well - You plan a party with your old friends but enjoy their company anew, or you follow a tried and tasted recipe but the dish somehow tastes better? Our Thanksgiving lunch yesterday was no different. I had planned to get together with a couple friends of mine. My friend's dad is visiting her from India. With both of our parents in town, we thought it would be nice to get together. And what fun we had! We each prepared a few dishes, mostly vegetarian. Every item turned out great, if I may say so myself. Both of our parents loved the traditional fair. We dined for a long time, amid delightful conversations. Here's a recount of our wonderful meal.


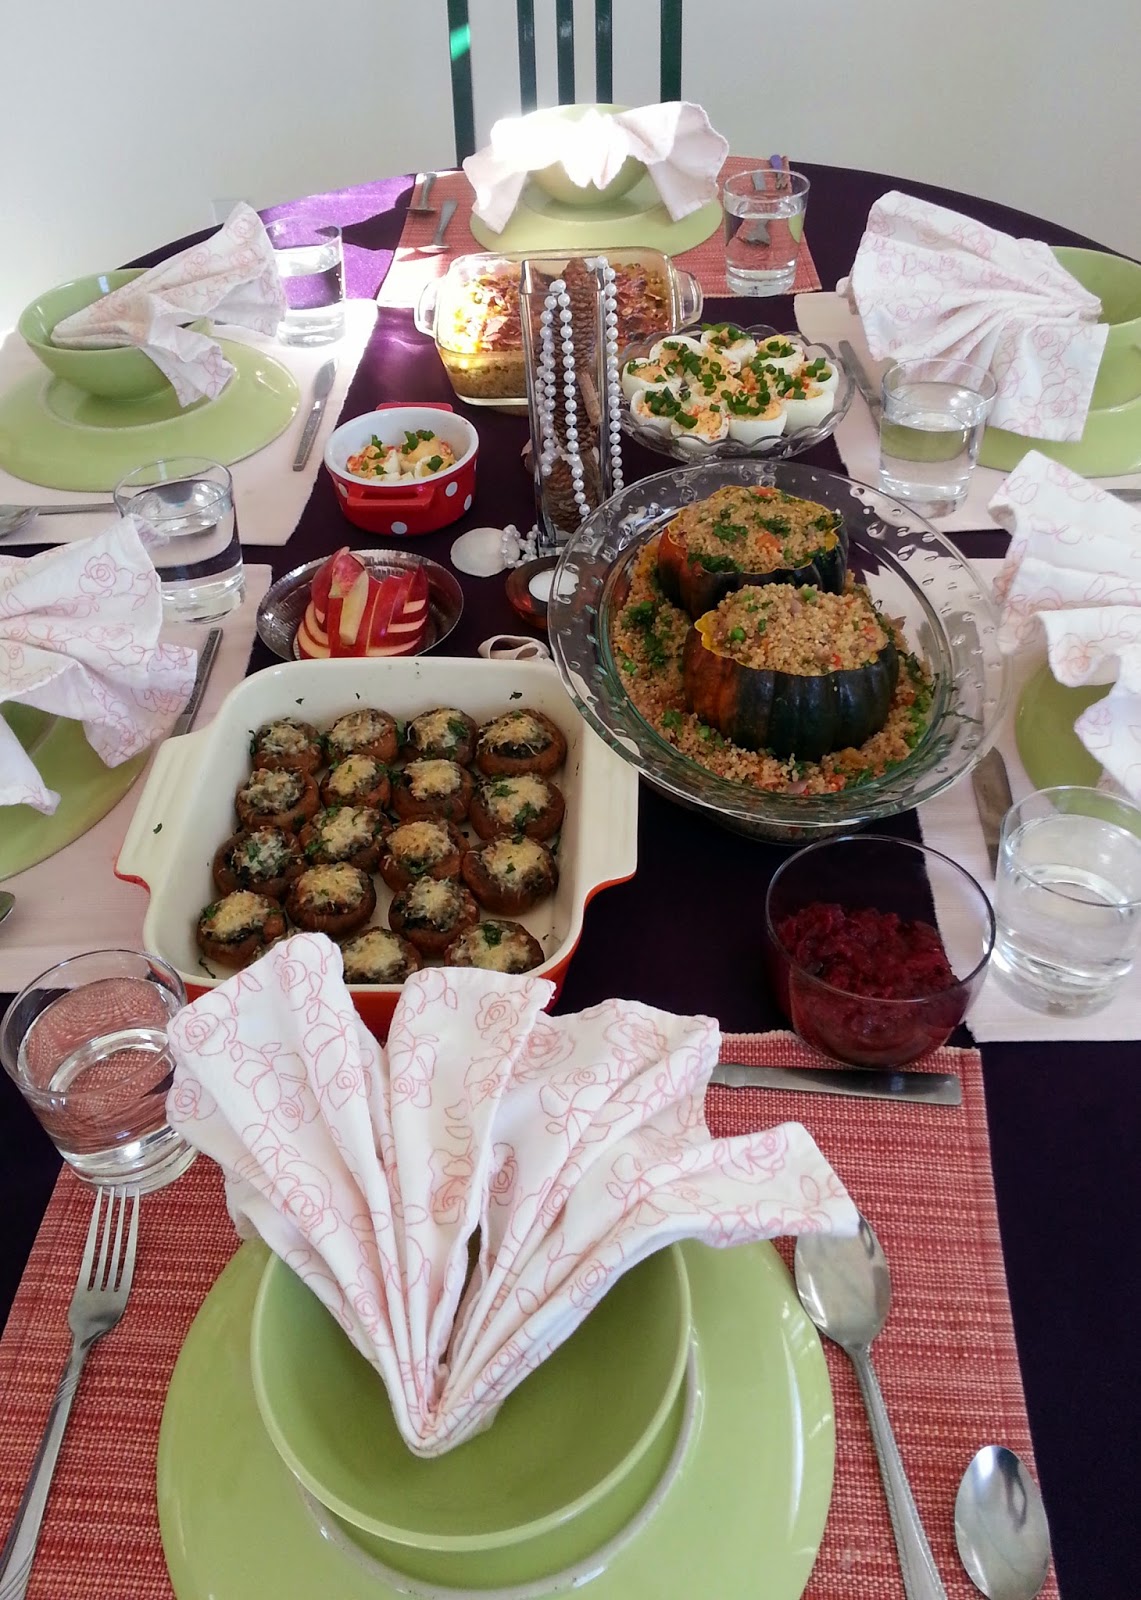
When we went over to my friends' house, they had already set up the table beautifully. I was certainly pleasantly surprised, knowing that they had just returned from a trip at 1 am!

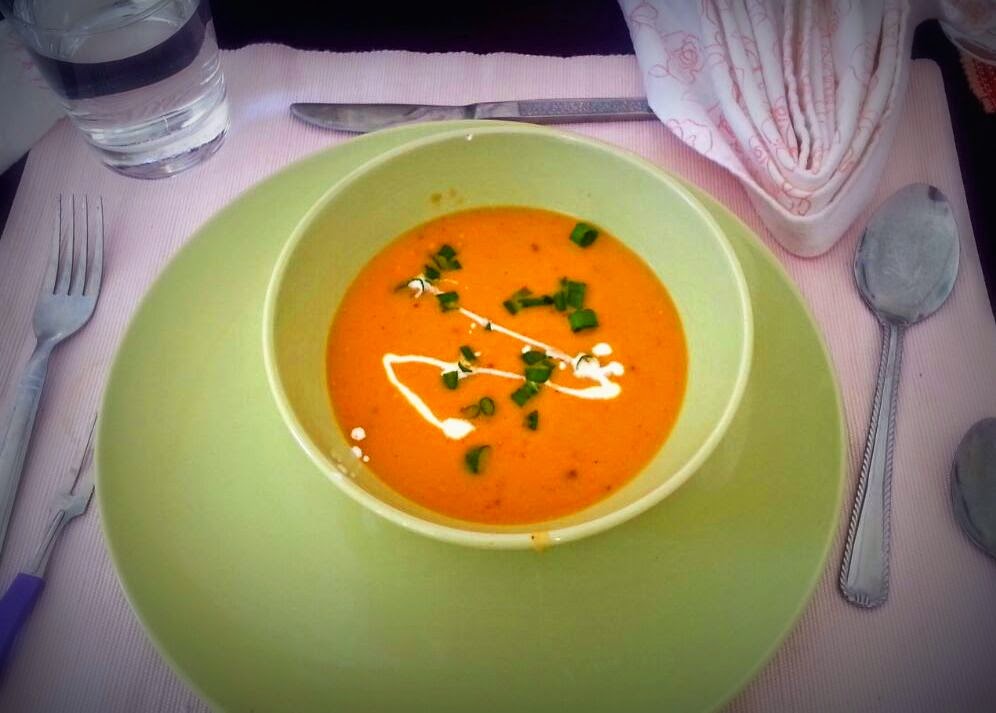
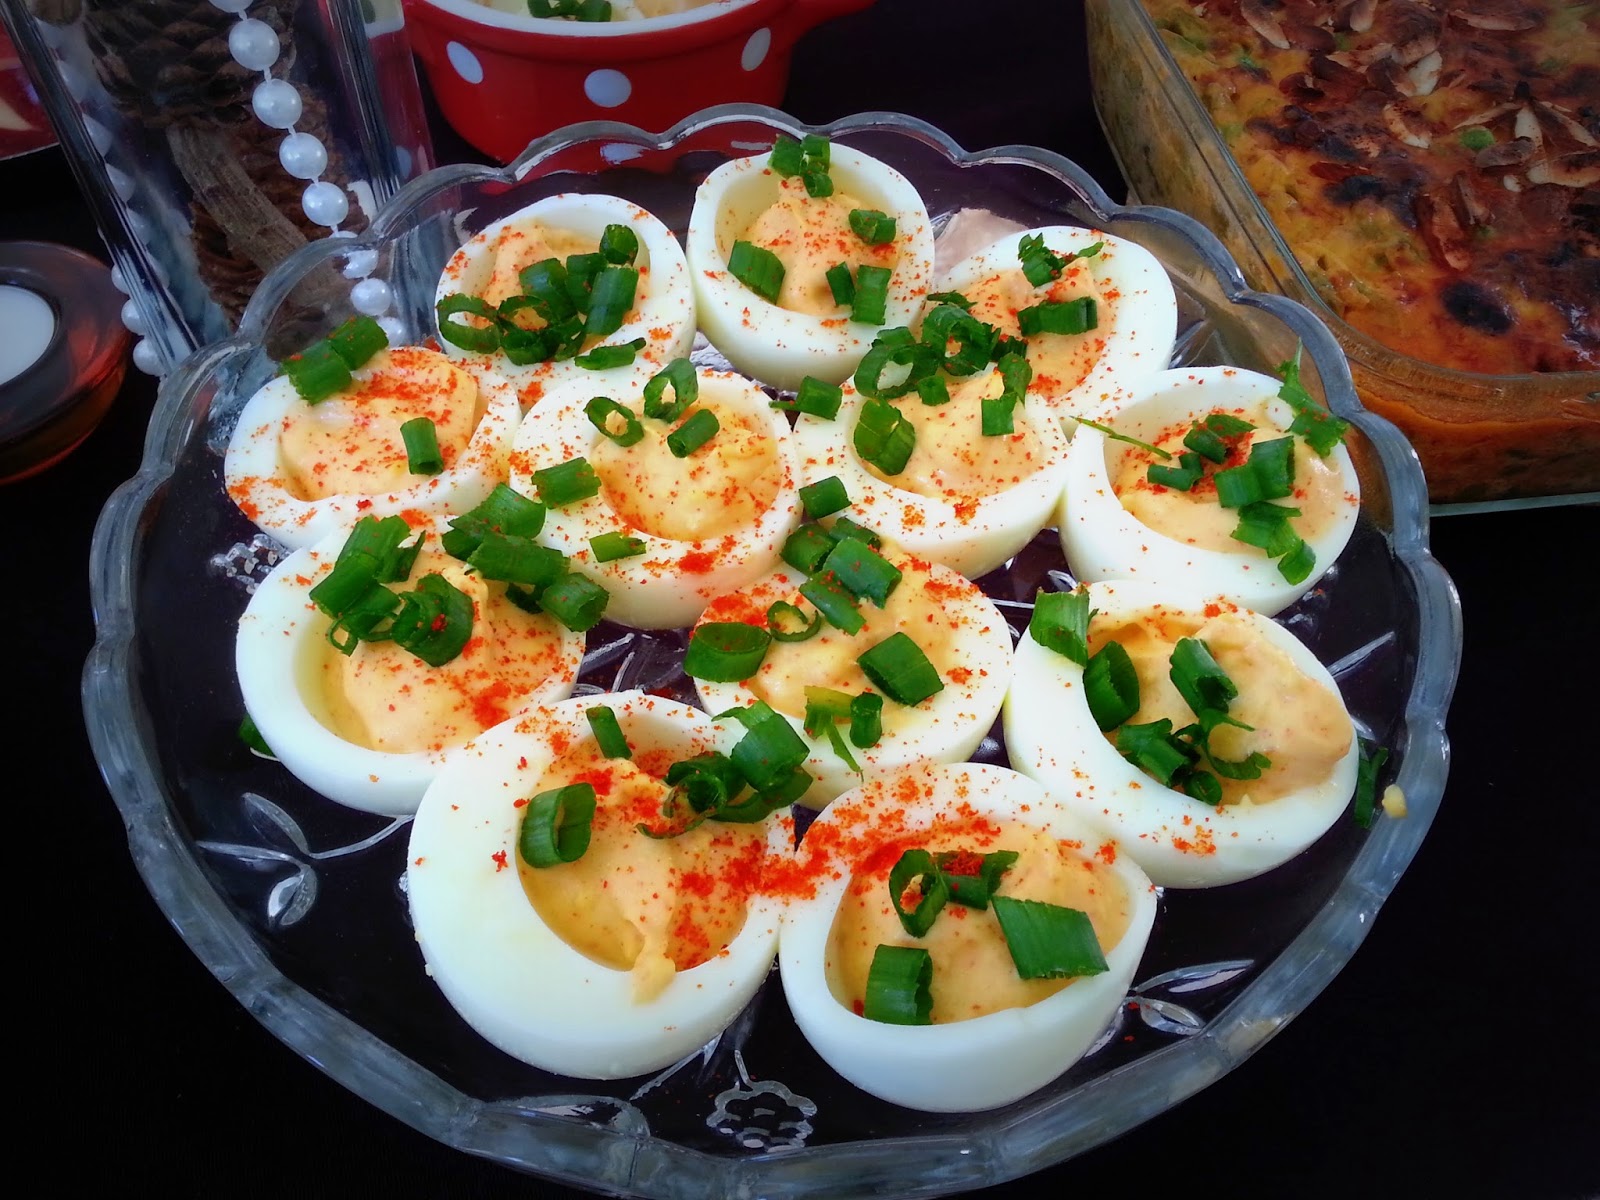
My friends made sweet potato and carrot soup with just the right amount of cinnamon, and some heat. It was the kind of soup that makes you  feel warm inside with just one sip. Then there were deviled eggs, green beans and peas casserole with crunchy almonds on top, and a beautiful dessert turkey made of fresh fruits! I contributed by making stuffed mushrooms for appetizers, stuffed acorn with quinoa pulao for the main course; and mom made third(!) batch of her almost famous cranberry pickle to eat with the pulao. To our delight, we ended up with very little leftovers. My friend immediately claimed the leftover pickle; somehow mom managed to steal the show with just a small side dish!


I used my sister's recipe for stuffed mushrooms, with a couple of modifications. It is a simple recipe, and a favorite finger food of mine to make at holiday parties. If using large mushrooms, I make 3 per person with a few extra to go around. I kept the mushrooms stuffed and ready to go in the oven ahead of time, and baked them just before heading over to my friend's house. They reheat well - just a few minutes in the oven at 375F.


Stuffed Mushrooms With Spinach and Parmesan

Ingredients:
20 Large white button mushrooms (you can also use the brown variety)
1 Small red onion - finely chopped
1 Cup finely chopped fresh spinach
1/2 Cup grated Parmesan cheese + more for topping
3 Garlic cloves - crushed and finely chopped
1 Teaspoon Tuscan seasoning (regular Italian seasoning in lieu of it)
1/2 - 1 Teaspoon crushed red pepper
2 Teaspoons olive oil
Salt & pepper to taste
Oil spray
  • Clean mushrooms with a damp towel. If the mushrooms are very soiled, rinse them in water and pat dry right away with a towel. Remove the stems (don't discard), and clean out the brown part inside with the handle of a spoon or a butter knife. 
  • Take ~1/2 of the mushrooms stems and chop them finely. These will go in the stuffing. 
  • Heat oil in a pan and add chopped garlic. Saute for a few seconds until golden. 
  • Add onion to the pan and saute until translucent. Then add chopped mushroom stems, spinach, herbs, and red pepper flakes. Cook for 3-4 minutes on medium heat until everything comes together. Season with salt & pepper. 
  • Turn off the heat and add grated cheese to this mixture. 
  • Spray insides of the mushrooms with oil, stuff with the above mixture, top them off with more cheese that'll melt and create a crust. Once stuffed, spray the mushrooms again with oil. 
  • Preheat oven at 400F and bake the mushrooms for ~20 minutes or until the cheese on top has turned golden brown and the mushrooms are tender. 
  • Take them out of the oven, remove all the excess juices accumulated at the bottom, garnish with chopped cilantro and serve!

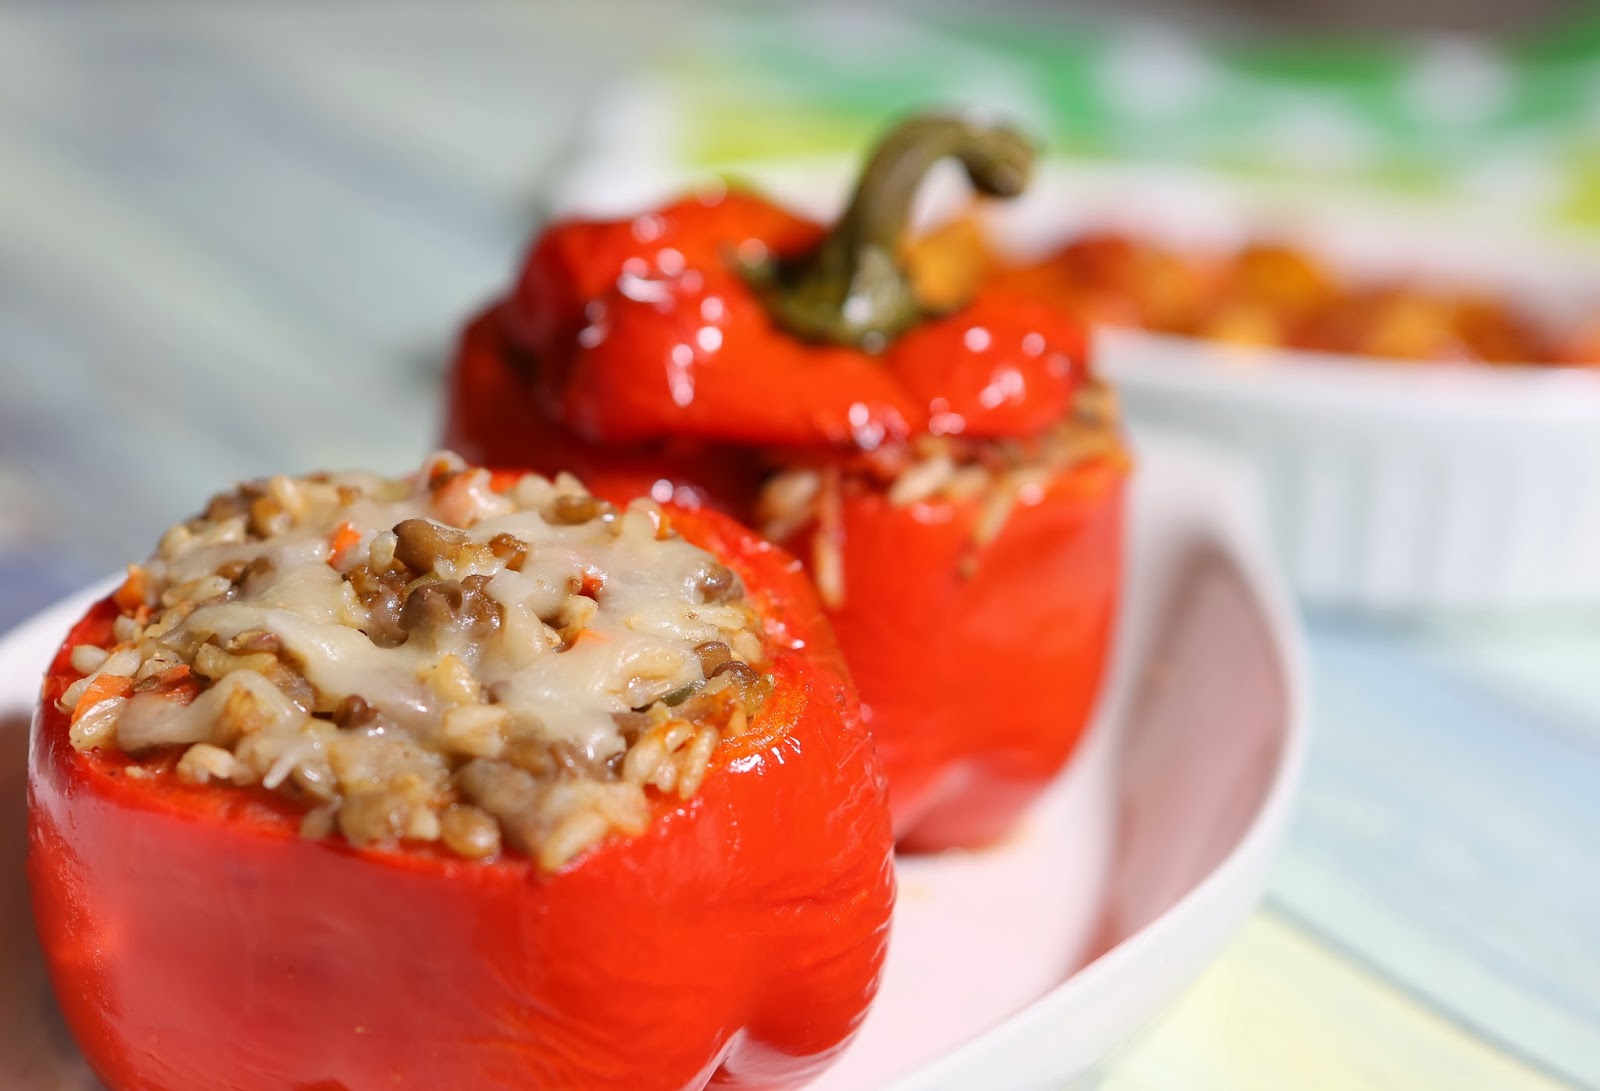
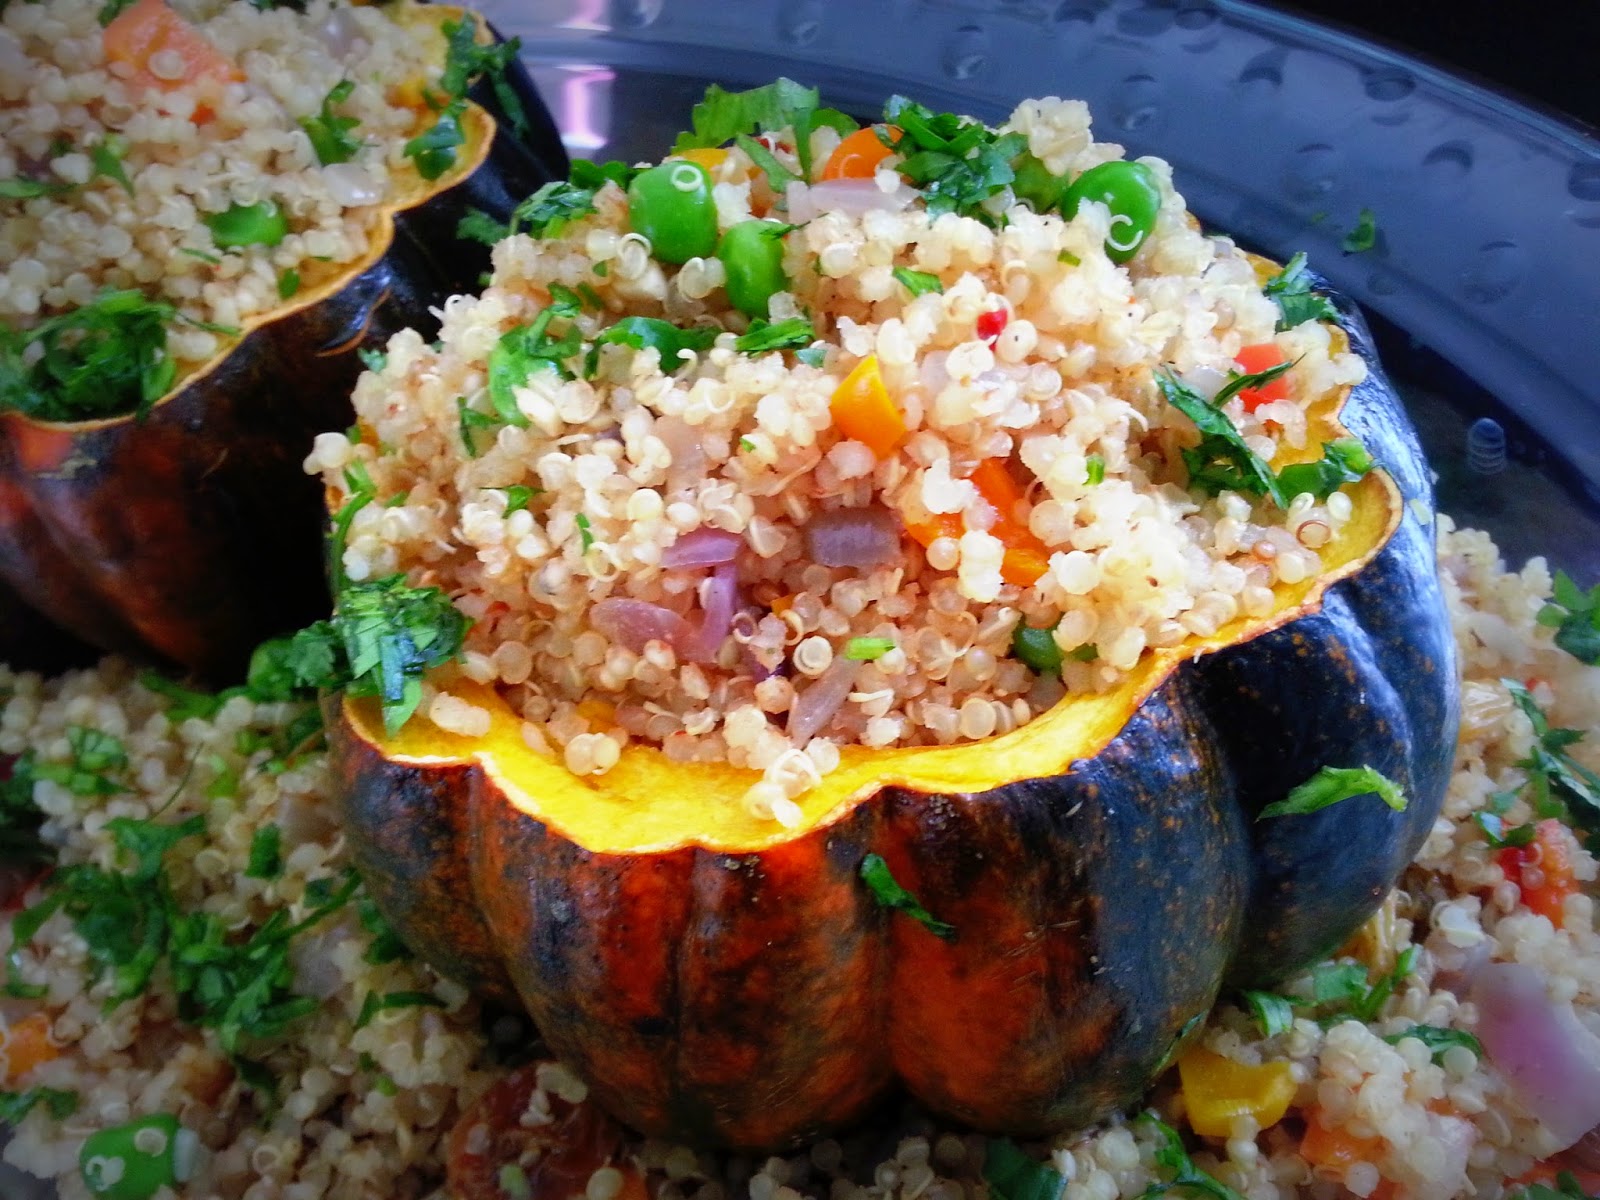
Stuffed acorn makes for a great vegetarian main course. It looks beautiful, is filling, and can be made quite healthy. I have always stuffed acorn with quinoa pulao with different veggies each time. I've made it with broccoli-carrot, mushroom-peas, just tri-colored peppers. This time I used sweet red and yellow peppers, and peas. To bring in a touch of spice, I added a little bit of garam masala (had to do it!). In went a few raisins to balance out the spices, like we do in Indian pulao recipes. I gauged ~3/4 cup packed cooked quinoa for each person. That was about how much everyone ate among all other dishes. I baked 3 medium acorns for 6 adults, but 2 were plenty.


Stuffed Acorn With Quinoa Pulao

Ingredients:
2 Medium sized acorns
1 1/2 Cups uncooked quinoa
1 Small red onion - finely chopped
3 Garlic cloves - crushed and finely chopped
3/4 Cup peas - frozen or fresh
3/4 Cup chopped red and yellow sweet peppers Or use bell peppers
1/4 Cup golden raisins
1 Teaspoon garam masala
1 Teaspoon Italian herbs
1 Teaspoon red chili powder or paprika
Some red chili flakes - to liking
Salt to taste
1 Tablespoon olive oil
Cilantro for garnishing

  • Clean acorns. Keep them stem side down, and cut the top horizontally about 1/4th way down. This will make them look like pots with lids. Clean out the seeds with a spoon. Spray the insides with oil. 
  • Preheat oven at 400F and bake the squash for 25 minutes or until tender. Take out and keep aside. 
  • On the side, cook quinoa according to package instructions. Keep aside. 
  • Heat oil in a cooking pan, add chopped garlic and onion and saute for a minute or so until the onions are translucent. 
  • Add peas and peppers and cook for a couple of minutes until tender. 
  • Mix in all the herbs and spices, and lastly cooked quinoa and raisins. Salt to taste.
  • Adjust the amount of spices to your liking. Once all the flavors have come together, turn off the heat. 
  • To assemble, take a casserole or a flat bottom serving dish. Spread some of the pulao at the bottom, keep the baked acorns on top, and fill them with rest of the pulao. Garnish with chopped cilantro. When serving pulao, scoop some acorn along with it. 

Here is to another great year of wonderful eats and great friends. I can't finish this post without being thankful for my sweetheart munchkin! 

I want to hear about your Thanksgiving stories!

Tuesday, October 14, 2014

Diwali Faraal - Khajachi Karanji or Satyachi karanji

Diwali is just around the corner. And Fall has finally arrived in San Diego. What a glorious time it is to be frying lots of things and using ghee abundantly. Despite the hot afternoons, dense morning fog and crisp evening air convinces me of the changing season and the approaching festive times. I started my Diwali preps over the weekend on a sweet note with flaky, melt in the mouth pastry called Khajachi Karanji or Satyachi Karanji.


 Karanji is a fried pastry, much like empanadas, made with all purpose flour cover and some sort of sweet stuffing. Our traditional recipe has grated fresh coconut filling. My husband's side of the family makes a more fancy version of it. The cover is made by layering multiple rolled dough rotis with ghee in between. When fried, the layers separate, must like puff pastry, creating wonderfully flaky and crispy karanji. It's called Khajachi karanji for the layers resembling another sweet called Khaja. It also gets its other name, Satyachi Karanji or Karanji made with Sate, from the ghee-corn starch spread used to create layers. The spread is called Sate. This Karanji is stuffed with a fine dried coconut filling which adds to the melt-in-the-mouth quality. Some make the karanji cover using very fine rava or semolina. It needs to be pounded and requires more work. I took the easier route.


Husband specially asked me to make Karanji 'their style' since I'm making everything else using my mom's recipes. I am always up for trying something new, especially when it involves a sweet ;). I called up my mother-in-law, and got detailed instructions from her. My skills were at test, and I decided to post the recipe when husband gave me two thumbs up!

The recipe is a little tricky. And the instructions are long. But the picture tutorial should help in understanding how it's made. This elaborate preparation is worth every delicious bite!

**This recipe makes ~12 karanjis.

Khajachi Karanji/Satyachi Karanji

Ingredients:
Dough
1 Cup all purpose flour
2 Teaspoons melted hot ghee - must be absolutely hot, not warm
Couple of pinches salt
Water as needed
1 pinch saffron and 1 Tablespoon milk Or food color of choice (optional)
A little milk to seal karanji

Sate
2 Tablespoons corn starch
~ 2 Tablespoons ghee (or as much needed to create a smooth paste)

Filling
1/2 Cup dry grated coconut. If you grate an entire coconut, scrape off the black part.
2/3 Cup sugar
2 Tablespoons almonds
1/2 Teaspoon cardamom powder

To prepare the dough:

  • Mix all purpose flour, salt, and hot ghee. The ghee helps make the dough light. 
  • Add just enough water to prepare a stiff dough. It is important not to make the dough soft
  • Cover the dough under a damp cloth and let it sit for a couple of hours. 
Optional:
  • If you want to make a two-colored karanji, you can use food color. Separate 1/3 and 2/3 flour. Add one color to 1/3 of the flour, and either keep the rest white or add another color. No one in my house is a big fan of artificial food color. So I added saffron to 1/3 of the dough. I added saffron to warm milk and crushed it until the color oozed out. Then added this milk to the dough. 


To prepare sate:
  • Mix corn starch and enough ghee to make a smooth paste in a small plate/bowl. Whisk this by fingers until it's mixed well and looks creamy. 


To prepare the filling:

  • Roast coconut on low flame until toasty (~5 mins). If you have sliced coconut, roast it and then grind it to a coarse powder. You don't want pieces of coconut poking through the dough. 
  • Grind sugar and almonds to a powder. 
  • Mix coconut, almond, cardamom powder, and sugar. Adjust the amount of sugar to your liking. Remember that frying tones the flavors down. Make sure the aroma of cardamom powder is prominent. Mix the filling well by hand. 


To make karanji:

  • Knead the dough well before making karanji. Make three parts of the dough.
  • Roll out each part into a roti. Keep the dough covered under damp cloth while working on each roti to ensure it doesn't dry out. 
  • Take one roti, spread the corn starch mixture or sata by hand to create a thick coat all around. Place the second roti on top of it. Apply more sata and layer the third roti. Press gently by hand. 
  • Now create a tight roll, like a Swiss roll. Pinch off the ends to close. 
  • Cut the roll in half at an angle (as shown in the pic above). Cut each piece in half again. Now cut all 4 pieces in thirds - a total of 12 pieces. Keep them covered under damp cloth. 
  • Press each of the dough pieces by hand to flatten out. You want to flatten it from the side that shows the layers. Since they are at an angle, the layers will seal when pressed. 
  • Gently roll the dough ball using corn starch or all purpose flour so it doesn't stick. Don't roll too hard or else the layers will separate before frying - this will break the karanji while frying, spilling out the filling into the oil. You want to roll the dough like a puri - not too thick not too thin. This cover is called a paari.
  • Place a large spoonful of the filling at the center of the paari. You want a decent amount of filling since the karanji will puff up after frying. Apply a little milk all around the edge of the pari, fold it in half and seal of the edges to create a boat shaped karanji. Press the ends well so that karanji doesn't open while frying. Don't leave any air iside. You can cut the excess ends using a karanji cutter, or a knife. 
  • Heat oil in a kadhai. Drop a small piece of dough. If the oil bubbles rapidly and the dough floats to the top right away, the oil is ready for frying. Lower the heat to medium and fry each karanji until golden. Don't turn the karanji too many times else it'll break. The layers in the paari should separate while frying. 
  • Take out the karanjis on a paper towel to absorb excess oil. Let them cool completely before storing. You don't want any steam remaining, else the karanjis will turn soft. 
  • Store in an airtight container once cooled. They can be stored for up to 2 weeks. 


This is one of the many sweets and snacks I plan to prepare this year. Let me know what you're making for Diwali!

Submitting this recipe to the Dish it Out - Diwali Bash event @ Cook's Joy

Saturday, August 30, 2014

Naralachi Vadi for Baal Ganesh

My most favorite time of the year is here - Ganpati Bappa arrived in our house yesterday on the occasion of Ganesh Chaturthi, and will stay with us the next 4 days. Oh, so much joy and good eats this festival brings!


I celebrate Ganesh chaturthi with much enthusiasm and glee, while trying to stay as eco-friendly as possible. See this hand-made clay idol and decor with used cardboard boxes from last year? The celebration this year is low-key, as I hardly have time to do anything with a baby and work. But my baby's first big festival needed something to make it memorable. Keeping the tradition, I made the idol at home. As a quick and simple alternative to clay, I thought of using play dough - the perfect medium to make idol for my baby's first Ganpati! Thanks to Pinterest, I knew I could make play dough at home. I used the no-cook play dough recipe on this site, with only half the measurements. I skipped cream of tartar (used for elasticity) and glycerin (used for shine). The preparation of making the dough with all purpose flour, salt, oil, and water took  10 mins all together. The key to getting good play dough is kneading it really well. Making the idol was equally quick as I skipped adding too many details. Our Bappa looks like Baal Ganesha (Baby Ganesha), and I was quite happy with it.


Husband asked for Modak for Naivedya. But it was too elaborate a process. I went for simple Naralachi Vadi (Coconut Barfi) instead, using one of the main ingredients from Modak. I was never a big fan of Naralachi Vadi until I tried it at one of my dad's friends' place. His wife had made the best vadi I had tried, and her secret ingredient was - potato! Who would've though?! Mashed potato gave the vadi a nice bite and chewiness. I don't like too hard, sugary and crumbly vadi, and potato added just the right texture to it. When I told the husband I was adding potato to the vadi, he thought I was joking! But he ended up loving the product, and I think Ganpati Bappa liked it too :).


Olya Naralachi Vadi/ Coconut Barfi

Ingredients:
1 Packed cup fresh/frozen grated coconut
1 Cup sugar
1/2 Cup milk
1 Small potato (~ golf ball sized) - boiled and mashed
1/2 Teaspoon cardamom powder
1 Tablespoon ghee
Dry fruits for decoration - I used Charoli. Almonds or cashews would be great.

  • Heat a pan on low flame, add ghee and grated coconut and cook for 2-3 minutes. 
  • Add sugar, milk, and mashed potato. Cook this mixture while stirring every so often. Make sure you take out all the lumps from the potato so that it's smooth. 
  • Cook the mixture down until all the sugar has dissolved and the moisture has evaporated. It should stop sticking to the pan and come together in a ball. 
  • Add cardamom powder and mix well. 
  • Grease a flat surface (plate/tray etc.) and spread the coconut mixture with a spatula into a 1/4'' cake. Sprinkle chopped dry fruits and pat gently on the cake. 
  • Once cooled slightly, cut the cake into desired sized diamonds. Let them cool completely before separating the barfi. 
Hope those of you who celebrate this festival are having a wonderful, modak-filled, celebration!

Thursday, August 7, 2014

Shravan Special - Puran Kadabu

I loved the auspicious month of Shravan as a kid for various reasons. Apart from all the holidays we got, food was certainly one of the highlights. Many women in Maharashtra observe the Jivati Vrata on Shravan Fridays by worshiping Goddess Jiviti for the health and longevity of their children. I didn't know of this vrata by its particular name, but I looked forward to eating Puran-Poli on the first Friday of the month. My mom performed 'ovalane' or 'aarati utarana', for which there is no translation in English! It's a ritual performed by offerning oil lamps to a deity/person as means of worshiping or offering respect. Details apart, mom made diyas out of Puran, the sweet split chickpea/chana daal stuffing that goes into Puran-Poli, to perform the ritual. Then we got to feast on delicious polis.

This year I got to pay it forward by praying for my daughter's well-being and long life. Of course, there was puran involved. Instead of making poli though, I prepared Kadabu - Indian style whole wheat empanadas stuffed with sweet Puran. Kadabu/Kadubu are better known in South India, although the preparation is different. While puran kadabu are made with wheat flour, other versions are either made with all purpose flour or rice flour, and the stuffing is often made of grated coconut instead of chana daal. Puran Kadabu are not very well known; for that matter my husband had never eaten them. But I am quite a fan. The good thing is you don't have to strain puran through food mill to make it smooth. In fact, coarse puran with a bite tastes really good in kadabu.


I saved the chana daal broth and some daal itself to make Katachi Amati which was served with rice, ghee, sweet lime pickle, and yogurt - yes, all home made! I can't even begin to tell you how happy I am to be making fresh yogurt at home every day since last week. Our nanny got us the starter and I couldn't have been more pleased with the results. Anyway, that may warrant its own post.


Puran Kadabu/Indian Sweet Split Chickpea-filled Empanada

Ingredients:
Puran
1 Cup split chickpea/chana daal
3/4 Cup grated jaggery
1 Teaspoon cardamom powder
Couple of pinches salt

Dough
2 Cups whole wheat flour
1 Teaspoon oil
1/4 Teaspoon salt
Water as needed

Oil for frying
  • Knead the dough by combining whole wheat flour, oil, salt, and enough water to form a stiff, firm dough. Cover and keep aside.
  • One the side, pressure cook chana daal until cooked well (4-5 whistles).
  • Once the daal is cooked, remove excess water (you can save the broth to make katachi amati). Add jaggery to the daal and start cooking until most of the water evaporates, and the mixture stops sticking to the pot. Add salt and cardamom powder and mix well. Puran or the stuffing is done.
To make kadabu:
  • Make large marble sized dough ball and roll it out thinly just like you would a puri. 
  • Take a decent amount of puran, approximately a golf ball size, so that you have a handsomely stuffed kadabu. Place it one one side of the round puri and press to form a half moon. 
  • Fold the other side of puri over and press two sides gently to seal. Make sure the kadabu is sealed properly otherwise frying oil will get inside and burn puran. 
  • To make the kadabu look pretty, gently press the tip of a fork into the sealed edges, and cut any uneven ends with a knife. Alternatively, you can use a Karanji Cutter if you have one. 
  • Fry on medium heat until golden brown. Kadabu will puff up when fried. It will soften once cooled. 
Pour some warn ghee on kadabu while serving, and enjoy!

Monday, December 2, 2013

Thanksgiving Recap

My close friend, and neighbor from Utah, visited us with her husband this Thanksgiving break. I've hosted plenty of potlucks over the last few years, but it had been a while since I planned and cooked the entire meal by myself. I was so excited about having her over that I made and scratched and remade my menu list a hundred times. It was just a party of four for dinner, of which two don't eat turkey. So I wanted to keep the menu simple, finishable (if there's such a word), yet complete with all the traditional favorites such as cranberries, and squash, and the usual. This definitely saved me from the much feared holiday cooking nightmares! We leisurely enjoyed multiple courses over 3 hours, breaking in between to make room for more. 

**My friend's hubby took food pics on his camera, which I forgot to transfer. Sharing the few that I had.


After ogling over hundreds of recipes and ideas online, here's what the menu was decided to be:

1. Brie-cranberry mini tarts - I've become addicted to Pinterest lately. I had pinned this simple fix-up appetizer recipe which not only tasted delicious, but also looked beautiful. I left out the pistachios from the original recipe, solely for forgetting to buy them. But it didn't make a difference to my guests. You can never go wrong with ooey-gooey baked brie with fruit relish. 
I tried the Spicy Pepper Cranberry Relish recipe from this NY Times article. Boy, was that a hit! I used regular green jalapenos instead of red, and added 1/2 cup of fresh orange juice instead of water+lemon juice. The orange juice enhanced the sweetness while adding acidity. The amount of pepper scared me at first, but they provided just the right amount of kick after taking out all the seeds. This recipe is a keeper. 

2. Arugula-pear salad with feta cheese and honey vinaigrette - For something green on the table, I went with my favorite salad greens paired with pears (funny I should use them together) and feta cheese. The dressing was very simple - honey, olive oil, red wine vinegar, and salt & pepper. Honey is perfect with the fruit, and it tames the peppery flavor of arugula. 

3. Roasted butternut squash soup with sage - What's Thanksgiving without the season's favorite? We make squash soup frequently during winter. It's always a simple fair with sauteed onion, garlic, sage, paprika, and salt & pepper. Roasted squash is so creamy by itself, it never requires anything additional. Oh btw, I made the soup in my new Vitamix - that's going to need its own post. 

4. Potato salad - I asked husband for a suggestion on the potato dish. What did he come up with? Deli style potato salad with mayo! Of course, I could have made creamy mashed potatoes, or a fancy gratin. But who ever laid the rules and said we couldn't have this salad instead? :P. No complaints, though. I love it myself and so did my friends. The salad had boiled red potatoes with skin on, chopped red radish, spring onions, lots and lots of fresh dill, a dash of paprika, mayo, mustard sauce, and good ol' salt & pepper. 

5. Shell pasta with basil pesto - Going down the menu items, I realize how easy everything was! The pasta was our last vegetarian course before the dessert. I pretty much just put everything together, yet it was quite elegant. I prefer simple butter/olive oil dressing or pesto in pasta over tomato sauce. I bought ready-made pesto, mixed it with perfectly cooked (yes, I actually got compliments on that!) pasta, added lots of chopped sun-dried tomatoes, olive medley, and topped it with feta cheese. This Mediterranean affair was quite delicious. 

6. Husband's special shrimp - The most exciting item on the table for the non-vegetarians was husband's 'world famous' shrimp. He makes this shallow fried shrimp marinated in coriander, garlic, and his mom's special masala for his friends all the time. I don't know what magic he puts in it, but that one dish always seems to take over ALL the other things I toil over! My friend's husband went gaga over the shrimp dish. Well, happy guests make me happy. 

7. Chocolate-pumpkin pie - Thanksgiving is incomplete without pie, make that pumpkin pie. My original plan was to set up our unused fondue for dessert. Some delicious dark chocolate fondue with fruits, marshmallows, and simple cake. But I couldn't resist making pie when I came across this Triple-Chocolate Pumpkin Pie recipe on Pinterest. Tell me that wouldn't entice you!
I grossly simplified the recipe though. My pie had a store bought graham cracker crust (yeah, judge me!). The basic pie filling recipe came from the pumpkin puree can (the standard recipe with 1 can pumpkin puree, 1 can evaporated milk, 2 eggs, 3/4 cup sugar, and spices). I melted 4 tablespoons of butter and 8 ounces semi-sweet chocolate in the microwave - a shortcut I use instead of using double boiler. Just melt the chocolate for 40-45 seconds each time until it's completely melted. Half of this chocolate mixture went into the pie filling. Once the pie was baked and cooled, I poured the rest on top to form a nice chocolaty crust. I think I'll never go back to the non-chocolaty pumpkin pie after having this!

All in all, the Thanksgiving dinner was a success. The preparation was fret-free, and the outcome was delicious. Most of all, it was the company whom we shared the meal with made it very special. Yet another year great year and wonderful people in our lives to be thankful for! Hope you all had a very special time as well!

Thursday, November 21, 2013

Winter Cooking

I used to sulk over the drab winter days before moving to San Diego. Now I cherish whatever cold days we get. It is the perfect time to crank up the oven and make something hearty. Here's what was on the menu Monday night - Stuffed Bell Peppers, with Maple Roasted Sweet Potatoes on the side. A combination of savory and sweet dishes. The great thing was, I baked both the dishes at once - saving some energy. What a comforting dinner that was!

Sweet potatoes usually turn into baked fries (the contradiction of that makes me laugh), or get pressure cooked with jaggery in my kitchen. I've wanted to try roasting them with maple syrup for a long time. As the sweet potatoes were baking, I decided to add a crisp apple to the dish on a whim - just because it was sitting there on the counter. It seemed like a natural pairing - apples and maple syrup taste great together, and they'd provide some crunch to soft roasted sweet potatoes. Husband, although skeptical of my creation at first, couldn't get enough of this dish. That's a victory in my opinion!

**The below recipes make 2 servings.


Maple Roasted Sweet Potatoes & Apples

Ingredients:
1 Large Sweet Potato
1 Apple (pick your favorite. I always buy Pink Lady)
1 Tablespoon olive oil
4 Tablespoons maple syrup (depending on how thick it is)
Salt to taste
Paprika to taste
  • Preheat oven at 375F. 
  • Peel and dice sweet potato in ~1 inch cubes.
  • Mix olive oil, 2 tablespoons of maple syrup, salt, and paprika, and toss the diced sweet potatoes in them. 
  • Cut the apple in similar sized cubes and toss them in the remaining maple syrup. 
  • Spread the sweet potatoes on a baking sheet and bake until tender, yet not fully done. Add apples at this point, and bake until the sweet potatoes are fork tender. The apples should be slightly crispy when the dishe is ready. 


Stuffed Peppers With Brown Rice & Lentils

Ingredients:
2 Medium red bell peppers - pick plump ones.
1/2 Cup brown rice
1/2 Cup whole lentils (Masoor)
1 Large garlic clove - minced
1/4 Cup finely diced onion
1 Tomato - diced
1/4 Cup finely diced carrot
1 Spring onion diced (optional)
1 Chipotle in adobo sauce - finely chopped
1 Tablespoon oil
Salt to taste
  • Preheat oven at 375F. 
  • Wash and cook brown rice and lentils together. 
  • Thinly cut the top off the peppers from the stem side. Remove seeds and ribs. Save the tops.  
  • Heat oil in a saute pan and saute garlic and onion until onions turn translucent. 
  • Add chopped tomato, carrot, spring onion, chipotle pepper, and saute until everything comes together (2-3 minutes)
  • Add cooked brown rice and lentils, and salt to taste. 
  • Stuff peppers with the rice mixture. Spray peppers with oil, or lightly brush some oil from the outside. This will help retain moisture. Close the pepper with the top that you chopped. 
  • Keep the peppers in a baking pan and bake for 30 mins, or until the peppers are soft and slightly wrinkled. 
Serving suggestion - Once you take the bell peppers out of the oven, top them off with some grated cheese (I used mozzarella) and let it melt on hot stuffing.

Tuesday, October 29, 2013

Hunky Chunky Cookies And Halloween Fun

Halloween decorations have crept up (literally) in my neighborhood over the past week. Our orange and purple lights are hanging on the palm tree, finally. Better late than never. The one thing that we did have out in time, our carved pumpkins, didn't survive to see the Halloween day though. Husband was quite methodical in his approach - he bought a pumpkin carving stencil book and all the fancy tools for carving. He even made a chlorine solution to prevent pumpkins from rotting. Unfortunately, the solution dried out the pumpkin a bit too much, shriveling and cracking through some of the design. The mold didn't seem to care about chlorine either. Anyhow, our haunted house and headless man managed to spook others for almost a week.


I picked up a Halloween special magazine while waiting at the grocery check-out counter a couple of weeks back - yes, I can shop all the way to the check-out line :D. I promptly tried one of the appetizers - Potatoes stuffed with herb & garlic cheese. Tell me how you can go wrong with cheese and potatoes! I am planning to make them again for my office Halloween potluck. Recipe should follow soon.


Now, what's Halloween without some lots of chocolate? Another recipe I tried for chocolate chip cookies, with a couple of modifications, was a winner! I made a fresh batch for my friends on Sunday, and also shared some with my colleagues yesterday. Everyone was all praises for the cookies, genuinely :D. The original recipe used a combination of milk, bittersweet, and white chocolate chips. I went with what was available in the pantry - bittersweet chips only. We're bigger fans of dark chocolate anyway. The cookies came out nice and big - the kind that make kids happy. So I called them Hunky Chunky cookies!


**Note: This recipe makes about 22-24 cookies

Hunky Chunky Chocolate Chip Cookies

Wet Ingredients:
1 Cup unsalted butter
2 Cups sugar (all white or half brown and half white)
1 Extra large egg
1 Teaspoon vanilla extract

Dry Ingredients:
1 Cup APF
3/4 Cup whole wheat flour
1/2 Cup unsweetened cocoa powder
1 1/2 Tsp baking powder
1 Tsp salt
1 Cup bittersweet chocolate chips

Prep: Line two baking sheets with parchment paper/aluminum file. Preheat oven to 350F.

  • In a large bowl, cream together butter and sugar with until smooth.
  • Beat in egg until the mixture if fluffy. Stir in vanilla extract.
  • In a separate bowl, sift all the dry ingredients except chocolate chips. Beat the flour into the butter-sugar mixture slowly, and fold in the chocolate chips.
  • Drop big spoonfuls of the batter on the lined sheets. I used a small ice-cream scoop to ensure the same size. Each drop was approximately the size of a golf ball.
  • Bake for 10-12 minutes. Then let the cookies cool on a rack.

I kept one of the baking sheets right at the center of the oven, and the other closer to the bottom. The center sheet cookies turned perfectly chewy. The bottom ones were more on the crispy side. Still delicious, but I wouldn't put the sheet right by the heating coils. I would like to add macadamia nuts next time - that'll make these cookies just perrrfect!

Hope you have a spooktacular, sugar-filled Halloween!!!


Thursday, October 17, 2013

Laddu Love

I find it challenging to plan for late afternoon-early evening snacks, especially when I'm ready to chomp down anything after getting home from work. But then, I don't like to kill my appetite for dinner either. It's not too much work to whip up guacamole or make veg cutlets or something else. Still, it would be nice not having to think about it every day. For quick energy boost between meals, I liked all sorts of khau (snack/treat) grandma used to keep ready - bhadang or healthy chivda to eat with yogurt, or one of her wholesome laddus made with moong, haliv (aserio) or whole wheat. How easy life used to be when mom or grandma had to worry about such things...*sigh*!

Now that I'm working up an appetite with the cooling Fall weather (and in preparation for the holiday season ;), I wanted to have something ready in the house for the occasional hunger pangs. Kanakeche Ladu (Whole Wheat Laddus) seemed to suit my mood, and the lack of enthusiasm for making anything elaborate, the other day. These laddus are quite nutritious, with golden roasted whole wheat flour, dry fruits, and a good dose of ghee. They are made with my favorite sweetener jaggery - always happy to forgo refined sugar. Most importantly, unlike besan or rava laddus, there's very little that can go wrong in the preparation. And you don't have to fret if you can't roll laddus, because the churma, or the coarse mixture, tastes fantastic by itself. Just don't tell anyone you attempted to make laddus :D.

Ladies, these laddus will be great to break your Karwa Chauth fast. Sweet, and energy packed when you are ready to faint after a long day of fasting =).

**The recipe below makes approximately 12 laddus.


Kanakeche Ladu/Whole Wheat Laddu

Ingredients:
2 Cups whole wheat flour
1/2 Cup ghee
3/4 Cup grated jaggery
Chopped dry fruits per your liking - almonds, cashews, raisins
1/2 Teaspoon cardamom powder

  • Heat 3 tablespoons of ghee in a kadhai on low flame. Add whole wheat flour and roast until golden and aromatic (~10 mins). Keep the stove on low and stir the flour so it doesn't burn. Once done, keep aside.
  • Add the remaining ghee and grated jaggery to the kadhai and heat just until the jaggery melts completely. Don't overcook. Be very careful -jaggery can really burn once hot!
  • Pour this ghee-jaggery mixture in roasted whole wheat flour. Add chopped dry fruits and cardamom powder. Mix everything well with a spatula.
  • Once the mixture cools enough to touch, break all the lumps with your hands and make golf-ball size laddus. If you find it difficult to roll laddus, add a little bit of ghee (although 1/2 cup should enough really).

If the laddus harden (because ghee can solidify in cold weather), just pop them in the microwave for a few seconds and they'll be as good as fresh. 

Sunday, October 13, 2013

Hello Again!

First of all, a big HELLO to you all! I've been away so long, I don't even know where to begin this post. Let me start by wishing a very happy Dashera! What did you do this Navratri season?

I've been neck deep in work lately. I don't want to whine, but it's been an uninspiring couple of months. We finally caught a much needed break last weekend and escaped to a beautiful mountain log cabin. After recuperating, this weekend was all about cleaning, reorganizing, and decorating the house for the holiday season. We're ready to celebrate fall, Halloween, Diwali, and whatever other holiday that's coming up :). Doing something festive cheered me up to finally write a post. A bright wreath with fall hues adorns our front door now, carved pumpkins are ready to spook passersby, and a big star shaped lantern will be hung up soon. Fun times are here again!

I asked husband what he wanted for Dashera today, and he sounded pretty unenthusiastic about any sweets. There was no time to make a big feast among all the chores either. So I kept the menu simple yet special - a fragrant pulao, daal fry, with papad and pickle on the side. I often make peas pulao to add a touch of  'special'. Today, I tried my mom's favorite khada masala pulao (whole spices pulao) topped with decadent ghee fried potatoes and onions. I certainly care more about the topping than the rice itself :D. This pulao is all the fancy without much work. And it's a big crowd pleaser, loved by kids and adults alike. It'll be a great addition to your Diwali party menu.


Whole Spices Pulao with Fried Potatoes & Onions

Ingredients:
4 Small red potatoes - peeled and cut into 8 wedges each
1/2 Red onion thinly sliced
1 1/2 Cups Basmati rice
2 Green chillies (slit in the center)
1 Teaspoon cumin seeds
2 Bay leaves
1 Cinnamon stick (~ 2 in)
5-6 Cardamom pods
4-5 Cloves
1/2 Teaspoon whole black peppercorns
2-3 Tablespoons ghee
Salt to taste

**Use a cast iron pot for making pulao. If not, use any thick bottom cooking pot.
  • Wash and drain rice and keep aside. 
  • Heat the cooking pot on medium-high and add 2 tablespoons ghee to it. Fry potatoes in ghee until golden brown (2-3 minutes) on each side. The potatoes should get crispy on the outside. Make sure they are tender when poked. Take them out and keep aside. 
  • Fry thinly sliced red onion (enough to garnish pulao) until brown in the remaining ghee. Keep aside.
  • You should still have enough ghee left in the pot for pulao. If not, add some more. If the ghee you fried potatoes and onions in smells burnt, replace it with a tablespoon of fresh ghee. 
  • Add all the whole spices, and green chilies to the pot and roast for a few seconds. Once the spices are fragrant, add washed rice and roast for another minute. 
  • Add 2 cups of water, salt to taste, and let the rice cook. It should cook fairly quickly after soaking, and cooking in ghee. You can cover it for some time, but take the lid off once it is half way done so that it doesn't get clumpy. Add a little bit of water if needed. 
  • Take out the rice in a serving bowl/dish and layer with fried potatoes and onion. 
**You can add peas, carrots, or green beans to the pulao if you like.

Serve with raita, daal fry, or your favorite curry. It tastes quite great by itself too. I prefer it this way.

Now that I'm back, stay tuned for more updates!

Wednesday, January 2, 2013

New Year Wishes

Wishing all my readers health, hopes and happiness in the year 2013!

2012 was tainted with all the turmoil going on around us - the most heartbreaking of all were the news of innocent people losing their lives for no fault of their own. Hope there is safety and solace for everyone in the new year. Even with all the disturbing events, we personally had lots to be thankful for in the past year - a new home, a lovely month with my parents, new friends, awesome travels and another beautiful year of togetherness. At the end of it, we should only remember the good things and try to turn any negatives into positives.

We hosted a few Holiday parties over the last couple of weeks. Two days after Christmas, I had invited all my colleagues and their families for dinner. After at least 50 mental revisions of the menu, I settled on the following -deviled eggs, yogurt-cucumber dip with chips and veggies, spinach and cream cheese crostini and quinoa-corn cakes for appetizers. The main course included a winter salad with cranberries and toasted almonds with honey-lemon dressing, herb-roasted potatoes, and orzo with roasted butternut squash and sage. The menu was simple, went well with adults as well as the kids and had items that could be made ahead of time. The food was a big hit. One of my colleagues' wife got two recipes and made at her New Year's party! (That certainly gave my ego a healthy boost :D).

My favorites among all were quinoa-corn cakes and the orzo. I tried both these dishes for the first time for the party. Call it holiday magic or whatever - both turned out really well. Unfortunately, in the rush of things, we forgot to take any pictures of the food at all. However, the recipes deserve to be shared.

The quinoa-corn cakes were my attempt at recreating an appetizer from the holiday buffet we had in Vegas. They were utterly delicious, and even without the chef's recipe, mine turned out more than decent.

I'm submitting this recipe to Priya's Quinoa-Ragi event hosted by Divya.

Quinoa-Corn Cakes

Ingredients:
1 1/2 Cups quinoa
1/3 - 1/2 Cup frozen corn
1/2 White onion
1 Large garlic clove
1/2 Teaspoon dried Italian herbs
Salt & Pepper & Paprika to taste
1/2 Cup shredded mozzarella cheese
Rice flour as needed
1 Tablespoon Olive oil + more for shallow frying

  • Cook quinoa according to instructions on the package.
  • Chop onion and garlic finely.
  • Heat oil in a pan and saute onion and garlic. Once translucent, add corn, quinoa, cheese and the seasoning and mix well. Turn the heat off
  • Add a rice flour little by little to the mixture just enough to bind everything together. 
  • Make small round patties/cakes about 3/4 inch thick. Pan fry the cakes in olive oil until golden brown.
Warm cakes with melted cheese taste just fantastic by themselves or even with a little bit of hot sauce!

I made butternut squash orzo loosely using Ina Garten's recipe for risotto. I made a vegetarian version by excluding pancetta and chicken stock, using vegetable broth instead. One important change I made was adding fresh julienned sage to the orzo by sauteing it with the onions. The aroma was heavenly! This is going to be added to my 'favorites' recipes.

Happy eats in 2013 to you all!

Sunday, November 11, 2012

Diwali Wishes!

Wishing everyone a very happy Diwali!!! May the glow of the Diwali diyas brighten our lives and remove darkness and evil. Hope you all are enjoying the festivities with your near and dear ones, and stuffing yourselves with Diwali sweets and snacks! Let's remember the less fortunate ones this Diwali and help in any way we can.

There are lots of firsts for us this Diwali - our first time celebrating it together (since I left hubs by himself last year while I was celebrating with my family back in India), our first Diwali in the new house, my first Diwali in San Diego! Although I miss my family and friends staying far from me, I'm super excited about being 'home' with hubby this year. Yesterday, we cleaned and decorated the house together, got a bigger and better home for our pet betta fish and ended the day by making some delicious 'faraal' with friends (sweets and snacks prepared specially on Diwali are called faraal in Maharashtra). A perfect Saturday before Diwali!

Rangoli at the doorfront
Back in India, all the ladies (with enthusiastic kids like me tagged along) would go to each other's house to help out with faraal making. The faraal was made in large quantities as it was to be shared with a big number of family members, friends and neighbors. Over here, the faraal hardly gets consumed. Honestly, I was wondering if I should even bother making anything this year. But once my friend told me how she and her husband were craving faraal, I immediately asked her to come over so we could have a 'faraal making party' :D. So last night, we gorged on fresh Shankarpali, Karanji and Garlic Shev/Sev along with a dinner of daal-rice and amrakhand (talk about gluttony). I had a moment of 'oh, I love faraal no matter how averse I'm to fried foods' and realized it isn't Diwali until the waft of ghee fills up your house!


I'm sharing the recipe for Garlic Sev/Lasanachi Shev. My mom passed on this recipe from the recipe book every Marathi woman swears by - Kamalabai Ogale's Ruchira! I absolutely love this preparation. It's great to change your palate in between all the sweets. Sadly, I don't have a Sev patra (the press that you make sev with), so I shaped these like kadbole by hand. I only made a small quantity so it won't be lying around for days.


Garlic Sev/Lasanachi Shev

Ingredients:
1 Cup Besan (chickpea flour)
3 Tablespoons whole wheat flour
6-7 Large garlic cloves
1 1/2 Teaspoons red chili powder (adjust per your liking)
1 Teaspoon cumin-coriander powder
1/2 Teaspoon ajwain/ova seeds
2-3 Pinches baking soda
Salt to taste
Water as needed
Oil for frying

  • Grind garlic cloves using morta-pestle or a small grinder. Add a little bit of water to it and strain it through a fine strainer. Squeeze all the water out of the garlic. You now have a garlic concentrate! You will use this concentrate to flavor the sev so that you don't end up biting into bits of garlic! Isn't that clever? 
  • Mix both the flours, red chili powder and cumin-coriander powder together. 
  • Bruise the ajwain lightly - just take it in your palm and rub it with your thumb. This brings out the oils. 
  • Mix the ajwain, garlic concentrate, baking soda and add salt to taste (add a little extra salt than usual - frying tones down the flavors). 
  • Add water little by little to form a soft, stiff dough. If you don't have a Sev press, make the dough stiff enough so you can shape it by hand.  
  • Heat oil in a kadhai. Once the oil is hot, drop sev in it through the press and fry until yellowish-brown. Keep the flame on low-medium heat. This way, the sev will cook from inside. Otherwise it ends up burning on the outside and the center remains uncooked. 
  • Without a press, you can make small bow-like shapes by rolling out the dough thinly between your palms and pressing two ends together like shown in the picture. 

Enjoy the sinful, fried foods today, for tomorrow we may diet ;). 

Wednesday, September 19, 2012

Ganesh Chaturthi Wishes

Wishing everyone a very happy Ganesh Chaturthi! May Lord Ganesh bless you with health and happiness, and remove all obstacles from your path.

My eco-friendly hand made idol with natural clay and non-toxic paint

Hope everyone is enjoying delectable modaks and other naivedya. Here are some recipes you could make
this year:


Tuesday, September 18, 2012

Haliv/Aliv Ladu

Hartalika wishes everyone! Happy fasting to those who are observing it today. Hartalika is celebrated by women in honor of Goddess Parvati on Bhadrapad tritiya (third day of the Hindu calendar month Bhadrapad). I used to observe the fast as a girl - to pray for a husband like Shiva! Now that I have found him, I skip the fasting bit of the celebration ;). Hartalika falls a day before Ganesh Chaturthi. My grandma would scurry around just before the big day trying to fill the pantry with sweets, so none of the visitors who came for Ganpati darshan left without plentiful of them. She made pedhas, barfis and all sorts of laddus. I always had my eye on the Haliv laddus, to replenish the depleted energy after a long day of fasting.


Haliv/Aliv seeds come from an herb called garden cress. They are also known as Aserio seeds. These seeds are rich in iron, calcium and protein. Grandma told us how good they were for women and said, "We didn't have all these energy tonics in my days. We ate haliv ladus or kheer for the essential nutrients." The great thing is, these laddus taste much better than any energy drink you've had! Haliv seeds swell up once soaked, just like sabja we put in faluda. They give a nice, chewy texture. The laddus are quite decadent with the generous use of coconut. The surprise element is the sweet, floral aroma from cloves. You can add some dry fruits if you like, but the laddus are quite rich on their own. Other laddu recipes, like rava and besan, require exact measurements and technique. This recipe is a lot simpler in comparison. The only tedious part is the cooking process.


 Haliv/Aliv Ladu

Ingredients:
1/2 Cup Haliv/Aliv seeds (Aserio seeds)
1 Cup coconut water (use regular water if not available)
1 Cup fresh grated coconut
3/4 Cup grated jaggery
2 Tablespoons sugar (if required)
3 Cloves
2 Teaspoons ghee (clarified butter)

  • Soak haliv seeds in coconut water for about an hour. The seeds start to puff up immediately and become slippery. They double in size once completely soaked.
  • Mix grated coconut (you can add some later if needed) and jaggery to the seeds and combine well. Let it sit for another hour. There should be equal or little more amount of coconut as the seeds. 
  • While the seeds are soaking, roast the cloves and grind them to a fine powder. 
  • Heat ghee in a kadhai and add the coconut,jaggery,haliv mixture and cloves powder and cook on low flame, stirring constantly. The seeds need to be cooked for a long time (~20-25 mins) until they become soft. 
  • Once the seeds are cooked through and the mixture comes together, turn off the heat and let it cool. 
  • Make golf ball sized laddus (you probably won't be able to eat a bigger laddu at one time since they are quite heavy). 

Notes:

  • The sweetness of jaggery depends on the quality. You can add some sugar to achieve desired sweetness. 
  • Soaking the seeds in coconut water adds more flavor. Use regular water if you don't have it. 
  • This recipe makes about 10-12 laddus.

Wednesday, July 25, 2012

Celebrating Shravan

Friday marked the first day of the Hindu calendar month Shravan. Shravan brings with it heavy monsoons after torturous summer heat, and the dry, deprived earth gets blanketed in lush greenery. As oceans swell and become dangerous with the onslaught of monsoon, fishing activity slows down. Everyone practices vegetarianism and gets ready to celebrate the changes in the surroundings that monsoon brings with it. Shravan is considered a holy month and probably has the most number of Hindu festivals. Many fast on Mondays to please Lord Shiva; newly married women in Maharashtra worship the Shivalinga on Tuesdays for their husband's well-being.


Shravan was my favorite time of the year for the number of school holidays we had. The days we did go to school were spent attending prayers, celebrations, and waiting for lunch breaks to attack each other’s tiffin boxes stuffed with goodies our moms prepared all through the month. We were distracted by the colorful clothes and jewelry on 'civil dress days'. Not that we didn’t dress civilly otherwise, but my school excused us from wearing school uniform every Monday and Friday of the month.  

At home, we were treated to a number of sweets and other special preparations in Shravan. My aaji (grandma) observed every fast religiously which she broke around sunset with some satvik food and sweets. Mom and the two of us sisters never fasted, but we relished the food nonetheless. Mom made fragrant ghee out of freshly churned butter to make the sweets decadent or simply poured it over warm sabudana khichadi. Among the many delicacies, Sanjyachi Poli stands out as one of my favorites. Sanja - sooji or semolina sweetened with jaggery - is stuffed inside whole wheat dough to make flaky, buttery, melt-in-the-mouth rotis, or poli as we call it. We Marathi people love our sweet rotis, like Puran poli, Gulachi poli or Khavyachi poli. Sanja poli is simpler to make compared to the others as the stuffing is not difficult to work with. It's not overwhelmingly sweet either. Some people make the stuffing with sugar, but I swear by jaggery. And as weird as this may sound, Sanjyachi poli tastes amazing with some spicy Maharashtrian style mango pickle! If you don't want to try that combination, enjoy it with some ghee or warm milk. 

**Note: The recipe below makes about 10-12 rotis depending on how big you make them. 

I'm submitting this recipe to the Celebrate Event by Jagruti, hosted by Sangeetha this month to celebrate the month of Shravan. 


Sanjyachi Poli/ Sooji Roti

Ingredients:
Sanja:
1/2 Cup Rava/Semolina
2 Tablespoons ghee/clarified butter
3/4 Cup grated jaggery
3/4 Cup water + more if needed
5-6 Cardamom pods - powdered
Couple of pinches saffron
Pinch of salt

Poli dough:
~ 1 3/4 Cups whole wheat flour
Water to knead the dough
1 Teaspoon oil
Pinch of salt
  • First, knead the dough with just enough water so you have a soft dough ball. It should be slightly softer than the usual roti dough so you can roll it with light pressure. This will ensure the stuffing doesn't get pressed out. Cover dough and keep aside. 
To make sanja
  • Add ghee to a kadhai and roast semolina on low-medium heat till it gets a reddish hue. It'll be very fragrant when roasted well. Make sure you don't over-roast it. Keep aside. 
  • Cook jaggery with water to help it melt, then add the roasted semolina, cardamom powder, saffron and a pinch of salt and cook down until the semolina is soft. Add a little warm water and cook down if the sanja is not cooked through. The stuffing should not be watery or else you'll have a hard time rolling rotis. 
  • Take a golf ball size dough and stuff sanja the size of a lime. The more stuffing you have the better. Roll the rotis gently making the sides thinner than the center. Apply a little ghee to each side while roasting. 


Sunday, July 15, 2012

Celebrating Ice-Cream!

Did you know it was National Ice-Cream day today? How cool is that?? I discovered just today that the third Sunday every July is dedicated to this frozen dessert we all love and adore. Here are some fun facts for you. I made some ice-cream to celebrate this day (duh!). The kind of ice-cream I grew up eating - simple and elegant flavors with all natural ingredients. No corn syrup, corn starch, milk powder or hydrogenated oil. Milk, cream, sugar and natural flavors - that's all you need to make some good ice-cream. 
  

I chose two of my favorite ingredients for flavoring - Kesar (saffron) and Ilaichi (cardamom). These two ingredients are ubiquitous in Indian desserts, providing sweet aroma and richness. I love the floral notes and touch of golden orange color saffron adds. My sister works for a food distributing company and gets me some of the best saffron available. Cardamom takes any dessert to a whole new level. I always make fresh cardamom powder from pods. Good quality ingredients make a world of a difference. A little bit of vanilla essence elevated those wonderful flavors in the ice-cream.


Creamy Kesar-Ilaichi ice-cream is India in a dessert bowl. This ice-cream is great by itself, fantastic with some warm gajar halwa or gulab jamun or goes great with some mango pulp, even better fresh mango. 


Kesar Ilaichi (Saffron Cardamom) Ice-Cream

Ingredients:
2 Cups whipping cream
2 Cups milk
3/4 - 1 Cup sugar (depending on how sweet you like it)
1 Teaspoon cardamom powder
1/2 Teaspoon saffron strands
1/2 Teaspoon vanilla essence
Chopped fruits for garnishing - pistachio or almonds

  • Warm 3-4 tablespoon of milk in the microwave. Add the saffron strands to warm milk to extract color and flavor. 
  • Now mix all the ingredients together, including the saffron milk and whisk it until the mixture is frothy and aerated. If using a hand mixy, whip it on low for about a minute. 
  • Chill the mixture for about an hour then churn in an ice-cream maker. 
  • When serving, garnish with some chopped dry fruits. Alternatively, you can add them to your ice-cream while making it. 

Sunday, July 1, 2012

Randomness

It's been a while since I was home alone being a couch potato, only my needle and yarn to accompany me. Mom and dad left yesterday to continue their trip at my sister's, leaving a huge void in my house. I'm quite thankful for the wonderful time we spent together though, and it consoles me that they are just across the country as opposed to the globe! Now that it's back to just the two of us, I won't need to cook as much. For now, I'll update you on all the happenings in the last few days.

No butter baked goodie - I had wondered how applesauce worked in baked goodies all this while. After a successful trial, I'm convinced of the power of apple! I baked an eggless yogurt cake for mom and dad before they left, using this easy recipe. I cut the recipe in half, used only 1 tbsp of sugar instead (for mom) and (apprehensively) substituted oil with applesauce. Boy, was I sweetly surprised at the end product?! The cake was moist, fluffy and tasty. I would recommend adding some fruits or berries to the cake though since it's pretty one tone. Mom and dad gave two thumbs up.

Float fun - I stay away from sodas; not just for health reasons but I don't like the taste at all. Ice-cream floats though are a different story though. Creamy vanilla ice-cream dunked in fizzy root beer is the ultimate summer dream. We got my dad hooked onto root beer floats while he was here. If you haven't tried them or haven't had them in a while, do revisit soon =D.

Feeling peachy - Take a look at the velvety peaches we've plucked from the tree recently! we snacked on a few juicy fruits and saved some for a tart, maybe.


Anjeer Barfi - Everyone who visits our house 'oohs' and 'aahs' over the giant anjeers (figs) in the backyard. My sister and bro-in-law love figs and asked us to save some for them. I don't know what the status will be when they visits us in fall, but I wanted to surprise them with some fig goodness. I made fresh Anjeer Barfi (a sweet made from figs) and sent with my parents. Bro-in-law only saved a little bite for my sister, but I heard they loved the barfi. I used a pretty standard method to make it:


Anjeer Barfi

Ingredients:
3 Large figs (all the ripe figs on the tree)
1 Teaspoon ghee/ clarified butter
2 Tablespoons chopped dry fruits + more for garnishing
3 Teaspoons sugar
1/4 Teaspoon cardamom powder

  • Puree figs in the food processor. If you don't have fresh figs, use twice as many dry figs - reconstitute them in warm water and puree. 
  • In a pan, heat ghee on low-medium and roast the dry fuits for 10-15 secs. They don't need to turn color. I used almonds as that was the only dry fruit I had on hand, but you can use cashews and pistachios as well. Add the fig puree, sugar and cardamom powder and cook on medium for 10 mins or so until most of the moisture evaporates and the mixture separates from the pan in one ball. It's important that you get rid of the water content. 
  • Grease a plate with ghee or line it with parchment paper/aluminum foil and spread the mixture and pat it to 1/2 inch thickness. Spread some chopped dry fruit on top and press gently into the barfi. Stick it in the fridge to cool and thicken. 
  • I made a big round barfi to send it. You can cut small 1 inch cubes. 

Babies and batwas - My BF recently delivered a beautiful baby girl (yay for her), and my cousin is expecting her second bundle of joy - a girl too - very soon! I crocheted two cute little headbands for both of them. One inspired by this simple but beautiful design, and another with a pretty little flower. The second one has reached its destination already and the mommy was simply thrilled about the handmade gift :). On my recent trip to Michael's, hubby picked this rainbow of a yarn ball for me, and I crocheted a simple batwa (pouch) with a pattern I created myself. Take a look. I'm tackling this new design now. 

Tuesday, December 13, 2011

Look, I Made A Snowman!

Only 12 days to go till Christmas, and I'm sure everyone's got their hands full baking and cooking and planning big meals for the holiday parties. The season's eatings started on my side with the food bloggers holiday party over the weekend. Oh, the goodies everyone made! The new enthusiastic baker in me wanted to make something sweet for the party at first. But looking at the number of bloggers who signed up for desserts, I turned to a savory dish I knew would please the crowds. Peruvian Causitas - mashed yellow potatoes seasoned with lime juice and Peruvian chile - make a great appetizer for any party. Shape them like snowmen, and you have the cutest looking appetizer that can be the center piece of your serving table! My dear Peruvian friend and neighbor in Utah made these snowmen two years back for Christmas and I just couldn't get over how adorable they were. I mean, look at them!!!

Hello, everyone!
Causas or causitas are a popular dish from Peru. It's a simple recipe with very few ingredients but packed with lots of flavor. The causitas I made were simply mashed potatoes/pureed. The more elaborate preparation contains filling of various sorts, such as avocado, shrimp, crab etc., to go in between two layers of mashed potatoes. Causitas makes for a great finger food. Shaped like little snowmen, they are just perfect for a holiday party claiming the center spot on the table. There are no exact measurements to make the potatoes, but make sure the punch from lime juice is prominent. That makes it delightfully light for a potato dish. And as my friend would say, add lots of lime juice to any Peruvian dish and it tastes good!


Snowmen Causitas - Peruvian Mashed Potato Appetizer

Ingredients:
Medium Yellow/Yukon Gold potatoes - about 1 per person (I used 10)
Limes - I needed 3 large limes for my potatoes
Peruvian Aji Amarillo chile paste - If you can't find it easily, use any mild yellow/orange chile
Salt & Pepper to taste
2-3 Tablespoons vegetable oil.

  • Boil potatoes, peel and mash. When the potatoes cool down enough to touch, get your best tool out - your hands - and take out any lumps. Add oil little by little while mixing by hand so the potatoes are not too sticky. 
  • Add juice from one lime at a time, and taste to make sure there's enough lime flavor. Don't let the mashed potatoes get too thin else you won't be able to shape them. 
  • Add a little bit of chile paste - this is just for slight flavor and color. The dish is not supposed to be spicy. I couldn't get to a Peruvian store so I used 1 regular yellow chile ground to paste. 
  • Season with salt & fresh cracked pepper. Taste, and as my friend put it, choose your lime-chile-pepper-salt happy place!! That sums it up =)
  • To make the snowmen, roll the mashed potatoes into small balls in two sizes, one smaller than the other. Stack the small ones on top of big ones and poke a toothpick through them. For the eyes and nose, you can use a variety of things. I chopped olives finely for eyes and red bell pepper for nose. You can also use carrots. Decorate the snowmen however you want. 

This is a great make-ahead dish. Make the mashed potatoes ahead of time and just shape them when you are ready to entertain. Get your kids to help you with making the snowmen and decorating them. Boy, are they gonna have fun with it! The snowmen taste just as good as they look.

Happy Holiday Cooking, everyone! :)

The snowmen sitting pretty with other dishes


LinkWithin

Related Posts Plugin for WordPress, Blogger...