Showing posts with label Breakfast. Show all posts

Saturday, October 11, 2014

A Healthy Start - Rava and Oats Uttappam For Breakfast

Preparing meals has become a joint venture in my house lately. Between prepping, cooking, cleaning after, and most importantly looking after the baby, we all need to rotate the roles every so often. I've been able to prepare some elaborate meals lately, such as our Dashera feast. But most of the times I let others help out as much as they can. Cooking with the family is the best way to spend some quality time with them. It's amazing what topics, stories, and helpful tips come out of 'cooperative cooking'. That is when we create memories to cherish for life.

Our Sunday brunch was no different. I made this healthy uttappa/uttappam made with rava and oats. Mom roasted rava and oats, I cut the veggies for the topping and chutney, dad helped grind the chutney, while husband kept the girl entertained. This easy uttappa doesn't require pre-planning, soaking, fermenting etc., much like this instant idli. We got almost two meals out of the batter for the four of us. I was going to make simple rava uttappa, but mom suggested adding oats. It has become a common ingredient in many of her diabetic friendly recipes. Not only that, oats made the uttappas light, and prevented them from sticking to the pan. The great thing about uttappas is that you can top them with a variety of veggies to suit your taste. I added grated carrot along with tomato-onion-cilantro topping. Beetroot, bell peppers, spinach, corn, cheese can be some other options. You are only limited by your imagination. To go with the uttappas, I made a tomato-onion chutney, which has become a favorite of mine lately, and has replaced the usual coconut-cilantro chutney.


Rava-Oats Uttappa/Uttappam

Ingredients:
2 Cups rava/semolina
1 Cup old fashioned oats
1 1/2 Cup yogurt
Salt to taste
Water as needed

Topping:
Mixture of finely chopped onion, tomato, green chili, chilantro, and grated carrot

  • Roast rava on medium heat until fragrant and just starts to change color. 
  • Roast oats until toasty and fragrant, and grind them to a coarse powder. 
  • Mix roasted rava, oats powder, yogurt, salt, and add enough water to make a pancake like consistency batter. Let the batter soak for about an hour, or hour and a half. 
  • To prepare uttappas, heat a pan on medium-high. Make sure the pan is hot before you make the first uttappa, else it'll stick to the pan, and the rest of them won't come out well either. 
  • Pour a ladleful of batter on the pan and gently spread it in a circular fashion. 
  • Add the topping. 
  • Once the uttappa starts to separate from the pan, and you can see that it's golden brown on one side, turn and cook on the other side. 


South Indian Style Tomato-Onion Chutney

Ingredients:
2 Medium tomatoes - diced
1 Small or 1/2 Large onion - diced
2 Garlic cloves - chopped
7-8 Curry leaves
Handful of cilantro sprigs (optional)
2 Red chilies/1 Teaspoon red chili powder
1 Tablespoon chana daal
1 Tablespoon urad daal
1/2 Teaspoon mustard seeds
Pinch asafoetida
1/2 Teaspoon turmeric powder
Salt to taste
1 Tablespoon oil for tempering

  • Heat oil in a pan, and add mustard seeds. 
  • Once the mustard seeds splutter, add asafoetida, turmeric powder, curry leaves, garlic, chana daal, urad daal, red chilies, and chopped onion. Roast until the onion is translucent and the two daals turn a red hue. 
  • If you are using red chili powder, add it with the tomatoes. 
  • Add tomatoes, and salt to taste, and roast until tomatoes are cooked (~3-4 mins). 
  • Once the above is cool enough to put into a grinder along with cilantro, grind it chunky or smooth  - however you like your chutney. 


Enjoy hot uttappas with the chutney!

What is your 

Thursday, April 17, 2014

One Month and a Change of a Lifetime

I've been on a blogging sabbatical the last two months. It might not have made a dent in the blogosphere; but my life has taken a 180 degree in that time! We welcomed our precious little girl, baby Shreya, into this world one month back. The past month has been a blur of feedings, changing diapers, calming a crying baby, and trying to function without getting much sleep. But it's all worth that gummy smile she's just started to give us!

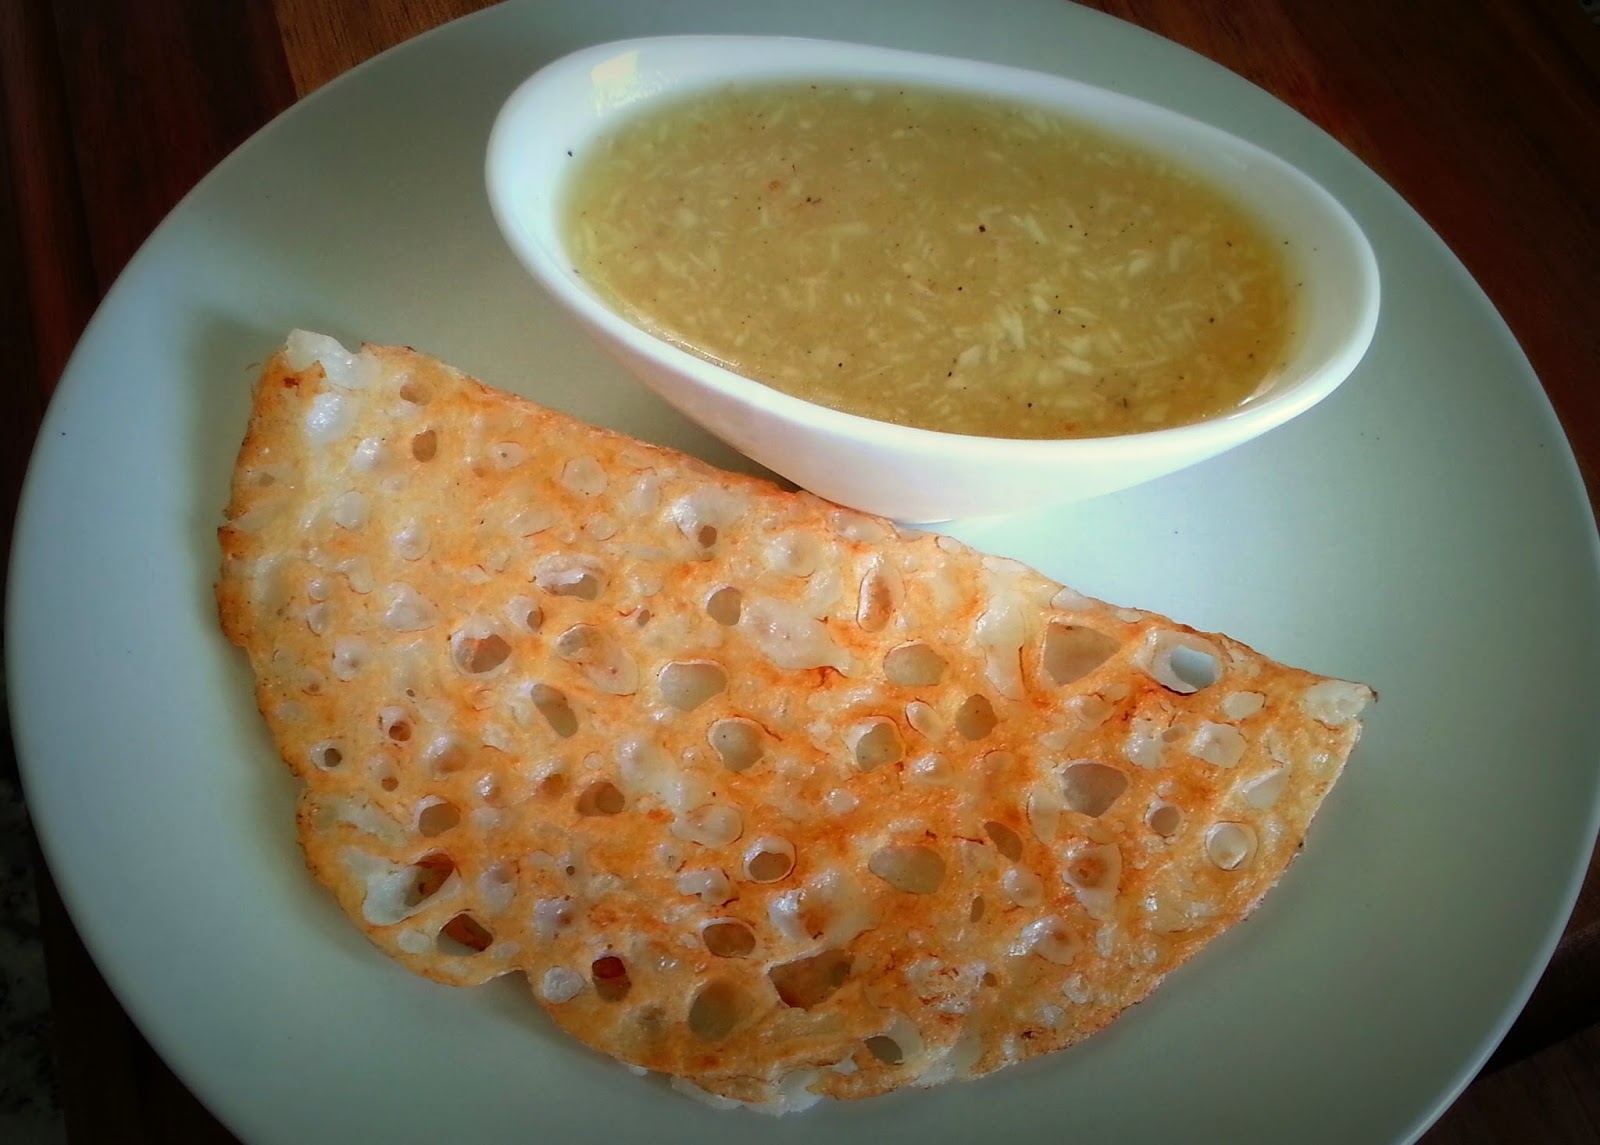
My mom, the cooking enthusiast that she is, informed me to that it's customary to make Ghavan-Ghatle on baby's one month birthday. The sweet cousin of my go-to savory meal choice. She immediately looked up the recipe in her favorite cook book Ruchira. I had planned to make a cake for the little one, but this recipe was far easier to make with a baby in tow. Ghavan is a simple rice flour crepe. Ghatle is a jaggery sweetened coconut concoction to dunk the ghavan. The crepes are soft and spongy and soak up all the sweet goodness of ghatle. I couldn't not love these - they are practically deconstructed Modak!


Ghavan Ghatle

Ghavan Ingredients
1 1/2 Cups rice flour
Water as needed
Couple of pinches salt
Ghee/clarified butter 
  • Mix enough water with rice flour to make a runny, crepe-like batter (~2-2/12 cups). Add a little salt and mix. 
  • Heat a pan on med-high heat. A non-stick pan will work the best. If you're not using a non-stick pan, grease the pan with a little bit of ghee. Make sure the pan is hot before you pour the batter in order to get a porous crepe. 
  • Spread a ladleful of batter on the pan, and let it cook till golden brown. The crepe will separate from the pan once done. Turn and cook on the other side. 

Ghatle Ingredients:
1 1/2 Cups water
3/4 Cup fresh/frozen grated coconut
1/4 Cup jaggery/per liking
1/2 Teaspoon cardamom powder
2 Teaspoons rice flour 
Couple of pinches salt

Heat water on low-med heat, and add jaggery and coconut. Let the jaggery melt. 
Mix rice flour with a little bit of water and add it to the coconut mixture. The rice flour will act as a thickener. 
Add in cardamom powder and salt. Turn off the heat when the mixture thickens slightly. 

Pour warm ghee on top of the ghavan and serve with warm ghatle!

***

I spent the last few months of my pregnancy making stuff for the baby. I couldn't wait to share pictures of some of my craft work - now seems like a good time to post them :). 

Hubby asked me to make a few colorful hats for baby pics. Here are two of my favorites:

A variation of this adorable bobble stitch hat: 


A ladybug hat for my li'l bug: 


I was looking for some ideas to make a crib mobile and stumbled upon this adorable pattern! Some inexpensive felt from recycled material (source - Michaels), cotton and scrap material to stuff, and an easy clip-on mobile crib hanger (source - Babies R Us, ~$10) was all I needed to make this mobile. I drew the patterns on paper first and traced them on felt.


I couldn't get over how cute and easy to make these little toys were and made a few furry friends as well. I used various sources for patterns, many of them pinned on my board. Aren't these guys fun? I still have lots of left-over felt which I plan to use - some day!


One of my dear friends was also due a few weeks after me. She had shared yummy home-cooked food with me in my ninth month. It was wonderful having home made meals without taking any effort on my part :). As a 'thank you', and since we never return empty containers, I stuffed one container with nutritious laddus for her and one with these fellas for her little one on the way. I looked up patterns for finger puppets on google and picked four that I liked the best. 


I hope to be able to blog as and when I can. Until next time!

Monday, May 6, 2013

Brunch In The Backyard

Just when I thought things couldn't get crazier with husband's right foot out of work, it did get crazier. The past week zoomed by with a lot of work in the office and home, and a few events planned for the weekend. I didn't mind the exhaustion <and some failures> because I was immersed in my two favorite activities - cooking and dancing!

I had been planning for the annual salsa cook-off in the office hosted around Cinco De Mayo. My prior recipe for a sweet 'n' savory mango salsa had bagged me two prizes. I went for a much simpler fruit salsa this year. Another sweet and spicy combination of grilled pineapple (used canned sliced pineapple to grill), tomatoes, onions, jalapeno, a little bit of pineapple juice, lime juice, cilantro and salt & sugar to taste. I loved the salsa, even if I say so myself. The competition was quite stiff this year though, and my recipe didn't win. However, I didn't mind losing a bit to other amazing recipes which I got to gorge myself with.

Grilled Pineapple Salsa
Saturday was supposed to be a big day - I had committed to participate in the San Diego Food Bloggers Bake Sale. I knew exactly what I was going to make - Orange and Cranberry bars - perfect for the warm weather. However, the craziness of the week just got to me. I got home on Friday night after dance practice and my legs just refused to move. So like a total loser, I pulled out of the Bake Sale the night before <totally embarrassed> and made a donation to No Kid Hungry, the charity we were raising donations for, instead. Husband consoled me saying it was not worth stretching myself and that the ultimate goal was to raise money anyway. After some reassurance, I decided to take Saturday morning off and slept like a baby.

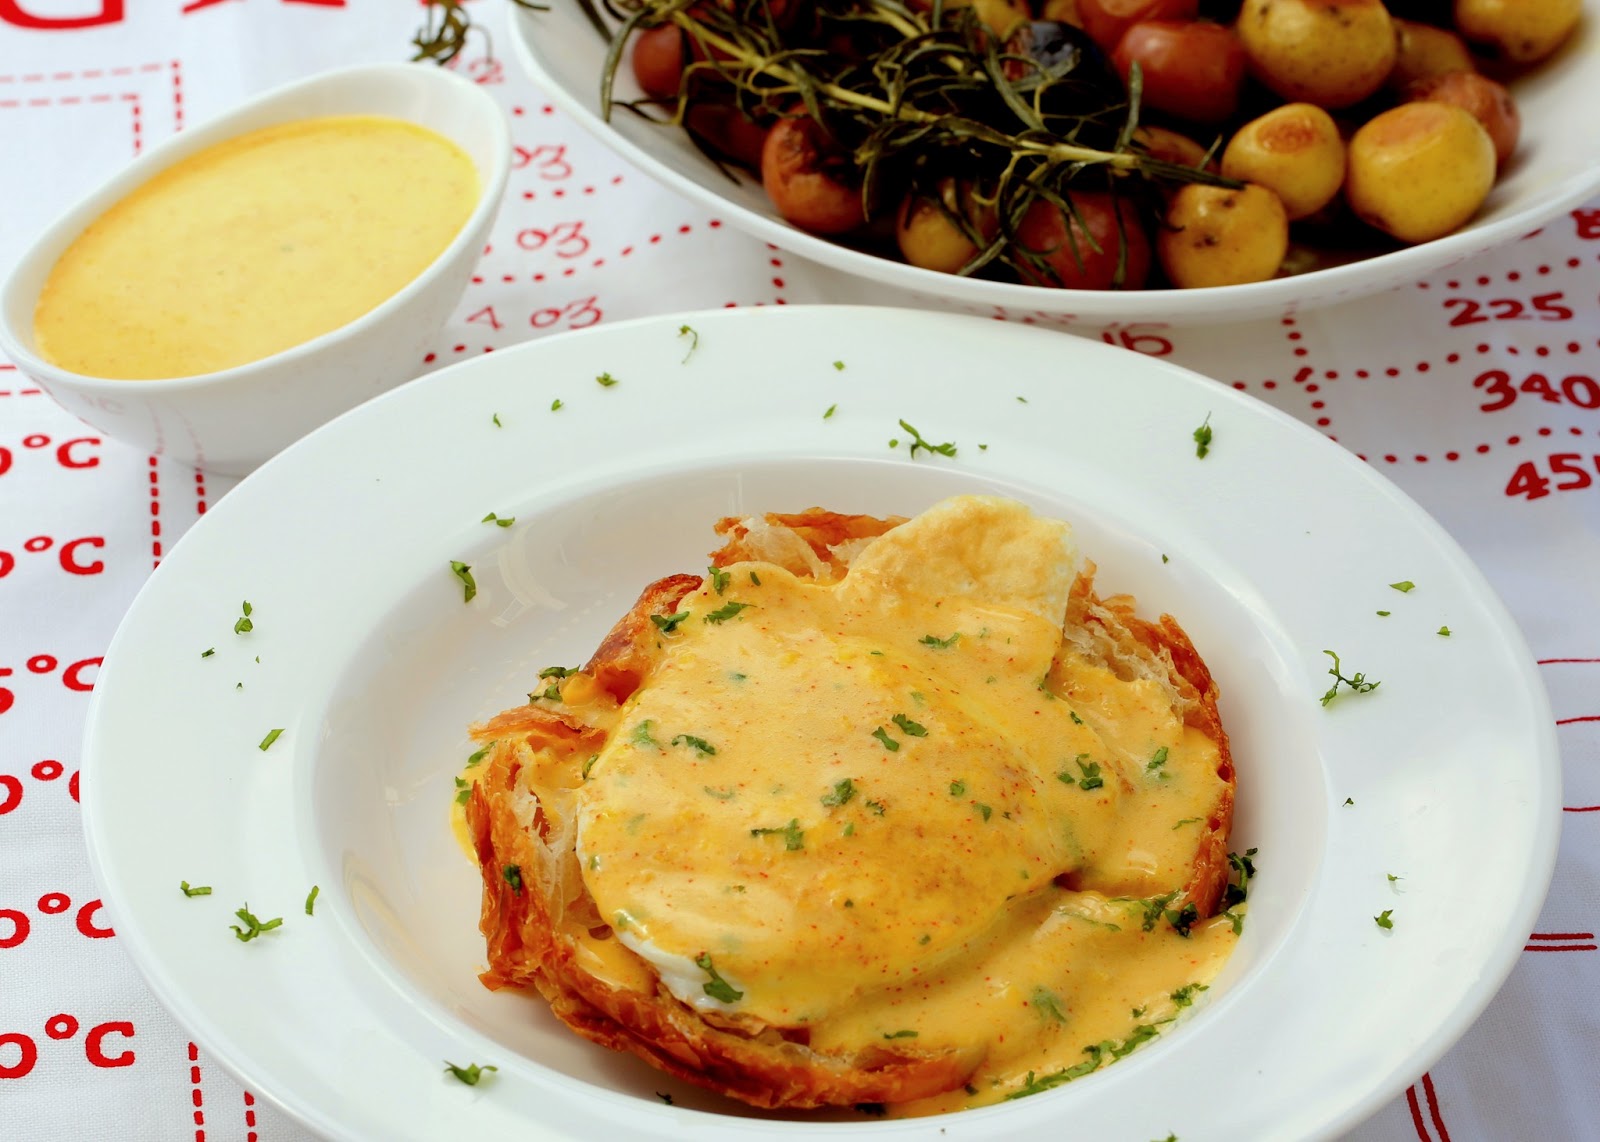
In all this madness, I had totally forgotten that it was one year since we moved into our beautiful house. Husband wished me early on Saturday morning. Oh boy, time really does fly! We are still not done decorating the entire place and we were celebrating one year anniversary already! This called for a celebration (and my being home with the husband after a long long time). I cooked us a nice brunch and enjoyed it out in the yard appreciating our 'home'. And what did I decide to tackle? Eggs with Hollandaise sauce - my idea of a perfectly comforting brunch. If not done right, Hollandaise sauce can turn into a curdled egg mess. But it was worth the risk given the occasion, so I went ahead with the experiment. The sauce turned out perfect on my very first try. It was enough to undo the prior failures. The basic recipe I read on AllRecipes app barely had any details on the method. But thanks to excessive viewing of paying attention to Food Network, I was able to make some modifications, add a couple of ingredients, and work through the sauce.

Sunny-side up egg on a croissant with made from scratch Hollandaise sauce
Hollandaise Sauce 

Ingredients:
3 Egg yolks
1/4 Cup melted butter
1 Tablespoon hot water
2 Teaspoons lemon juice
1/4 Teaspoon garlic powder
Paprika to taste
Salt to taste
Cilantro for garnishing - chopped finely.

  • Simmer water in a double boiler. The water shouldn't be boiling vigorously, you want to cook the eggs very slowly. Make the water doesn't touch the pot above. 
  • Whisk egg yolks in the top pot. Keep whisking vigorously without stopping throughout the process else you'll end up with scrambled eggs. Keep a hot pan holder on the side in case you need to lift the pot from heat. 
  • Once the egg yolks thicken slightly and change color (all this happens very fast), take the pot off heat and add melted butter slowly whisking all the while. Put it back on the boiler and stir in hot water. 
  • Keep stirring the sauce, lifting the pot if the heat is too high, until the sauce thickens and becomes frothy and light (2-3 minutes). Take the sauce off the heat and whisk in lemon juice, garlic powder, paprika and salt. Sprinkle some chopped cilantro. 
  • The sauce thickens even more as it starts to cool off. Serve a poached or sunny-side egg on English muffin or croissant and drizzle the sauce generously on top. Enjoy!

Notes:

  • Don't have a double boiler? No worries - I don't either. Use two pots from your kitchen that sit on top of each other leaving room for water in between. Use stainless steel for the top pot. 
  • If you end up with some lumps in the sauce even after all that whisking giving you cramps, just strain the sauce to remove them.
  • If the sauce gets too thick after it cools down, simply whisk in a little bit of hot water until you get the desired consistency. 

On the side, I pan roasted a colorful combination of baby potatoes with fresh rosemary (from the garden), lots of garlic, paprika and salt. Hubby's favorite recipe since I made it with the first sprig of rosemary.


Things could only get better after a brunch like that. I had a dance performance yesterday. I was nervous about this one - we learned the dance in exactly 3 sessions. The dance came out really well though, and it was one of the best experiences I had learning a piece. Here's a picture from the show - I'm the girl in the center :). All the rush came to an end with the show (until it starts all over again).


Saturday, February 23, 2013

Back To The Kitchen

It's been 50 days to be specific since this blog saw the light of day; and my cooking has been more intermittent than ever all this while. What have I been up to? Mostly been buried under piles of work and other commitments. But things are starting to taper off (for now =/) and I'm back in the kitchen cooking hearty meals every night. Ah, it feels so good to be eating fresh meals and experimenting with different foods again!

One of the things I like to try is substituting ingredients in traditional Indian recipes with the groceries available here. We have a steady supply of zucchinis all year around and I try to use it in as many ways as I can - in parathas, cutlets (the Indian kind ;), or sambar. Zucchini lends itself to any flavor combination since it doesn't have any strong taste on its own. Yesterday, I used zucchini in a recipe that calls for cucumber - savory Ghavan. Ghavan is a Maharashtrian style instant Dosa commonly prepared in the coastal region of Konkan. It's a popular breakfast/brunch item that can be made sweet or savory. My mom always made both varieties at the same time since I preferred the sweet version while my sister liked the savory kind. But the savory ghavans are much quicker to make. They are simple crepes made with a basic batter of rice flour and yogurt/buttermilk. My grandma used to add grated cucumber for some body and texture in the savory ghavans. Zucchini seemed like a logical choice to replace cucumbers and they worked out perfectly. Plus a dose of nutritional veggies never hurts!


Zucchini Ghavan (Maharashtrian Style Instant Dosa)

Ingredients:
3/4 Cup grated zucchini
1 1/2 Cups rice flour
1 Cup buttermilk or 1/2 cup yogurt thinned with water
1 Large green chili (or more if you like) - chopped
Handful of cilantro - chopped
Salt to taste
Oil for greasing the pan

  • Combine rice flour and buttermilk well until all the lumps dissolve.
  • Add zucchini, chopped chili, chopped cilantro and salt to taste and mix well. The batter should not be too runny or too thick - somewhat like dosa batter. You can add some water to get the right consistency. Let the batter sit for 15-20 mins. 
  • Heat a pan on medium-high flame. Drizzle a little bit of oil, pour a ladleful of batter and spread in a circular motion to make a crepe slightly thicker than dosa. 
  • Cover the pan and let the ghavan cook on one side for a couple of mins until golden brown. Remove cover and cook the ghavan on the other side the same way. 


I made my favorite peanut-garlic chutney to go with these (recipe will be up soon) yummy ghavans. But a simple coconut chutney or cilantro chutney is perfect.

Monday, October 15, 2012

Instant Idli

I have always loved having soft,fluffy idlis dunked in sambar and chutney. It must be all those Sundays spent as a kid eating a brunch of idlis while watching my favorite 'Potli Babaki Kahani' or some other show that makes it my favorite Sunday meal. But to be honest, I don't always have the patience to soak rice and urad daal, grind and ferment the batter in advance. As a quick and delicious alternative, I make rava idlis. Rava idlis, as the name suggests, are made completely out of rava. There's no soaking and fermenting for hours required; but you'll be surprised how pillowy soft these idlis turn out. Yogurt provides that slight tang you'd get from fermenting. The best part is, there's lots of flavor in the idlis themselves, so you can do with a quick chutney on the side. You can add all sorts of stuff the the batter - I usually go with peas and onion. Grated carrots go really well also - they add flavor as well as some color.
I made rava idlis for a potluck at my friend's yesterday. The picture was taken under very low light with my phone, hence the poor quality.

The recipe below makes enough idlis for 2 people.


Rava Idli

Ingredients:
2 Teaspoons oil
1 Tablespoon urad daal
1 Teaspoon grated ginger
2 Small green chilies - finely chopped
1/2 Small onion - finely chopped
1 Spring curry leaves - roughly chopped (add cilantro alternatively)
Handful of green peas
1 Cup rava/semolina
1 Cup yogurt
A pinch baking soda (optional)
Salt to taste
Water as needed.

  • Heat oil in a wok/kadhai and roast urad daal until golden brown.
  • Add ginger, chilies, curry leaves, peas and onion and saute for a few seconds.
  • Add rava and roast, stirring constantly, on medium heat  until the rava turns a darker hue and becomes fragrant (~10 mins). The key to good, soft idlis is roasting the rava well. Don't keep the heat too high as you don't want it to burn.
  • Take it off the heat and mix with yogurt. Add water little by little until you have a thick batter. Rava will soak up water and puff up. Add salt to taste and baking soda.
  • Let the batter rest for 45 mins to an hour.
  • Make idlis in an idli patra just like you would the regular idlis. 


Enjoy with your favorite chutney or sambar. 

Friday, October 12, 2012

Fall Flavors

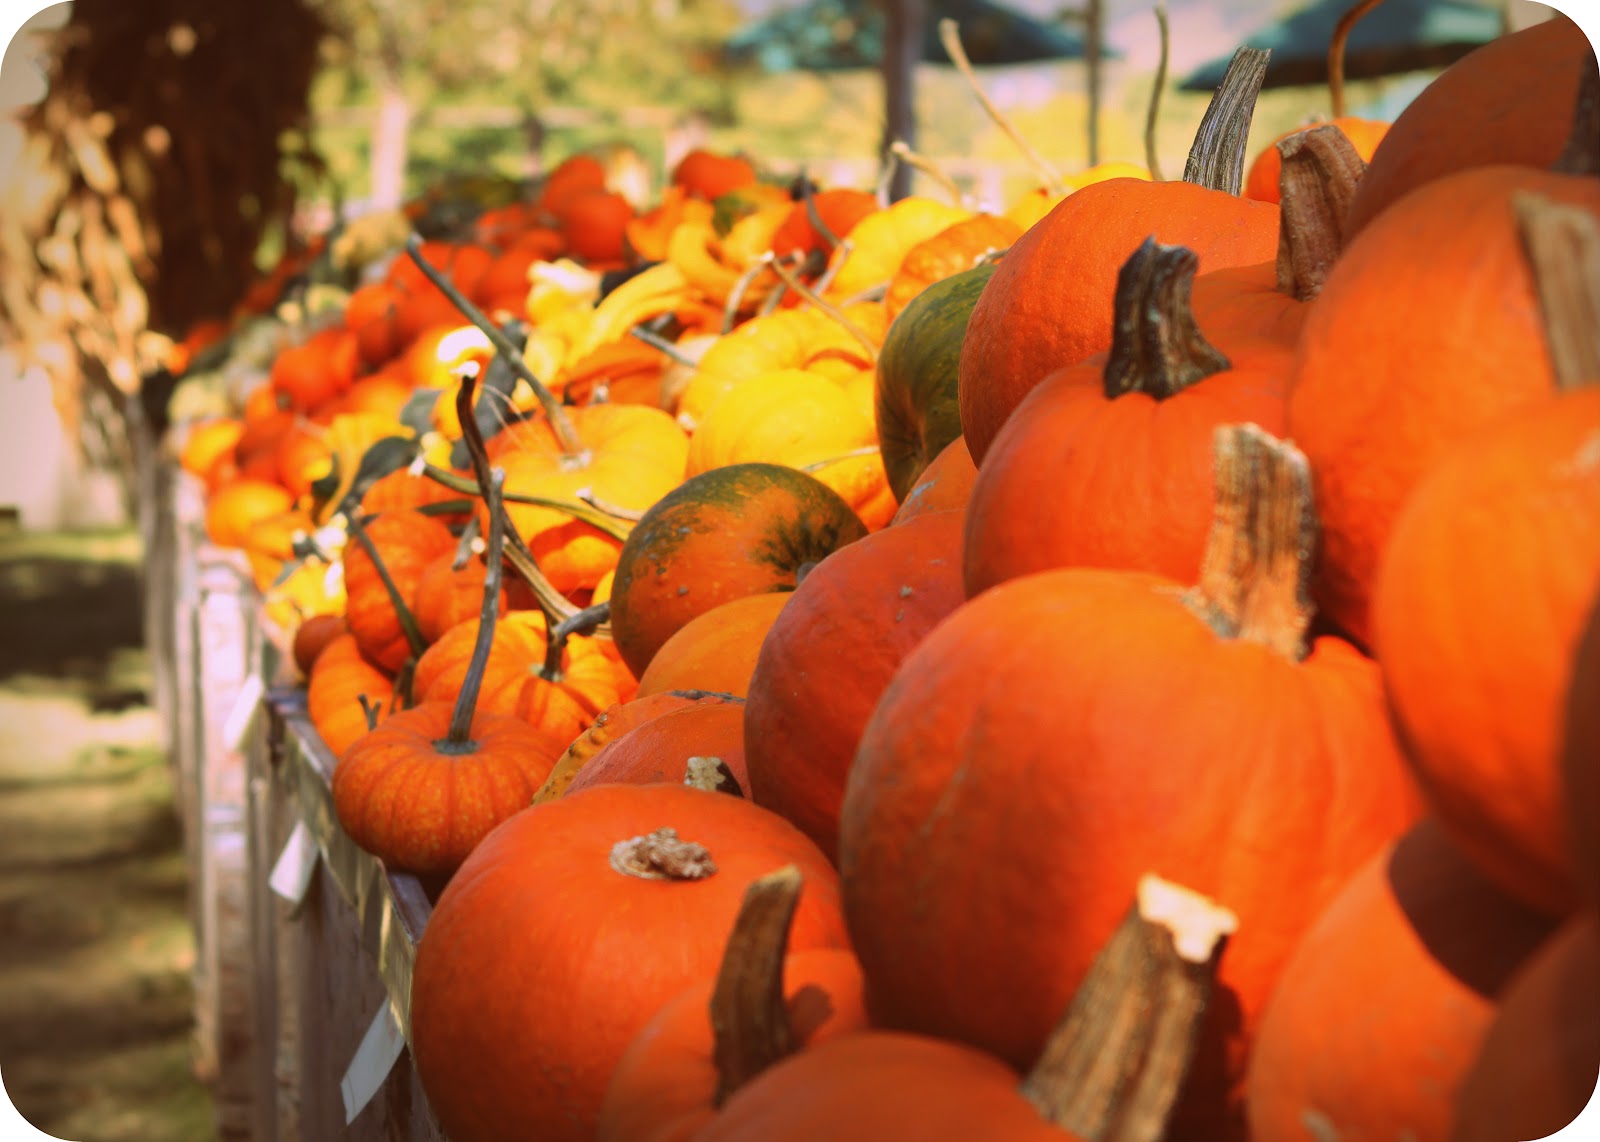
On a recent trip up north to Pismo Beach, our hotel manager informed us about this lovely farm called Avila Valley Barn. I am so glad we shifted our other plans to visit this place! It wasn't just a farm - they had a market full of fresh produce and a petting zoo with cute farm animals. The market was teeming with the season's best - pumpkins of every size, color and shape imaginable. Although we had a whole day left to roam around, I couldn't help but pick up a few veggies and a gorgeous plump sugar pumpkin! After getting home, I simply roasted and pureed the pumpkin. This way I can use it for different recipes. Time for some fall cooking!

Pumpkins at Avila Valley Barn
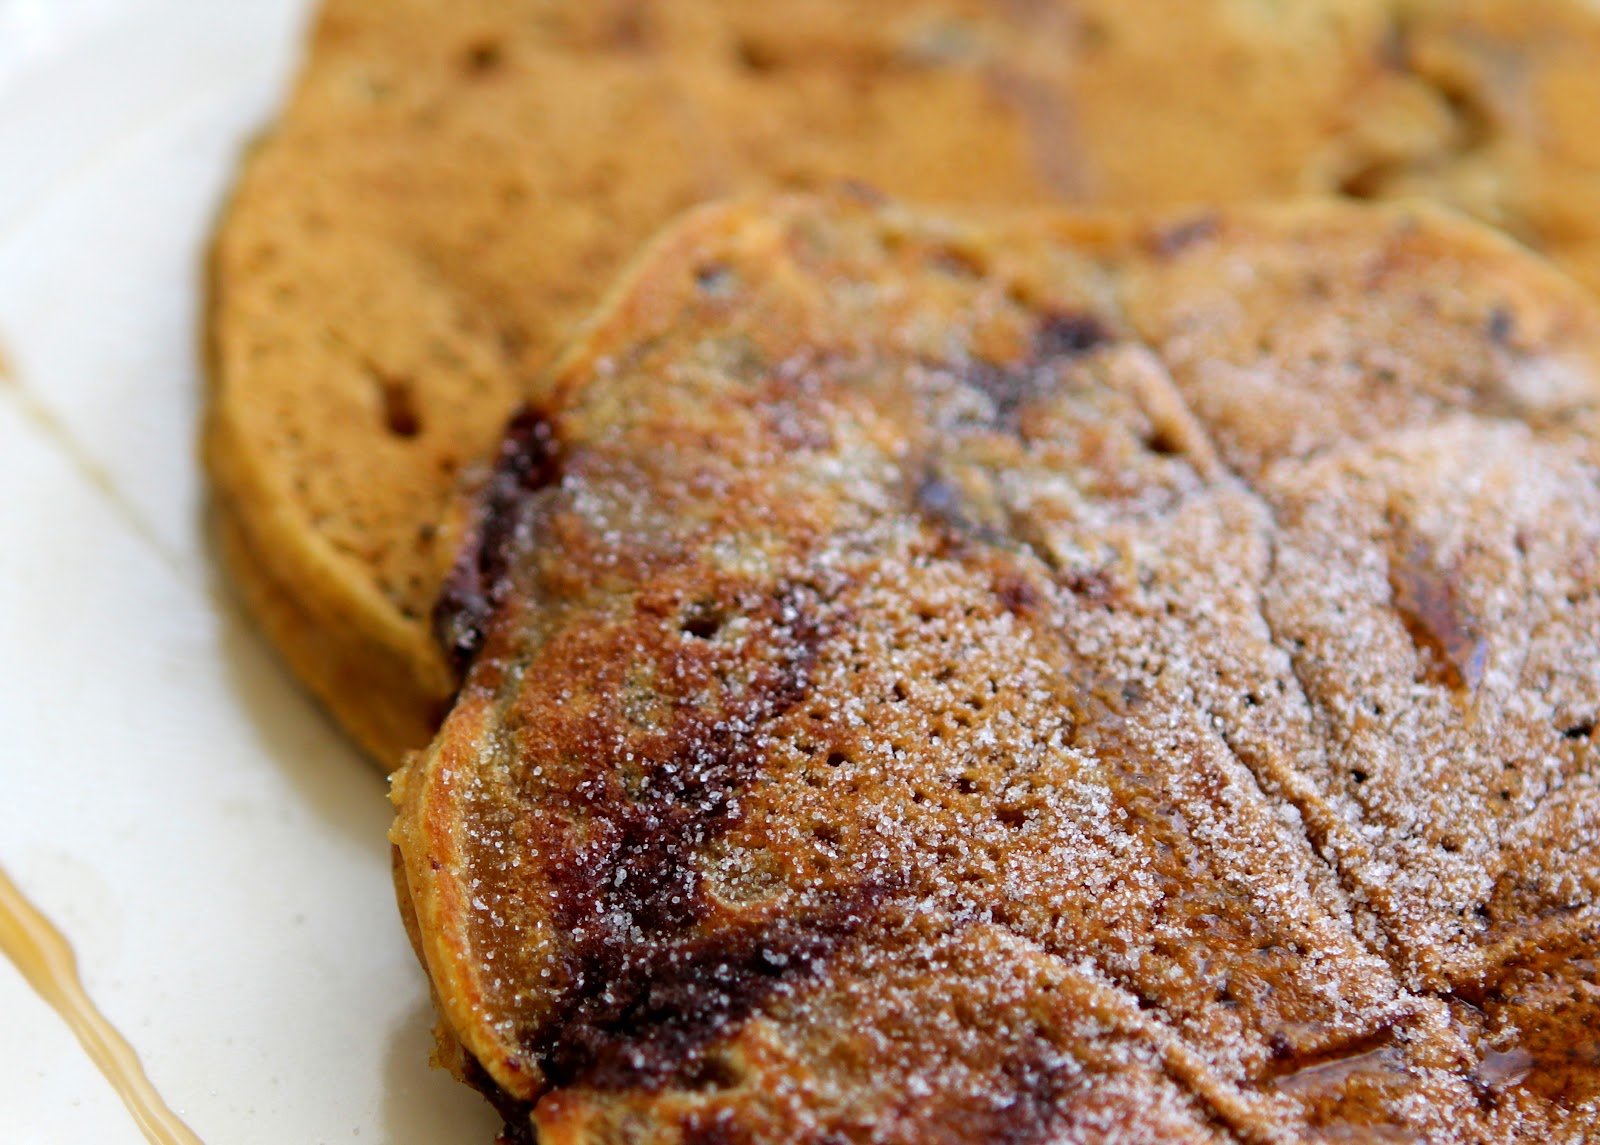
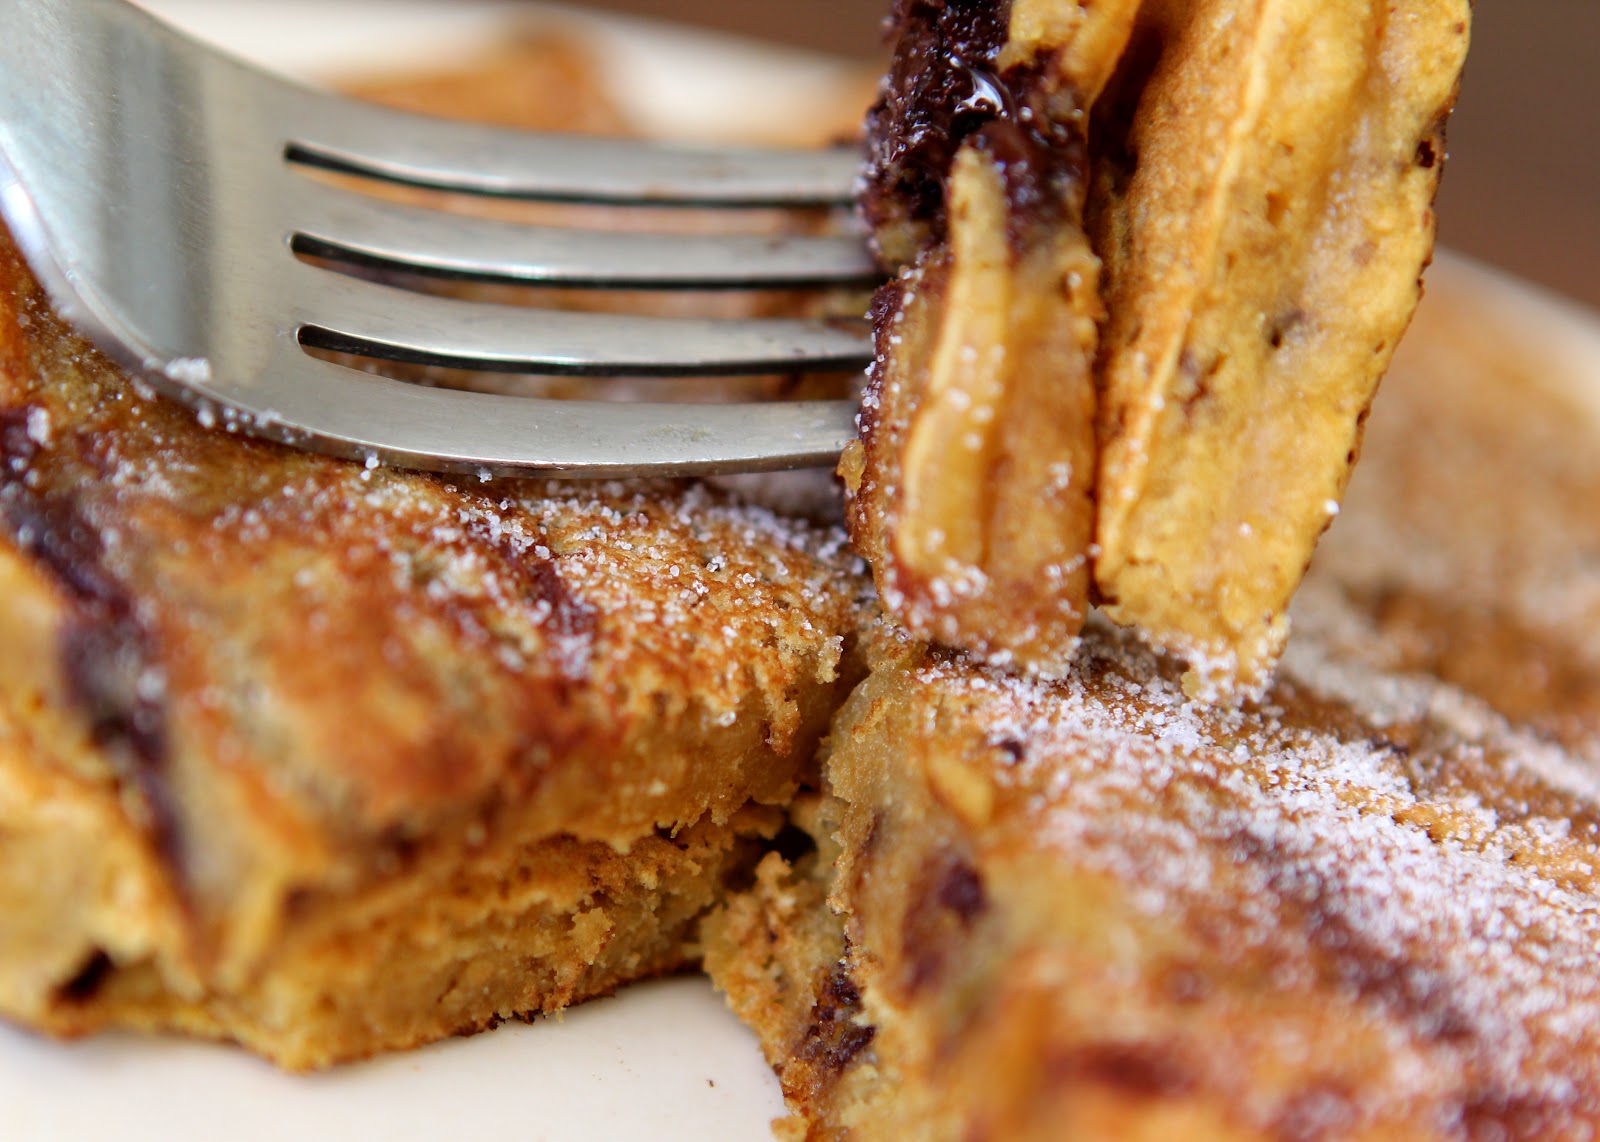
Some warm, fluffy pancakes seemed like the perfect dish to start off the season. If I had to sum up fall flavors in one dish, I would make these pancakes - ultimately comforting pumpkin-spice pancakes with some chocolate chip goodness! I used 100% whole wheat flour and used no eggs. The pancakes turned out pillowy soft with the help of pumpkin puree and milk. The chocolate in the batter melted as the pancakes cooked and oozed out of each bite. Super delicious. These pancakes didn't even need much syrup to go with them. Just sprinkle some powdered sugar and let some butter melt on top. This is the kind of breakfast you should be eating on a fall weekend! 

Some powdered sugar on top!

Pumpkin Spice - Chocolate Pancakes

Ingredients:
1 Cup whole wheat flour
3/4 Cup pumpkin puree from sugar pumpkin
1 Cup milk
1/2 Teaspoon baking soda
1/4 Cup brown sugar (adjust depending on the sweetness of pumpkin puree)
2 Tablespoons melted butter
1/4 Teaspoon cinnamon powder
A hint of nutmeg powder
1 Oz good quality semi-sweet chocolate chips/chunks

Making pumpkin puree:
Preheat oven to 350F.
Cut the pumpkin in half and remove the strings and seeds (don't throw the seeds away - you can roast them for a healthy snack :).
Roast the pumpkin for about 45 mins or until the flesh is fork tender. You can brush the inside of pumpkin with some butter to lock in moisture and add flavor. I let it roast just as is.
Cool the pumpkin, scoop out the flesh (which should be really easy after roasting it) and puree in the food processor. You may need to add a little bit of water to help the processor, but don't make it too thin.

If you don't want to go through the trouble of making your own puree, simply use canned one. But trust me, the fresh puree tastes so much better :).

Making the pancakes:
Mix the dry ingredients - whole wheat flour, baking soda, sugar, chocolate chunks, cinnamon and nutmeg in a bowl.
Add the wet ingredients - pumpkin puree, milk and butter, and mix well.
Heat a pan on medium and pour a ladleful of the batter. Cook on each side for a couple of minutes or until each side turns a light brown.

Enjoy the pancakes with some powdered sugar, butter or maple syrup!


I'm submitting this recipe to B-O-O-O-O Halloween Event @ AnuzHealthyKitchen.


Wednesday, June 27, 2012

Going Green With Dosa

Time flies so quickly when you are having fun. I can't believe all the excitement of having my parents over is about to come to an end already. My initial plan was to post all the dishes we prepared; but there was only so much time to make the most of their stay. It's been a short, but blissful month enjoying the new house, the garden, beautiful San Diego weather and fresh, tasty meals with them (I say fresh because who has time to prepare every meal from scratch on a daily basis?). I cooked quite a few elaborate meals for mom and dad.  But I've been after all the simple meals I could think of now that I cook for 4 people twice a day. Dishes that spare me time to sit and chit-chat with them instead of toiling away in the kitchen. And you can't talk about simple meals without mentioning the ever-loved dosas! Or all the cousins of the batter. The great thing about dosas is, you can make a large batch of batter and you're ready to feed an army. Nobody in my house minds multiple dosa meals. I just turn them into uttapams or stuff different chutneys inside for a new look and taste each time. The traditional rice batter doesn't fit my mom's diet though. But really, I can't give up on such a great dinner option. I made Moong bean dosas the other day to keep it healthy and mom-dad loved the simple preparation. Mom makes a batter with mixed beans and lentils sometimes. However, moong beans alone make extremely flavorful dosas. The vibrant green color doesn't get muddled with other ingredients either. They are not as crispy as the real thing, but so tasty, you won't miss the crunch. Dad declared he would switch to this dosa from now on. 


Moong Bean Dosas

Ingredients:
1 1/2 Cups moong beans
1/4 Cup rice (to add some crispiness)
Handful of washed cilantro
2-3 Small (Thai) green chilies
2-3 Garlic cloves
Salt to taste
Water as needed
Oil as needed
  • Soak moong and rice in water overnight. The beans should almost double in size. I let the beans sprout by taking out excess water and letting them soak for additional few hours. 
  • Grind all the ingredients in a mixer/food processor adding water little by little until you have a batter slightly thicker than dosa batter. Cilantro adds flavor, nutrition, and helps maintain that beautiful green color. 
  • Heat a pan on medium-high heat, grease it lightly, pour a ladleful of batter at the center and spread with the back of the ladle, not too thin. Cook until brown on the bottom. Don't coax the dosa until it's nicely roasted on one side - it'll start separating from the pan by itself when it's ready. Flip and cook until you see brown spots on the inside. 
  • I learned a trick from one of my South Indian family friends - cut an onion in half and dip it in oil. Then rub the oil on the pan with the onion. This ensures spreading oil evenly while using very little. It also adds slight onion flavor to the dosa. 

We enjoyed these yummy dosas with a chatpati chutney I recently found at the Indian store - Nirav's Rajwadi Sandwich Chutney. It's like a mango pickle meets cilantro chutney meets tamarind chutney goodness. They call it a sandwich chutney, but we've been eating it with anything and everything. 

Sending this to Show Me Your HITS - Legumes and Lentils Event, event by Sangeetha's Kitchen.

Friday, June 1, 2012

A Sweet Start - Broken Wheat Porridge


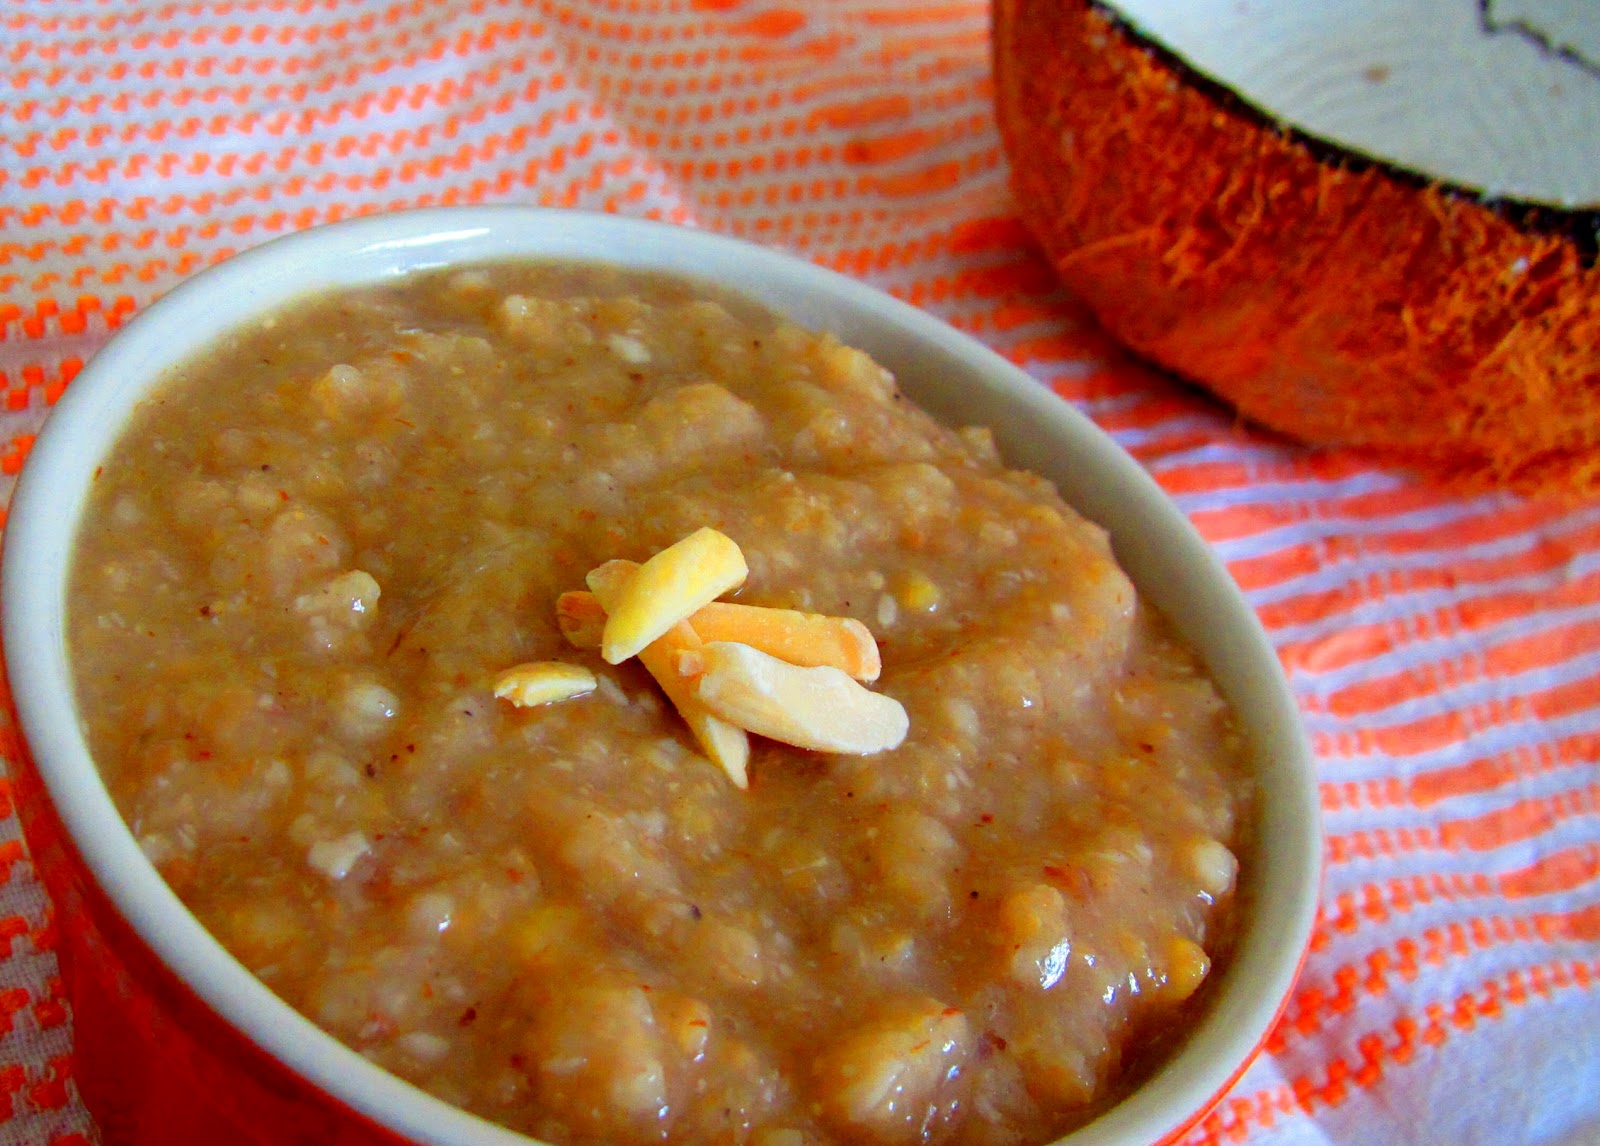
Desserts with coconut evoke nostalgic memories of some of the most exciting events in my life. We have a custom of breaking coconut at the start of any new venture or when inaugurating a new purchase (something really special - we don't break coconut before wearing a new dress, of course =D). The coconut would then be offered to God and turned into a delicious dessert - a barfi or sweet coconut rice, laddu or kheer. All these tasty treats remind me of my first bike, first computer, getting our first car and all the other milestones! The custom is symbolic of breaking all obstacles and achieving the sweet outcome. I love these small but meaningful traditions. Of course, I didn't miss out on this tradition when we entered a very big phase in our lives of home ownership recently. It's been a little under a month since we moved to our home sweet home! I've been caught in a whirlwind of activities - moving can be stressful. Hence the long absence from the blogging world. But I made sure to take pictures of the dessert I prepared from the coconut we offered while entering the house.


With my kitchen barely set up, I wanted to make something simple and went to one of my childhood favorites - Gavhachi Kheer or Broken Wheat Porridge. Gavhachi kheer is a very down-home, comforting, non-glorious yet delicious dessert. I love how it's no-fuss and simple to make. As long as you have good ingredients, there's little that can go wrong in the preparation. It's great as a dessert for any meal and one of the few Indian sweets that is great for breakfast.


Gavhachi Kheer/ Broken Wheat Porridge

Ingredients:
1 Cup broken wheat (or whole wheat)
1 Cup good jaggery - grated
A little less than 1/2 cup fresh grated coconut

1 Tablespoon Ghee/clarified butter
1 Tablespoon chopped dry fruits such as cashews or almonds

1/2 Teaspoon cardamom powder
3-4 Cups water or as needed

  • Soak broken wheat for 3-4 hours. This helps it cook fast. If you have whole wheat instead, soak it a bit longer and pulse in the food processor just enough so that it's coarse. 
  • Heat ghee in a pressure cooker and roast the dry fruits until golden. 
  • Add broken wheat and toast it for a couple of minutes. Then add jaggery, coconut, cardamom powder, and mix everything well. 
  • Add water and pressure cook with 2 whistles. The wheat almost doubles in size after cooking. There should be enough water so that you get a nice thick consistency. This kheer is not like the milk-based thin kheers. 
  • Serve with some ghee and more dry fruits on top.

Just 4 days back, my parents flew from India to visit us in the new house! Having a new 'field' to play around, I've been cooking my heart out under my mom's expert guidance. I'll make a point to post some of those recipes as time permits.

Have a good weekend, everyone!

Wednesday, October 5, 2011

Quick Corn Usal

Today, I'm going to leave you with a quick and easy recipe for a great snack. That's it. No blabber. And I will more than make-up for the void of stories very soon, I promise.


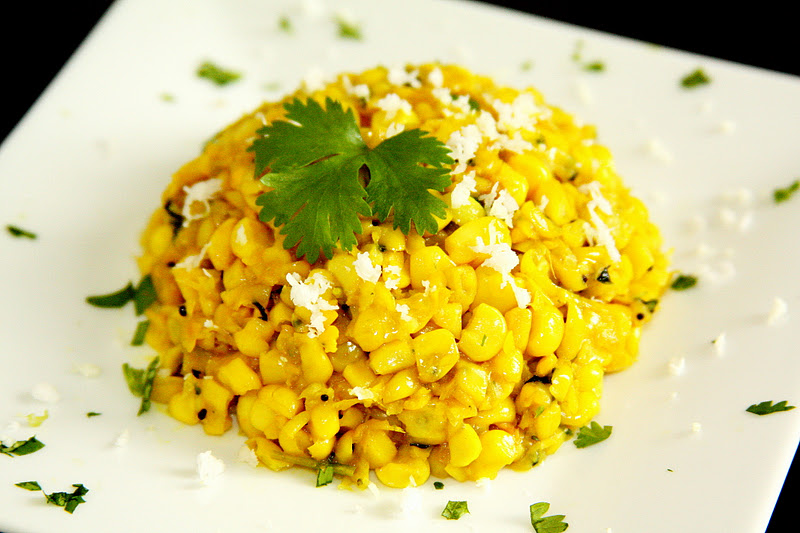
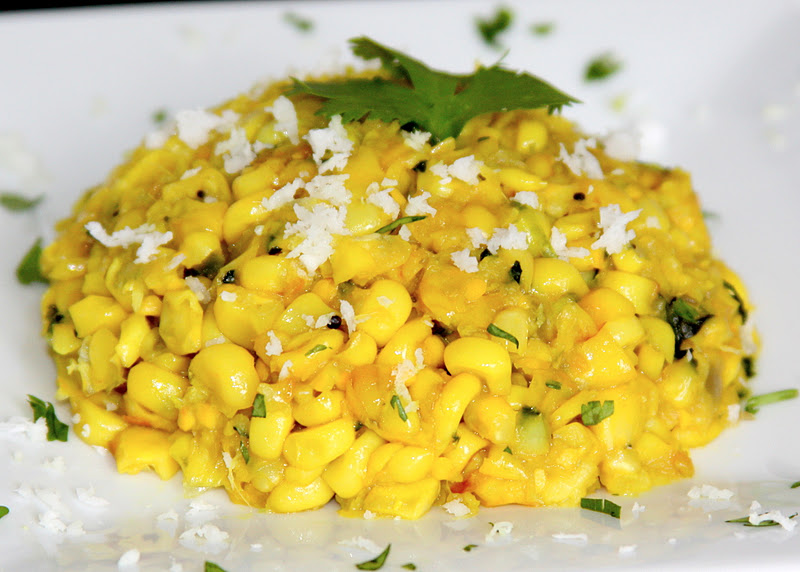
Usal is a generic name for spicy curried or sauteed beans or sprouts. Corn comes under the grain category, but I guess this dish is called Usal because of the other common ingredients used in the preparation. It's a popular Maharashtrian dish prepared especially in early winter when corn is bountiful. The cooking process enhances the sweetness of corn, and is wonderfully balanced by the touch of spiciness. A dish of warm savory corn usal is very comforting on balmy fall evenings.


Corn Usal/Kanasachi Usal

2 Large sweet corn cobs/ 1 packet frozen corn
1/2 Small onion - finely chopped
1 Serrano chili
2-3 Garlic cloves
1/2 Inch fresh ginger
1 Tablespoon grated coconut
1/3 Teaspoon mustard seeds
1/4 Teaspoon turmeric
A pinch of asafoetida
Salt to taste
Chopped cilantro for garnishing
Lemon juice
  • Husk and clean the corn. Hold the stem in your hand, rest the other end on the cutting board and cut off the kernels with a sharp knife. Or, just open a bag of thawed frozen corn :D.  
  • Run your knife through the kernels to give them a rough chop. The starchy juice that comes out helps it cook well, bring the dish together and give it that wonderful caramelization. You can also give the kernels a quick pulse in the food processor. 
  • Grind chili, garlic and ginger to a paste.
  • Heat a couple of teaspoons of oil in a wok/kadhai. Add mustard seeds and let them splutter. Then add asafoetida, turmeric, onion and chili-ginger-garlic paste and saute for a a couple of minutes.
  • Add corn, grated coconut and salt and mix everything well. If the corn is dry, you can add a splash of water. 
  • Cover and cook, checking and stirring occasionally, on medium heat. 
  • The dish is done when the corn is cooked completely, most of the water content will evaporate(8-10 minutes). Don't worry if the corn gets slightly brown and caramelized. This is the tastiest part of the dish! 
  • Garnish with lots of chopped cilantro, some lemon juice and more grated coconut if you like. 

Monday, August 8, 2011

Layers of Happiness

I've always been in love with trifles. Growing up in a traditional Indian family from a small town, I didn't know what the classic trifle really was until I moved to the US. We did, however, have our own versions. The heavenly Cocktail with layers of fruits, cake, ice-cream and jelly at the Imperial Ice-cream parlor or my Aunt's version with fruits, custard and tutti-frutti cake; scooping a bit from every layer of deliciousness with a tall spoon and stuffing my face with that big bite put a huge smile on my face. I especially looked forward to the ritualistic summer Sunday visits to Imperial and couldn't wait to hold that chilled glass in my hands. The star fruit in India was mango of course, but strawberries were a rare addition when available. The burst of fresh, juicy fruits with lusciously creamy ice-cream or custard was party in my mouth.

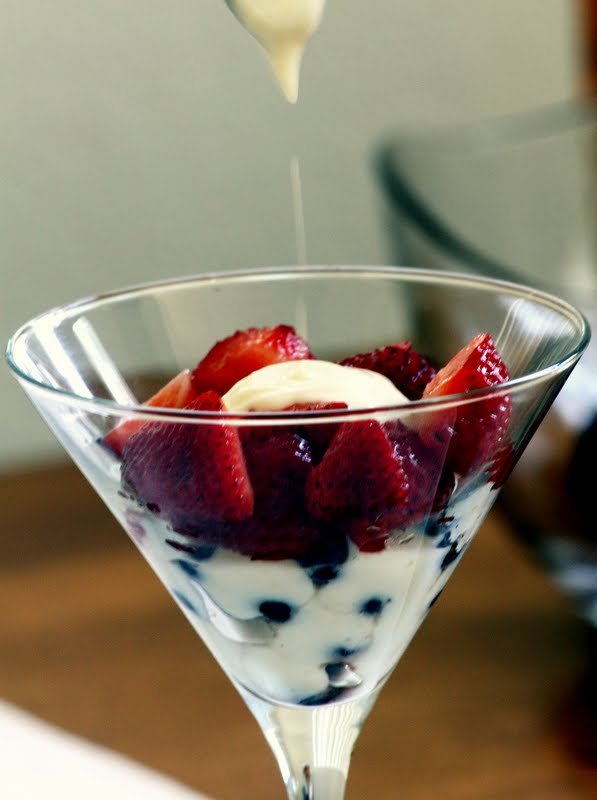
With those pictures from childhood in mind, I decided to make a trifle with the gorgeous seasonal organic berries from the Farmer's Market this weekend. I should confess that I stretched the definition a bit and took the liberty of calling my no-cake, no whipped cream dessert 'trifle'. Why get caught up in terminology though, when the end product is the same satisfying layers of succulent fruits and a creamy component no short on taste? The strawberries, blueberries and blackberries were so fresh and juicy that I wanted them to stand up for themselves. A little bit of sugar to enhance their sweetness, some lowfat yogurt to keep it nutritious, and mere 15-20 minutes of prep time, and I was already indulging in a refreshing summer creation. Some lemon zest in the yogurt added a pop of flavor and brightened the entire dish. With a busy schedule on Sunday and a diminishing pantry supply, this trifle turned into my Sunday Supper. I wasn't complaing after enjoying a large glassful of this on a sweltering August afternoon! 


Triple Berry Trifle with Honey-Lemon Yogurt

Ingredients:
2 Cups mixed berries - You can use your favorite kind, I used blueberries, blackberries & strawberries
2 Tablespoons sugar
1 Cup yogurt
1 Lemon
1 Tablespoon honey 
  • Clean the berries. Cut the strawberries into fours. Sprinkle sugar on the berries and keep aside.
  • Strain the yogurt to thicken it slightly. Beat it with a spoon so it's smooth and creamy.
  • Add zest of one large lemon and a tablespoon of honey to the yogurt and mix well. Honey was great to sweeten the yogurt slightly and mixed in easily.
  • To assemble it, add a few blueberries to the bottom of your glass/cup, add a layer of the yogurt. Repeat this with strawberries and then blackberries. You can layer them in any order you like, but the result is the same delicious trifle! 
I would've liked the yogurt to be thicker so it wouldn't have seeped into the fruits so much. Straining it a little more would've helped, but I could hardly wait to eat. I was still very happy with the end result and will be making this more often. It'll be a great dessert to serve at summer parties as you can make it well in advance and refrigerate. The individual personal cups/glasses make it more fun.

I still had two baskets of Strawberries left and hubby demanded a jam! Stay tuned for a great jam recipe with a twist!

Wednesday, April 20, 2011

A Healthy Way To Treat Yourself

As I gear up for the upcoming bake sale, I am making a mental note of ingredients I want to use to give my baked goodies an Indian twist. Baking technique is not used in Indian cooking; at least not the kind known to people in the U.S. There is, however, one thing that popped up in my head while thinking hard about Indian baked items. My childhood favorite - Rava Cake! Ahh, I can still smell the wonderful aroma filled in the entire house when my mom treated us to this tasty snack. You may say 'healthy' and 'treats' just don't go together, but I can guarantee you, this cake doesn't have half the calories of the regular cake.

It's a simple recipe you will remember off the top of your head. I took it up a notch by adding a subtle yet exciting flavor to it - Gulkand (rose petals preserve)! This addition took the cake to a whole new level while maintaining the very essence of the cake - being completely Indian! This cake is not as fluffy as the all purpose flour cakes but is very moist and the texture of rava makes it interesting to eat.

Gulkand Rava Cake with edible rose buds

Gulkand Rava Cake/Rose Petal Preserve Semolina Cake 

Ingredients:
1 Cup Rava (Semolina)
1 Cup yogurt 
1 Cup Sugar
1/2 Cup Milk
1.5-2 Tablespoons gulkand
1/2 Teaspoon cardamom powder (as in any Indian sweets)
1/4 Teaspoon baking soda
Pinch of salt
  • Mix rava, yogurt, sugar, gulkand, cardamom powder, baking soda and salt. Add half of the milk and mix well. The batter should be runny like the usual cake batter. Add the remaining milk as needed. 
  • Keep the batter aside for 2-3 hours to soak. Rava will puff up slightly and become soft in this process. Make sure the gulkand is broken up and mixed well.
  • Pour the batter in a greased baking pan.
  • Preheat cake to 300F and bake the cake for 25-30 minute or until the sides turn brown. You should make sure the cake is baked by poking a knife. If it comes out clean, it's done. 
  • Let the cake cool, pull it from the sides using a knife and it should come out very easily if you flip it on a plate. Cut the cake in small pieces. I decorate the cake with edible petals and buds (completely edible - a friend gave them to me to flavor green tea). 
You can add dry fruits to the cake batter for a tasty surprise in a bite.

Sunday, March 20, 2011

What's In Your Pantry?


Into the oven

Ready to eat!

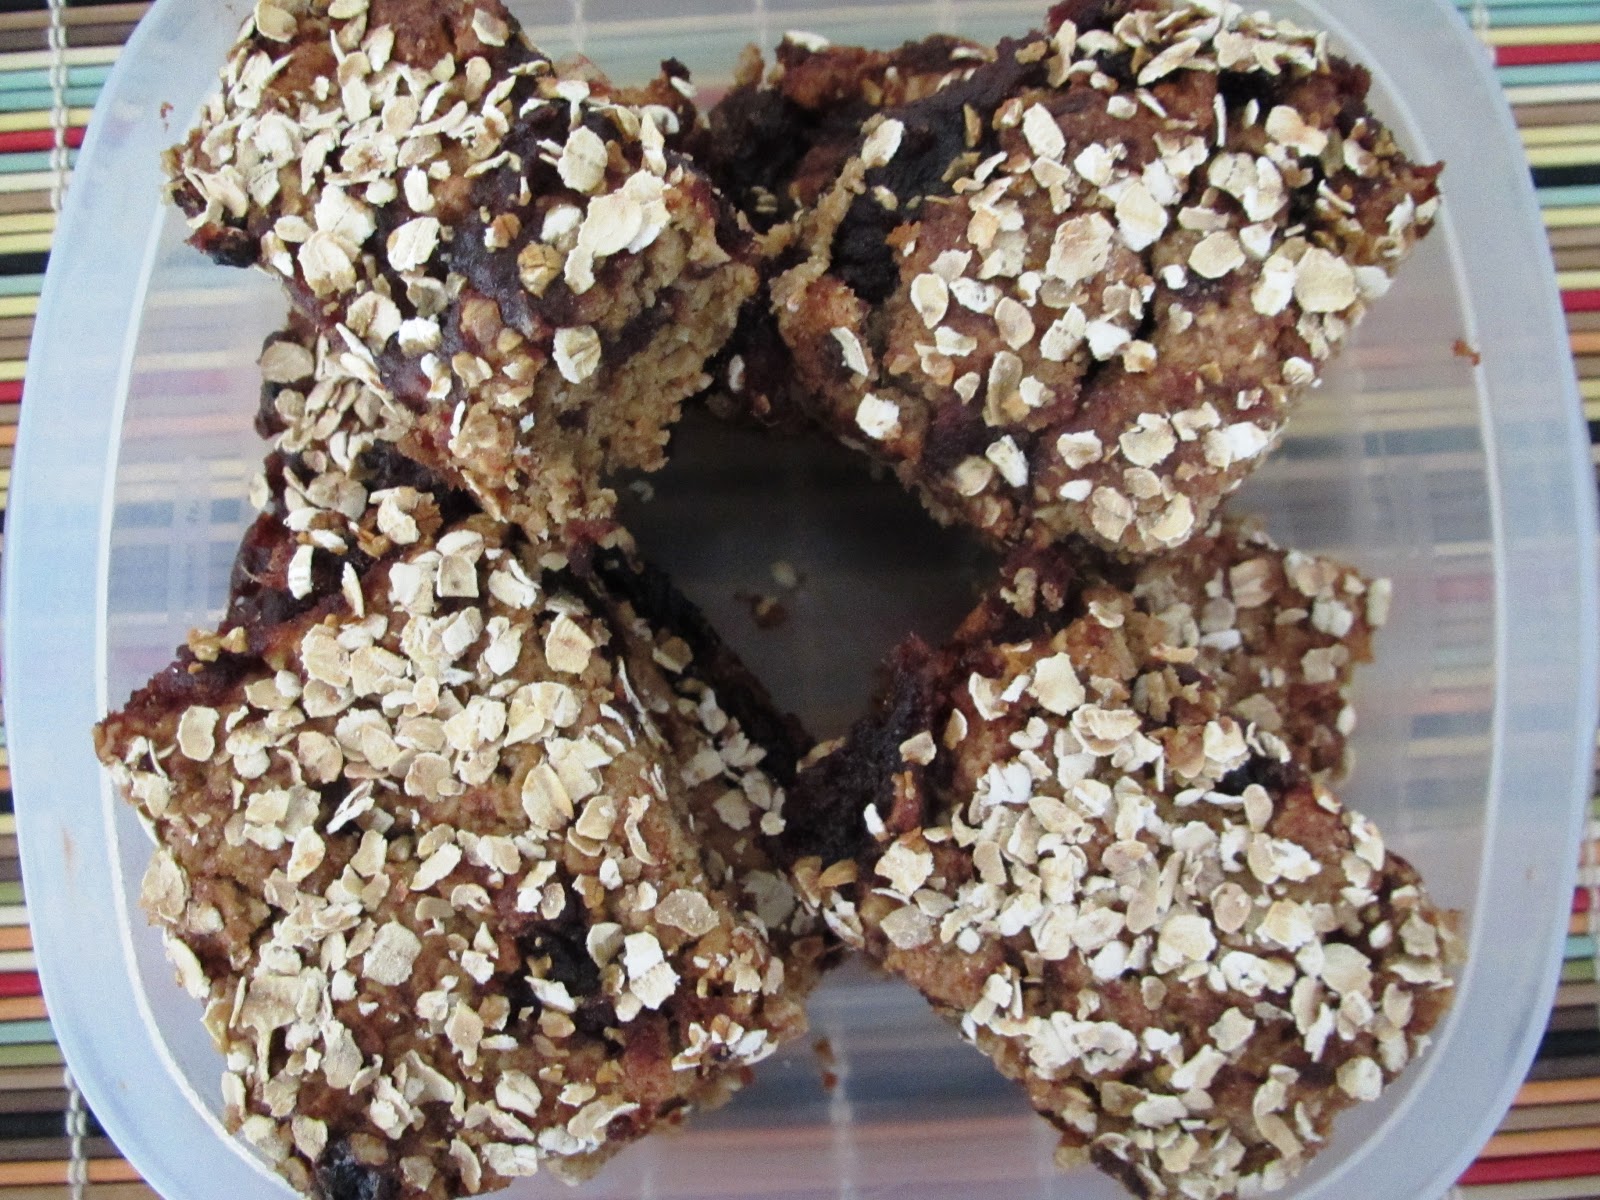
Wonderfully chewy date bars!
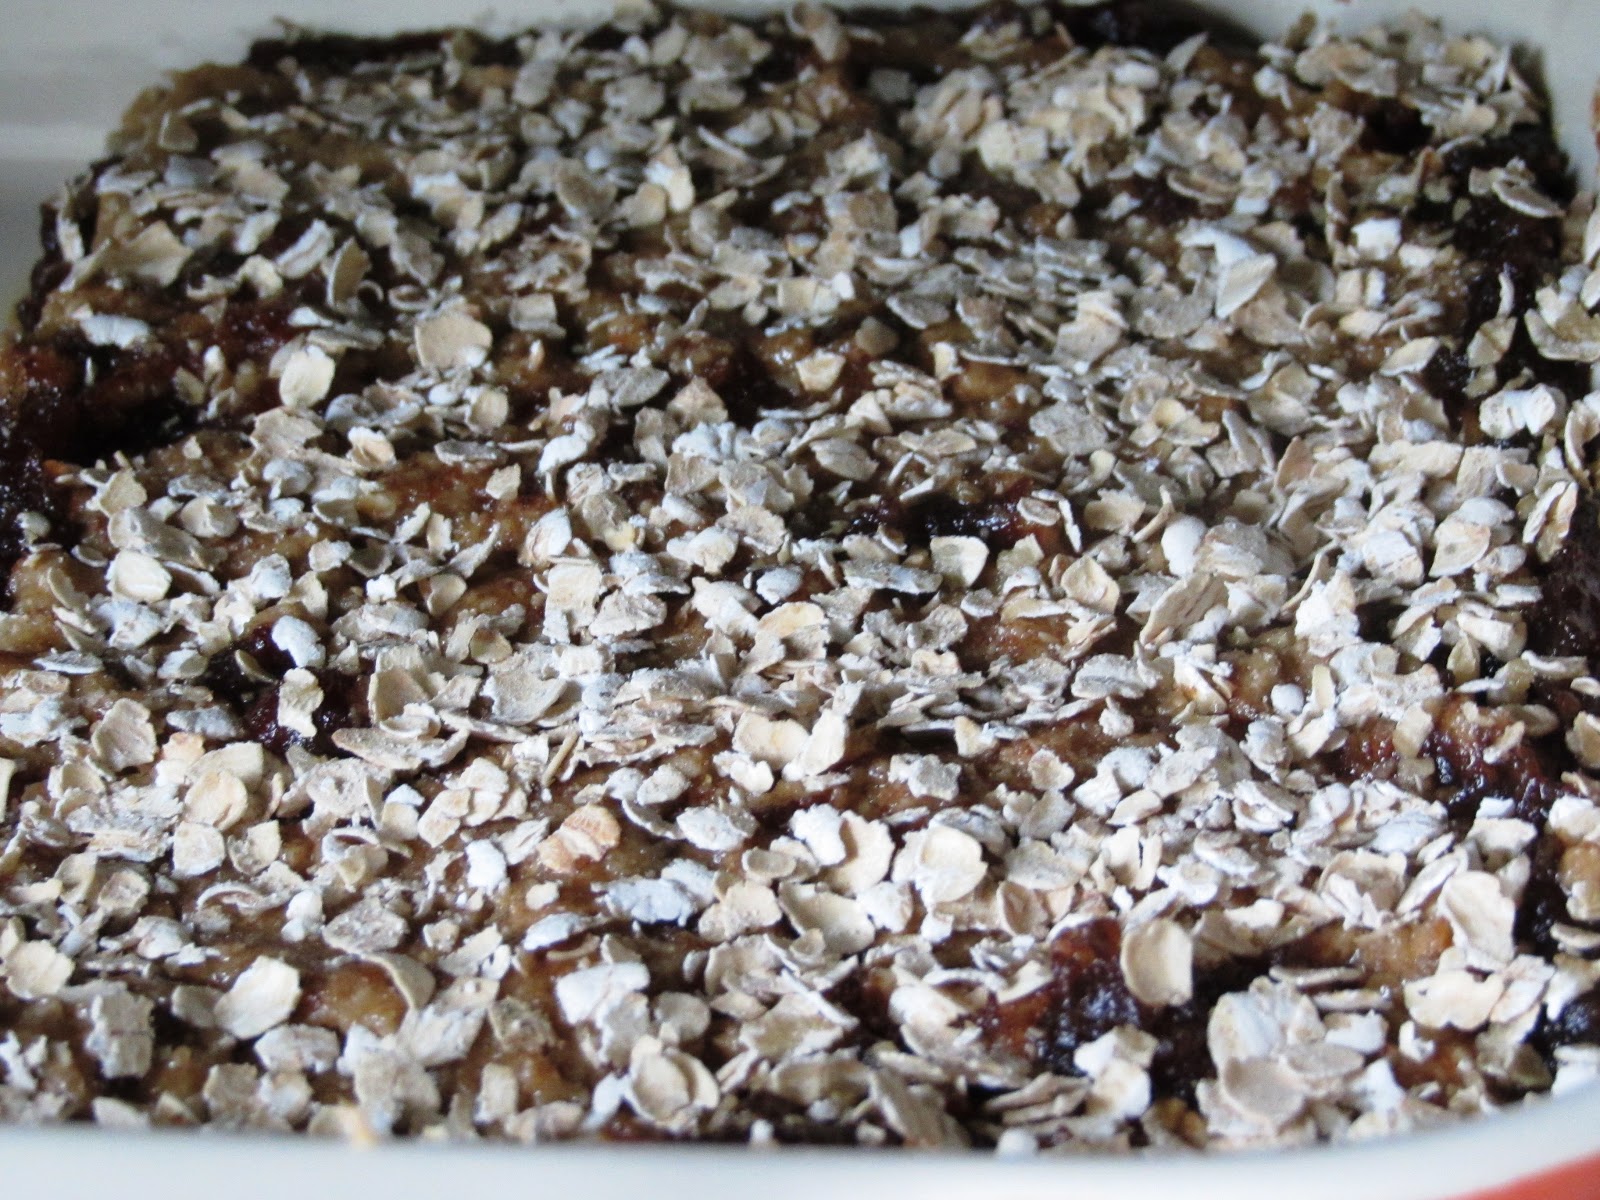
While organizing my pantry today (finally after 3 weeks of moving into the apt), I found an unopened packet of chopped dates my hubby had bought and never touched! Not using it soon enough would mean it would end up in the garbage (ouch!). I’ve used dates in Indian sweet dishes with other dry fruits, but using up a whole packet meant I needed to make dates the main ingredient. I'm quite a fan of date bars and cookies and other chewy delicacies of the Arab land. I looked up some recipes I had to pass as I was missing some important ingredients. Buying something else to use up the dates would’ve completely defeated the purpose of finishing ingredients from the pantry. After looking up a few recipes I found this that seemed delicious and modifiable using what I had in the kitchen. Here's my modified version. 
 
Oatmeal Date Bars

Ingredients:
1 Cup chopped dates – the dates I used had a little bit of sugar sprinkled
¾ Cup water
3 Tbsp honey
¾ Cup all purpose flour
2 Packets Quaker's maple brown-sugar oatmeal
2 Tbsp powdered jaggery – you can also use brown sugar
1 Tbsp ghee (clarified butter)
1 Tbsp oil
Milk as necessary – I used low fat milk

*I do not own a measuring cup - I used a ramekin which is about the same size*
  • Combine the dates, honey and water in a saucepan and cook until it has jam like consistency. Keep aside to cool. 
  • Preheat oven to 400 degrees Fahrenheit.  
  • Beat ghee, oil and powdered jaggery with a mixer. I used half oil half ghee but you can choose to use all butter, all ghee, all oil (whatever you have/like).
  • Mix all purpose flour, oatmeal, baking soda and salt and stir into the jaggery mixture. Add a few tablespoons of milk-just enough to bind it together into thick dough. It should not be too loose else the bars will be too mushy to cut. Using milk, I got away with only 2 tablespoons of oil/ghee together instead of using ½ cup of butter.
  • Grease a baking pan and pat down ½ of the batter forming approximately ¼ inch layer. Spread the date jam and another layer of the flour. You should be careful not to press down the top layer else the date jam will ooze out. You may want to press the remaining dough in between your palms and then put it on top and press down gently.
  • Sprinkle some more oatmeal to create a crunchy top. Bake for about 20 minutes.
  • Remove the baking pan from the oven, let it cool down and cut the bars. I cut them into 12 pieces.
Home run! Even after modifying the original recipe quite a bit, I got perfectly thick and crunchy from the outside and chewy on the inside bars. A great snack for afternoon hunger pangs or a grab-n-go breakfast.

LinkWithin

Related Posts Plugin for WordPress, Blogger...