Showing posts with label Appetizer. Show all posts

Monday, July 14, 2014

Stuffed Padron Peppers...And Other Veggies :)

My colleagues and I were having a conversation about how to train kids not be picky eaters. To my mom's delight, I was a good eater from early on. But even when meals didn't include what I absolutely loved, mom enforced a simple rule - serve a very small portion on the plate and don't get off the table without finishing it. As tortuous as it may sound to some, it really can't kill you to eat a few bites of something you don't love. The good part was that my mother cooked delicious food. If we didn't like something, she made an effort to try different recipes to make it more palatable for us. And there was often that guilt trip - there are way too many kids out there who don't even get two meals a day, let alone choose what they eat. Be thankful that you get to try such variety of foods!

There was one vegetable for which I always made faces though -  bell peppers! The ubiquitous vegetable in the US, and something I've grown to love, was my enemy as a kid. The Indian bell peppers are much smaller, with thinner skin, and more robust flavor compared to what we get here. I thought they were too pungent. Mom cooked them many different ways - fire roasted bell pepper and yogurt raita, stir fry with crispy potatoes, or stuffed  potatoes or chickpea flour to mask their strong flavor. Her stuffed bell pepper preparation was my favorite.

I found beautiful Padron peppers at the Saturday farmer's market. They looked like smaller versions of Indian bell peppers with the same fragrance. Padron peppers originate from Spain and have a wonderful smoky flavor when charred. The seller at the market told me they are usually deep or shallow fried in olive oil and seasoned with sea salt. They don't have a lot of heat, so you can eat them whole. I asked her how they would taste stuffed with something, and she thought it was a great idea. I thought I would try the chickpea filling. The recipe is fairly simple. Chickpea flour is seasoned with garam masala and other spices and stuffed inside seeded peppers. The peppers are beautifully charred in oil on high heat. The slight heat and smoky flavor of the peppers is fabulous. The chickpea flour filling is slightly crunchy against the soft flesh of the peppers, and does a great job of taming some of the pungency. This dish can be served as an appetizer, or a side dish. It tastes great with roti, or rice and yogurt. If you don't find padron peppers, any low heat peppers such as small bell peppers, poblano, Anaheim would be great. I cooked the peppers on stovetop, but you could grill stuffed peppers in summer. It'll be a great side to all the cookouts.
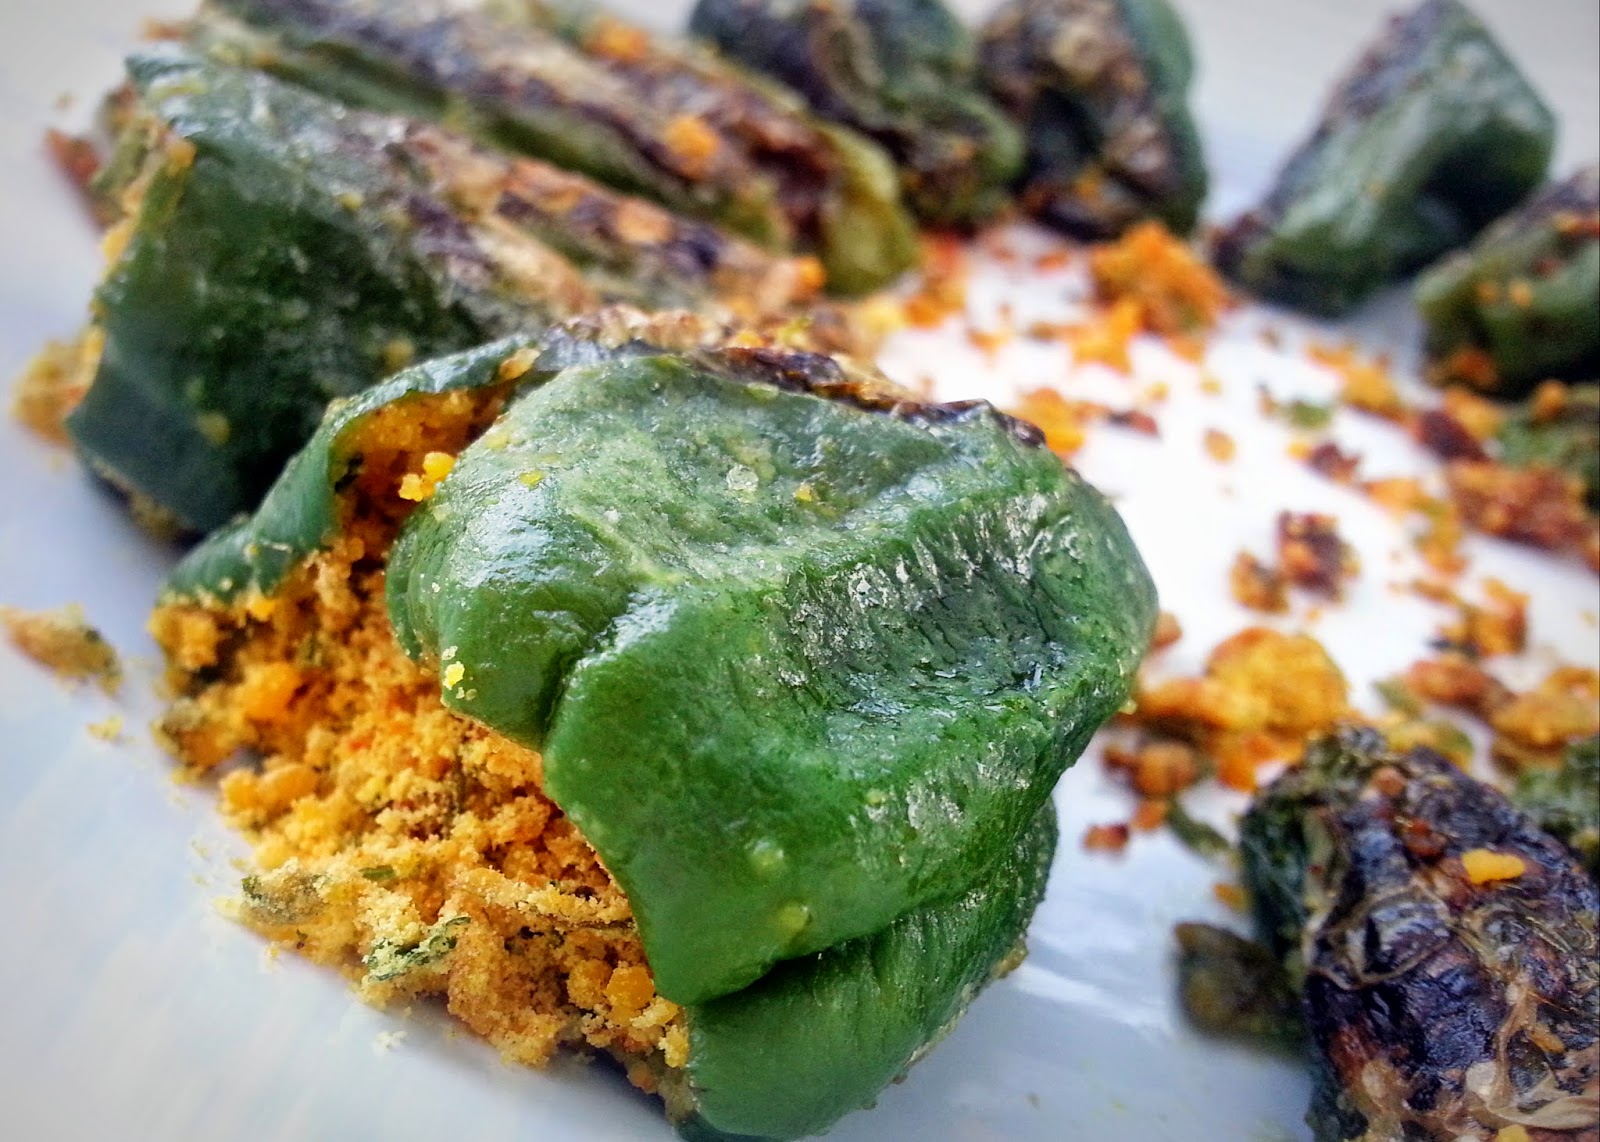

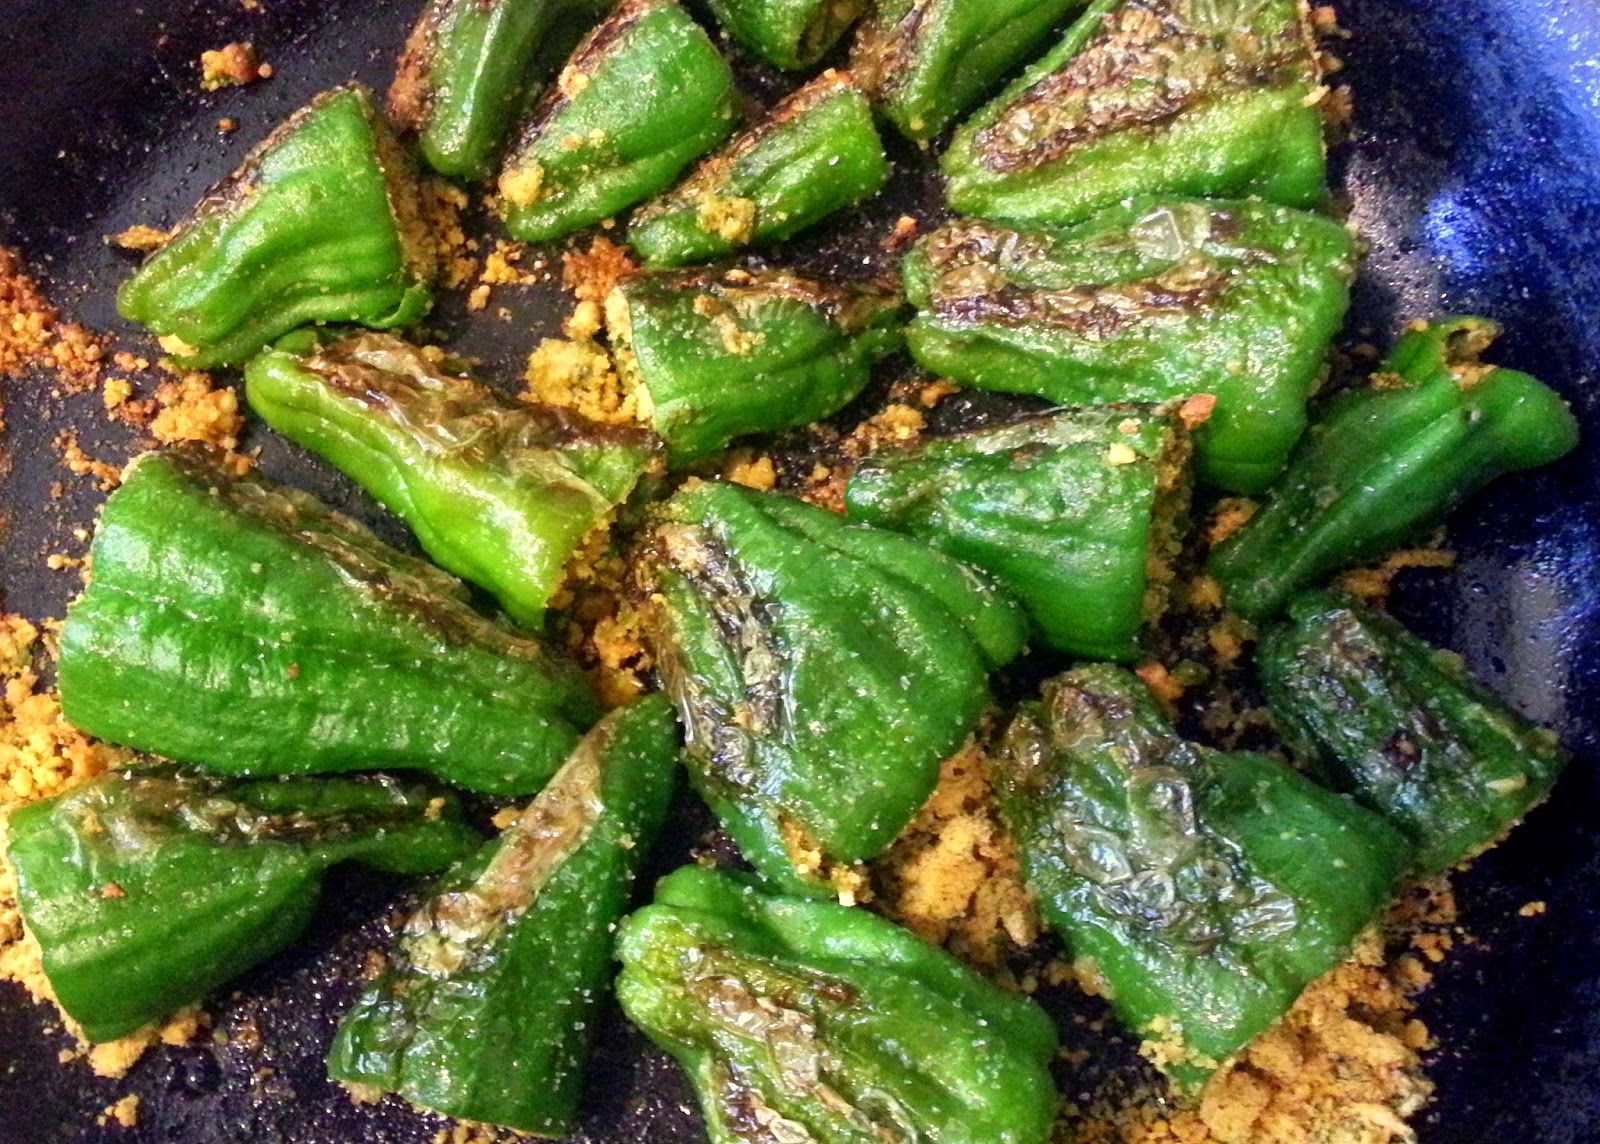


Chickpea Flour Stuffed Peppers

Ingredients:
2 Dozen medium Padron peppers - destemmed and seeded
1 Cup chickpea flour
3 Tablespoons olive/vegetable oil + more for shallow frying
1/2 Cup chopped cilantro
1/2 Teaspoon mustard seeds
Pinch of asafoetida
1/2 Teaspoon turmeric powder
1 1/2 Teaspoons garam masala
1 Teaspoon red chili powder (adjust per liking)
Salt to taste
  • Heat oil in a frying pan and add mustard seeds. When they splutter, add asafoetida, turmeric powder and chickpea flour.
  • To this, add chopped cilantro, garam masala, red chili powder, and salt to taste. Roast chickpea flour till fragrant and 'cooked'. If it looks too dry, you can sprinkle some water (use very little - you don't want clumps). Taste and adjust the seasoning to your liking.
  • Once the chickpea flour filling is done, keep aside.
  • Remove the stems of peppers and take out the seeds. Fill them with chickpea flour filling.
  • Coat the frying pan with some more oil and lay all the peppers on the pan. Cover and let the peppers get charred. Covering the pan will keep the steam inside and help cook the chickpea flour further.
  • Turn the peppers with a tong and char them on the other side. Once the peppers are cooked through, turn off the heat.

Enjoy!

---***---

Speaking of stuffed veggies, I made a set of stuffed felt veggies for my baby girl. I had seen a toy veggie basket at my friend's house; her son played with them. That set was a little more 3D than my version, which is somewhere in between 2D and 3D :D. I think it's a great toy - colorful, educational, and may encourage my daughter to eat all her veggies (or so I hope).One of my friends who has a girl just a little older than Shreya loved the idea of felt toys, and asked me to make some for her baby. I wanted to send the toys just in time for her 6-month birthday which didn't leave me time to make a new veggie set, so I gifted her the one I already had. I can always make more for my daughter. Here's my satisfied customer playing with her new toys :).


Along with veggies, my friend asked if I could make an owl as well. Owls are all the rage these days. I came up with the following pattern after going through several pics on the web. Whooo wouldn't like a pink owl?


Just hangin' out!

Until next time!

Wednesday, July 3, 2013

Fresh From The Garden

The garden gods have been pretty generous lately. My plants are loving the warm weather and all the extra attention they've been getting from two new members in the house now.

Our heirloom tomato plant produced its first meaty, juicy, attractive babies. Their vibrant color won me over even before tasting them. And the taste - aah! They had the perfect balance between sweetness and tartness. Nothing like the grocery store varieties. I could eat these on their own!


Along with the prized heirloom produce, we picked a few red chilies, plenty of tiny purple tomatoes, and a whole lot of fragrant basil. Thank heavens for all these fresh veggies and herbs, or I may forget how things are supposed to taste.


What do you do when you have organic, flavorful produce? Not muddle the flavors! That's what I decided and made this simple tomato-pesto tart using puff pastry sheets lying in the freezer. Tart was a great choice to use heirloom tomatoes - they are firm and meaty, and hold up really well even after being blasted with heat. And their soft flesh contrasted the crunchy pastry sheet beautifully. These tarts made for a nice summer meal - crispy, light, full of bursting juices.


Heirloom Tomato - Pesto Tart

Ingredients:
2 Puff pastry sheets
3-4 Heirloom tomatoes (depending on their size)

For pesto:
1 Cup packed fresh basil leaves
2 Garlic cloves
1/4 Cup nuts - cashews, almonds, pine nuts, or walnuts
2 Tablespoons grated parmesan cheese
Olive Oil as required
Salt to taste

  • Preheat oven at 375F.
  • Add all the ingredients for pesto, except olive oil, to the food processor. Make a coarse paste, while adding olive oil little by little. I use minimum amount of oil to get a smooth paste.
  • Wash and cut tomatoes in 1/4 inch discs.
  • Thaw the puff pastry sheets just enough so that you can separate them. If you let them thaw for too long, the dough will start stretching in all directions! Cut each sheet in three width wise. I used Pepperidge Farm box which comes with 2 sheets - so I had 6 decent sized tarts.
  • Lay these sheets on a tray lined with parchment paper or lightly oiled aluminum foil. Divide the pesto and spread it on each sheet. Then lay the tomato slices, and bake these tarts for 15-18 minutes or until the pasty sheets are golden brown. The tarts are ready to eat. 
---

One of my very close friends, Aditi, has been a loyal reader of my blog. We keep exchanging recipes and ideas. She gave me the recipe to make Sai Bhaji - a simple mixed greens preparation using split chickpea lentils and potato for some substance. I tried it last night using fresh Swiss Chard from the garden and other greens. This recipe is a keeper. It was done in no time and just tasted 'healthy'! I was too eager to eat and took a very bad picture with my phone. 


Sai Bhaji

Ingredients:
1 Cup of spinach, swiss chard and mustard greens each - washed and chopped. Feel free to add any other greens that are smooth in texture when cooked.
2 Cup washed split chickpeas (chana daal) - soaked in water to soften
1 Small potato - peeld and cubed
1 Small onion - finely chopped
1 Tomato - cubed
2 Teaspoons minced ginger and garlic
1 Tablespoon oil
1 Teaspoon mustard seeds
1/4 Teaspoon turmeric powder
Red chili powder to taste
Salt to taste

  • Heat oil in a pressure cooker and add mustard seeds. Once they splutter, add turmeric powder, and chana daal. Saute for 2 minutes.
  • Add ginger-garlic, onion, tomatoes, and potatoes if using, and mix well. 
  • Mix in all the greens, add red chili powder and salt to taste, and add a little bit of water (just enough to cook). Pressure cook the greens for 2-3 whistles. I cooked them without the whistle just enough so the chana daal would cook but not break. 


The Bhaji is ready to be eaten with rotis. Chana daal provided a great bite to the otherwise soft bhaji. A good dose of protein too. It had a nice tang provided by tomatoes that lifted all the flavors. I'll add this recipe to my usual dinner rounds.


Tuesday, June 4, 2013

Mexico In A Bowl

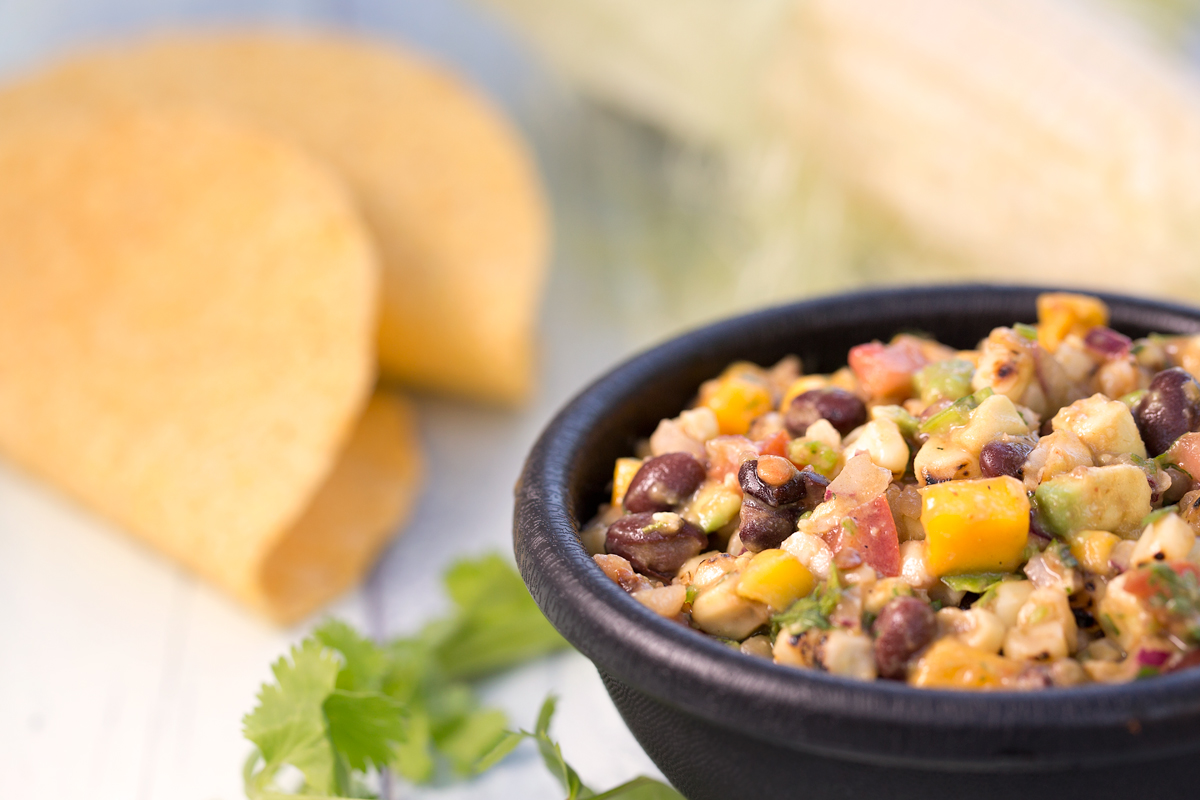
For someone living in San Diego, I have surprised myself by not posting many south of the border recipes. Today I had all the right ingredients to put together a fabulous salsa using a can of black beans that was pushed to the back of the pantry. Don't you feel just as happy when you find the perfect ingredients for a dish you weren't expecting to make?? This salsa has everything you expect in Mexican cuisine - roasted corn, black beans, mango, avocado - the whole nine yards. Hence, I call it 'Mexico In A Bowl'! Of all the salsas that I have ever made/tasted, this is by far my most favorite combination. The contrasting textures and flavors marry really well. My love for using sweet fruits in savory dishes is no secret to anyone. And wouldn't one love a zesty salsa with bits of mango bursting with sweet juices? Digging into a bowl of this was like taking a vacation to a tropical paradise.


I couldn't stop myself from taking one scoop after another of the salsa while husband was clicking pictures. He sure makes my food look good! This salsa bowl, exactly like the ones in Mexican restaurants, was a gift from my company for participating in the Salsa competition last month. Thinking back, I should've made this salsa for the competition to secure a spot..oh well. The look of this bowl makes me feel like I'm dining out =D.


Roasted Corn, Mango, And Black Bean Salsa

Ingredients:
1 Corn on the cob - white or yellow
1 Ripe mango - chopped into small pieces
1 Cup cooked black beans
1 Small or 1/2 large avocado - chopped into small pieces
1/2 Small onion finely chopped
1 Small tomato finely chopped - take out the seeds
1 Whole chipotle in adobo sauce
Lots of chopped cilantro
Juice from 1 lime
Serrano hot sauce - to liking
Salt to taste

  • Roast corn on open flame until you get beautiful char marks. To separate the kernels, hold the stem of the corn in one hand and rest the tip on a cutting board (holding the corn at an angle). Now run the knife through the base of the kernels from top to bottom - away from you. 
  • Mix corn kernels, chopped mango, black beans, avocado, onion and tomato. 
  • Finely chop chipotle and add to the above. Sprinkle plenty of cilantro. 
  • Add juice from one lime, salt to taste and mix everything well. Taste the salsa and add some hot sauce if you would like. It tastes better on the milder side since it has so many sweet elements. You can add more of one or more of the ingredients - suit yourself!


Serving suggestion: 

  • The salsa is perfect with tortilla chips as an appetizer
  • I used it in hard shell tacos - All you need is sauteed red and green bell peppers (cut them in strips and saute in some oil on high flame. This will give them nice charring) and some queso. Add bell peppers to taco shells, add a big scoop of this salsa, and top it with some shredded cheese and more hot sauce if you want. The tacos were just perfect! Husband especially enjoyed them. 
  • You could make a nice burrito/burrito bowl with soft tortilla, Mexican rice, salsa, lettuce and sour cream if you like. 


Monday, February 25, 2013

Dumpling Party

The San Diego Food Bloggers (SDFB) community meet ups are always something to look forward to. Our leader Marie of Meandering Eats is popular for coming up with great themes for the get-togethers. A few of us SDFB ladies got together for a fun dumpling party at Marie's place this Saturday. We gobbled up a variety of dumplings, which, apart from the usual savory Asian kinds, included sweet blueberry dumplings - yum!

Veg Momos - steamed and pan-fried on one side (the other side ;)
When Marie first announced the event, I immediately thought of making Modak - my ultimate favorite dumplings. But then, modaks get made quite often in my house, thanks to my husband who will eat them any day. I could use a change and try something new. The next thing that came to mind was Nepali vegetable Momo - a savory dumpling very similar to its other Asian siblings but with some familiar spices to my Indian palate. Momos are native to Nepal and other Himalayan states/countries. I assume they were borrowed from the Chinese cuisine  Momos were a favorite thing to eat at my usual dine-out place in Utah - the Himalayan Kitchen. That's where I had momos for the first time and have been a fan ever since.


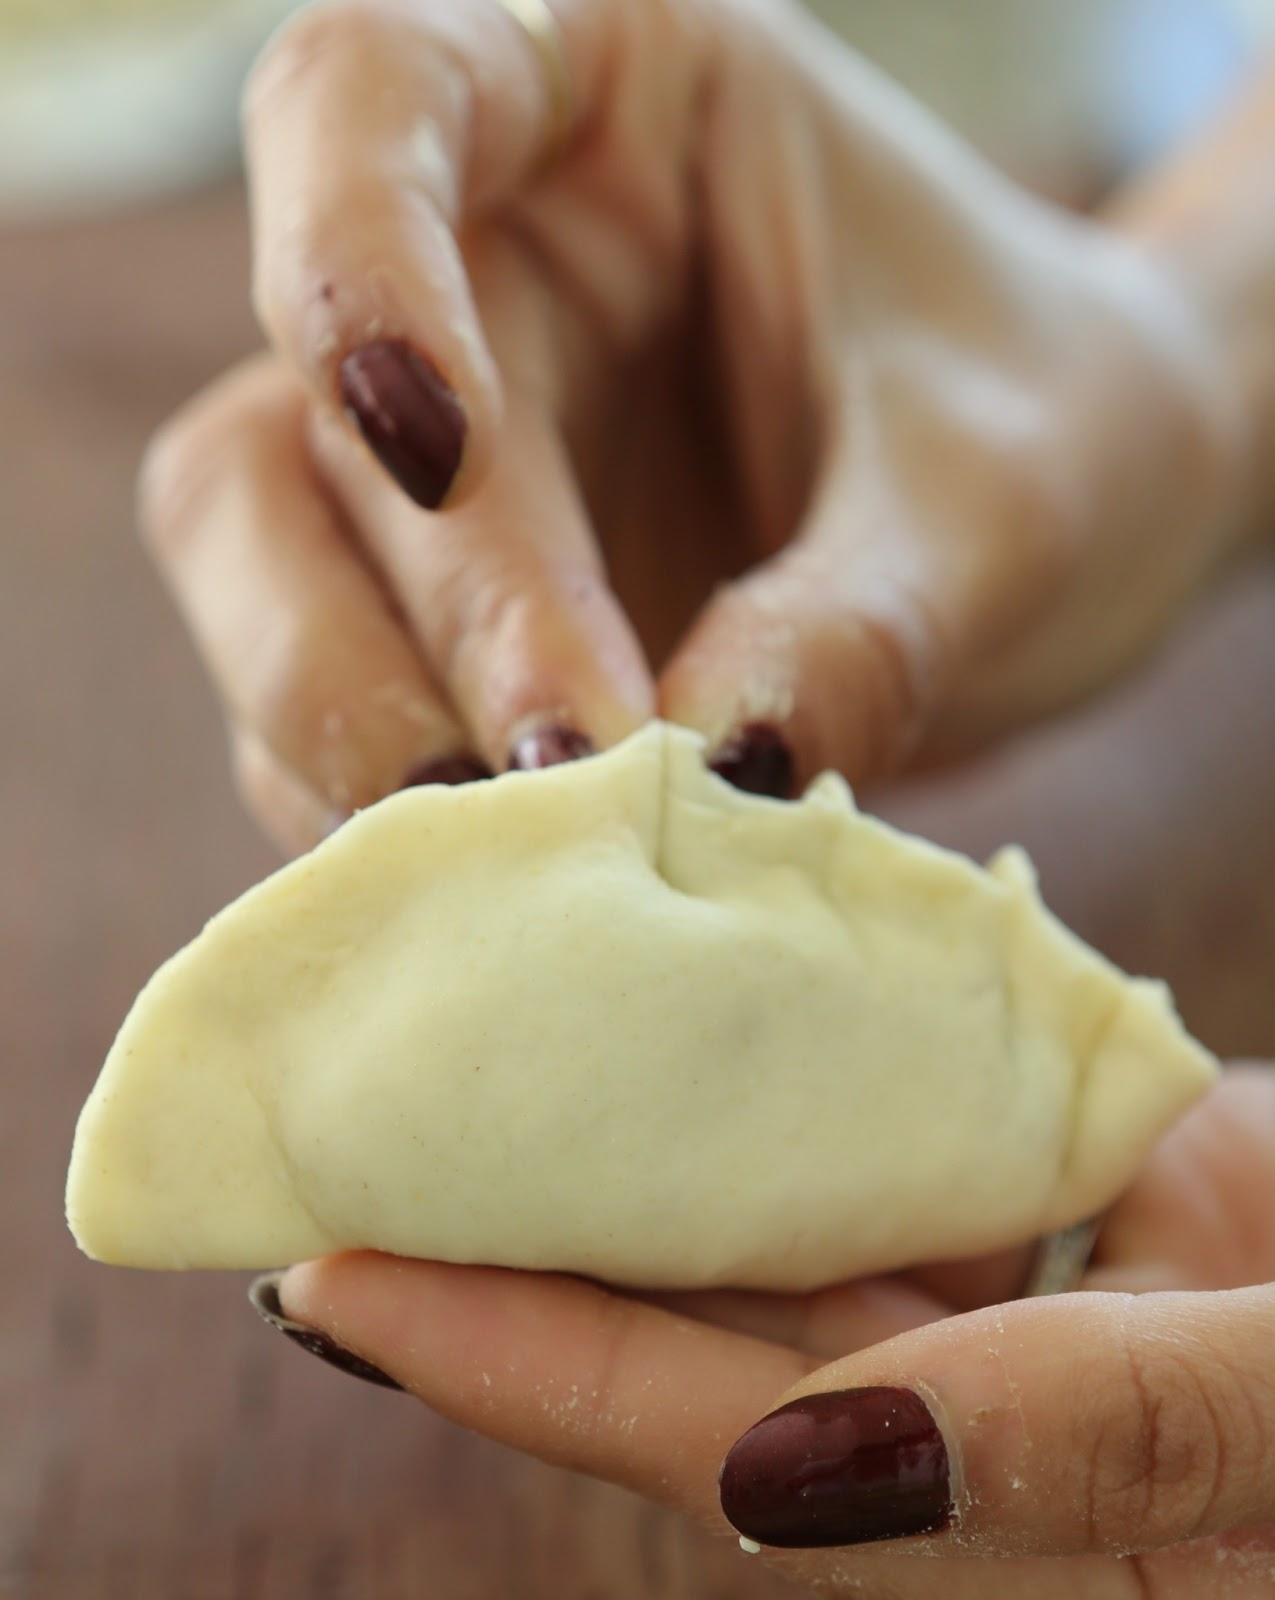
I found a whole lot of recipes online with some Tibetan or Bhutani variations. These dumplings have a simple covering of all purpose flour dough with filling of all sorts. The vegetarian dumplings have a variety of finely chopped vegetables sauteed with onion, ginger, garlic and some other spices. A few ingredients that struck me as unique were fenugreek seeds, and cumin and coriander powder. These are not the spices you would expect to find in a traditional Asian dumpling. And momos don't typically have soy sauce. This creates a unique dish that combines far east Asian and south Asian flavors. Momos can be simply steamed or pan-fried after steaming for some smokiness and sear, which is how I like them. They are traditionally served with a tangy tomato chutney, or 'tomato achaar'. I went for a quick combination of oil and Sriracha sauce. The shapes of momos are fun. You can shape them literally like modak. I attempted the half-moon shape with some degree of success.


Notes:
  • The APF dough seizes while rolling so it's a little tedious work. But that's the maximum difficulty level!
  • If you plan on making momos, steam them just before serving. As I realized, they start to dry out if kept for too long. 

Nepali Veg Momo

Ingredients:
Dough:
1 Cup all-purpose flour
Water as needed
A pinch of salt

Filling:
2 Cups finely chopped vegetables - (Cabbage, carrots, mushrooms, spring onions, red & green bell peppers, spinach). Add more of cabbage and carrots than other veggies
2 Large garlic cloves - finely chopped (~1 tablespoon)
1/2 Inch piece of ginger - grated
1/4 Medium onion - finely chopped
Spices - ground fenugreek, cumin and coriander seeds, 1/2 teaspoon each
Handful of cilantro - finely chopped
Red chili powder to taste
Salt to taste
2 Teaspoons sesame oil
Vegetable oil for pan-frying
  • Form a stiff dough of APF with water and a pinch of salt. Some add a pinch of baking soda to the dough. I left it out. Cover and let it sit. 
  • Heat sesame oil in a pan and add onion, ginger, garlic. Saute until onion is translucent. 
  • Add the ground spice mix, red chili powder, all the veggies and cilantro and saute for a min or so just until the vegetables are tender. Do not overcook them. 
  • Turn off heat and add salt at the very end so that the vegetables don't become watery. You want the filling to be dry. If it gets too watery, you can add a spoonful of APF mixed with a little bit of water to the filling and cook for a few seconds. That will hold the filling together. Let it cool before making the momos.
  • To shape the momos, roll out the dough into a thin roti/sheet - thin enough to be able to see light from the other side but thick enough that it won't rip while shaping. 
  • Cut out small rounds with either a katori or a cookie cutter (as shown in picture above). Place a spoonful of the filling at the center and press close both ends by folding the round in the center. 
  • To give them that characteristic dumpling look, pinch the excess flour to make petal-like shapes where you closed the dumpling. If you have too much flour at the end, just cut it with a knife before pinching. 
  • Steam these dumplings in a steamer for 5-6 mins. I don't have the bamboo steamer, so I just put them in a greased pressure cooker vessel and steamed them in the pressure cooker without the whistle. 
  • You can serve them just like that or pan-fry them in a little bit of oil on one side only until lightly browned. 
All the goodies at the Dumpling party!


Wednesday, January 2, 2013

New Year Wishes

Wishing all my readers health, hopes and happiness in the year 2013!

2012 was tainted with all the turmoil going on around us - the most heartbreaking of all were the news of innocent people losing their lives for no fault of their own. Hope there is safety and solace for everyone in the new year. Even with all the disturbing events, we personally had lots to be thankful for in the past year - a new home, a lovely month with my parents, new friends, awesome travels and another beautiful year of togetherness. At the end of it, we should only remember the good things and try to turn any negatives into positives.

We hosted a few Holiday parties over the last couple of weeks. Two days after Christmas, I had invited all my colleagues and their families for dinner. After at least 50 mental revisions of the menu, I settled on the following -deviled eggs, yogurt-cucumber dip with chips and veggies, spinach and cream cheese crostini and quinoa-corn cakes for appetizers. The main course included a winter salad with cranberries and toasted almonds with honey-lemon dressing, herb-roasted potatoes, and orzo with roasted butternut squash and sage. The menu was simple, went well with adults as well as the kids and had items that could be made ahead of time. The food was a big hit. One of my colleagues' wife got two recipes and made at her New Year's party! (That certainly gave my ego a healthy boost :D).

My favorites among all were quinoa-corn cakes and the orzo. I tried both these dishes for the first time for the party. Call it holiday magic or whatever - both turned out really well. Unfortunately, in the rush of things, we forgot to take any pictures of the food at all. However, the recipes deserve to be shared.

The quinoa-corn cakes were my attempt at recreating an appetizer from the holiday buffet we had in Vegas. They were utterly delicious, and even without the chef's recipe, mine turned out more than decent.

I'm submitting this recipe to Priya's Quinoa-Ragi event hosted by Divya.

Quinoa-Corn Cakes

Ingredients:
1 1/2 Cups quinoa
1/3 - 1/2 Cup frozen corn
1/2 White onion
1 Large garlic clove
1/2 Teaspoon dried Italian herbs
Salt & Pepper & Paprika to taste
1/2 Cup shredded mozzarella cheese
Rice flour as needed
1 Tablespoon Olive oil + more for shallow frying

  • Cook quinoa according to instructions on the package.
  • Chop onion and garlic finely.
  • Heat oil in a pan and saute onion and garlic. Once translucent, add corn, quinoa, cheese and the seasoning and mix well. Turn the heat off
  • Add a rice flour little by little to the mixture just enough to bind everything together. 
  • Make small round patties/cakes about 3/4 inch thick. Pan fry the cakes in olive oil until golden brown.
Warm cakes with melted cheese taste just fantastic by themselves or even with a little bit of hot sauce!

I made butternut squash orzo loosely using Ina Garten's recipe for risotto. I made a vegetarian version by excluding pancetta and chicken stock, using vegetable broth instead. One important change I made was adding fresh julienned sage to the orzo by sauteing it with the onions. The aroma was heavenly! This is going to be added to my 'favorites' recipes.

Happy eats in 2013 to you all!

Thursday, November 1, 2012

Kojagiri Cutlets!

Hi everyone! Hope you enjoyed lots of Halloween candy and baked some sweet treats. I had been looking forward to this Halloween for days - mostly because it was our chance to finally meet the neighbors, which I'm happy we did. The whole parade of kids dressed up as princesses, ninjas, ghosts, transformers and what have you, was quite a lot of fun. Hubs and I put our beach chairs in front of the house and enjoyed giving out candy to happy kids (derived mostly through their gesture since I couldn't really see many of their faces) and talking to parents who worried whether their li'l ones said "thank you"! Our first holiday season in the new neighborhood as begun on a sweet Halloween candy note!


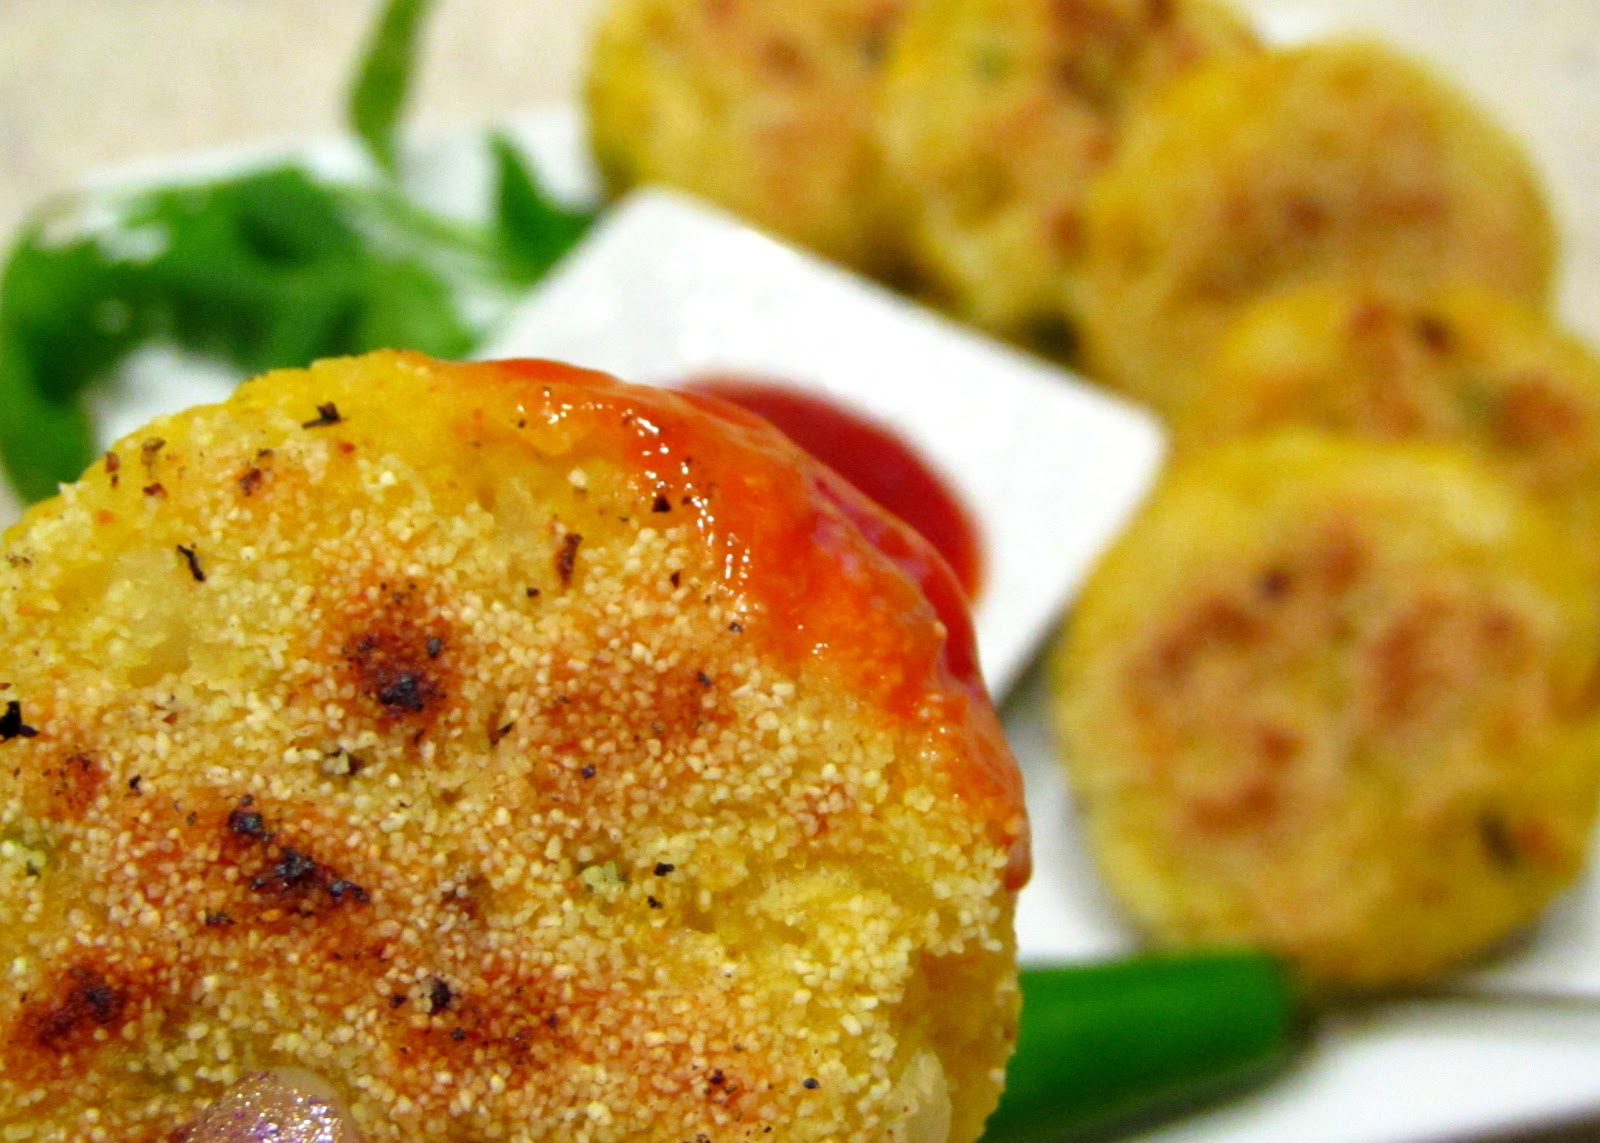
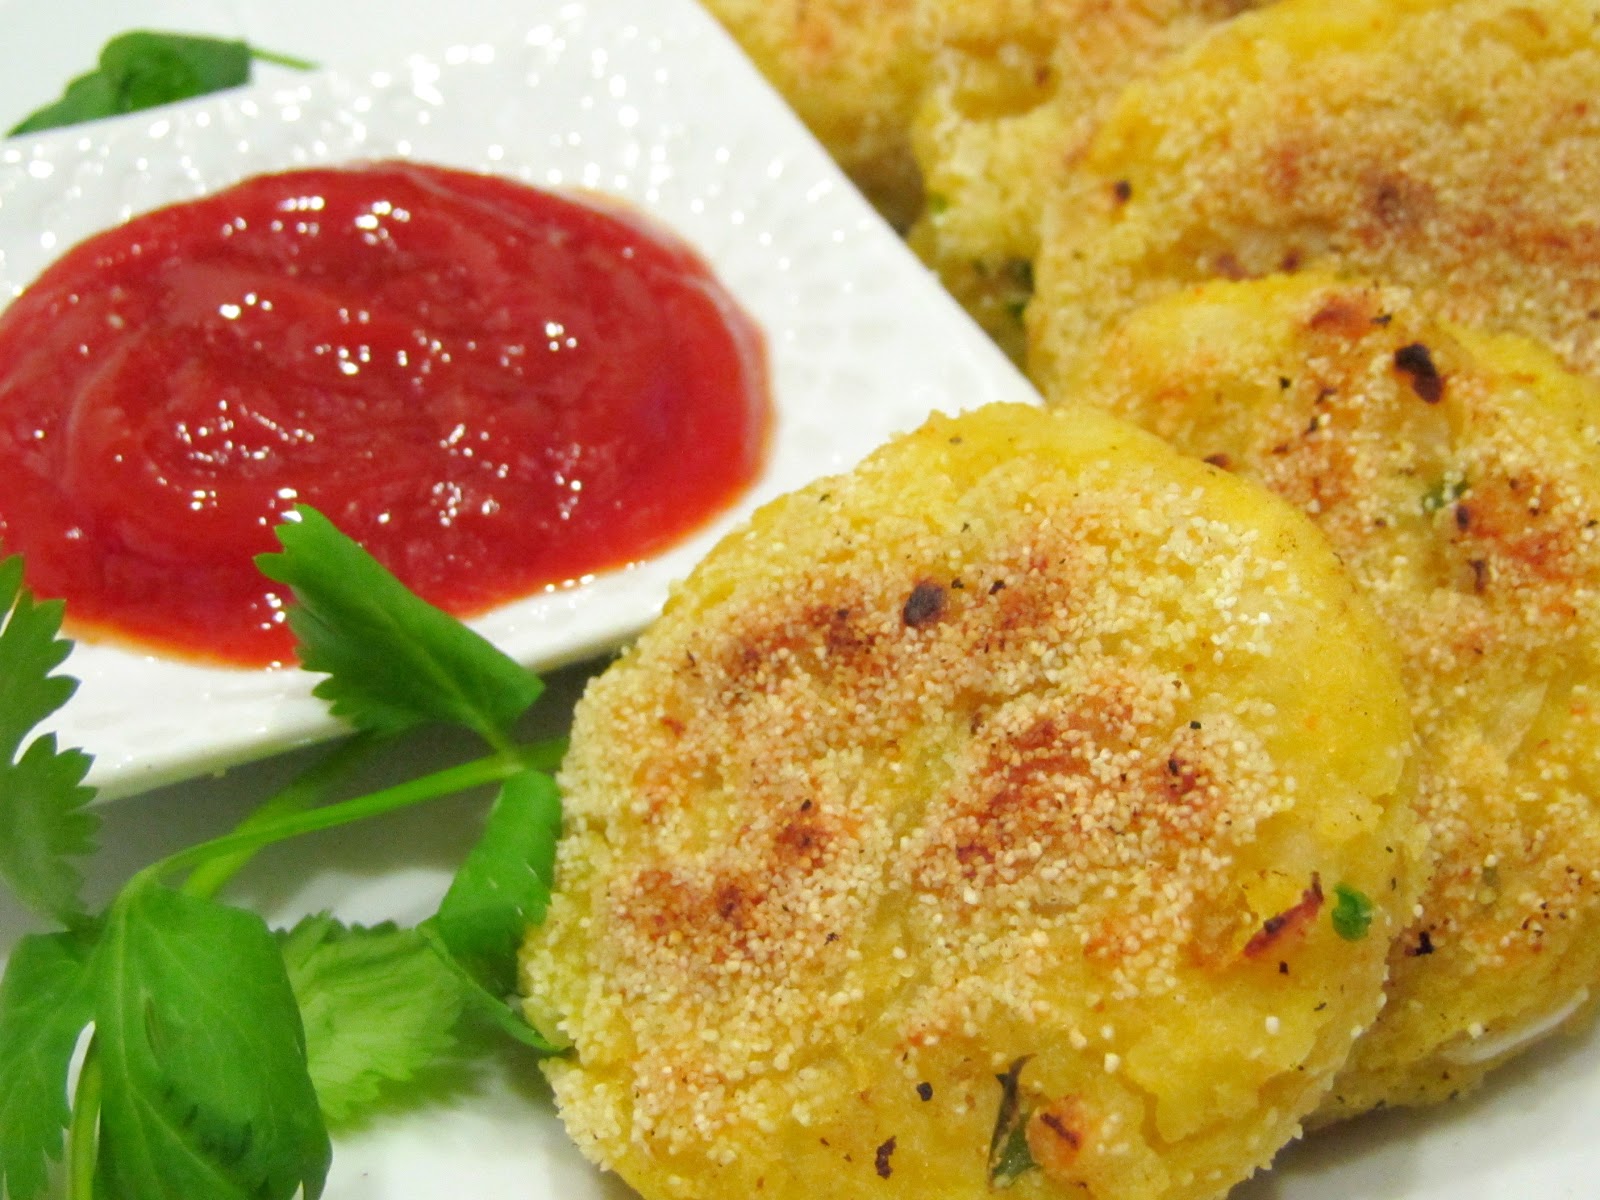
Anyway, to cut to the chase - cutlets! I made these fun snacks three days back for Kojagiri pournima (full moon night). I was hoping to post the recipe right away and get to my 100th post(!). Anyway...The story goes that Goddess Lakshmi roams the earth on this full moon night and asks "Ka: Jagarati" meaning "Who's awake" and  blesses those who observe night vigil with wealth and prosperity. People gather at night and enjoy flavored milk (masala doodh) and poha (flattened rice) after offering it to the beautiful full moon. In honor of this day, I made some tasty cutlets of poha. I remember my mom making these out of left-over Maharashtrian style kande-pohe (seasoned flattened rice). Poha is unusual to use in cutlets, but it works really well. It turns into almost rice-flour essentially, which helps in binding the cutlets and absorbing any flavors you add.  If you are making them out of kande-pohe, you already have the ginger, green chili, onion, cilantro etc. I mimicked the same flavors and made these out of plain poha. A fun snack you could make as starters for all the diwali parties you'll have lined up! These are great after-school snacks for kids as well. Of course, tone down the spiciness for them.


Poha Cutlets

Ingredients:
1 Large potato
1 1/2 Cups washed thick poha 
1/4 Medium onion - finely chopped
A few springs of cilantro - finely chopped
1 Inch ginger
2 Small green chilies
1 Teaspoon cumin-coriander powder
Salt to taste
Rava (semolina) for coating
Oil as needed. 
  • Soak thick poha (don't use the thin variety) in some water and drain right away. Let it sit for 15 minutes. 
  • Boil the potato until fork tender and peel. 
  • Grind gingner, green chilies and cumin-coriander powder together. 
  • Mix the soaked poha, potato, onion, cilantro, the space paste you made and salt and bind well until the potato and poha are mashed. Sprinkle some water if the mixture is too dry. 
  • Make small flat patties and roll them in rava, pressing lightly. This will create a nice crunchy crust on the cutlets. 
  • Heat a pan on medium-high flame and drizzle some oil. Pan fry the cutlets on each side until brown. 


The cutlets taste yummy with ketchup! 


Saturday, October 27, 2012

Eggplant Bhajja

The latest choice of weekend activity among our friends has been gathering at someone's house and cooking together. Oh, the joy of communal cooking and sharing meals! It's so much better than going out - the food is fresh and much healthier (not to mention, cheaper!), we get to learn each other's culinary skills, cooking doesn't feel like a chore when you want to relax, and most importantly, it gives us opportunity to have conversations and spend more quality time with each other. 

 
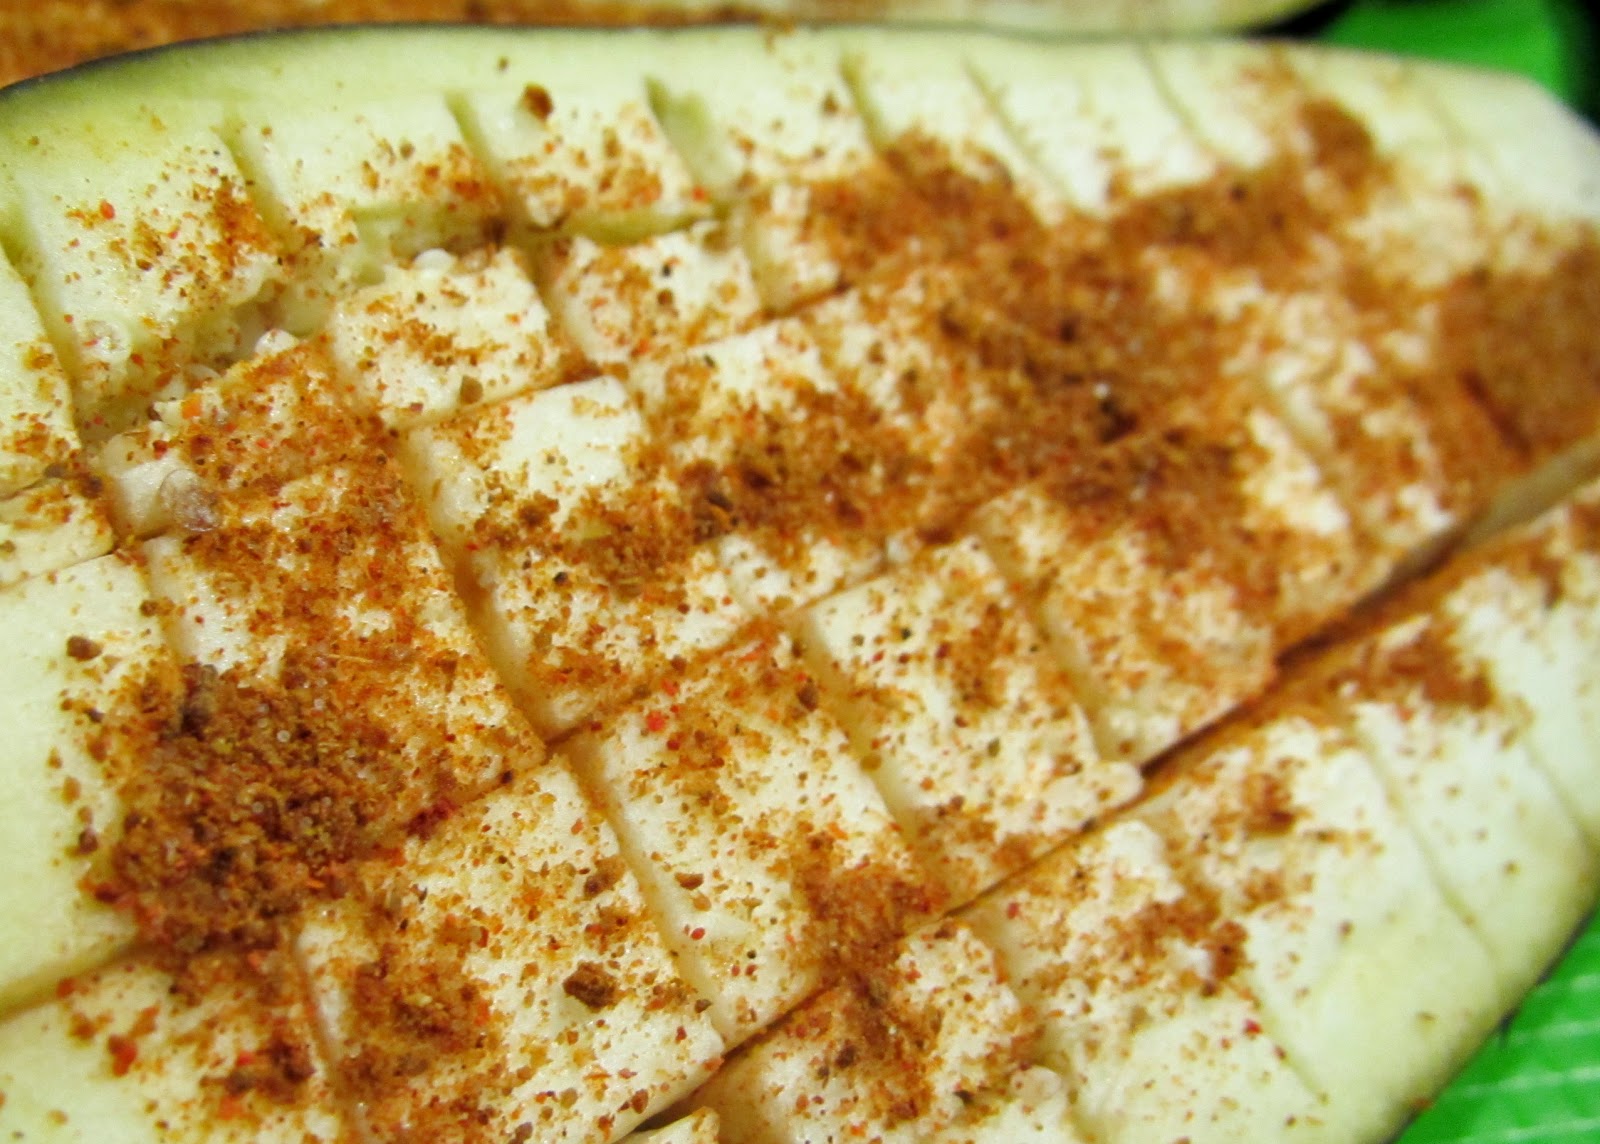
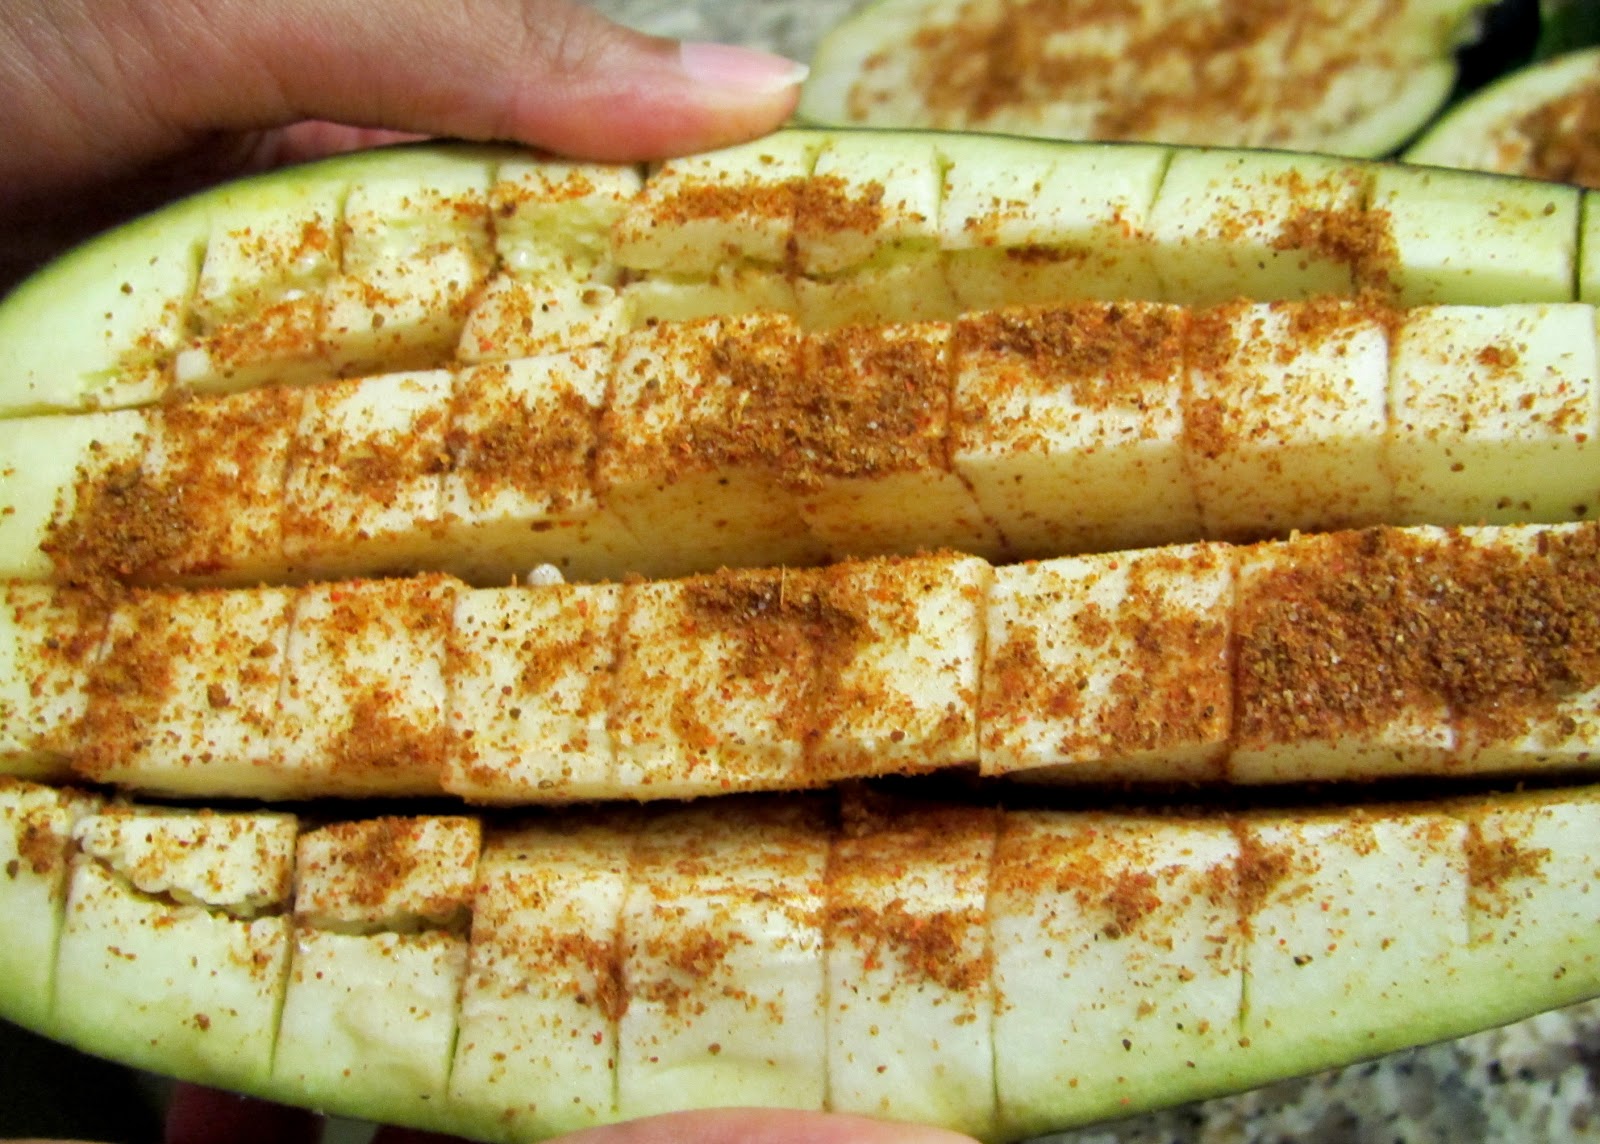
Some interesting recipes always come out of our cooking rituals. Last night when we had gathered at our place, my friend Deepti taught me what I can claim as the yummiest eggplant dish I've had. A very unique and ridiculously easy recipe that'll make the pickiest eater love eggplants! It wasn't hard for me to fall in love since I like eggplants in any form, but my other friends who don't care for them couldn't stop eating it either. This was Deepti's grandma's recipe who had learned it from her Sindhi neighbors. Her grandma made it for them as an after-school snack. The preparation is very simple - cut aubergine eggplants in the center and make grid-like slits, sprinkle some masala on top and roast for a few minutes. Done.You just scoop out the center with a spoon and enjoy the crusty-spicy eggplant that is extremely delicate and juicy inside. Amazing how something as simple as that can turn an ordinary eggplant into a gourmet dish. 

If only you could taste this through the screen - don't be fooled by the color.

Eggplant Bhajja

Ingredients:
4 Aubergine eggplants
1 1/2 Teaspoons cumin-coriander powder
1 1/2 Teaspoons garam masala/goda masala
3/4-1 Teaspoon red chili powder (depending on how spicy you want it)
Salt to taste
Oil as needed. 

  • Cut eggplants in the center lengthwise. Make vertical and horizontal grid-like slits as shown in the picture below. This way, the spice mix you sprinkle will get all the way through. 
  • Combine the spices and salt and sprinkle over the eggplants and in between the slits. You can adjust the level of spices according to your liking. My friend uses garam masala for this recipe but I prefer goda masala for the slight sweetness coconut adds. 
  • Microwave the eggplants keeping face up for 2-3 minutes. This speeds up the cooking process. The eggplants should feel soft to touch. The cooking time may vary depending on the eggplants size. 
  • Heat a pan on medium-high, drizzle a little bit of oil (very little - you are not shallow frying them) and keep the eggplants face down (the side of spices touching the pan). Cover the pan and let the eggplants roast for 2-3 minutes. Once they are slightly charred on that side, turn them, cover and cook for a couple of minutes more. 
Serve while hot. It can be eaten as an appetizer or just a side dish. Just take a spoon and dig in!

Wednesday, October 17, 2012

Pudachi Wadi

Hi everyone! Wish you all a very happy Navratri. Hope you have your garba shoes on and are dancing the nights away :). I have a fun snack recipe for you to munch on after all that dancing. 


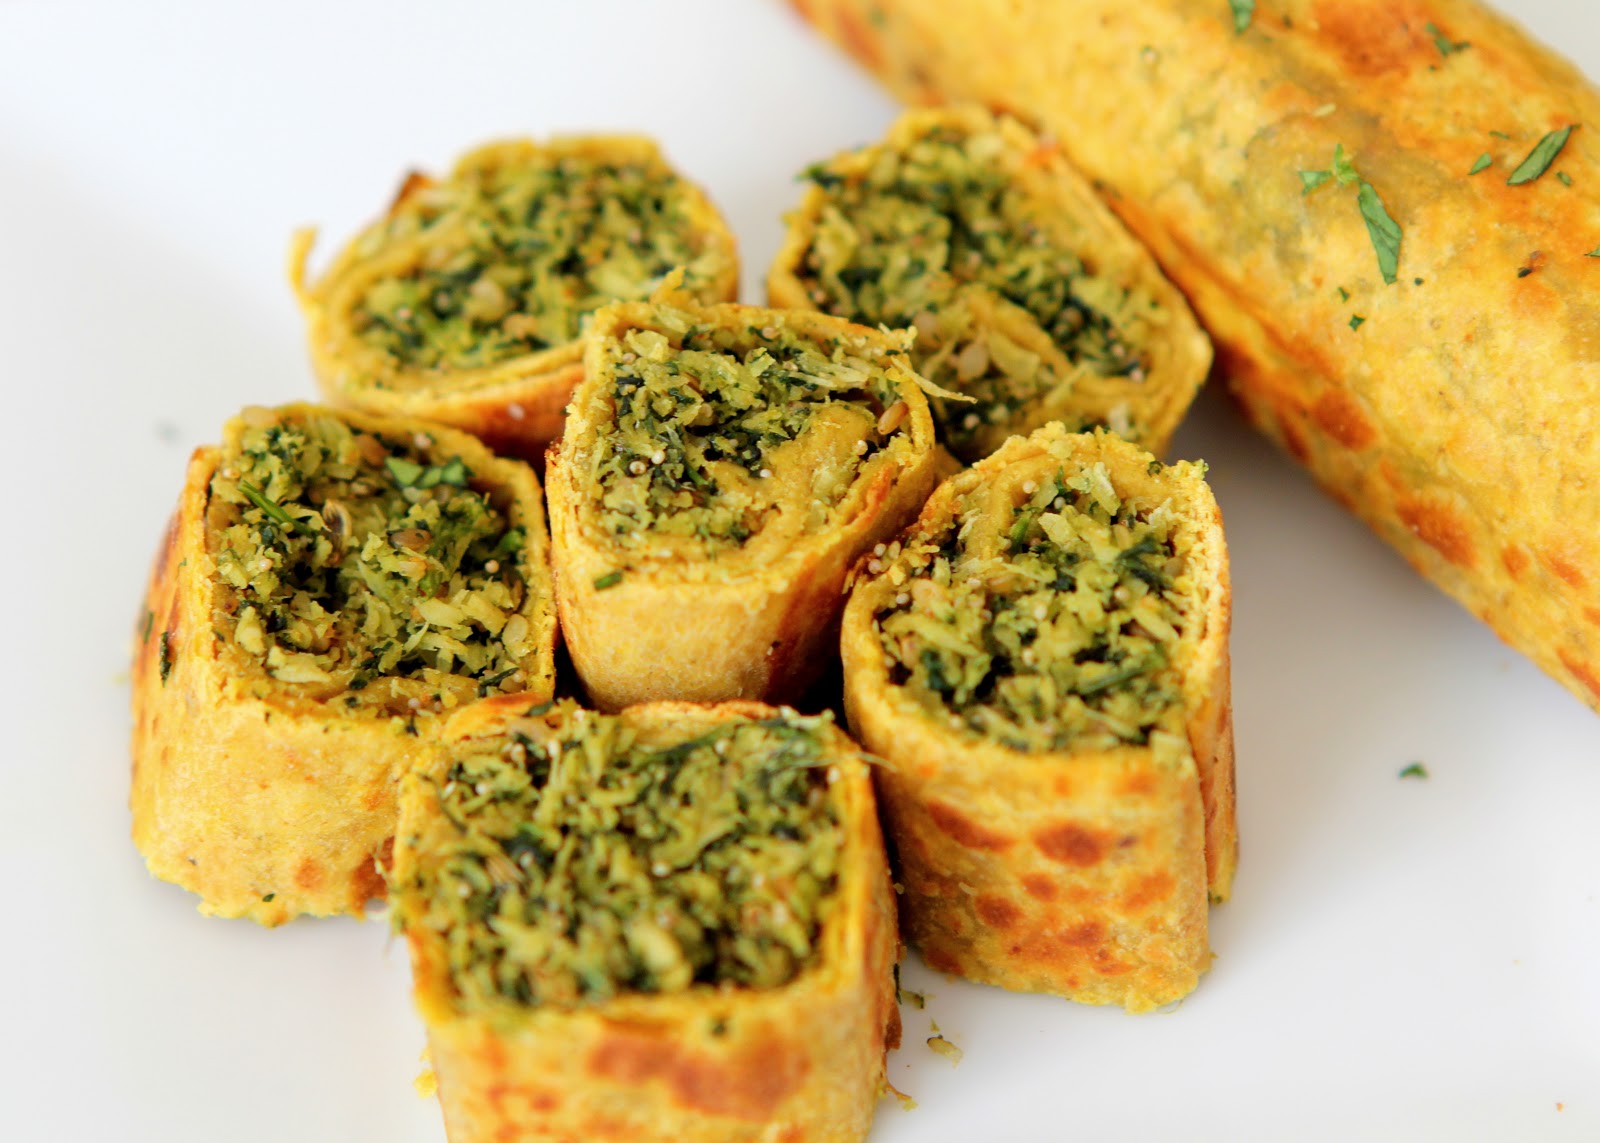
I wanted to make something different this festival season. Not the typical sweets and faral - I'll be making plenty of that for diwali. My mom as always came to my rescue with this tasty snack recipe - Pudachi Wadi. Pudachi wadi is somewhere between Bakarwadi and Kothimbir wadi. It has a lot of common ingredients with kothimbir wadi and is shaped like bakarwadi. Can't go wrong with that. I guess the name comes from the way you shape these - rolling the roti into a pudi (a small packet). I was so excited about the recipe that I started going through my pantry for the ingredients before mom was done talking to me. 


This wadi has a savory coconut-cilantro filling with toasty sesame seeds and poppy seeds. For additional flavor and taste, I added some fennel seeds. The sweet bite they provide balances the spicy-savoriness perfectly. Besan in the covering makes it very crispy and light. The original recipe calls for frying but I went with shallow-pan frying using minimal oil. I don't think there was any compromise on taste. You should just make sure that the filling is roasted well since it won't cook as much while shallow frying as in deep frying. You can deep fry the rolls before cutting if you want the real thing. I didn't try baking them, but I think they'd turn out okay that way too. The recipe will make about 20-25 pieces after cutting.  


Pudachi Wadi

Ingredients:
Filling:
1 Tablespoon sesame seeds
1 Teaspoon poppy seeds
1 Teaspoon fennel seeds
2 Teaspoons oil
1 Teaspoon garlic paste
1 Teaspoon ginger paste
1 Green chili - finely chopped
1/2 Cup packed grated coconut
1 1/2 Cup loosely filled chopped cilantro
1 Teaspoon dhana-jeera powder
1 Teaspoon goda masala/garam masala
1/4 Teaspoon red chili powder for color (optional)
Salt to taste

Cover:
1/2 Cup whole wheat flour
1/4 Cup besan/chickpea flour
1/2 Teaspoon dhana-jeera powder
1/2 Teaspoon red chili powder
Salt to taste
Water as needed

  • First, knead the dough by combining all the ingredients for the cover. Add just enough water to form a stiff dough you can roll out. 
  • For the filling, roast the sesame and poppy seeds until slightly darker and aromatic and keep aside. 
  • Heat oil in a kadhai and add ginger, garlic, green chili and roast for about a minute. Then add rest of the ingredients except the cilantro and roast, stirring constantly. 
  • Add cilantro once the coconut is roasted well and let it all come together for another minute or so. 
  • I pulsed this filling through the grinder quickly just to mix everything well. But you don't have to do that. 

To make the wadi:

  • Divide the dough as well as the filling in 4 equal parts. 
  • Roll each dough ball into a roti - not too thick. Then fill the center with the filling. Fold the small sides in so the filling doesn't come out and roll the roti into a tight roll. 
  • Heat a pan and drizzle some oil. Pan-fry the wadi rolls turning on each side until the cover is crispy. 
  • Once completely cooled, cut the rolls into small pieces and serve with some tamarind chutney. 


Thursday, August 9, 2012

Blog Hopping

The blogging community has opened up a world of culinary possibilites. I bookmark about a dozen recipes every day and at least try to use an interesting technique, a new ingredient or get inspiration from them even if I can't go through them all. There are way too many awesome recipes to try and way too many great cooks to get to know for one lifetime. But the first blogger I came across about 5 years back while looking for Imperial Cold Drink House, and quickly realized the popularity of, was Nupur of One Hot Stove. Nupur is hugely popular in the blogging community, and it is very well deserved. She always has some delicious recipes and useful tips for her readers. And there are few who can write as beautifully as she does.

Her latest post talks about the mighty machines in our kitchen - food processors. It made me fall in love with the Ronald food processor my parents gifted me all over again. I can't thank this little helper of mine enough for making my life easier. I use it to knead dough when I have a large group of people to feed, make soups, chutneys, idly-dosa batters and a zillion other things. It was time to show it some love by making Nupur's red bell pepper pesto. What a fantastic recipe! I have used roasted red bell peppers in wraps, hummus, eggplant dips etc., but have never tried pesto with it. Coincidentally, I had also picked up a bunch of red bell peppers on sale from Sprouts the other day. Nupur's post came at the right time. With whatever substitutable ingredients on my hand, I made the pesto today. There was a fresh spring of basil in the garden - totally meant for pesto. The only nuts available in my pantry were almonds. They don't have an overpowering taste and blended in just perfectly. Husbby is raving about this pesto and I'm really pleased with the outcome as well. I'll surely be making this for a potluck or a party!

Updated image : I made this pesto without tomato and I think I like this better. 
Roasted Bell Pepper - Basil Pesto

Ingredients:
2 Large red bell peppers - roasted, peeled and seeded
1/2 Tomato (optional)
2 Garlic cloves
1/2 Cup almonds (you can also use a mix of almonds and cashews)
Basil - handful of leaves
1 Teaspoon paprika or to taste
Salt to taste

  • Roast bell peppers using the technique I've mentioned here. Or simply use the bottled ones.
  • Grind all the ingredients into a fine pesto. I omitted olive oil completely. The pesto tasted just perfect without it, but go ahead and add it if you like the taste. I didn't have any jalapeno. Paprika was a good substitute for smoky heat. 

We enjoyed the pesto with some chips. I'll probably be spreading the leftovers over a slice of bread tomorrow. 

Wednesday, August 8, 2012

First Zucchini!

Finally, after fighting last year's luck and some persistent slugs, my zucchini plant has yielded its first fruit. As I mentioned earlier, I knew exactly what I was going to make with the first zucchini. Hubs and I have become huge fans of this simple recipe to make zucchini fries/chips. The original inspiration was a recipe by Veggie by Season. I had tried it in my egg-aversion days and had replaced egg with some yogurt to help the breadcrumbs stick. Sadly, I ended up with a product far from being crunchy. The yogurt made it a soggy mess. Ever since, I have resorted to the good ol', comparatively healthy technique of shallow frying. I also switched to panko bread crumbs instead of the regular ones since they provide a lot more crunch. Some tweaking to the original seasoning of simple salt and pepper makes this version quite flavorful. Today we enjoyed the chips as appetizers for dinner. One zucchini was just enough to get us started on the rest of the courses. 

The picture came out sad, only because I was too hungry to spent time on photography!
Zucchini Fries/Chips

Ingredients:
1 Zucchini
1/2 Cup yogurt - whisked
3/4 Cup panko  bread crumbs
Paprika to taste
Dash of garlic powder
Salt to taste
Oil spray/oil

  • Cut zucchini in about 1/8 inch thick disks. Don't make it too thin. 
  • Whisk some yogurt (with a few drops of water if needed) so that it's smooth. Season it with paprika, salt and a dash of garlic powder. 
  • Take the bread crumbs in a plate and season them with paprika, salt and garlic powder as well. Seasoning yogurt as well as the bread crumbs will make these chips flavorful throughout. 
  • Dip the zucchini in yogurt, then press into the bread crumbs on both sides and fry in a pan using oil spray. If you don't have oil spray, simply spread some oil on the pan. Fry on both sides until golden brown. 

You can enjoy these chips with some ranch or another creamy dip, but they taste just perfect by themselves. 

Sunday, July 8, 2012

Citrus Salad

Cleaning, cooking, grocery shopping, crafting, reading and studying. That's a Saturday well spent. In between all the chores (and a big scoop of Fro-Yo), I totally skipped my lunch yesterday. When the hunger finally hit, I threw together a quick salad for..umm..Luncher(Lunch cum Dinner=?) or Linner! Salad was the perfect choice for a meal on a hot day like the one we had yesterday.


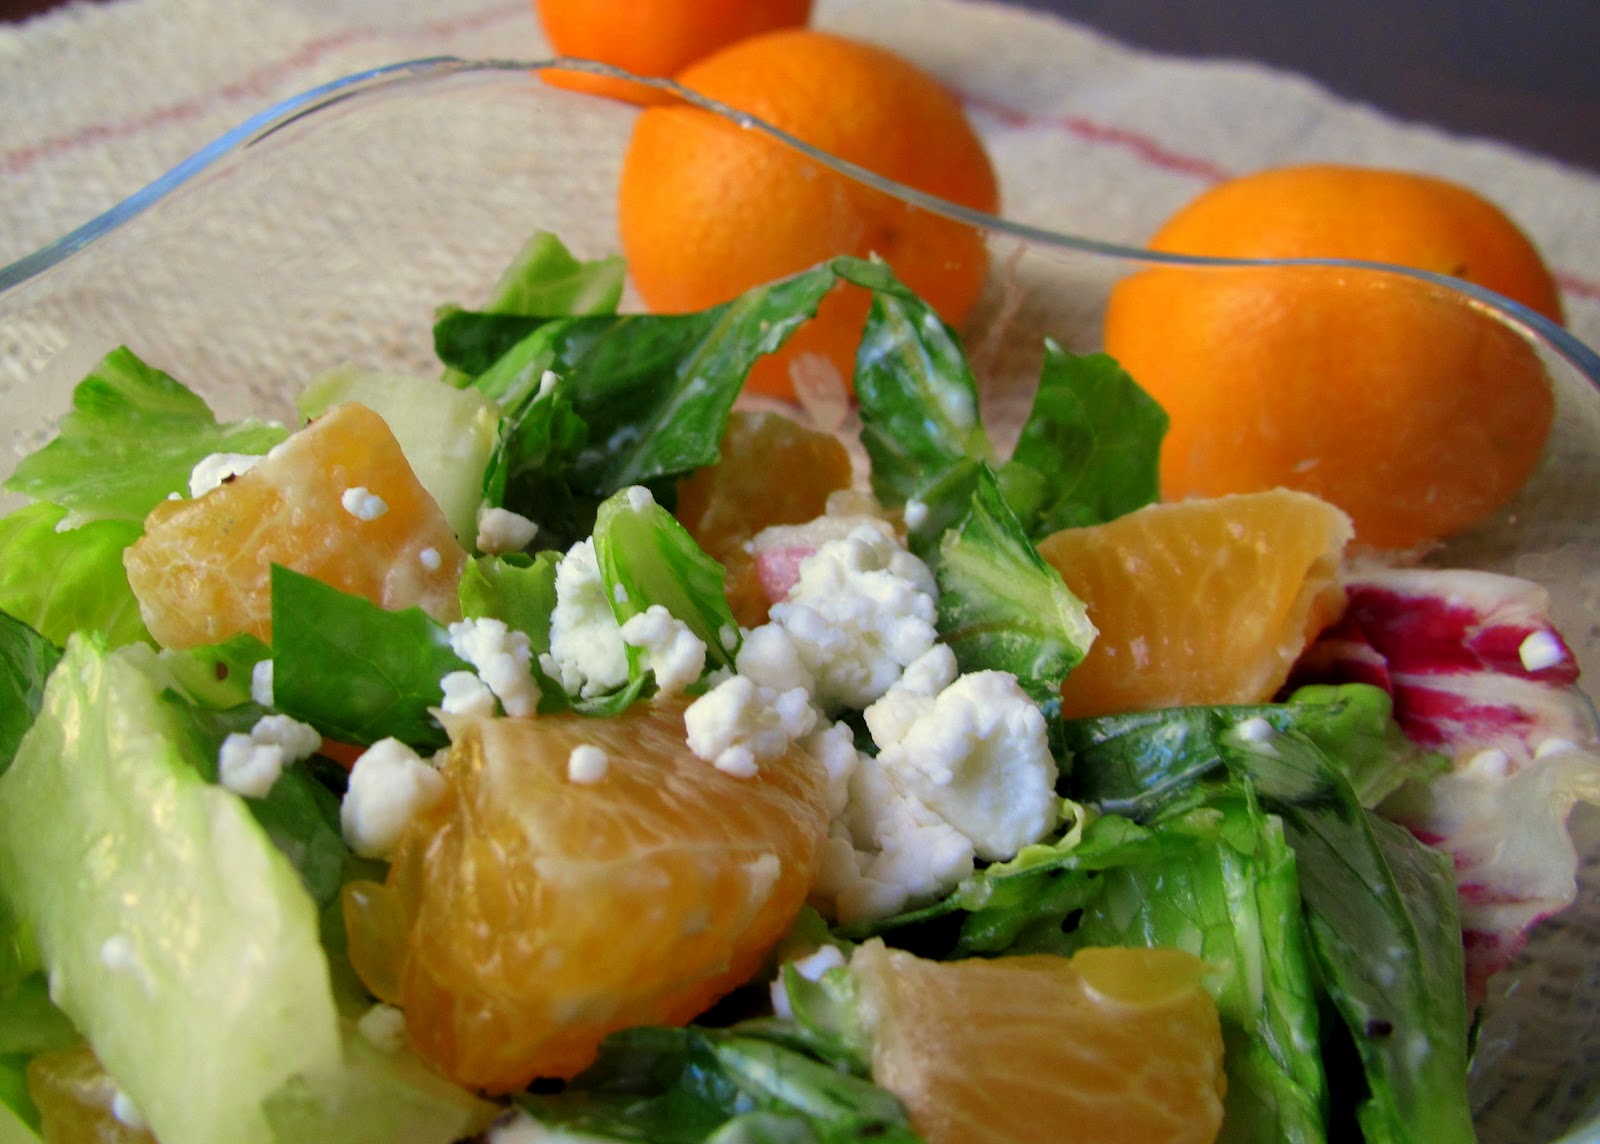
I talked about this deh-licious salad my friend made for Thanksgiving dinner. I love love love fruits in salads, which you can tell from herehere and here. I didn't have the original dressing recipe, but I knew all the important ingredients that made up the salad. It wasn't really meant to end up on the blog. The salad was so darn tasty though, that I couldn't resist posting the recipe (hence the crappy photography). This citrus-goat cheese salad with honey dressing is just perfect for a summer afternoon. The goat cheese gives it plenty of creaminess and slight pungent earthiness. And what can be more refreshing than citrus? I used tangerines - perfectly citrusy, easy to peel and separate the wedges, and full of bursting juices. The dressing comprising of two ingredients altogether couldn't have been simpler. 


Citrus-Goat Cheese Salad with Honey Dressing


To make this 'too simple to post a step-by-step recipe' salad, simply toss together chopped lettuce mix (Italian salad mix is the best), tangerine wedges cut in half and crumbled goat cheese. For the dressing, whisk together honey and red wine vinegar in almost equal parts (a little less vinegar than the honey, adjust the flavor to your liking), salt & pepper for seasoning and drizzle over the salad. 


With as little as 3 main ingredients, you have a salad bursting with flavors, textures and colors. 

Saturday, July 7, 2012

Bookmark Thursday

Thursdays are usually 'throw something together and rush out the door' kinda dinner nights for us. I have a dance class every Thursday evening (pursuing a long time dream of learning Kathak :) and I don't get much time to cook anything. Hubby helps himself to some leftovers (if he's really hungry) or waits for me to come back and put anything that's available in the fridge in between two slices of bread and call it a sandwich. After almost 5 months, I was home this Thursday. Bonus time! It was a perfect opportunity to go down some of the bookmarked recipes and try 'em out. 


I had been eyeing these glorious Masala Buns posted by one of my favorite bloggers, US Masala. For a while, it seemed like every other blogger was making buns of some sort and I was the only one missing out. A few days back I came across Sangeetha's blog through her HITS event and saw another recipe for stuffed buns. The recipe looked too tempting not to give it a shot.


Masala buns are simple buns stuffed with some kind of curried vegetable filling. They looked very intimidating to me at first, but except for the fact that you have to wait, the recipe turned out to be quite simple. The fun part is, you stuff the buns before they bake. So as you pull a morsel of a fluffy, soft bun, there's a tasty treat inside! Sangeetha had stuffed the buns with spicy cauliflower, which I'm sure would've tasted great. But I went with a more predictable filling - veggies cooked with Paav-bhaji masala. To make the buns a little 'Indian', should I say, I added toasted cumin seeds to the dough. Aromatic, pillowy buns stuffed with paav-bhaji like bhaji. Tell me you won't like that!
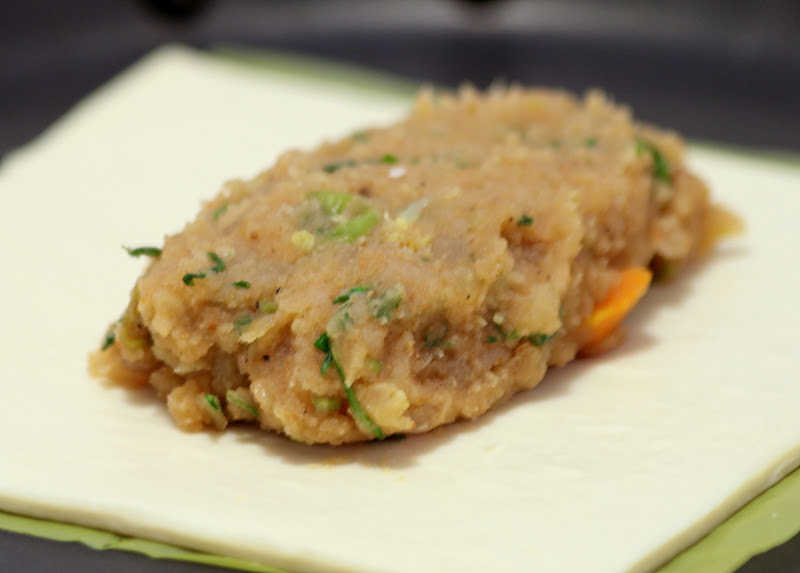

Masala Bun 

Ingredients:
Buns:
1 1/2 Cups All purpose flour
1/4 Cup warm water
1/4 oz. Dry active yeast packet
1 Tablespoon sugar
1/2 Teaspoon salt
1/2 Teaspoon toasted cumin seeds
3 tbspn EVOO + as needed

Stuffing:
1 Tablespoon oil
1/2 teaspoon cumin seeds
1 Large / 2 medium boiled potatoes
1 Small tomato
1/2 Medium onioin
1/2 Cup mixed veggies - I used peas and bell peppers only
2 Garlic cloves - minced
1/2 Inch ginger - minced
1 1/2 Teaspoons paav-bhaji masala
1 Teaspoon Red chili powder
Salt to taste

Dough for the buns:
  • Mix yeast, sugar and warm water and let it stand until the mixture gets foamy (~10 mins). Sangeetha mixed the yeast with the flour itself, but I figured getting the yeast acting would be faster and better. 
  • Add flour, salt, EVOO. Bruise the cumin seeds on your palm using the thumb slightly to get all the fragrant oils out and add them to the dough. Knead well using a little bit of water as need to form a stiff but soft dough. The original recipe used milk instead of water, I just took the easy way. 
  • Cover the dough with a damp towel and keep in a warm place for ~45mins to an hour so to rise. While you are waiting, start working on your stuffing. 
  • Once the dough almost doubles in size, punch it gently and knead again for a few mins. 
  • Divide the dough in 6 parts and shape them round. Keep on a greased aluminum foil on baking sheet. Let them stand for another 10 mins or so. The dough will rise again slightly.
Stuffing:
  • Chop all the veggies finely. Mash the potatoes. 
  • Heat oil in a pan and add cumin seeds. Once they splutter, add ginger-garlic, onions and tomatoes and saute until the onions are translucent. 
  • Add spices, rest of the veggies, salt and cook for 10 mins or until the mixture comes together well. If it becomes too dry, add a little bit of water. Adjust the spices according to your liking. 
Put it together:
  • Make a dent in each of the dough balls to form a cup-like shape. Stuff them with a golf-ball size vegetable filling and pinch the dough together to close the dough balls. 
  • Brush them with some OO and let them stand for another 10 mins. 
  • Bake for 15-18 mins on 375F or until the buns turn golden brown. 
  • To serve, brush the buns with a little bit of garlic butter or OO. 
If you have some stuffing leftover - make a sandwich :D.


Tuesday, December 13, 2011

Look, I Made A Snowman!

Only 12 days to go till Christmas, and I'm sure everyone's got their hands full baking and cooking and planning big meals for the holiday parties. The season's eatings started on my side with the food bloggers holiday party over the weekend. Oh, the goodies everyone made! The new enthusiastic baker in me wanted to make something sweet for the party at first. But looking at the number of bloggers who signed up for desserts, I turned to a savory dish I knew would please the crowds. Peruvian Causitas - mashed yellow potatoes seasoned with lime juice and Peruvian chile - make a great appetizer for any party. Shape them like snowmen, and you have the cutest looking appetizer that can be the center piece of your serving table! My dear Peruvian friend and neighbor in Utah made these snowmen two years back for Christmas and I just couldn't get over how adorable they were. I mean, look at them!!!

Hello, everyone!
Causas or causitas are a popular dish from Peru. It's a simple recipe with very few ingredients but packed with lots of flavor. The causitas I made were simply mashed potatoes/pureed. The more elaborate preparation contains filling of various sorts, such as avocado, shrimp, crab etc., to go in between two layers of mashed potatoes. Causitas makes for a great finger food. Shaped like little snowmen, they are just perfect for a holiday party claiming the center spot on the table. There are no exact measurements to make the potatoes, but make sure the punch from lime juice is prominent. That makes it delightfully light for a potato dish. And as my friend would say, add lots of lime juice to any Peruvian dish and it tastes good!


Snowmen Causitas - Peruvian Mashed Potato Appetizer

Ingredients:
Medium Yellow/Yukon Gold potatoes - about 1 per person (I used 10)
Limes - I needed 3 large limes for my potatoes
Peruvian Aji Amarillo chile paste - If you can't find it easily, use any mild yellow/orange chile
Salt & Pepper to taste
2-3 Tablespoons vegetable oil.

  • Boil potatoes, peel and mash. When the potatoes cool down enough to touch, get your best tool out - your hands - and take out any lumps. Add oil little by little while mixing by hand so the potatoes are not too sticky. 
  • Add juice from one lime at a time, and taste to make sure there's enough lime flavor. Don't let the mashed potatoes get too thin else you won't be able to shape them. 
  • Add a little bit of chile paste - this is just for slight flavor and color. The dish is not supposed to be spicy. I couldn't get to a Peruvian store so I used 1 regular yellow chile ground to paste. 
  • Season with salt & fresh cracked pepper. Taste, and as my friend put it, choose your lime-chile-pepper-salt happy place!! That sums it up =)
  • To make the snowmen, roll the mashed potatoes into small balls in two sizes, one smaller than the other. Stack the small ones on top of big ones and poke a toothpick through them. For the eyes and nose, you can use a variety of things. I chopped olives finely for eyes and red bell pepper for nose. You can also use carrots. Decorate the snowmen however you want. 

This is a great make-ahead dish. Make the mashed potatoes ahead of time and just shape them when you are ready to entertain. Get your kids to help you with making the snowmen and decorating them. Boy, are they gonna have fun with it! The snowmen taste just as good as they look.

Happy Holiday Cooking, everyone! :)

The snowmen sitting pretty with other dishes


Monday, November 21, 2011

A Warm Winter Soup

Others may think it's always bright and sunny in San Diego, but we do get our fair share of cold days. Like the bone-chilling 60 degrees weather we had today ;). Jokes apart, it's getting cold here now and with Thanksgiving just around the corner, winter is in the air (literally). Well, I'm totally loving the crisp morning air, signs of the holiday season and how the heavenly aromas of cinnamon, nutmeg, and toasty pecans engulf me when I step into the grocery store. Squash of every color, shape, and size have replaced summer produce on the racks just in the two weeks I was gone to India. Pumpkin, of course, is the king of squash around this time. I got a gorgeous bright orange slice of pumpkin last week to initiate my winter cooking!

There's nothing more comforting in this season than a pot of soup simmering away in the kitchen. The waft of aromatic spices going around the house makes you feel all warm and cozy inside. I came across this pumpkin soup recipe by Rachael Ray and loved the idea of garnishing the soup with crispy apple and cranberry relish. Knowing that I'll be consuming (a lot) more than needed calories in the ensuing weeks, I wanted to make my soup low on calories. I replaced the heavy cream with a little bit of milk and added a small potato to get that smooth, rich texture. Also, I reduced the amount of liquid quite a bit to make it thick and full of pumpkin flavor. It was a perfect winter soup with all the wonderful holiday elements in it!

The recipe looks long, but it's literally as simple as tossing ingredients together and letting them simmer until you have a hearty flavorful soup. 

Colorful pumpkin soup with apple-cranberry relish - full of all the wonderful holiday flavors!
Pumpkin Soup with Apple-Cranberry Relish

Soup:
1 Tbsp butter
1 Small onion - chopped
1-2 Garlic cloves - chopped
1 Bay leaf
1 Inch cinnamon stick
1 Small russet potato - peeled and cut into small pieces
Salt & Pepper
1 Tspn cumin-coriander powder
2-3 Tspns paprika - adjust per your liking
2 Teaspoons all purpose flour
1 Wedge of pumpkin / 28 oz can of pumpkin puree
2 Cups water
1 Cup Vegetable stock (optional)
A pinch of nutmeg
1/4 Cup whole milk

Relish:
Red apple - finely chopped
Handful of dried sweetened cranberries - finely chopped (no particular measure here, add as many or as little as you want)
1 Tspn chili powder
2 Tspns honey
Chopped almond (optional)

  • If you have fresh pumpkin, cut it into 2 inch pieces and pressure cook them in a little bit of water. The peel comes right off after cooking. Mash it slightly. 
  • Heat a soup pot on medium, add butter and let it melt. 
  • Add bay leaf, cinnamon stick, garlic, potato and onion and season with salt & pepper. Saute for a few minutes until the potato and onion are tender (~5 mins). 
  • Add cumin-coriander powder, paprika, pumpkin mash/puree, 1 cup water & 1 cup vegetable stock. I didn't use all vegetable stock because I didn't want the pumpkin flavor to be overpowered by the stock. However, some stock provides a little bit of body to and extra flavor. Add another cup of water if needed.
  • Sprinkle a pinch of nutmeg. Add milk and let the soup simmer for 10 mins or so. 
  • Take out the bay leaf and cinnamon and puree the soup in the food processor or by using a hand mixie. 

  • Mix chopped apple, chopped dried cranberries, honey and a little bit of paprika. Top the soup with this relish.  For some more nutty flavor to the soup, I sprinkled some chopped almond. 


Tuesday, October 11, 2011

Puff of Magic

Long before I was introduced to the wide array of pastries, I drooled over Veg Puffs at the Corner Bakery by our house. Puff pastry sheets were completely unknown to me at the time, not available at any grocery stores. It amazed me endlessly how someone managed to get SO many paper-thin layers on the crust. The only logical explanation I had come up with was, someone rolled the dough into ridiculously thin sheets and layered them. Well, I was naive and ignorant. Veg Puff was one of those things I believed only bakeries could magically produce. Something home cooks couldn't fathom recreating. Of course, it dawned upon me later that making a delicious puff pastry was as easy as 1-2-3. 1: Buy pastry sheets 2: Bake with your favorite filling 3: Gobble, gobble, gobble! One could make the pastry dough at home, but sometimes I go for convenience.


Veg Puff is a popular pastry pocket with a flaky, golden brown crust that everyone loves. Tucked inside is a mashed vegetables filling seasoned with all the aromatic spices we Indians love. And of course, what's not to love about that combination! The fluffy, slightly sweet buttery crust tones down all the spices and the crunch from it provides a great contrast to the mashed vegetables. You sink your teeth into it and without fail give out that 'ohh, this is so comforting' sigh. The filling has all sorts of vegetables and they are so wonderfully masked that any picky eater will love them. It has mashed potatoes, cauliflower, carrots, peas and onion. You can add bell peppers, beets or I imagine cabbage too! You can change up the quantities of vegetables per your liking. Veg puffs were one of my favorite (yes, B+I) after school snacks. Recreating childhood 'magic' in my very own kitchen was simply marvelous! The list of ingredient looks long, but trust me, it's a very simple recipe. 


Veg Puff 

Crust:
Frozen puff pastry sheets. Thaw for 8-10 minutes or until they are soft and pliable. Cut them into 5'x5' or 6'x6' squares. Alternatively, you can buy the pre-cut square sheets.

Filling:
2 Medium white/yellow potatoes - boiled and mashed
1/2 Small onion - finely chopped
Handful of green peas
1/2 Cup finely chopped vegetables - I used cauliflower and carrot
1 Teaspoon ginger-garlic paste (optional)
Finely chopped cilantro
1/2 Teaspoon cumin seeds
1/2 - 1 Teaspoon red chili powder - adjust according to taste
1/2 Teaspoon cumin-coriander powder
1/2 Teaspoon Garam masala
1/4 Teaspoon Chaat masala/Aamchur powder
Pinch of asafoetida
Pinch of turmeric
Salt to taste
2 Teaspoons oil

  • Preheat oven at 350F
  • Heat oil in a pan, add cumin seeds and let them splutter. 
  • Add asafoetida, turmeric, ginger-garlic paste and onion and saute for a couple of minutes until the onion is golden brown. 
  • Add all the vegetables except mashed potatoes, all the spices and salt and let the vegetables cook for 2-3 minutes. 
  • Then add mashed potatoes, a splash of water if the mixture is too dry, mix and let everything cook together for 3-4 minutes. The cooking will make all the spices and vegetables come together. 
  • Sprinkle some finely chopped cilantro on the filling. 


  • Place about two tablespoons of the filling at the center of the puff pastry sheet, fold it in center to form a rectangle and close the ends by pressing together. You can make triangles alternatively, or any creative shape you can come up with. 
  • Bake the pastry in the oven until golden brown. You may have to turn it once (carefully) to make sure the bottom of the pastry is baked also. 


Enjoy the warm, flaky pastry with some ketchup! Yes, that's the 'sauce' of choice for most Indian snacks.

Sunday, June 19, 2011

Setting New Trends..Breaking Some Old

Brace yourself for a long 50th post!

Boy, what an exciting week it's been! New creations, new acts of bravery and some new friends - all packed in one fraction of a month.
The week started off with the same old Monday blues with a bit of a drama at work...never hurts to have some spice in life, eh? I thought it would be just an ordinary week, only to find myself going routes I would have either avoided or not expected myself to be.

1. The (not-so) big purchase of a measuring cup: Yes! I now own an actual measuring cup that's not a 'katori' (small bowl) or a ramekin used to eyeball ingredients. It was a big commitment for a person like me who swears by 'a pinchful of this and a palmful of that'. But I was quick to realize what a whole new world of opportunities it has opned for me. All that baking I steered away from, well..not anymore! Of course, I want to stay true to myself and enjoy what I do. Nevertheless, with all the inspiration from my fellow bloggers and a little bit of rethinking, I've realized what I'll love making and eating.

To begin with - Whole Wheat Banana Loaf! I had two bananas too ripe for my taste. I thought of making Kelyachi Puri (Indian Fried Banana Flat Bread) but frying is always at the bottom of my cooking techniques list. Last year I made a whole wheat banana bread/cake/loaf/whatever using barely any oil and no eggs. It turned out yummy but this was a good opportunity to make it the right way. I stumbled upon this recipe through Elise's blog. I followed the recipe exactly except replacing nuts with chopped dates. So rustic and earthy with the whole wheat, dates and honey! This is breakfast, lunch, snack, dinner all in one. Two thumbs up!

The loaf..and a slice with a drizzle of honey that wasn't supposed to get soaked up :D

2. Food Bloggers Round Table 1: I feel so lucky to have met some of the best food bloggers from San Diego through the Bake Sale. Our ever-so-gracious host Marie along with Amanda initiated the San Diego Food Bloggers Round Table meetings starting this weekend. This will be a platform for some veteran bloggers and small time bloggers like me to get together and discuss various blogging related topics. The topic for our first meeting was Social Media - how to leverage the various social networking sites to our advantage. It pushed me to be a little tech savvy, the result of which was my blog's Facebook Page! Yay! Thanks to Kathy and the rest of the group for their valuable input. We met up over a potluck brunch. You can only imagine how delicious the food was!


I wanted to bring a taste of India to the table without serving something completely foreign. And you'll all agree there's nothing more popular than Samosas! To make it extra special, the filling was made of Paneer. It was my random experiment that went right thankfully. Here's the recipe:

Cilantro-Mint chutney
Baked Samosa

Paneer Samosa

Ingredients:
1 Cup All purpose flour
1 Tablespoon Ghee/clarified butter
12 Oz. Paneer - grated
1 Medium potato - boiled and mashed
1/2 Cup green peas - coarsely ground
1/2 Small Onion - finely chopped
3 Cloves garlic
1 Inch Ginger
3-4 Mint leaves
1 Small green chili
1/2 Teaspoon cumin seeds
Garam Masala
Chaat Masala
Cumin-coriander powder
Red chili powder - if needed
Salt to taste
Oil for frying

  • Mix a cup of all purpose flour, a pinch of salt and warm ghee and add water little by little to form a firm, thick dough. Cover and keep aside.
  • Grind ginger, garlic, green chili and mint to a paste.
  • Heat about a couple of teaspoons of oil in a saute pan and add cumin seeds to it. Once the seeds roast, add onions and let them sweat just for a couple of minutes. I didn't want to add raw onion hence I added this step. 
  • Take it off the heat, add grated paneer, mashed potato, peas, salt to taste, some garam masala and chaat masala and some red chili powder if needed. I was doing a trial and error with the spices since my Indian taste buds are biased and I wanted it to appeal any palete. This is the stuffing.
  • To make the samosa, take a small ball of the dough (smaller than a golf ball) and roll it out thinly. Cut it in the center forming two half moons. Form a cone from each half, add the stuffing and close the open side with a little bit of water to help the dough stick together.

I fried one batch for the meeting and baked one for us at home (350F ~15-20 minutes turning every 5 minutes). As always, I loved the baked version a lot better - much less oil and the crust was much crispier. The fried one tasted good no doubt - but my vote always goes for baking. I must thank my lovely husband for helping me fry the samosa as I waited to make them at the last minute so they'd be fresh.

To accompany the samosa, I made a quick green chutney with 2 bunches of cilantro, some mint, a couple of small cloves of garlic, green chili and cumin seeds and salt ground finely.

3. Into the ocean: Now for the most exciting, somewhat scary, adrenaline rushing experience of the week - Kayaking!! This may sound like a regular activity to any San Diegan - not to me. I am not scared of water..hell no...I'm TERRIFIED! Ocean especially freaks me out, for that matter any body of water where I can not touch the ground (which ain't too deep) or hold onto something. This was the bravest thing I've done in a long time. Hubby gave me all the support and kept me calm throughout and brought me back to the shore safe. Although every nerve and muscle in my body was cringing with fear, I managed to stay afloat for a little more than an hour and landed back without tipping over. Am I a superwoman or what?! Go ahead - laugh at me. I have no shame though. Floating over big waves in the ocean may not be my idea of fun, but I can finally check this off my list!

On the way to La Jolla Cove

With that and hoping everyone had a very happy father's day...I bid you adieu till the next time.

LinkWithin

Related Posts Plugin for WordPress, Blogger...