
Showing posts with label Baking. Show all posts

Thursday, February 28, 2013

Which Wich - Tasty Sandwich Rolls

My new found love seems to be bread-making. The freshly made, warm, non-chemical infiltrated bread can't be beat. And who doesn't love the yeasty-toasty aroma the kitchen fills up with while baking? I've been enjoying trying out different recipes and practicing my techniques. Bread making is deeply therapeutic and satisfying. If you have any pent up frustration from work or whatever other things life throws at you, take it out on the dough and knead it out! After the first couple of failed attempts, I've got it down pretty well now. The most important thing to bread making are finding the right balance of flours, kneading the dough really well and giving it time! Yes, I used to get very impatient earlier and not let the dough rise enough or slice the bread too fast after baking - both of which will result in dense, sticky loaves. Once you get past that, you'll realize that the basic technique to making bread is pretty much the same - activate/proof the yeast, add flour, knead, let rise, knead again and bake. 
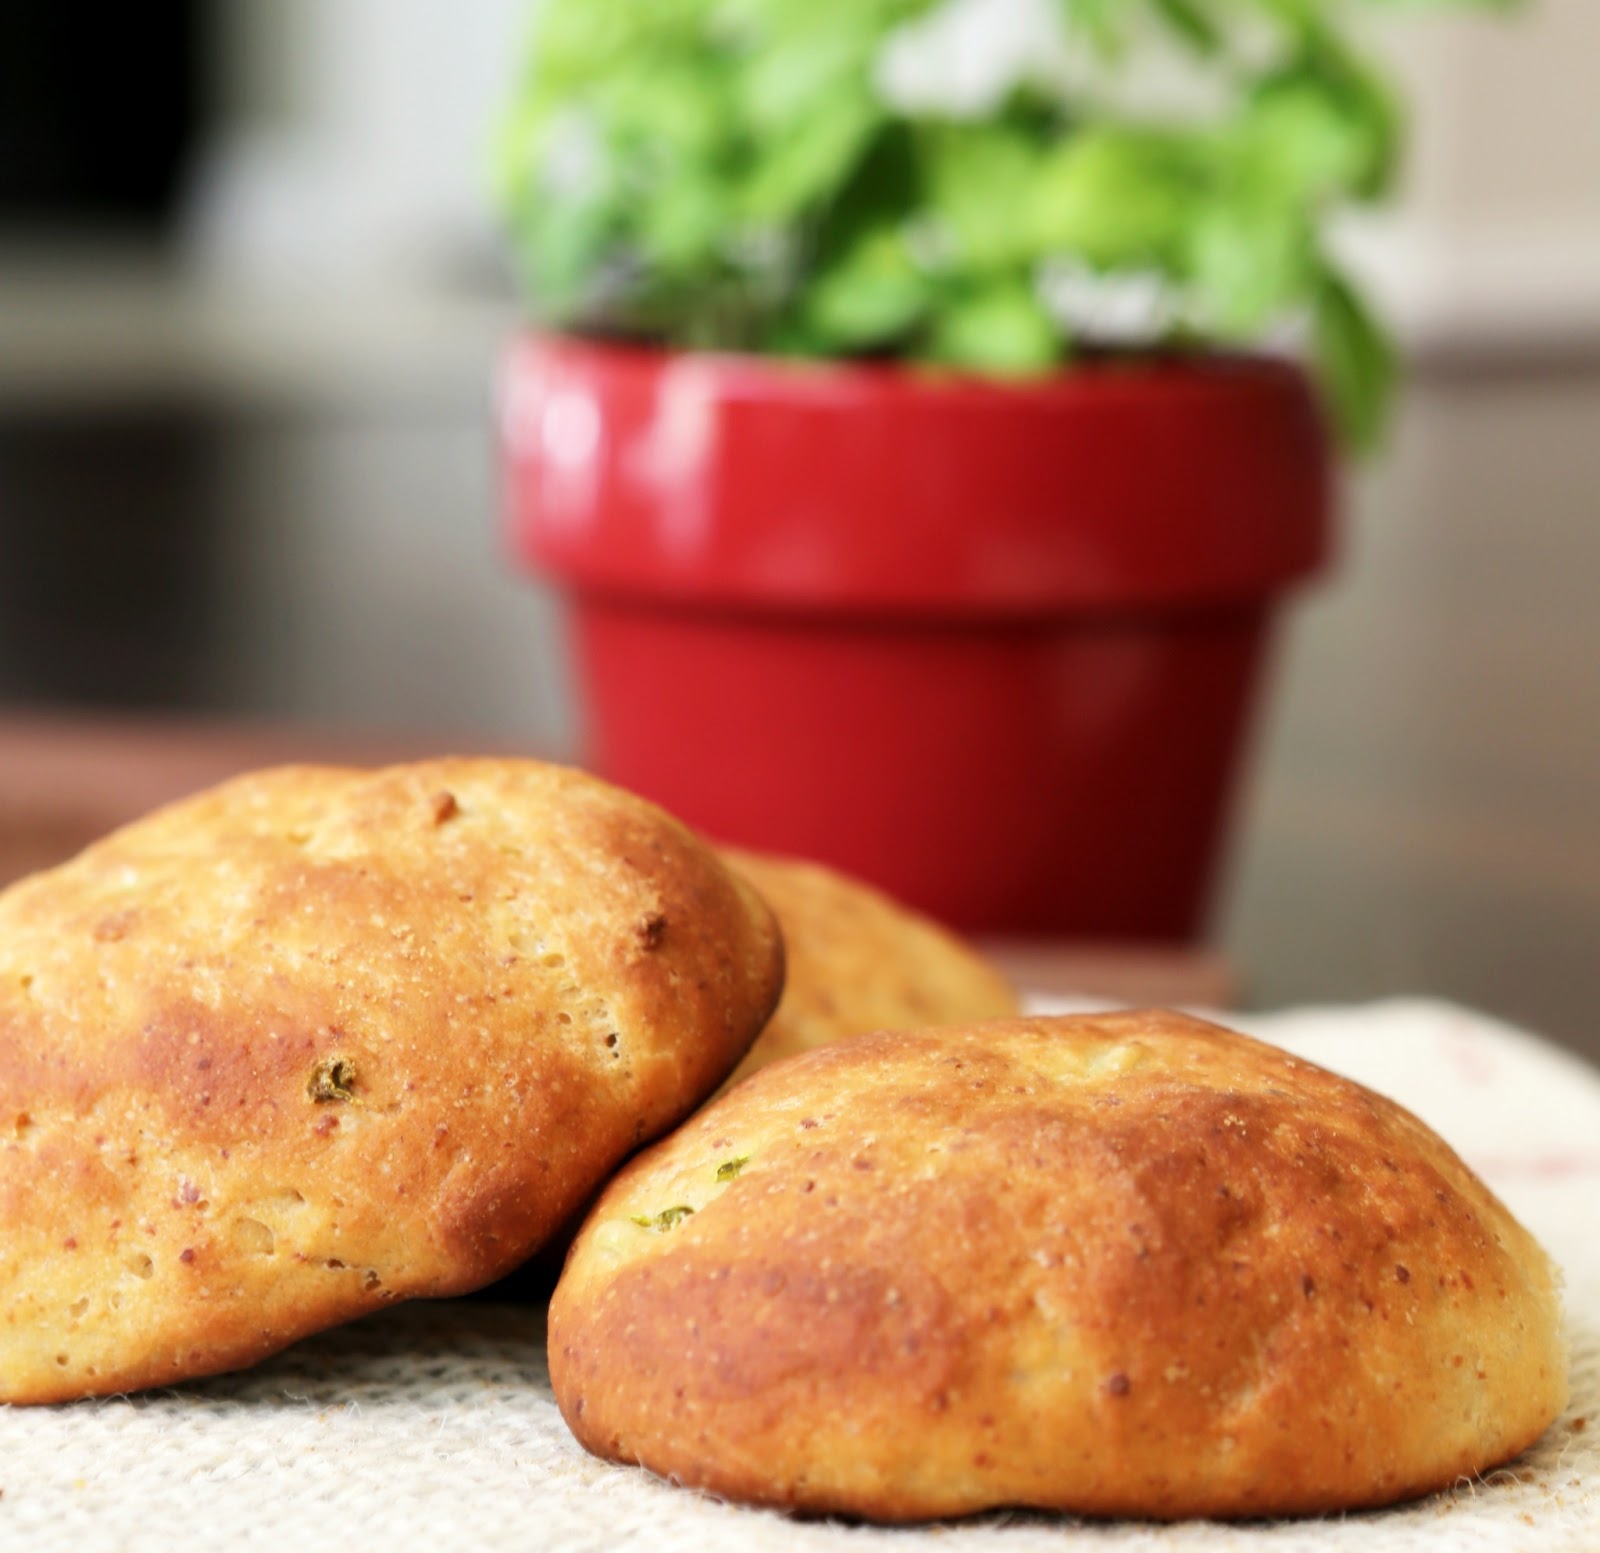

I had bought a copy of Homemade Bread - Popular Kitchen Series a few months back. It's a great little magazine that explains bread making techniques in detail and has some great recipes anyone can try at home. I've tried a few now, some with my variations, and they worked out great. A few days back, I took a recipe for a basic loaf and made smaller sandwich rolls with some oomph. Jalapeno-parmesan rolls were great to make quick sandwiches - especially for lunchbox. Husband likes them because sandwiches are are easy to eat at work. With a fried egg in between, they make for a great brunch. There's lots of flavor in the bread itself, so anything you stuff in between will taste great. The recipe is very adaptable - you can add a myriad of things to the dough, like olives, onions, sun-dried or regular tomatoes, zucchini, garlic, herbs, any other cheeses you like. Let your creativity go wild. 
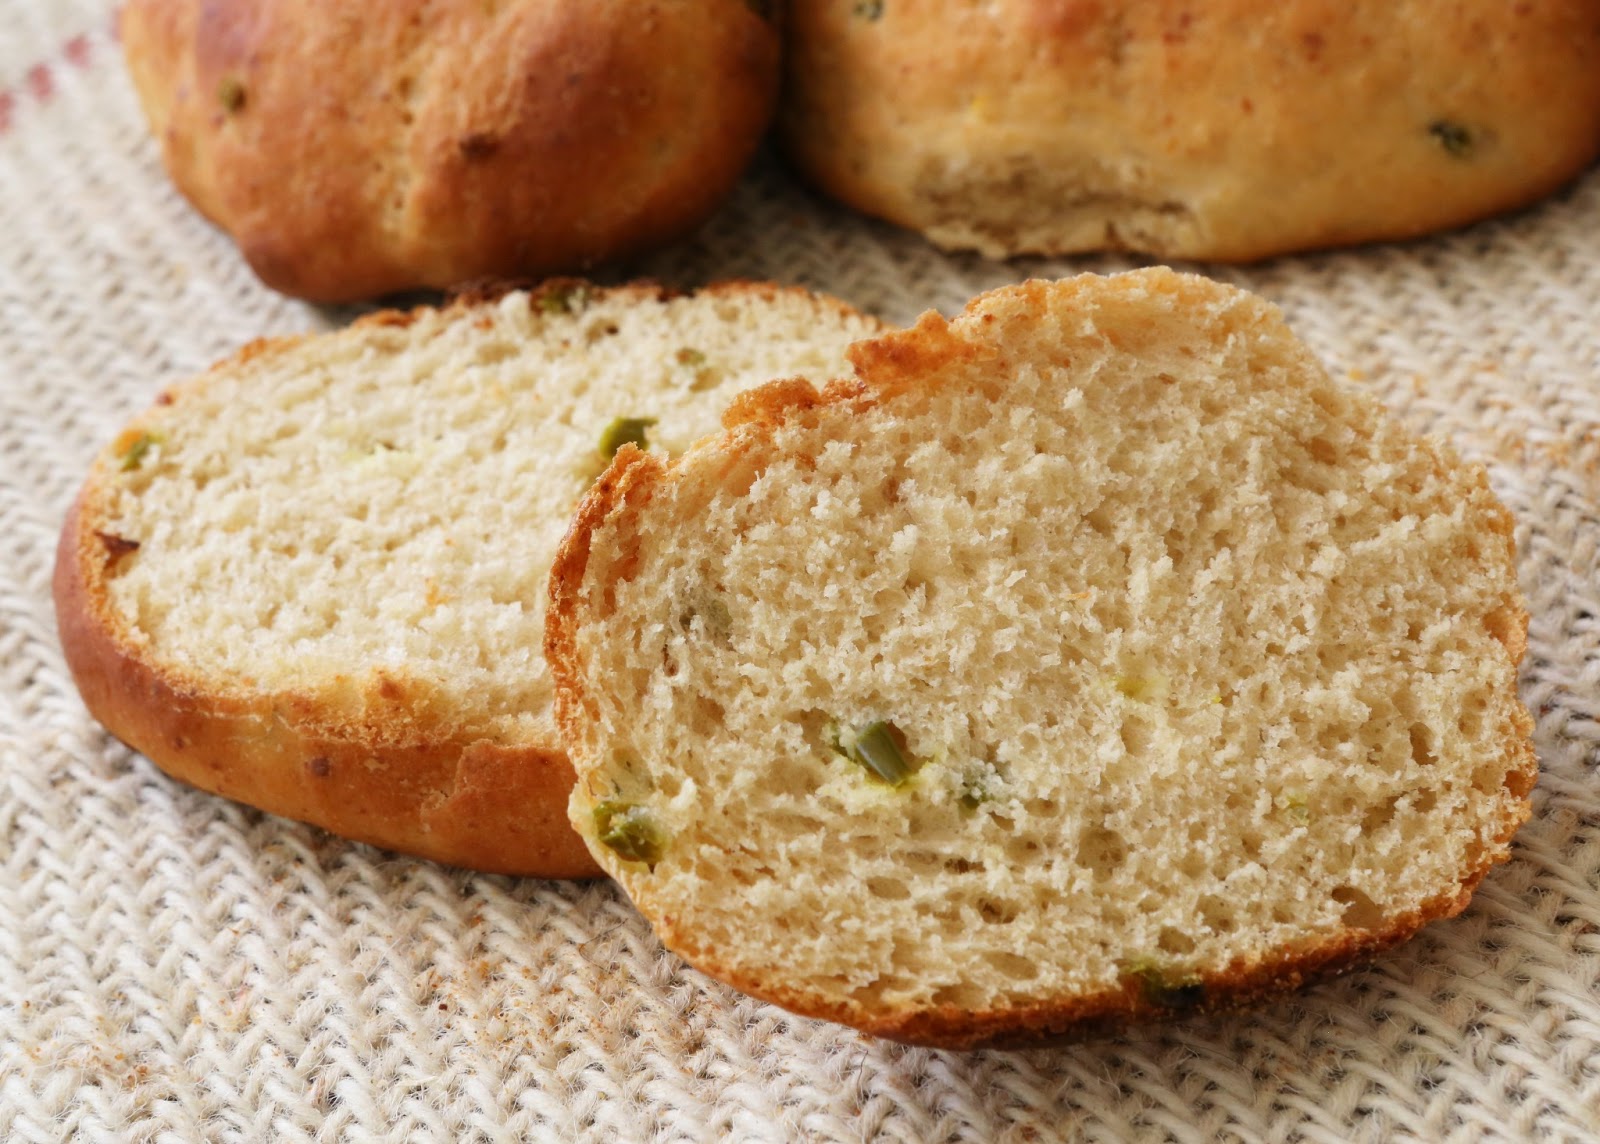

Jalapeno-Parmesan Sandwich Rolls

Ingredients:
1 Cup warm water
1 Packet active dry yeast
2 Teaspoons sugar
1 Teaspoon salt
2 Tablespoons olive oil
1 1/2 Cups all purpose flour (APF)
1 + 1/4 Cups Whole Wheat Flour
1/4 Cup grated parmesan cheese
3-4 Tablespoons chopped pickled jalapeno - adjust depending on your preference
Olive oil for greasing
Corn flour for dusting
  • Add active dry yeast and sugar to warm water and set aside for 10 minutes or until the mixture is fully frothy. Don't heat the water too much else the yeast will just die.
  • Once frothy, add salt, olive oil, APF, 1 cup of whole wheat flour, cheese and chopped jalapeno and start kneading. Add whole wheat flour little by little if the dough is too sticky. Only add enough so the dough doesn't stick. You want a soft, pliable dough ball. 
  • To really get the gluten working, stretch the dough with the heel of your palm and fold it back. Knead so for 10 mins. Then cover the dough and let it sit for an hour or so or until the dough doubles in size. 
  • Punch the risen dough and knead again for another 10 mins. Make 6 equal portions of the dough and roll them round or slightly oval. 
  • I prefer using my giant dutch oven for bread baking, but use any thick bottom pan you have. Grease the bottom with some olive oil and dust with a little bit of corn flour. Place the dough balls with some space in between and brush them with oil. Cover and keep aside for another hour. They should rise.
  • Preheat oven at 425F and bake the bread for 35-40 mins or until golden brown. 
Let the bread cool completely before cutting it.


Sunday, September 9, 2012

Pizza Night

When I lived in NY, pizza was my go-to meal. It was the most accessible food choice when I was on a time crunch, was lazy to cook one day, or made last minute dinner plans with friends. My numerous sleepovers with school buddies were never complete without ordering a variety of thin crust pizzas from the 'Famous Pizzeria' (it was famous too =D). The crispy, baked to perfection pizzas would be gobbled up amid 5-6 girls chattering all at the same time! My favorite pizza had lots of veggies and wasn't drowned in out-of-the-can tomato sauce. Post school, as I started making healthier diet choices, I cut down my pizza consumption considerably. But on Friday, when my friend came down from LA to stay over, I wanted to have some pizza for old time's sake. Only this time, I made it from scratch at home.

I love thin crust pizzas since you get to enjoy more of the good stuff (the toppings) without filling yourself with dough! Previously when I made the crust at home, it was more like a roti dough that I used. This time, it was authentic with yeast, and yet had the healthy whole wheat component. I switched things up with a creamy garlic sauce instead of the typical tomato pizza sauce. You don't have to tell anyone that there's hardly any cheese in it. The recipe is extremely easy and a favorite of mine. I often add it to my pasta when I'm craving a luscious, yet not too cheesy sauce.

Making this pizza seems like a long process. And it is, but most of it just calls for sitting and waiting for the dough to rise or the pizza to bake. Everything else is pretty simple and the effort is worth every tasty bite! The great thing about making pizza at home is you can add whatever and how many ever toppings as you like. If you have friends over, have fun with them making your own pizzas. Keep the dough and the toppings ready, and each person can build their own. The garlicky gooey goodness of the sauce tastes perfect with baked crunchy veggies.

Note: This recipe makes around 4 small or 3 medium pizzas.


Thin Crust Pizza with Creamy Garlic Sauce

Ingredients:
Crust:
1 1/2 Cups warm water
1 Packet active dry yeast
1 Teaspoon sugar
2 Cups whole wheat flour
1 Cup all purpose flour
2 Tablespoons EVOO
Salt to taste
All purpose flour/corn flour for dusting

Garlic Sauce:
1 Tablespoon butter
1 Teaspoon all purpose flour
1 Cup milk
3 Garlic cloves - grated
Fistful (about 1/4 cup) of shredded cheese - Used a 4 cheese blend. Go for simple mozzarella if you like.
Mrs. Dash seasoning blend or any other herbs and spices blend
Salt to taste

Toppings:
Any veggies you like really! I used a mix of thinly sliced mushrooms, red onions, tomatoes, green bell pepper, avocado, olives, jalapeno (as you can tell, I love my veggies!)

To make the crust:

  • Add active dry yeast and sugar to the water and keep aside for 10-15 minutes until the yeast bubbles. 
  • Once the water is frothy, add the two flours, EVOO and salt and knead really well for a few minutes. You can add a little bit of warm water if needed to form a soft, elastic dough ball. Cover the dough and let it rise for about 45 minute or until the dough doubles in size. 
  • Punch the dough and knead again for a minute until soft. Keep aside until you work on the sauce. 

To make the sauce:

  • Heat butter in a sauce pan on low-medium flame. Once the butter melts, add all purpose flour and whisk continuously until the flour cooks through and turns a golden color. 
  • Add milk and grated garlic to the pan and keep stirring, breaking any lumps. The sauce, or rue as it is called, starts to thicken quickly. Turn the heat off when you achieve the desired consistency. 
  • Season with some salt and your favorite seasoning blend (simple Italian herbs will do), and add a little bit of cheese and stir. The heat will help the cheese melt and blend into the sauce. If the sauce becomes too thick, simply add some warm milk and whisk. The sauce is ready!

To put the pizza together:

  • Preheat over at 400F. 
  • Flour a pizza stone if you have one, or a wooden surface to roll the dough. Divide your dough in three or four parts depending on how big you want the pizzas. Roll each dough ball into a thin crust (about 1/4 inch) using a gentle hand on the rolling pin. 
  • Transfer the crust to your baking tray (don't try to lift it after building your pizza - wisdom learned from a stupid mistake =D ), then spread that yummy sauce generously, your choice of thinly sliced veggies and sprinkle just a little bit of shredded cheese. I used only a tablespoon or so for each pizza. 
  • Bake for 20 minutes or until the crust is golden brown on the sides and the veggies are baked crispy. 


Some chili flakes on top, a drink on the side, and some fun conversations are all you need for great dinner time.

Saturday, July 7, 2012

Bookmark Thursday

Thursdays are usually 'throw something together and rush out the door' kinda dinner nights for us. I have a dance class every Thursday evening (pursuing a long time dream of learning Kathak :) and I don't get much time to cook anything. Hubby helps himself to some leftovers (if he's really hungry) or waits for me to come back and put anything that's available in the fridge in between two slices of bread and call it a sandwich. After almost 5 months, I was home this Thursday. Bonus time! It was a perfect opportunity to go down some of the bookmarked recipes and try 'em out. 


I had been eyeing these glorious Masala Buns posted by one of my favorite bloggers, US Masala. For a while, it seemed like every other blogger was making buns of some sort and I was the only one missing out. A few days back I came across Sangeetha's blog through her HITS event and saw another recipe for stuffed buns. The recipe looked too tempting not to give it a shot.


Masala buns are simple buns stuffed with some kind of curried vegetable filling. They looked very intimidating to me at first, but except for the fact that you have to wait, the recipe turned out to be quite simple. The fun part is, you stuff the buns before they bake. So as you pull a morsel of a fluffy, soft bun, there's a tasty treat inside! Sangeetha had stuffed the buns with spicy cauliflower, which I'm sure would've tasted great. But I went with a more predictable filling - veggies cooked with Paav-bhaji masala. To make the buns a little 'Indian', should I say, I added toasted cumin seeds to the dough. Aromatic, pillowy buns stuffed with paav-bhaji like bhaji. Tell me you won't like that!


Masala Bun 

Ingredients:
Buns:
1 1/2 Cups All purpose flour
1/4 Cup warm water
1/4 oz. Dry active yeast packet
1 Tablespoon sugar
1/2 Teaspoon salt
1/2 Teaspoon toasted cumin seeds
3 tbspn EVOO + as needed

Stuffing:
1 Tablespoon oil
1/2 teaspoon cumin seeds
1 Large / 2 medium boiled potatoes
1 Small tomato
1/2 Medium onioin
1/2 Cup mixed veggies - I used peas and bell peppers only
2 Garlic cloves - minced
1/2 Inch ginger - minced
1 1/2 Teaspoons paav-bhaji masala
1 Teaspoon Red chili powder
Salt to taste

Dough for the buns:
  • Mix yeast, sugar and warm water and let it stand until the mixture gets foamy (~10 mins). Sangeetha mixed the yeast with the flour itself, but I figured getting the yeast acting would be faster and better. 
  • Add flour, salt, EVOO. Bruise the cumin seeds on your palm using the thumb slightly to get all the fragrant oils out and add them to the dough. Knead well using a little bit of water as need to form a stiff but soft dough. The original recipe used milk instead of water, I just took the easy way. 
  • Cover the dough with a damp towel and keep in a warm place for ~45mins to an hour so to rise. While you are waiting, start working on your stuffing. 
  • Once the dough almost doubles in size, punch it gently and knead again for a few mins. 
  • Divide the dough in 6 parts and shape them round. Keep on a greased aluminum foil on baking sheet. Let them stand for another 10 mins or so. The dough will rise again slightly.
Stuffing:
  • Chop all the veggies finely. Mash the potatoes. 
  • Heat oil in a pan and add cumin seeds. Once they splutter, add ginger-garlic, onions and tomatoes and saute until the onions are translucent. 
  • Add spices, rest of the veggies, salt and cook for 10 mins or until the mixture comes together well. If it becomes too dry, add a little bit of water. Adjust the spices according to your liking. 
Put it together:
  • Make a dent in each of the dough balls to form a cup-like shape. Stuff them with a golf-ball size vegetable filling and pinch the dough together to close the dough balls. 
  • Brush them with some OO and let them stand for another 10 mins. 
  • Bake for 15-18 mins on 375F or until the buns turn golden brown. 
  • To serve, brush the buns with a little bit of garlic butter or OO. 
If you have some stuffing leftover - make a sandwich :D.


LinkWithin

Related Posts Plugin for WordPress, Blogger...