Wednesday, March 11, 2015

Pan Roasted Butternut Squash Salad - Salads Galore

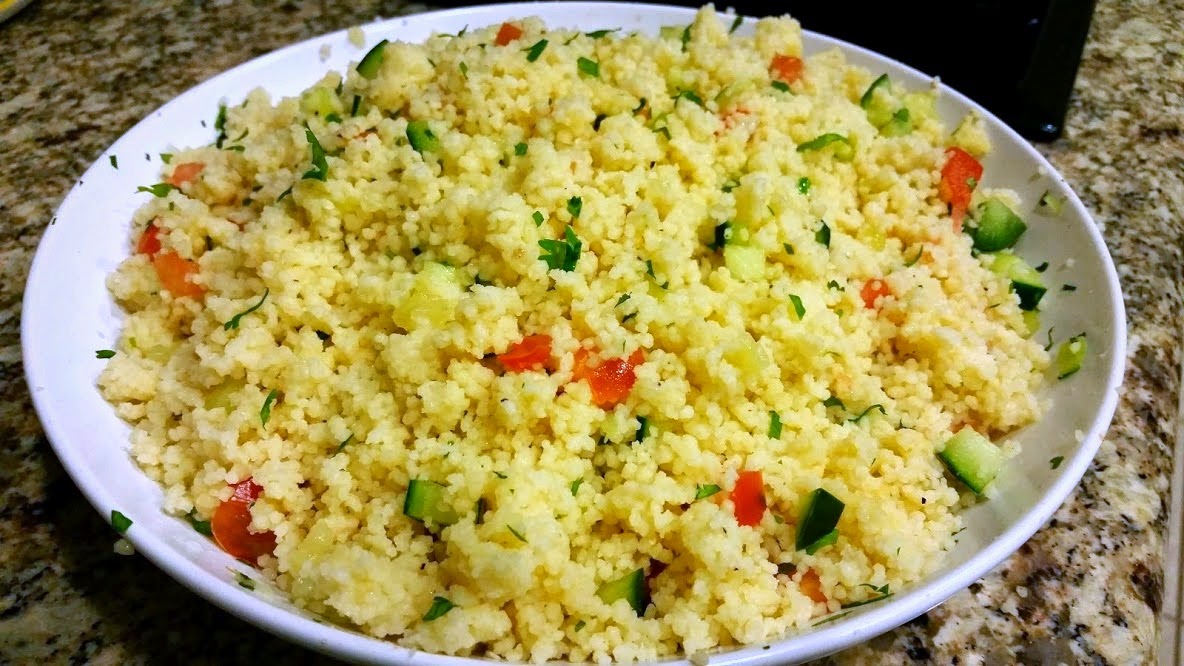
Lately my colleagues' favorite topic of discussion at lunchtime has been healthy living. Everyone has been trying to eat better, exercise more since the new year. I don't get a whole lot of exercise other than running around my daughter, and weekly dance class,  but I always make an effort to eat as healthy as I can. This includes eating lots of veggies, beans, whole grains, and fruits, and minimizing anything that comes out of a box/can. I have also been trying to buy local, organic foods as much as I can. Many of our dinners comprise of big bowls of salads. Luckily we can eat salads any time of the year, even while rest of the country is half frozen.

Here are three salads I prepared this week:

Broccoli madness: This is easily my most favorite salad ever! I have been eating broccoli madness at a local soups+salads chain called Souplantation. The chain also exists in Florida by the name Sweet Tomatoes. I had been consuming this salad happily until recently, when I found out that it contained bacon! No more broccoli madness at Souplanatation for me. But I found their copycat recipe here, and made it sans bacon. I loved the salad just as much, so it had nothing to do with bacon :D. I used a little less mayo than what the recipe required. My next experiment will be making this with thick yogurt instead of mayo.


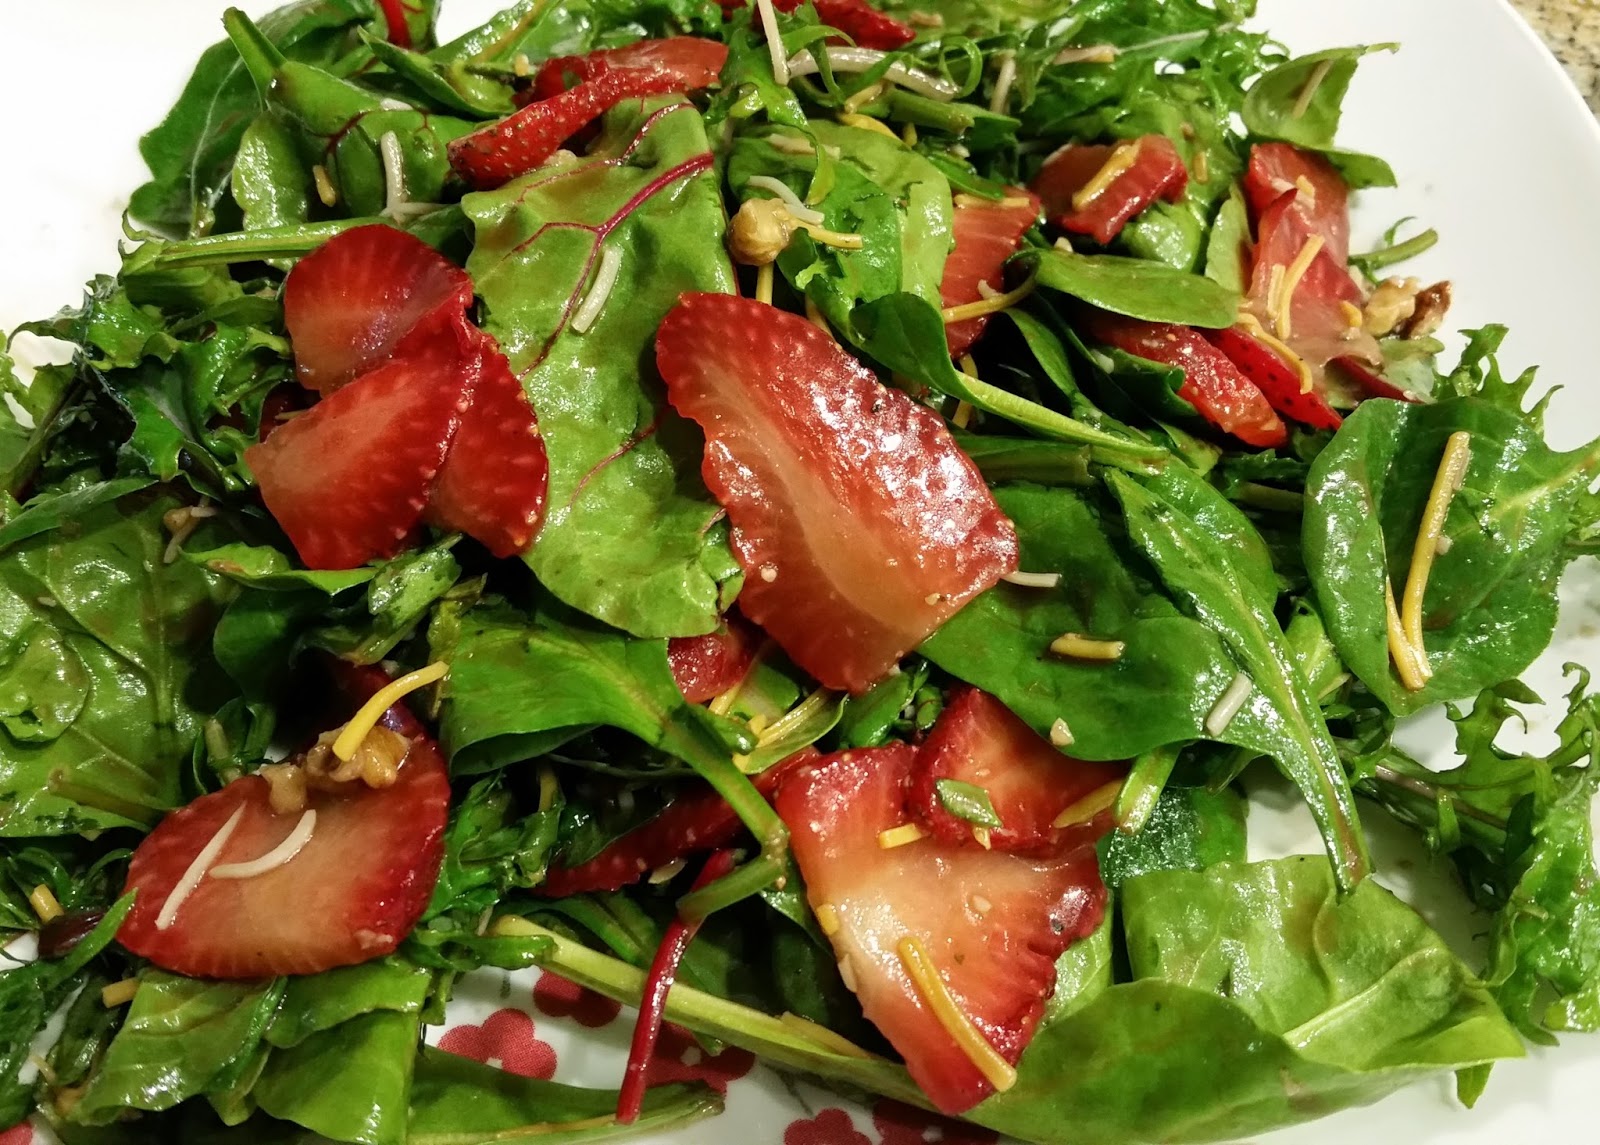
Berry salad with maple-balsamic vinaigrette: I am a huge fan of fruity salads. I prepared a simple salad with mixed greens, sliced strawberries, chopped walnuts, and a sweet and tangy maple-balsamic vinaigrette. The vinaigrette was adapted from this recipe. I omitted shallots, added a touch of garlic salt instead of fresh garlic, and added a tablespoon of maple syrup instead of a teaspoon of honey. Totally delicious! My daughter snacked on strawberries. 


I picked up The Complete Vegetarian Cookbook by America's Test Kitchen at Costco over the weekend. For someone who loves to cook and eat, I am not big on collecting cookbooks. But one look at this book, and I knew I had to buy it. This book deserves its own post, so more about it later. However, here is something I tried from the book last night - roasted butternut squash with maple dressing and goat cheese. How good does that sound? It tasted just as great. The original recipe could be eaten as a side dish, but I turned it into a meal by making a few changes. First, I pan roasted butternut squash instead of roasting in the oven. I try not to waste energy by using the oven for small things. The key was using perfectly ripe butternut squash though - it cooked really fast over flame. The original recipe called for a topping of pecans. I had walnuts on hand. They worked perfectly fine. I laid these beautifully roasted butternut squash slices over a bed of baby spinach to turn it into a meal sized salad. This had everything I like in salad - the perfect blend of sweet and savory flavors, and contrasting textures. The big plus was that I could mash butternut squash with a fork and my daughter absolutely loved it!


Pan Roasted Butternut Squash Salad with Maple Dressing, Goat Cheese, and Walnuts

Ingredients:
1 Medium butternut squash
1 Tablespoon butter
1/2 Cup chopped walnuts
1/2 Cup maple syrup
1 Teaspoon paprika
Goat cheese for garnishing
Baby spinach - as much as you like
Salt to taste
  • Wash and peel butternut squash. Cut it in the center lengthwise and remove all the seeds. Cut each half of the squash into 1/2'' slices. 
  • Heat a large skillet/pan over medium heat. Add butter and swirl it around to cover the pan. Add butternut squash slices to the pan in one layer, sprinkle with salt to taste, and turn the heat to medium-high. 
  • Cover the pan and let the squash caramelize on one side. Takes around 4-5 minutes. Once golden brown on one side, turn all the pieces and do the same on the other side. Insert a fork to make sure the squash is cooked through. 
  • Take the squash off the pan and add walnuts to the same pan and toast for a couple of minutes.
  • Add paprika, and a little salt to maple syrup and whisk. 

To assemble the salad:
  • Add roasted squash over a bed of baby spinach. Drizzle maple syrup dressing. Sprinkle goat cheese and chopped walnuts. 
Dig in!


Saturday, February 21, 2015

Simple Couscous Salad

Going forward, I'll make an effort to highlight easy meal options for the busy parents. I will add keep adding to this list, which you can access by clicking on the 'Kid-friendly' label.

To give you an idea of what goes on in my kitchen, here is what I cooked this week:

Monday - Thai red curry with sauteed tofu and mixed vegetables. I bought all natural (as natural as it can get) red curry paste from the store. This dish was hardly any work after that. All I had to do was bring a can of coconut milk and red curry paste to a boil, add sauteed tofu and mixed vegetables (broccoli, carrots, red and yellow peppers, a couple of red radish) and cook for 3-4 minutes. Lots of chopped cilantro for garnishing, and it tasted great with some leftover peas pulao from the night before. 
My daughter ate cooked carrots, radish, peppers, and a little bit of tofu from the curry. 


Tuesday - Avocado and roasted red bell pepper grilled sandwich on multi-grain bread. Avocado is so creamy by itself, I didn't have to add any cheese. The girl ate avocado slices from my sandwich. 

Wednesday - Couscous salad with cucumber, tomato, and cilantro. Baby girl loved this couscous salad!

Thursday - Asian style salad with mixed greens, shredded carrots and broccoli (using leftover broccoli and carrots from Thai curry), tangerine, and peanut dressing. None of the ingredients were good for the baby - she ate some pear and avocado. 

Friday - Simple cabbage sabji with roti. Then we went out for dinner to kick off the weekend. Shreya loves eating fresh roti.

Saturday - Husband made a delicious pizza with kale pesto base, lots of veggies and cheese on top. Baby girl enjoyed picking out spinach off the top. 

I make variations of the couscous salad every time. And it always tastes great. This is the basic Mediterranean style salad to which you can add many other things. In addition to cucumber and tomato, you can have olives, black beans or chickpeas, diced peppers, diced zucchini, feta cheese, chopped spinach or basil etc. The simplest version is great as a light meal. Or you can eat it with a vegetable and beans stew or lentil soup. 


Couscous Salad with Cucumber & Tomato

Ingredients:
1 Cup uncooked couscous 
1 Tablespoon olive oil
1 Small cucumber - diced (big or small depending on how you liked it)
1 Small tomato - diced
2 Tablespoons lemon juice 
Chopped cilantro for garnishing
Salt & pepper to taste
  • Cook couscous according to the package instructions. Add olive oil and salt while cooking it. 
  • Add pepper just before taking couscous off the heat. Take it out into a flat bowl, and fluff it up by running a fork through the couscous gently. 
  • Once couscous cools down a little, add diced cucumber and tomato, sprinkle lemon juice, and mix well. 
  • Garnish with cilantro. You can use your favorite herb, such as basil or parsley. 
Persian cucumbers taste the best in this recipe. You can use halved cherry tomatoes instead of regular tomatoes. They are bursting with juices and make the salad look pretty. Some toasted pine nuts or slivered almonds on top would be great for crunch. There, I just gave you a whole bunch of different permutations-combinations.

Thursday, February 19, 2015

Easy, Kid Friendly Meals

Some of my friends have asked me to make a section on baby/kid friendly recipes. Like any new mother who's juggling multiple tasks, I am always pressed for time. I no longer have the luxury of cooking leisurely. However, it is more important than ever that I plan for healthy and nutritious meals for the family now that the baby girl has started to eat from our plates. I'll share information about how I plan for weekday meals, and some of my favorite easy fix-up recipes. Not all recipes are good for the young ones, but they are easy cooking options for the parents. I'll also talk about what my daughter loves to eat. Going forward, I'll label all my posts that fall into the baby/kid friendly category as 'Kid-friendly' so you can go and click on the label to see all the recipes.

My Eleven Month's Favorite Foods
My daughter eats most of the stuff we eat - basically whatever she can chew with her tiny 4 teeth. Sometimes we trick her into eating her own foods by putting it in our plates. However, here are some of her favorite things.
  • Boiled carrots, peas, beets, sweet potatoes
  • Cooked and pureed spinach, green beans with a touch of salt and cumin
  • Squash - butternut, acorn, zucchini, pumpkin cooked with a touch of salt and cumin-coriander powder
  • Lightly seasoned rava or sevai upama
  • Daal-rice or khichadi
  • Well cooked pasta, couscous, quinoa, oats
  • Roti with mildly spiced and well cooked vegetables or small beans
  • Fruits - banana, pear, blueberries, strawberries, apples, cantaloupe, avocado
  • Rice puffs
Meal Planning
  • I try to do bulk of my groceries every week and a half to two weeks. If we are running out of milk or some other essential, we just make a quick trip to the store. We are lucky enough to have access to fresh and abundant vegetables even during winter. I buy a variety of vegetables, but all in moderate quantity. 
  • Depending on what I get in the store, I plan for a few different dishes and write them down on my kitchen board. This way, I don't have to think about what to make every day. I don't necessarily stick to the list. Sometimes we have leftovers to finish, sometimes we go out with friends, sometime we are in the mood for something else. However, the list is a guide and keeps me on track with what needs to be used up from the fridge. 
  • I try to make multiple dishes with a mix of veggies. For example, if I make a mixed vegetable curry, I work the leftover vegetables into a pasta dish, a rice or quinoa pulao, a veggie sandwich, or a couscous. The idea is to have a different vehicle each time to serve the vegetables or beans. This way, we get to eat a variety of vegetables and cuisines. Also, I can just take out the cooked veggies, mash them, and feed my daughter. 
Below are some meal ideas, mostly categorized by different carb mediums. Although many of these recipes are available online, I'll try to post my recipes and link them as I do.

Meal Ideas

Rice - Instead of making plain rice, I try adding different veggies, beans, and legumes. It means less rice, and more of the healthy stuff; and great one pot meals.
  • Mixed vegetable pulao
  • Masoor rice
  • Moong daal khichai
  • Mixed vegetabe khichadi
  • Palak khichadi
Pasta - I am not a huge fan of pasta with tomato sauce. However, I enjoy whole wheat pasta simply tossed in olive oil or with pesto.
  • Penne with kale pesto
  • Shiitake mushroom orzo (you can use any kind of mushroom in this recipe)
  • Mixed vegetable pasta in olive oil (wish mushrooms, broccoli, spinach, sun dried tomatoes)
  • Pasta salad (with tomato, olives, chopped spinach/arugula, broccoli, feta cheese)
Couscous - I love couscous for how easy it is to prepare. Also, it doesn't need to be served hot - so a great make ahead. Couscous is a good source of fiber and protein.
Quinoa - High in fiber and iron grain is a great replacement in many rice dishes.
Bread- We have made a permanent switch from white to multi-grain or whole wheat bread. It is great to make healthy sandwiches. Most of the times I throw in whatever suitable vegetables we have. Everything tastes great in between two slices of bread. We have a George Foreman grill which has served us really well.
  • Avocado sandwich with pesto (or any other spread on the bread)
  • 'Bombay' Sandwich (with cucumber, tomato, boiled potato, and mint-cilantro chutney)
  • Roasted red pepper sandwich (with tomato, your favorite cheese, spinach/arugula/basil)
  • Grilled veggie sandwich (with zucchini, eggplant, bell peppers, mushrooms etc.)
Salads - Husband loves salads. We make a big bowl of salad for dinner at least once a week. You can toss pretty much anything together and call it a salad.
Other

Monday, February 16, 2015

Garlicky Masala Peanuts

You don't realize how time gets away from you when there is a super active, and attention seeking 11 month old at home. I hardly get time to do anything once I'm home from work. I meant to post this recipe two weeks ago, but better late than never.

Our friends had invited us over for a Superbowl party. The host, despite suggesting to have a potluck, had graciously agreed to do all the cooking. Husband suggested taking some snack along. I didn't have much time to make anything fancy. We had just hosted our neighbors for an Indian brunch the day before, and my kitchen was somewhat of a mess. I browsed through the pantry for an idea, and decided to make Masala Peanuts - spicy peanut fritters. Masala peanuts are great to munch on while sipping on a cold beer. This is a popular 'chakana' (the vernacular term to describe all the snacks that go well with alcohol) item in India. Peanuts are coated in a spicy chickpea flour batter and deep fried until golden brown. They are spicy, crunchy, zesty, and just typing this makes me want to have some! I added a touch of garlic powder to the batter - why not? Garlic goes great with peanuts. The only problem was that the besan/chickpea flour I used was the coarse type. I would've preferred fine besan as it stick to peanuts better. Despite that, husband loved the preparation, and so did all the guests at the party.


Garlicky Masala Peanuts

Ingredients:
1 Cup whole unroasted peanuts (with or without skin)
1/2 Cup besan/ chickpea flour
3 Tablespoons rice flour
2 Teaspoons red chili powder (adjust to your liking)
2 Teaspoons cumin-coriander powder
1/2 Teaspoon turmeric powder
1/2 Teaspoon amchur/ dried mango powder
2/3 Teaspoon garlic powder
Salt to taste
1/2 Cup water (or as needed)
Oil for frying

  • Mix besan, rice flour, and all the spices. Add water little by little to make a thick batter. 
  • Add in peanuts and mix until all of them are evenly coated. 
  • Heat oil in a frying pan. Add ~1 tablespoon hot oil to the battered peanuts. This hot oil added to the batter before frying is called 'mohan' and helps make the fritters light. 
  • Fry battered peanuts on medium heat until golden brown. If you add a bunch of peanuts together, they'll end up sticking together. Take some in your hand, and drop them from the side of the frying pan while separating them with your fingers. This will ensure they don't stick. Be careful with hot oil.
  • Take them out of the frying pan and keep on a paper towel to absorb excess oil. 
  • The peanuts will be soft right out of the frying pan, but let them cool a bit and they'll be crunchy. 


Serve with a cold beverage!


Friday, January 30, 2015

Kale Pesto

If you follow the latest food trends, you'll know there is a new 'superfood' popping up every now and then. It seemed like everyone had jumped on the flaxseed wagon some time ago before Chia seeds stole the limelight. Then there was the barley to quinoa shift. And while spinach remains one of the most popular greens thanks to Popeye, kale has been 'the' green to consume lately! I'm not crazy about going by the latest food trends; in fact I believe in eating a variety. But adding a new green to my diet, especially one rich in vitamins and minerals, can never hurt. Another reason to eat kale is it's abundant in winter, when other vegetables are scares. I have been making an effort to eat more of it. My problem with kale though is that it can be bitter and stringy if the leaves are not absolutely fresh and tender. For that reason I had mostly been making kale chips in the oven for the longest time. Now I have found another recipe that will get me to eat more of the green. I was browsing through the cookbook that came along with my Vitamix, and came across a basil kale pesto recipe. I didn't have basil or pine nuts on hand, so I made the pesto using kale entirely, and swapped walnuts for pine nuts. The result was delicious. I tossed together some cooked penne pasta, fresh tomatoes, broccoli, and pesto for a satisfying and healthy week night dinner. The leftover pesto made a great smear for a veggie sandwich.


Kale Pesto

Ingredients:
2 Cups Kale leaves - torn
2 Cloves of garlic
1/4 Cup walnuts - you can also use pine nuts or almonds
2/3 Cup Parmesan cheese
~1/4 Olive oil
1/2 Teaspoon red chili flakes
Salt per taste

  • Wash kale leaves thoroughly. Tear the leaves off the stock. If there are any veins that are tough, remove them. 
  • Toss in kale leaves, garlic, walnuts, Parmesan, salt, and red chili flakes in a food processor. Pulse a few times until all the ingredients are combined and the leaves are roughly chopped.
  • Slowly drizzle in olive oil while grinding until you have smooth pesto. 


Serving suggestion:
Cook your favorite pasta. Add chopped fresh tomatoes, blanched broccoli florets, kale pesto, and mix well. Serve with some grated Parmesan on top. You can add any other veggies or meat you like. 

Sunday, January 18, 2015

Baby Girl's First Sankranti & Tilgul Vadi Recipe

My mother-in-law had brought a cute little black dress for my daughter when she was just born. I told my MIL I would save the dress for the baby girl's first Makar Sankranti. It was finally inaugurated yesterday, when we celebrated Shreya's first Sankranti and Bor-nahan. 

Makar Sankranti marks Sun's transition into the Capricorn zodiac. The festival is celebrated during the peak of winter. It is customary to eat sweets made out of sesame (Til) and jaggery (Gul), both of which generate heat. All the different versions of sweets made out of these two ingredient are usually called Tilgul in Marathi. People visit each other to exchange sweet tilgul, and to remind each other to speak just as sweetly. This is one festival when we get to wear black clothes as black absorbs heat and keeps one warm. Sometime within the 2-3 weeks after Sankranti, women get together for haldi-kunku (literally meaning turmeric-vermilion) to exchange small gifts and tilgul. A ceremony called Bor-Nahan, literally meaning berry shower, is held for new born babies. The ceremony can be performed any time until the child is 5 years old. It symbolizes showering children with abundance and good fortune. The child is dressed in black and adorned with jewelry made out of sugar coated sesame called halwa. Then he/she is showered with small Indian berries known as Bor, puffed rice, tilgul, and fruits.

I had a large group of friends over for haldi-kunku yesterday. Everyone was in a festive mood, wearing black for the occasion. After applying haldi-kunku and presenting small gifts to everyone, I got Shreya ready for her ceremony. To my surprise, she not only didn't resist wearing the halwa jewelry, but flaunted it the entire evening. Since there were no berries to be found here, my friends and I showered Shreya and other little ones present with puffed rice (her favorite food these days), tilgul, pear, and chocolates. Guess what the first thing my girl grabbed - chocolates, of course! The kids had a blast eating things right off the floor - something mommies never allow otherwise. 

I had prepared chhole-puri, sakhar bhat (sweet rice made with sugar syrup, and flavored with cloves, saffron, and cardamom), and tilgul vadi for the guests. Tilgul vadi is yet another soft and crumbly candy bars form of sesame and jaggery. The recipe was from a Marathi cookbook called Hamkhas Pakasiddhi by Jayashree Deshpande. My husband's aunt gifted the cookbook recently, and I have been trying out different recipes from it. The til-gul was a big hit, and almost every single one of my friends asked me for the recipe. So here it is. I pretty much followed the recipe to the tee. The only difference is that I have converted the measures into the standard US cup size. Everyone loved the vadi so much that they even finished the leftover crumbles :D. 


Tilgul Vadi/Soft Sesame-Jaggery Candy Bars

Ingredients:
1 Cup sesame seeds 
1/2 Cup peanuts - skin removed
1 Packed cup grated jaggery - grated from yellow jaggery block, do not use powdered jaggery
2 Teaspoons ghee
2 Tablespoons water
3/4 Teaspoon cardamom powder
1-2 Tablespoons desiccated coconut/grated dry coconut
  • Grease a flat steel plate (~12'' in diameter) with ghee and keep aside. 
  • Roast sesame seeds in a pan on low-medium heat until they just start turning color. Similarly, roast peanuts until they start turning golden. 
  • Grind sesame seeds and peanuts coarsely. Grind them separately so one is not finer than the other. Keep aside. 
  • Mix ghee, water, and jaggery in a heavy bottom pan/kadhai and heat on medium flame. Keep stirring so the jaggery doesn't burn. Turn off the heat just as the jaggery starts boiling. This melted jaggery is called 'paak'.
  • Add cardamom powder, ground sesame and peanuts to the jaggery and mix well. 
  • Pour this mixture onto the greased plate, and pat with a spatula into a 1/4'' thick cake. You may have to use your hand to smooth out the top. Be careful as jaggery retains heat for a long time and can burn. 
  • Sprinkle shredded desiccated coconut on top while the mixture is still hot and gently pat it into the 'cake'. 
  • Once the mixture has cooled completely, cut the sesame-jaggery cake into 1''-1 1/4'' strips first, then make slanted cuts across to get diamond shaped vadi. These vadis are soft and crumbly, unlike sesame chikki or brittle, so use a sharp knife and be careful while cutting. I found that it was easier to cut with the tip of the knife. You can even dip the knife in ghee so it doesn't stick. 


Friday, December 5, 2014

A Roasted Vegetables Dinner

All good things must come to an end. After spending three wonderful months together, and making lots of new memories, we said goodbye to my parents. I am so happy and thankful for the time my daughter got to spend with her grandparents. It's going to be difficult getting used to an empty house.

I was on the important task of eating down our overstocked fridge before mom and dad left. Monday night I took all the veggies - Brussels sprouts, cauliflower, carrots, turnip, and a leftover poblano pepper - and decided to use them up. I had originally planned to roast Brussels sprouts on Thanksgiving; it was time to do so finally. Rest of the vegetables, also roasted, went into a velvety smooth soup. The soup was made at mom's request - she kept on talking about this wonderful roasted cauliflower soup she had tried somewhere, and had been asking me to make it. The other vegetables happened to go well with it, so I tossed them in. What started as an exercise to just finish up the produce turned into a wonderful meal, perfect for the cold night we had. 


I roasted Brussels sprouts tossed in some olive oil, herbs, salt & pepper, at 400F for about 25 minutes. Sometimes simple is what you should aim for. Mom and dad, who called them mini cabbages, loved roasted Brussels sprouts, especially the crunchy outer layers.

I kept to soup low cal by using milk instead of cream for that smooth and creamy texture. The carrot and poblano helped take away the pungency of the cauliflower. Some almonds on top gave it a nice crunchy bite.This was a good filling soup. You could add potato or other winter veggies to it. This recipe is a keeper.


Roasted Cauliflower, Carrot, & Turnip Soup With Poblano

Ingredients:
1 Medium head of cauliflower
1 Medium Turnip
1 Large or 2 small carrots
1 Poblano pepper
1 small onion
3 Cloves of garlic
2 Teaspoon Italian herbs
3/4 Teaspoon cumin-coriander powder
1/2 - 1 Teaspoon red chili powder
Salt & pepper to taste
1 Quart low sodium vegetable broth
3/4 Cup whole milk (or cream if you like)
Olive oil for tossing vegetables and sauteing
Chopped cilantro, chopped chives, slivered almonds, or croutons for garnishing

  • Prepare the vegetables for roasting - separate cauliflower florets, cut turnip and carrots into cubes. Toss these vegetables and whole poblano in a little bit of oil (just enough to coat), and Italian herbs. 
  • Spread all the veggies on a baking sheet, and bake at 400F for 20-25 minutes, or until the cauliflower is golden and rest of the veggies fork tender. Take out and keep aside. 
  • On the side, chop onion and garlic finely.Heat a couple of teaspoons of oil, and saute them until onions are translucent. 
  • Add all the roasted veggies, cumin-coriander powder, red chili powder, and half the vegetable stock to the pot. Blend this until smooth and creamy. I used my Vitamix, which does a great job of making smooth soups. 
  • Pour this back into the pot, add the remaining vegetable stock, or as much needed to create the consistency you like, milk, salt & pepper to taste. 
  • Bring the soup to a boil and reduce to simmer. 
  • Serve hot, with your favorite garnish. I added chopped cilantro, and slivered almonds for some crunch. 


LinkWithin

Related Posts Plugin for WordPress, Blogger...