Tuesday, March 20, 2012

Swirling in Chocolate

March starts a string of celebrations in my house. Some of the nearest and dearest people in my life, like my dad and sister, are March babies. And I found myself a March born husband, who grew a year older wiser last week =). My usual self would've cooked him a nice meal on his birthday and rushed to the bakery for a cake. Make that chocolate cake for the chocolate lover. But I was in a particularly adventurous mood this time and decided to bake a cake myself - a cheesecake - with chocolate swirls - and chocolate decorations!


Modern art =)

I went through several recipes of chocolate cakes online and finally settled on one on the back of Philadelphia cream cheese packet in my fridge! Sometimes you find inspiration in the most unexpected places.  The recipe only listed out the steps without going into details. So I got some tips from none other than David Overton:
  • Line your baking pan with parchment paper to get the cake out easily. You can also use aluminum foil.
  • Use water bath to get that smooth, creamy texture - although I got lazy and baked mine without one.
  • Turn the oven to high only for a short while and then turn it down to finish. Since my cake was made out of only one packet of cream cheese, I kept the beginning temperature at 350F. It was just right for the size of my cake.
  • Be patient and let the cheesecake cool for at least 4 hours. Trust me, I can get impatient, but this cake tasted a whole lot better the next day. 
Instead of the usual graham crackers for crust, I used Anna's Almond Thins. They so flavorful on their own that the crust didn't require any other spices. I had to add some chocolate to the cake. The idea of swirling some dark chocolate seemed better than adding it to the entire batter. It made the cake look much prettier as well. The only negative about the swirls was, the cake let off some steam through those swirls and ended up cracking it a little bit. Maybe a water bath would've prevented it from cracking. But the cake came out intact and the texture wasn't affected at all.


Chocolate decorations - simple embellishment! 
Cheesecake seemed like the perfect base to stick some chocolate decorations I had recently learned to make from Jean-Pierre Wybauw's book 'chocolate'. Cover a flat sheet/pan/dish with some sugar, put some melted baking chocolate in piping bag and pipe the design you like. Keep it in the fridge to cool for 20 mins or until the chocolate hardens completely. As simple as that. The chocolate shapes come out pretty glistening with sugar granules.

Happy Birthday, dear hubby!
Chocolate Swirl Cheesecake 

Ingredients:
Crust:
1 Dozen almond crackers
2 Tablespoons butter - melted

Filling:
1 Pack (8oz.) cream cheese
1/3 Cup sugar
2 Tablespoons sour cream
1/2 Teaspoon vanilla
2 Teaspoons Bailey's
1 Egg
1 Oz baking chocolate

Preheat oven at 350 degree F.
Line your baking pan (bottom and sides) with parchment paper or aluminum foil .

Crust:
  • Crush almond crackers in the food processor and mix with 2 tbsp melted butter. You can use more crackers depending on how thick you like the crust.
  • Press this mixture at the bottom of the pan using spatula or a glass. Keep pan in the freezer until you work on the filling.
Filling:
  • Combine the cream cheese, sugar, sour cream, vanilla and bailey's (optional) and beat until smooth and well blended. 
  • Break egg in a separate bowl and whisk it quickly with a fork. Beat the egg with the cream cheese mixture only until it's well incorporated. Do not over beat. 
  • Pull out the baking pan from the fridge and pour the mixture into it.
  • Melt chocolate in the microwave 30 seconds at a time until it's completely melted. To make swirls, pour chocolate thinly over the filling making zig-zag shapes or circles. Take a toothpick or a  skewer and start swirling the chocolate around gently. Don't muddle the shapes.
  • Once you have a pretty looking design, bake the cake at 350 degrees for 15 mins and then turn the temperature down to 250 and bake for another 30 mins or until the filling is set.  
  • Let the cake cool and then refrigerate for 4 hours minimum until you serve. 

Hubby was very happy with the surprise cake and couldn't get enough of it. He said he won't need to go to the Cheesecake Factory again!
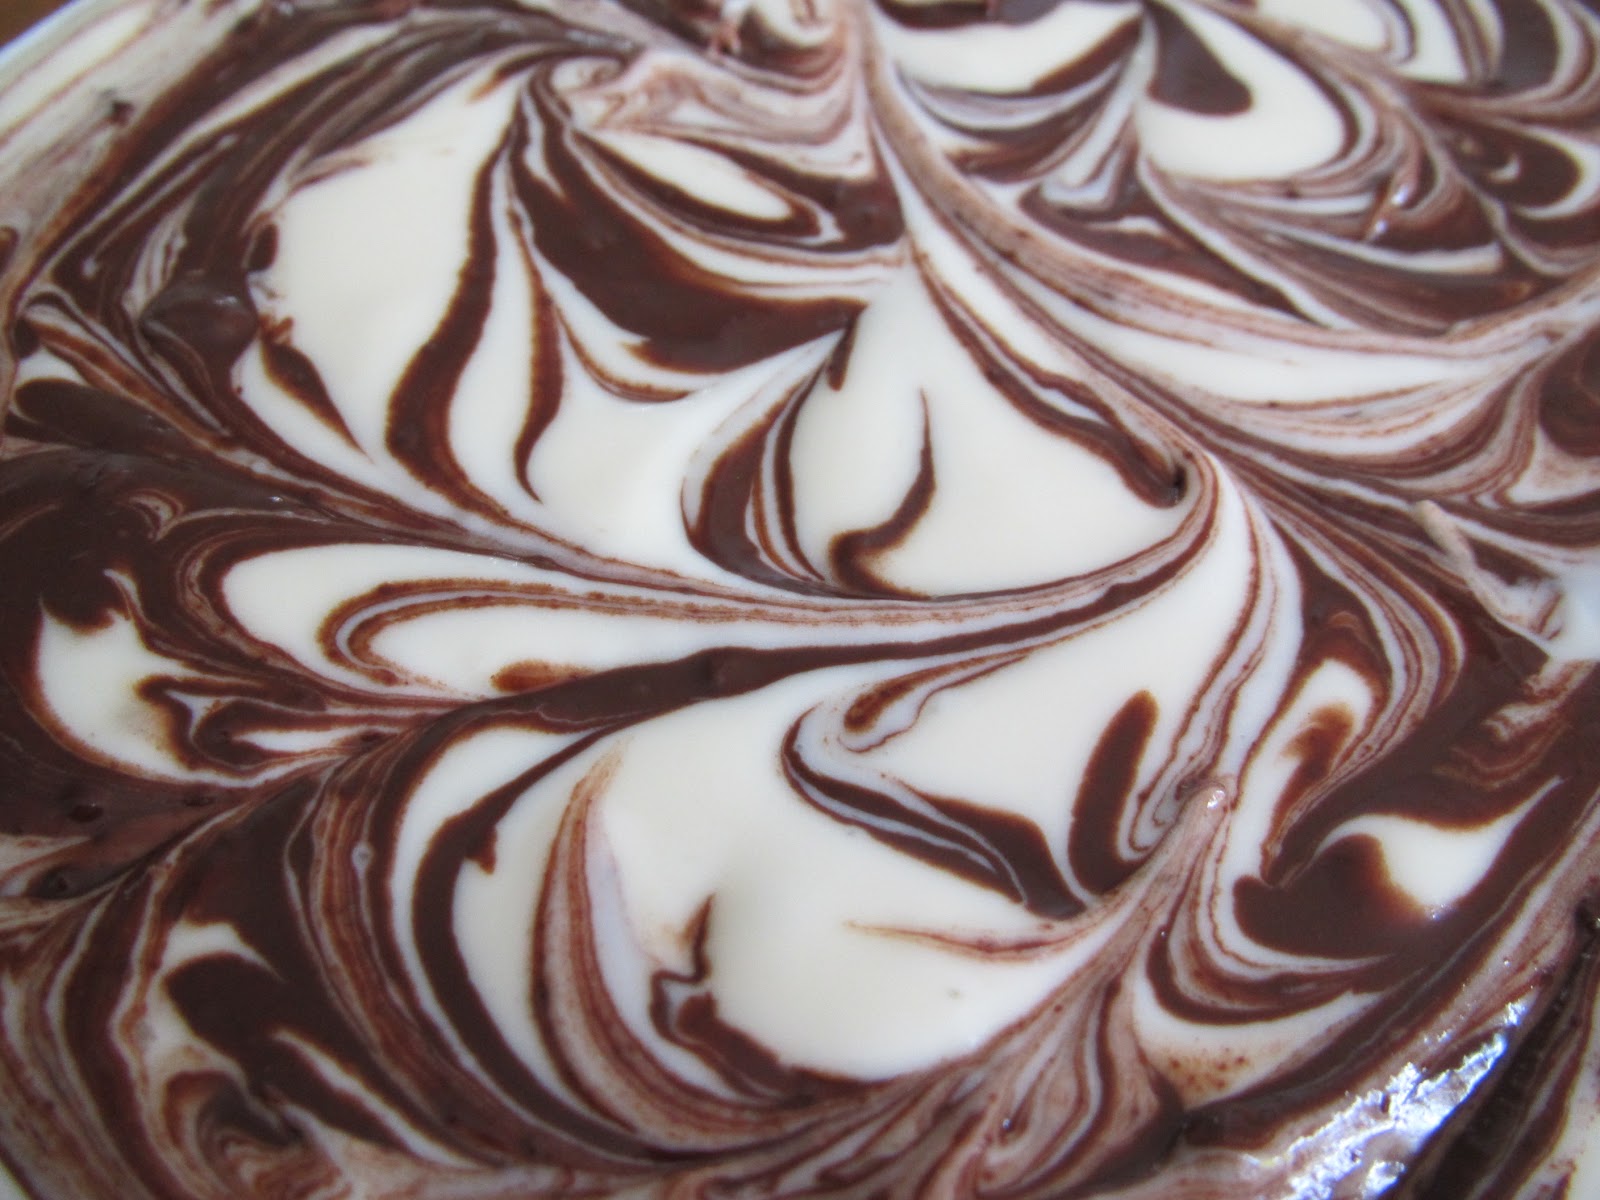
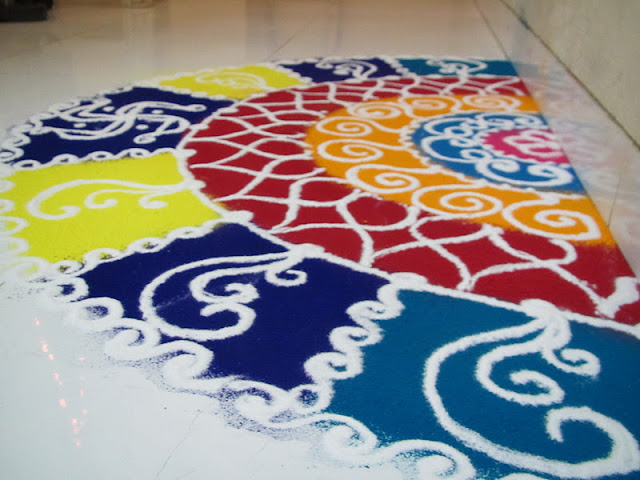
Monday, March 12, 2012

Holi Hai Bhai Holi Hai!

Hello everyone!! Hope you all had a great Holi! As I mentioned last year, the celebration doesn't end for us until 5 days after. So if you haven't played color to your heart's content, do so until you can't rub the it off your face.

I've been completely MIA in the blogosphere for a very long time now. Sometimes life throws things at you and you need to take care of one thing at a time. That is what's been happening with me lately. But you didn't think I had abandoned my blog, did you?? I certainly missed out on many events in the last 2.5 months. Most important of all, my blog's one year b'day! I'm so thankful to all the wonderful readers and fellow bloggers I've had the fortune of 'meeting'. It's been long - but what better occasion than Holi to get back in action? This festival announces the onset of spring and brings new colors and new hopes to our lives. It has certainly renewed my enthusiasm and I'm bringing you a recipe for a very colorful dish.

I had bookmarked Sanjeev Kapoor's recipe for Shaam-Savera a while ago, and I finally had a chance to make it. They say you eat with your eyes first. This recipe for palak-paneer koftas in a rich, creamy tomato sauce is a perfect example of how beautiful and colorful a dish can be. My version of the dish is somewhat simplified - mainly the koftas, which I made with rice flour. I love using rice flour in koftas/fritters since it makes them light and crispy. The other advantage of rice flour over corn flour is it doesn't get chewy after sitting for some time. The gravy recipe is pretty standard. A couple of changes I made were adding onion paste and some more whole spices for full bodied flavor. I had run out of heavy cream so I ended up making a paste out of some cashews. It made for a perfect substitute, adding creaminess and sweetness to the dish.


Shaam Savera: Palak-Paneer Kofta in Rich Tomato Gravy

Ingredients:
Kofta:
1 Bunch fresh spinach
1 Cup rice flour (use as needed)
2 Teaspoons cumin-coriander powder
2 Teaspoons red chili powder (adjust spices per your liking)
Salt to taste
Paneer
Vegetable oil for frying

Gravy:
1 Can (6 oz) tomato paste or 4-5 tomatoes finely chopped
1 Tbsp butter
3-4 Garlic cloves crushed and finely chopped
1/2 Small onion - paste or finely chopped (optional)
Khada Masala/Whole spices (3-4 cardamom cloves, 1 bay leaf, 1 inch cinnamon stick)
1 Teaspoon cumin-coriander powder
1 Teaspoon red powder (or to taste)
Salt to taste
Heavy cream/Cashew paste 

To make koftas: 

  • Clean spinach leaves and blanch in hot water for 2-3 minutes until soft. Drain well and chop finely. 
  • Add cumin-coriander powder, red chili powder and salt to chopped spinach and then start adding rice flour little by little until you have just enough to bind spinach together. 
  • Cut paneer into 3/4 inch cubes or, like I did, make small rounds with a melon baller! 
  • Take spinach mixture a little less than a golf-ball size, place a ball/cube of paneer at the center and make round koftas. Fry them until koftas are golden brown on the outside. 
Gravy:

  • Heat a wok on medium and add butter. Butter can overheat easily so don't keep the stove on high. 
  • Add the whole spices. Once they are fragrant (20-30 secs), add garlic paste and onion paste and slow roast until golden brown. 
  • I used tomato paste instead of fresh tomatoes for this recipe since it is much smoother. Add tomato paste, Garam masala, red chili powder and salt to taste and cook for 10-15 mins until all the flavors come together. Add some water if the gravy starts getting too thick.  
  • Once cooked, turn the heat to low and add 1/4 cup (or more if you like) heavy cream. Cook for 5 more mins and turn the heat off. Or to make cashew paste, simply soak them in warm water for 5 mins and grind to paste.
Now to put it all together, serve the gravy in a rather flat serving bowl. Cut koftas in half and place them on the gravy. Serve with some roti, naan or jeera rice.

Submitting this recipe to the Know Your Dairy event hosted by Motions and Emotions for Jagruti's Know Your series.


Tuesday, December 13, 2011

Look, I Made A Snowman!

Only 12 days to go till Christmas, and I'm sure everyone's got their hands full baking and cooking and planning big meals for the holiday parties. The season's eatings started on my side with the food bloggers holiday party over the weekend. Oh, the goodies everyone made! The new enthusiastic baker in me wanted to make something sweet for the party at first. But looking at the number of bloggers who signed up for desserts, I turned to a savory dish I knew would please the crowds. Peruvian Causitas - mashed yellow potatoes seasoned with lime juice and Peruvian chile - make a great appetizer for any party. Shape them like snowmen, and you have the cutest looking appetizer that can be the center piece of your serving table! My dear Peruvian friend and neighbor in Utah made these snowmen two years back for Christmas and I just couldn't get over how adorable they were. I mean, look at them!!!

Hello, everyone!
Causas or causitas are a popular dish from Peru. It's a simple recipe with very few ingredients but packed with lots of flavor. The causitas I made were simply mashed potatoes/pureed. The more elaborate preparation contains filling of various sorts, such as avocado, shrimp, crab etc., to go in between two layers of mashed potatoes. Causitas makes for a great finger food. Shaped like little snowmen, they are just perfect for a holiday party claiming the center spot on the table. There are no exact measurements to make the potatoes, but make sure the punch from lime juice is prominent. That makes it delightfully light for a potato dish. And as my friend would say, add lots of lime juice to any Peruvian dish and it tastes good!


Snowmen Causitas - Peruvian Mashed Potato Appetizer

Ingredients:
Medium Yellow/Yukon Gold potatoes - about 1 per person (I used 10)
Limes - I needed 3 large limes for my potatoes
Peruvian Aji Amarillo chile paste - If you can't find it easily, use any mild yellow/orange chile
Salt & Pepper to taste
2-3 Tablespoons vegetable oil.

  • Boil potatoes, peel and mash. When the potatoes cool down enough to touch, get your best tool out - your hands - and take out any lumps. Add oil little by little while mixing by hand so the potatoes are not too sticky. 
  • Add juice from one lime at a time, and taste to make sure there's enough lime flavor. Don't let the mashed potatoes get too thin else you won't be able to shape them. 
  • Add a little bit of chile paste - this is just for slight flavor and color. The dish is not supposed to be spicy. I couldn't get to a Peruvian store so I used 1 regular yellow chile ground to paste. 
  • Season with salt & fresh cracked pepper. Taste, and as my friend put it, choose your lime-chile-pepper-salt happy place!! That sums it up =)
  • To make the snowmen, roll the mashed potatoes into small balls in two sizes, one smaller than the other. Stack the small ones on top of big ones and poke a toothpick through them. For the eyes and nose, you can use a variety of things. I chopped olives finely for eyes and red bell pepper for nose. You can also use carrots. Decorate the snowmen however you want. 

This is a great make-ahead dish. Make the mashed potatoes ahead of time and just shape them when you are ready to entertain. Get your kids to help you with making the snowmen and decorating them. Boy, are they gonna have fun with it! The snowmen taste just as good as they look.

Happy Holiday Cooking, everyone! :)

The snowmen sitting pretty with other dishes


Wednesday, November 30, 2011

My Continued Thanksgiving

Hello everyone! Hope you all had a fantastic Thanksgiving with your near and dear ones, and had a big indulgent meal. A few of our friends gathered at our place for a pot-luck dinner. The celebration continued for me till today with yet another pot-luck at work. Thanksgiving gives us the opportunity to reflect on life and count the many ways we are blessed. I had much to be thankful for this year as we celebrated one wonderful year of marriage last week! God has blessed me with a loving, caring husband who has changed my life for the better. And how can I not thank Him for making me a part of two beautiful families, friends I can count on, a job I can depend on, and the beautiful city of San Diego I call my home now.

We didn't cook Turkey, but it was at the dinner table nonetheless =D
A few of us friends gathered for a rather non-traditional Thanksgiving dinner this year. Everyone decided to bring their favorite dish (or anything they could make, pretty much :D). Since most of our friends are fishatarians, hubby went on to prepare his favorite shrimp and pardon a turkey! Don't underestimate the shrimp on Thanksgiving though, it definitely became the start of the show.


We started off with a kick-ass guacamole our friend NK prepared right in front of us. I made my favorite stuffed mushrooms with garlic, onion and more mushrooms. Another friend NP, whose sister works for Sanjeev Kapoor (google Anupa Das for her recipes), got fruits & cheese on skewers. All the while we were munching on appetizers, hubby was hard at work bar-tending, making sure everyone was getting enough alcohol in their systems =D.


NP also made this amazingly delicious salad with orange, pomegranate, goat cheese and honey dressing using her sister's recipe. I'm a big fan of fruits in salads and it was definitely one of the best salads I've had. SM made a yummy penne pasta with pesto sauce. The garlic bread he brought with it made it a perfect combo. I contributed to the main course by making baked cauliflower. And of course, everyone gorged on the hubby's grilled shrimp.


We were almost in food coma by the end of it, but what's a Thanksgiving meal without a pie?? Since we didn't stick to the traditional Thanksgiving theme, I skipped the usual pecan-pumpkin and made a coffee-chocolate silk pie - my take on French silk pie! This was my first time making a pie and I was nervous about the outcome, especially when I modified the original recipe. But it was oh-so-good!!! I made it again for my colleagues today and they loved it too. I used this recipe and modified it a bit to have the perfect filling for a 9 inch crust. The addition of coffee was perfect - it helped cut through the sweetness and added some depth to the flavor. The pie was silky smooth, totally sinful and extremely luxurious!


Coffee Chocolate Silk Pie

Ingredients:
9" Pastry shell - baked according to the package directions
3/4 Cup sugar
2 Large eggs
2.5-3 oz Baking chocolate (depending on how chocolaty you want it)
1 Tablespoon brewed coffee
1/2 Teaspoon vanilla essence
1/2 Cup unsalted butter
1/2 Cup heavy whipping cream
Extra whipped cream & chocolate shavings (optional)

  • Combine sugar and eggs in a sauce pan and heat on medium, stirring constantly, until the mixture covers the back of the spoon without dripping right off (~5 mins). Remove from heat, add chocolate, vanilla and coffee and stir until mixed well. Let the mixture cool till lukewarm.
  • In a bowl, cream butter until fluffy. Whipping is the key to getting that light, smooth pie filling. Add the cooled mixture and beat again on high until fluffy.
  • In a separate bowl, whip the heavy cream until firm,stiff peaks form. Fold the whipped cream into the chocolate mixture gently.
  • Pour the mixture into the baked crust and chill for a minimum 6 hours. I kept the pie in the fridge for almost 24 hours and it was just the perfect consistency and texture when I served it.
  • Garnish with some whipped cream and chocolate shavings if you like. 

Monday, November 21, 2011

A Warm Winter Soup

Others may think it's always bright and sunny in San Diego, but we do get our fair share of cold days. Like the bone-chilling 60 degrees weather we had today ;). Jokes apart, it's getting cold here now and with Thanksgiving just around the corner, winter is in the air (literally). Well, I'm totally loving the crisp morning air, signs of the holiday season and how the heavenly aromas of cinnamon, nutmeg, and toasty pecans engulf me when I step into the grocery store. Squash of every color, shape, and size have replaced summer produce on the racks just in the two weeks I was gone to India. Pumpkin, of course, is the king of squash around this time. I got a gorgeous bright orange slice of pumpkin last week to initiate my winter cooking!

There's nothing more comforting in this season than a pot of soup simmering away in the kitchen. The waft of aromatic spices going around the house makes you feel all warm and cozy inside. I came across this pumpkin soup recipe by Rachael Ray and loved the idea of garnishing the soup with crispy apple and cranberry relish. Knowing that I'll be consuming (a lot) more than needed calories in the ensuing weeks, I wanted to make my soup low on calories. I replaced the heavy cream with a little bit of milk and added a small potato to get that smooth, rich texture. Also, I reduced the amount of liquid quite a bit to make it thick and full of pumpkin flavor. It was a perfect winter soup with all the wonderful holiday elements in it!

The recipe looks long, but it's literally as simple as tossing ingredients together and letting them simmer until you have a hearty flavorful soup. 

Colorful pumpkin soup with apple-cranberry relish - full of all the wonderful holiday flavors!
Pumpkin Soup with Apple-Cranberry Relish

Soup:
1 Tbsp butter
1 Small onion - chopped
1-2 Garlic cloves - chopped
1 Bay leaf
1 Inch cinnamon stick
1 Small russet potato - peeled and cut into small pieces
Salt & Pepper
1 Tspn cumin-coriander powder
2-3 Tspns paprika - adjust per your liking
2 Teaspoons all purpose flour
1 Wedge of pumpkin / 28 oz can of pumpkin puree
2 Cups water
1 Cup Vegetable stock (optional)
A pinch of nutmeg
1/4 Cup whole milk

Relish:
Red apple - finely chopped
Handful of dried sweetened cranberries - finely chopped (no particular measure here, add as many or as little as you want)
1 Tspn chili powder
2 Tspns honey
Chopped almond (optional)

  • If you have fresh pumpkin, cut it into 2 inch pieces and pressure cook them in a little bit of water. The peel comes right off after cooking. Mash it slightly. 
  • Heat a soup pot on medium, add butter and let it melt. 
  • Add bay leaf, cinnamon stick, garlic, potato and onion and season with salt & pepper. Saute for a few minutes until the potato and onion are tender (~5 mins). 
  • Add cumin-coriander powder, paprika, pumpkin mash/puree, 1 cup water & 1 cup vegetable stock. I didn't use all vegetable stock because I didn't want the pumpkin flavor to be overpowered by the stock. However, some stock provides a little bit of body to and extra flavor. Add another cup of water if needed.
  • Sprinkle a pinch of nutmeg. Add milk and let the soup simmer for 10 mins or so. 
  • Take out the bay leaf and cinnamon and puree the soup in the food processor or by using a hand mixie. 

  • Mix chopped apple, chopped dried cranberries, honey and a little bit of paprika. Top the soup with this relish.  For some more nutty flavor to the soup, I sprinkled some chopped almond. 


Thursday, November 10, 2011

Coconut Creamed Corn - From Jenny of Vintage Sugarcube

Hello everyone! I'm back from a wonderful vacation to India. Just as I recover from all the Diwali festivities, I can smell Thanksgiving in the air here. While I've taken a long break from cooking, I'll share a lip-smacking good creamed corn recipe by my blogger friend Jenny of Vintage Sugarcube.

The monthly meet-ups of San Diego Food Bloggers has given me the opportunity to meet some amazing bloggers and try their scrumptious dishes. Jenny and I met at the Bake Sale that initiated the food bloggers meetings and I've been an admirer of her blog since. As the name suggests, her blog is very vintage with some  delicious dessert recipes. Each of her recipes is woven through a funny story accompanied by fabulous pictures, like this or this. The effort she puts into each post is evident and her witty personality shines through them all. Check out her 'About Me' page for her published recipes.

Jenny brought this creamed corn dish to the bloggers meet a couple of months back, and everyone was raving about it. Not only does she know her desserts, she can cook. It was the best creamed corn I had ever had. Of course I helped myself to a few handsome spoonfuls of it. The secret ingredient? Coconut milk! Creamed corn is already yummy, but coconut milk takes it to a whole new level. The fresh corn and lime zest made it a perfect summer dish then. But I don't see why you wouldn't skip baked corn this Thanksgiving and make this utterly delicious creamy, fragrant, melt in the mouth corn dish instead. I asked Jenny to share the recipe on her blog, but she only posts dessert recipes. I immediately offered to do a guest post (a recipe this good needs to be shared with the world). Jenny was extremely kind to make the creamed corn again - twice, to get it perfect - and share the pictures and recipe with me. I was supposed to post it before leaving for India, but work schedule did not permit. Better late than never though, and just in time for the holidays.

Thanks, Jenny, for sharing this wonderful recipe with me and my readers.


Coconut Creamed Corn
By Jenny (www.vintagesugarcube.com)

Serves 6
Found and adapted via www.shutterbean.com  / Ad Hoc at Home Cookbook
  • 6 ears corn, shucked
  • 1 lime
  • 3 tablespoons butter
  • ½ cup heavy cream (no cheating, gotta buy the heavy cream)
  • ½ cup coconut milk (please don’t buy the light/lite)
  • Few shakes or more of cayenne (I haven’t a clue how spicy you like it!)
  • ½ tsp salt
Cut corn off cobs and set aside.  I place a couple large pieces of wax paper under the cutting board to catch any flying kernels.  
Zest lime and set zest aside.
Melt butter in stock pan or medium skillet.  Microwave whole zested lime to soften it up a bit (30-45 seconds).  
Add corn and juice from lime to sizzling butter and sauté for 5 minutes.  
Then add cream and coconut milk, cayenne and salt.  Cook until creamy (approx 15-20 minutes) over low-medium heat.   
Stir in lime zest prior to serving.  

Tuesday, October 25, 2011

Happy Diwali!

Sparkling diwali wishes to everyone!!! Today is the Hindu festival of lights - Diwali. For those who are not familiar with the festival, you can find some information here.

I'm celebrating this joyous festival in India today! I surprised my parents 4 days back by dropping in unannounced :). Waking up bright and early to the sound of firecrackers, decorating the house with rangoli, diyas and flowers, relishing the delicious sweets prepared specially on this day and spending time with the most important people in my life, my family - this is real diwali! 

I'm absolutely busy enjoying the festivities here. While I'm taking a break from cooking, I'll be posting a lovely recipe ASAP shared by one of my favorite blogger friends. Stay tuned .

Diyas - to light up our lives.

My rangoli in my in-laws house :)

Rangoli in my house

Lantern decorations in my house

LinkWithin

Related Posts Plugin for WordPress, Blogger...