Saturday, July 7, 2012

Bookmark Thursday

Thursdays are usually 'throw something together and rush out the door' kinda dinner nights for us. I have a dance class every Thursday evening (pursuing a long time dream of learning Kathak :) and I don't get much time to cook anything. Hubby helps himself to some leftovers (if he's really hungry) or waits for me to come back and put anything that's available in the fridge in between two slices of bread and call it a sandwich. After almost 5 months, I was home this Thursday. Bonus time! It was a perfect opportunity to go down some of the bookmarked recipes and try 'em out. 


I had been eyeing these glorious Masala Buns posted by one of my favorite bloggers, US Masala. For a while, it seemed like every other blogger was making buns of some sort and I was the only one missing out. A few days back I came across Sangeetha's blog through her HITS event and saw another recipe for stuffed buns. The recipe looked too tempting not to give it a shot.


Masala buns are simple buns stuffed with some kind of curried vegetable filling. They looked very intimidating to me at first, but except for the fact that you have to wait, the recipe turned out to be quite simple. The fun part is, you stuff the buns before they bake. So as you pull a morsel of a fluffy, soft bun, there's a tasty treat inside! Sangeetha had stuffed the buns with spicy cauliflower, which I'm sure would've tasted great. But I went with a more predictable filling - veggies cooked with Paav-bhaji masala. To make the buns a little 'Indian', should I say, I added toasted cumin seeds to the dough. Aromatic, pillowy buns stuffed with paav-bhaji like bhaji. Tell me you won't like that!


Masala Bun 

Ingredients:
Buns:
1 1/2 Cups All purpose flour
1/4 Cup warm water
1/4 oz. Dry active yeast packet
1 Tablespoon sugar
1/2 Teaspoon salt
1/2 Teaspoon toasted cumin seeds
3 tbspn EVOO + as needed

Stuffing:
1 Tablespoon oil
1/2 teaspoon cumin seeds
1 Large / 2 medium boiled potatoes
1 Small tomato
1/2 Medium onioin
1/2 Cup mixed veggies - I used peas and bell peppers only
2 Garlic cloves - minced
1/2 Inch ginger - minced
1 1/2 Teaspoons paav-bhaji masala
1 Teaspoon Red chili powder
Salt to taste

Dough for the buns:
  • Mix yeast, sugar and warm water and let it stand until the mixture gets foamy (~10 mins). Sangeetha mixed the yeast with the flour itself, but I figured getting the yeast acting would be faster and better. 
  • Add flour, salt, EVOO. Bruise the cumin seeds on your palm using the thumb slightly to get all the fragrant oils out and add them to the dough. Knead well using a little bit of water as need to form a stiff but soft dough. The original recipe used milk instead of water, I just took the easy way. 
  • Cover the dough with a damp towel and keep in a warm place for ~45mins to an hour so to rise. While you are waiting, start working on your stuffing. 
  • Once the dough almost doubles in size, punch it gently and knead again for a few mins. 
  • Divide the dough in 6 parts and shape them round. Keep on a greased aluminum foil on baking sheet. Let them stand for another 10 mins or so. The dough will rise again slightly.
Stuffing:
  • Chop all the veggies finely. Mash the potatoes. 
  • Heat oil in a pan and add cumin seeds. Once they splutter, add ginger-garlic, onions and tomatoes and saute until the onions are translucent. 
  • Add spices, rest of the veggies, salt and cook for 10 mins or until the mixture comes together well. If it becomes too dry, add a little bit of water. Adjust the spices according to your liking. 
Put it together:
  • Make a dent in each of the dough balls to form a cup-like shape. Stuff them with a golf-ball size vegetable filling and pinch the dough together to close the dough balls. 
  • Brush them with some OO and let them stand for another 10 mins. 
  • Bake for 15-18 mins on 375F or until the buns turn golden brown. 
  • To serve, brush the buns with a little bit of garlic butter or OO. 
If you have some stuffing leftover - make a sandwich :D.


Sunday, July 1, 2012

Randomness

It's been a while since I was home alone being a couch potato, only my needle and yarn to accompany me. Mom and dad left yesterday to continue their trip at my sister's, leaving a huge void in my house. I'm quite thankful for the wonderful time we spent together though, and it consoles me that they are just across the country as opposed to the globe! Now that it's back to just the two of us, I won't need to cook as much. For now, I'll update you on all the happenings in the last few days.

No butter baked goodie - I had wondered how applesauce worked in baked goodies all this while. After a successful trial, I'm convinced of the power of apple! I baked an eggless yogurt cake for mom and dad before they left, using this easy recipe. I cut the recipe in half, used only 1 tbsp of sugar instead (for mom) and (apprehensively) substituted oil with applesauce. Boy, was I sweetly surprised at the end product?! The cake was moist, fluffy and tasty. I would recommend adding some fruits or berries to the cake though since it's pretty one tone. Mom and dad gave two thumbs up.

Float fun - I stay away from sodas; not just for health reasons but I don't like the taste at all. Ice-cream floats though are a different story though. Creamy vanilla ice-cream dunked in fizzy root beer is the ultimate summer dream. We got my dad hooked onto root beer floats while he was here. If you haven't tried them or haven't had them in a while, do revisit soon =D.

Feeling peachy - Take a look at the velvety peaches we've plucked from the tree recently! we snacked on a few juicy fruits and saved some for a tart, maybe.


Anjeer Barfi - Everyone who visits our house 'oohs' and 'aahs' over the giant anjeers (figs) in the backyard. My sister and bro-in-law love figs and asked us to save some for them. I don't know what the status will be when they visits us in fall, but I wanted to surprise them with some fig goodness. I made fresh Anjeer Barfi (a sweet made from figs) and sent with my parents. Bro-in-law only saved a little bite for my sister, but I heard they loved the barfi. I used a pretty standard method to make it:


Anjeer Barfi

Ingredients:
3 Large figs (all the ripe figs on the tree)
1 Teaspoon ghee/ clarified butter
2 Tablespoons chopped dry fruits + more for garnishing
3 Teaspoons sugar
1/4 Teaspoon cardamom powder

  • Puree figs in the food processor. If you don't have fresh figs, use twice as many dry figs - reconstitute them in warm water and puree. 
  • In a pan, heat ghee on low-medium and roast the dry fuits for 10-15 secs. They don't need to turn color. I used almonds as that was the only dry fruit I had on hand, but you can use cashews and pistachios as well. Add the fig puree, sugar and cardamom powder and cook on medium for 10 mins or so until most of the moisture evaporates and the mixture separates from the pan in one ball. It's important that you get rid of the water content. 
  • Grease a plate with ghee or line it with parchment paper/aluminum foil and spread the mixture and pat it to 1/2 inch thickness. Spread some chopped dry fruit on top and press gently into the barfi. Stick it in the fridge to cool and thicken. 
  • I made a big round barfi to send it. You can cut small 1 inch cubes. 

Babies and batwas - My BF recently delivered a beautiful baby girl (yay for her), and my cousin is expecting her second bundle of joy - a girl too - very soon! I crocheted two cute little headbands for both of them. One inspired by this simple but beautiful design, and another with a pretty little flower. The second one has reached its destination already and the mommy was simply thrilled about the handmade gift :). On my recent trip to Michael's, hubby picked this rainbow of a yarn ball for me, and I crocheted a simple batwa (pouch) with a pattern I created myself. Take a look. I'm tackling this new design now. 

Wednesday, June 27, 2012

Going Green With Dosa

Time flies so quickly when you are having fun. I can't believe all the excitement of having my parents over is about to come to an end already. My initial plan was to post all the dishes we prepared; but there was only so much time to make the most of their stay. It's been a short, but blissful month enjoying the new house, the garden, beautiful San Diego weather and fresh, tasty meals with them (I say fresh because who has time to prepare every meal from scratch on a daily basis?). I cooked quite a few elaborate meals for mom and dad.  But I've been after all the simple meals I could think of now that I cook for 4 people twice a day. Dishes that spare me time to sit and chit-chat with them instead of toiling away in the kitchen. And you can't talk about simple meals without mentioning the ever-loved dosas! Or all the cousins of the batter. The great thing about dosas is, you can make a large batch of batter and you're ready to feed an army. Nobody in my house minds multiple dosa meals. I just turn them into uttapams or stuff different chutneys inside for a new look and taste each time. The traditional rice batter doesn't fit my mom's diet though. But really, I can't give up on such a great dinner option. I made Moong bean dosas the other day to keep it healthy and mom-dad loved the simple preparation. Mom makes a batter with mixed beans and lentils sometimes. However, moong beans alone make extremely flavorful dosas. The vibrant green color doesn't get muddled with other ingredients either. They are not as crispy as the real thing, but so tasty, you won't miss the crunch. Dad declared he would switch to this dosa from now on. 


Moong Bean Dosas

Ingredients:
1 1/2 Cups moong beans
1/4 Cup rice (to add some crispiness)
Handful of washed cilantro
2-3 Small (Thai) green chilies
2-3 Garlic cloves
Salt to taste
Water as needed
Oil as needed
  • Soak moong and rice in water overnight. The beans should almost double in size. I let the beans sprout by taking out excess water and letting them soak for additional few hours. 
  • Grind all the ingredients in a mixer/food processor adding water little by little until you have a batter slightly thicker than dosa batter. Cilantro adds flavor, nutrition, and helps maintain that beautiful green color. 
  • Heat a pan on medium-high heat, grease it lightly, pour a ladleful of batter at the center and spread with the back of the ladle, not too thin. Cook until brown on the bottom. Don't coax the dosa until it's nicely roasted on one side - it'll start separating from the pan by itself when it's ready. Flip and cook until you see brown spots on the inside. 
  • I learned a trick from one of my South Indian family friends - cut an onion in half and dip it in oil. Then rub the oil on the pan with the onion. This ensures spreading oil evenly while using very little. It also adds slight onion flavor to the dosa. 

We enjoyed these yummy dosas with a chatpati chutney I recently found at the Indian store - Nirav's Rajwadi Sandwich Chutney. It's like a mango pickle meets cilantro chutney meets tamarind chutney goodness. They call it a sandwich chutney, but we've been eating it with anything and everything. 

Sending this to Show Me Your HITS - Legumes and Lentils Event, event by Sangeetha's Kitchen.

Thursday, June 14, 2012

Garden Gossip

Of all the pleasures that our new house has brought us, our lovely garden has become our joy and pride. Hubby spends 95% of his time (sometimes against my wish) in the garden, tending to the newly planted veggies, fruits and flowers. But my disappointment in his excessive gardening (instead of doing the dishes) vanishes when I look at how beautifully they are growing! Of course, I can't help but love the garden myself. That's the first place I visit after getting home from work. The plants take way all my exhaustion and freshen my mind. Mom and dad have made it a ritual to check up on plants first thing in the morning and then enjoy tea in their company. Plants are like babies - they need our care and love. And give us happiness seeing them grow and flourish. Here's a peek at what's growing in my garden this year. 

Swiss Chard  has beautiful ruby red stems and veins meshing through large velvety green leaves. A simple preparation of sauteed chard with onions and garlic makes a healthy and tasty side. I like it with roti as well. 


Spinach makes Popeye strong! And it's one of the most widely loved greens. I use spinach in a myriad ways - in salads, sabjis or curries, like this or this, daals, dips, pakodas and a number of other appetizers. The culinary uses of this leafy vegetable are endless.


Most people usually either love eggplant, or hate it. There's no in between. I am in the former category. I can have eggplants in any way, shape, or form. Be it chips from large eggplants, curry with stuffed small eggplants, grilled Japanese eggplant in pizzas or sandwiches, or simply bharta from large eggplants - I like 'em all. I don't know how large this eggplant will grow before I need to pluck the fruit, but there's a little eggplant peeking through the bottom leaves!


Last year was a sad year for zucchini. The golden zucchini I planted died before the first fruit was fully grown. I hope to have better luck this time. So far my 4 plants are looking good, and one of them better give me some zucchini! (Un)fried zucchini chips have been my new craze. I'll make that first thing I have a zucchini.


I have a special place for tomatoes in my heart. That was the first vegetable I grew when I started gardening in Utah and have been growing for 4 years now. Hubby wanted to plant tomatoes no matter what other veggies we planted, because they do not disappoint you. Tomatoes are extremely hardy and love bright and sunny weather. Check out these cuties! 


Poblano pepper! My jalapeno pepper suffered the same fate as zucchini last year. This year I'm trying my luck with poblano; but I hear peppers are generally late bloomers. I've been praying to the plant gods so that  I can roast my own poblanos!


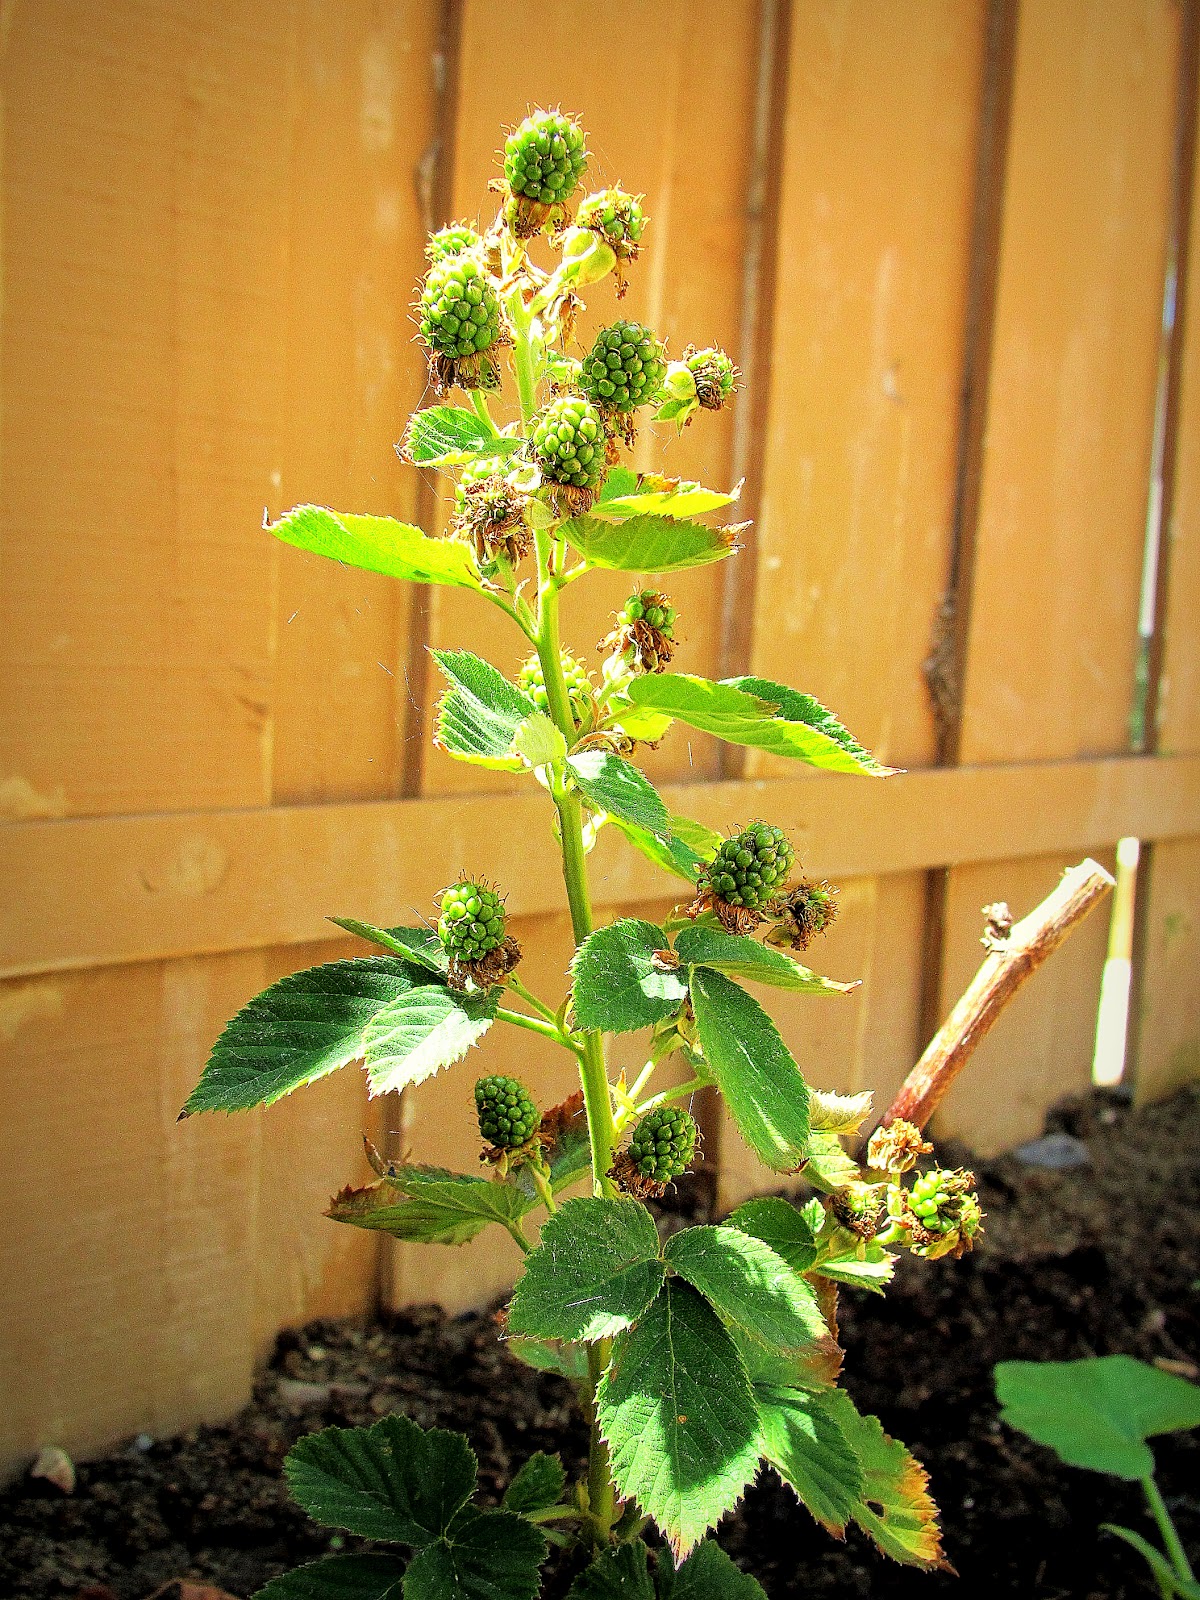
Blackberries are hubby's favorite kind of berries. Our little plant is already bearing lots of tiny fruits. I can't wait to snack on them and hopefully make some jam or preserve out of the leftovers. 


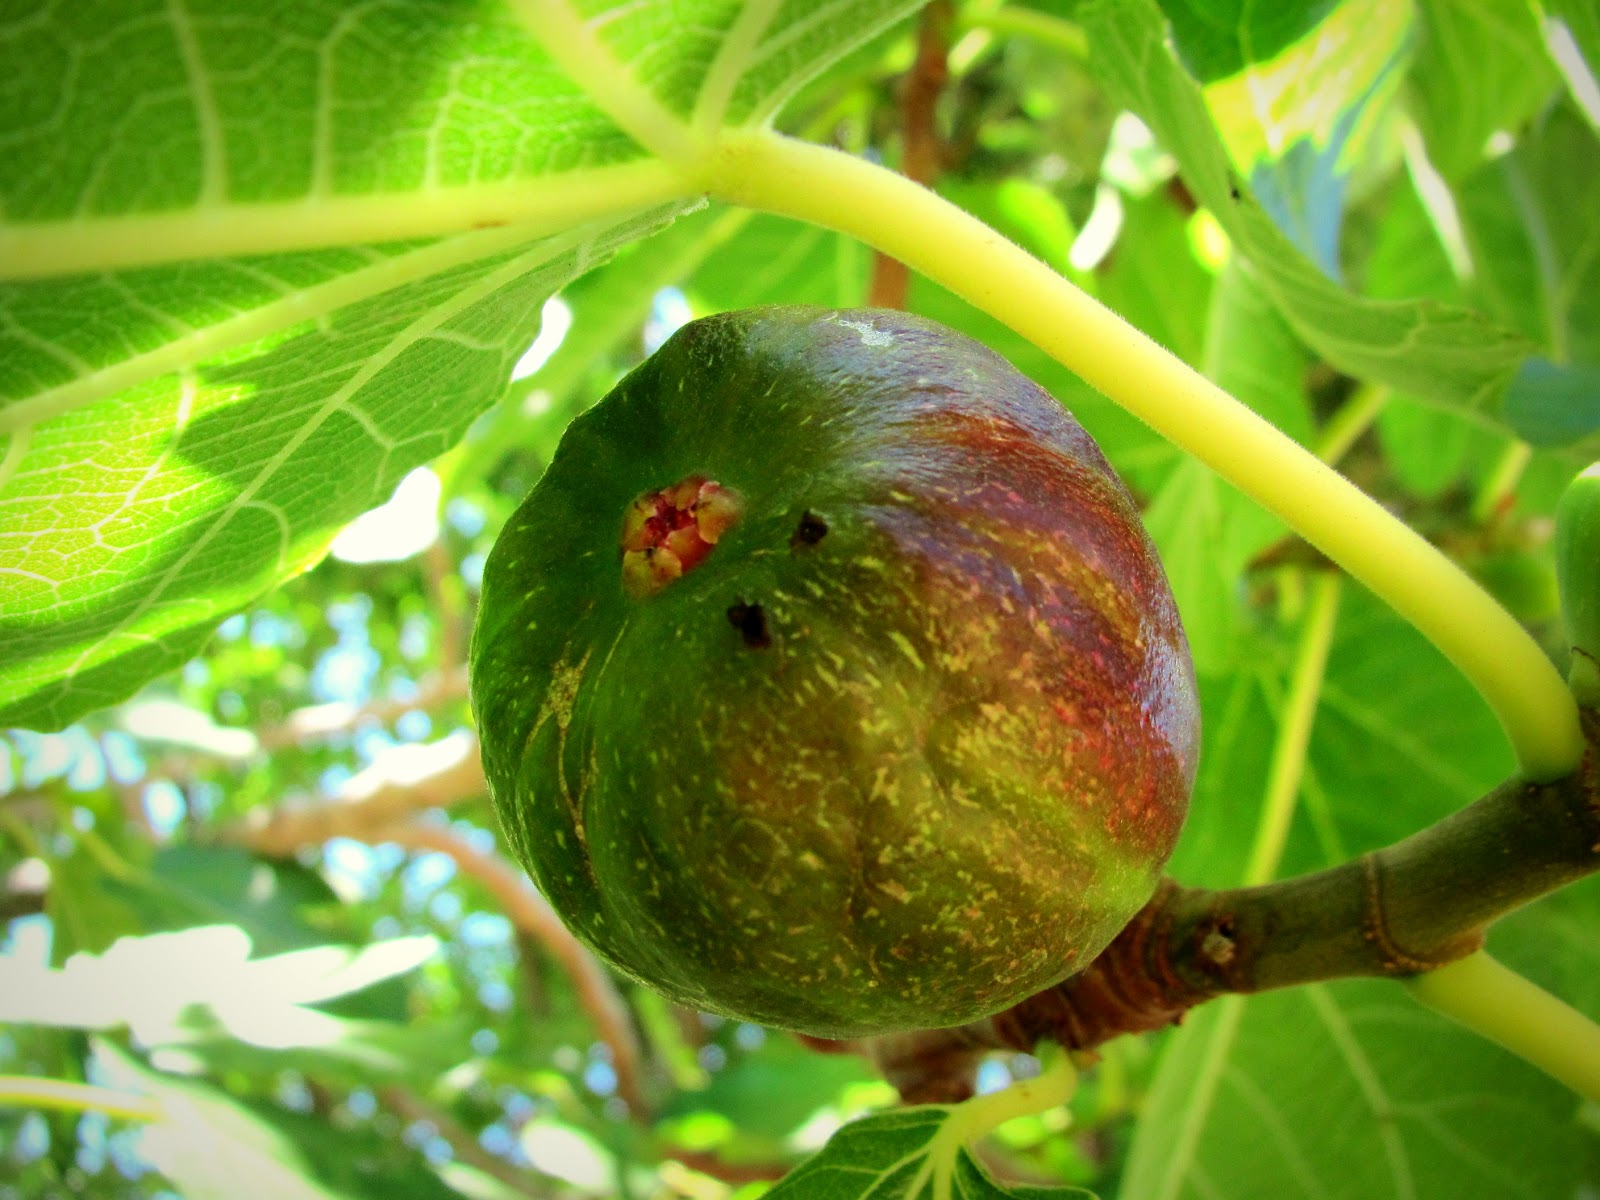
We inherited lots of fruit trees and flowers from the previous owners. I was ecstatic to see the large fig tree! Mom and I have been waiting for the dozens of figs to ripen. I am looking forward to trying some desserts and flat-bread pizzas with caramelized figs.


We had no idea there was a peach tree in the backyard! The tree is fairly small and neither of us paid too much attention to it, until recently, when the green fruits camouflaging with the leaves started turning red-orange. Peach tart sounds like a good idea.


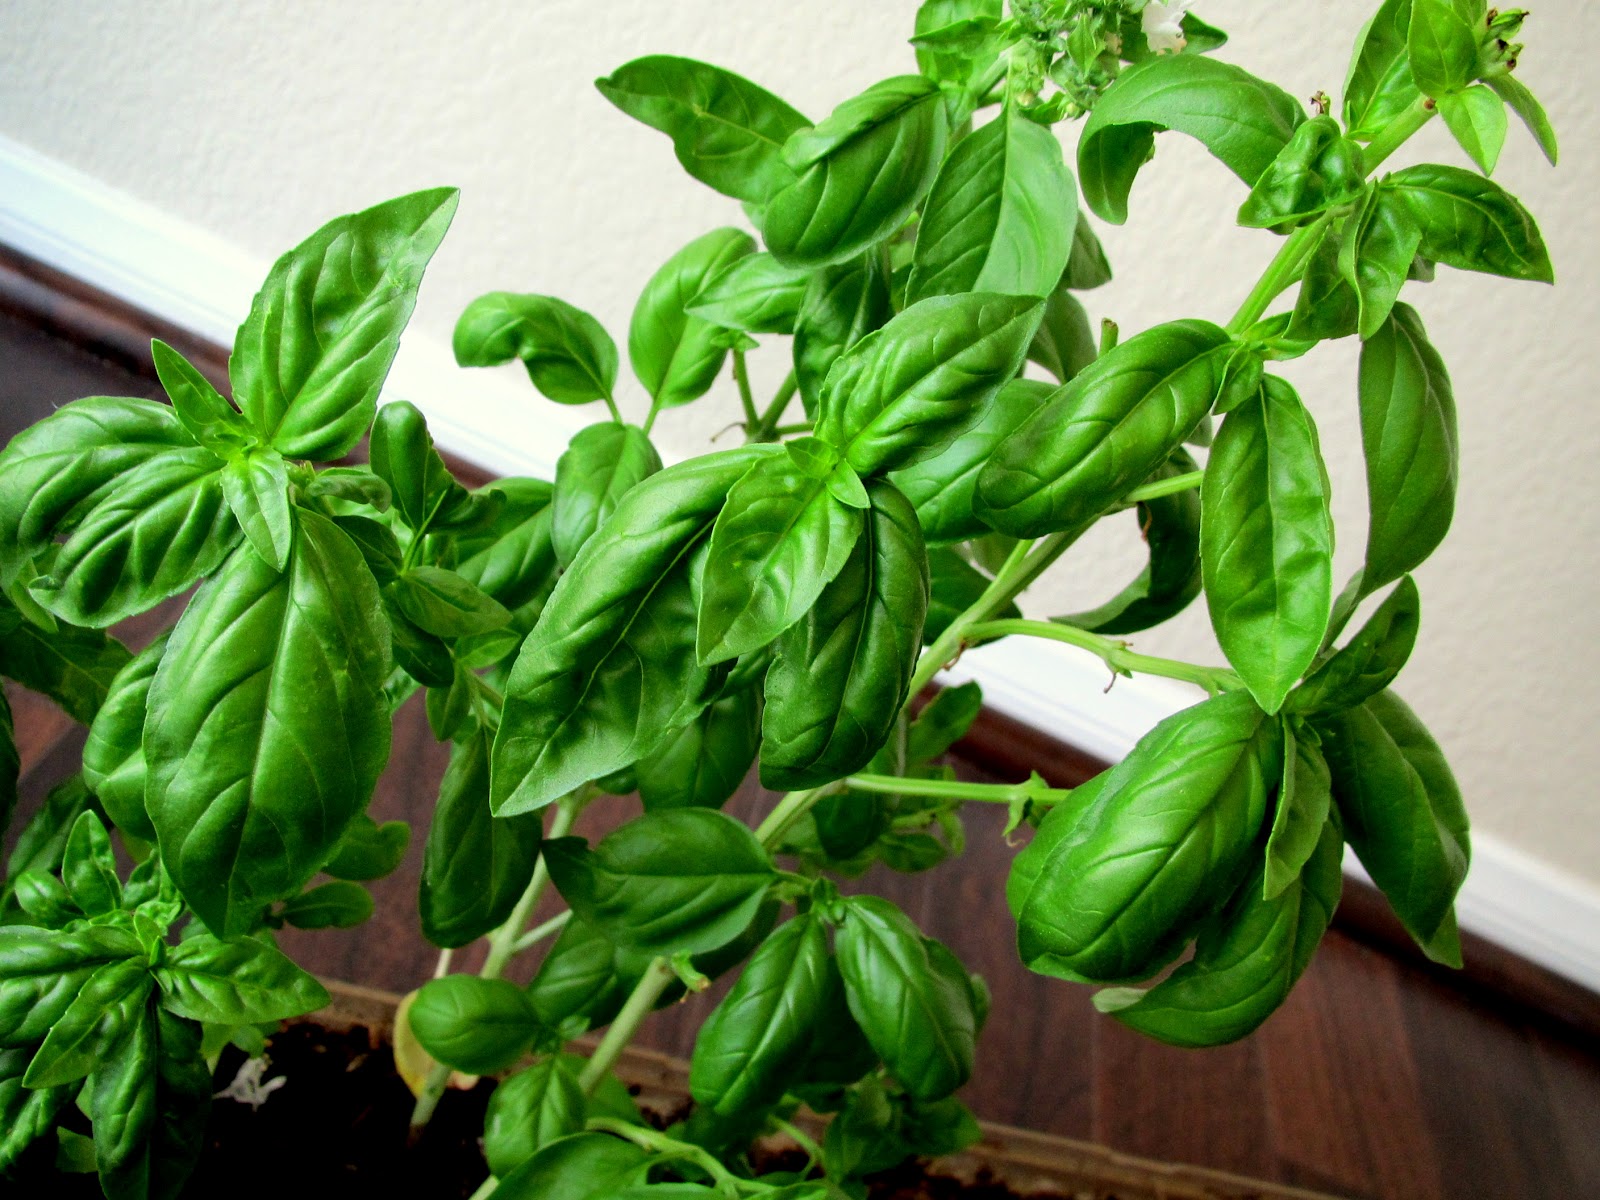
Basil has been my faithful herb. I sowed the leftover seeds from last year and they give me a big bunch of leaves every week. I love adding a few julienned leaves to pasta or making my basil-cilantro chutney for sandwiches or wraps. It adds lots of flavor and some moisture to a simple veggie wrap, like the picture below this. 


Wraps and sandwiches are our dinner favorites. Easy to put together and healthy to eat, they are quick dinner fixes. I simply use some whole wheat tortillas or flatbreads. Make a chutney by grinding basil-cilantro (2:1 ratio) leaves, garlic cloves, sometimes a spoonful of parmesan, a little EVOO, salt and pepper, and water for the right consistency. Spread this chutney generously, and add your favorite greens and veggies such as tomato, lettuce, sprouts, avocado, purple cabbage etc. My favorite among the veggies is roasted bell pepper, which adds meatiness and slight sweetness to the wraps. Simply roast red bell pepper on open flame until the skin is completely charred, cover in a container for 5-10 mins so the steam loosens the skin and then peel off the burned skin. You are left with sweet, juicy flesh. I always roast bell peppers at home instead of buying the canned ones. Wrap it all up and enjoy it with some hot sauce. 


That's about it for my garden! Have you been gardening this summer? Any recipes I should try out when I pick the veggies?

Monday, June 11, 2012

Frozen Delight For Summer Night

Ever since mom and dad got here, we have been having a gala time planning meals, grocery shopping, cooking together and sitting in the backyard, reminiscing the good ol' days over dinner. The summer night breeze goes great with a veggie flat-bread pizza, a yummy sandwich with homegrown basil pesto, tacos or burritos or a simple rice and daal dinner. I pride in cooking healthy ; but I've been making an extra effort to cook low-cal to suit my mom's diabetic diet. Eat whatever you want, a summer meal enjoyed in the backyard warrants a dessert though; and what's better than some ice-cream? Mom doesn't care much for sweets, but ice-cream is something she loves and misses having; especially since sugar-free, fat-free ice-creams are still rare to find in India. So I turned to a much healthier and just as satisfying option to sate her craving - Frozen Yogurt. A delicious dessert to indulge in on a summer night without all that guilt.


Frozen yogurt is ridiculously easy to make as long as you have an ice-cream/FroYo maker. You just need some thick, strained yogurt and your favorite fruit for flavoring. Sugar is optional. You can also buy Greek yogurt; but I find straining yogurt just as simple as picking up a Greek yogurt container from the grocery store. Just hang some plain (low-fat or regular) yogurt in a cheese cloth for 3-4 hours and you are done. You can use a variety of fruits, such as berries, mangoes, nectarines, to make the frozen yogurt interesting. If you are a chocolate person, go for some good quality chocolate chips. I used apricots this time since my mom loves them, and they turned out to be a great choice. Apricots have that gorgeous mango color and the flesh is juicy, sweet and slightly tart. Whatever your choice of fruit may be, you are less than 5 ingredients away from this frozen treat!


Apricot Frozen Yogurt

Ingredients:
1 1/2 Cups strained yogurt/Greek yogurt
4 Apricots
2 Tablespoons honey
1/2 Teaspoon vanilla essence
2 Tablespoons water
  • Wash, pit, and chop apricots finely. Keep a little less than a 1/4 of the apricots on the side and add the rest to a saucepan.
  • Add honey, vanilla essence and a little bit of water to the saucepan and cook the mixture on low-medium heat for about 5 mins or until the apricots are soft. Vanilla is great to enhance any flavor. Cooking helps bring out the sugars in apricot and the consistency helps mix the fruit well with the yogurt. It gets you that gorgeous color too. If you want sugar in your FroYo, just add it to the fruit while cooking. 
  • Cool the cooked apricot mixture in the fridge for a few minutes and mix it with the yogurt. Add the remaining uncooked apricots as well. The uncooked fruit added a great bite. 
  • Put this mixture in an ice-cream maker and churn according to the manufacturer's instructions. 
There, you have a gorgeous looking, wonderful tasting, absolutely no-guilt dessert for a lovely summer night!

Tuesday, June 5, 2012

Spice It Up

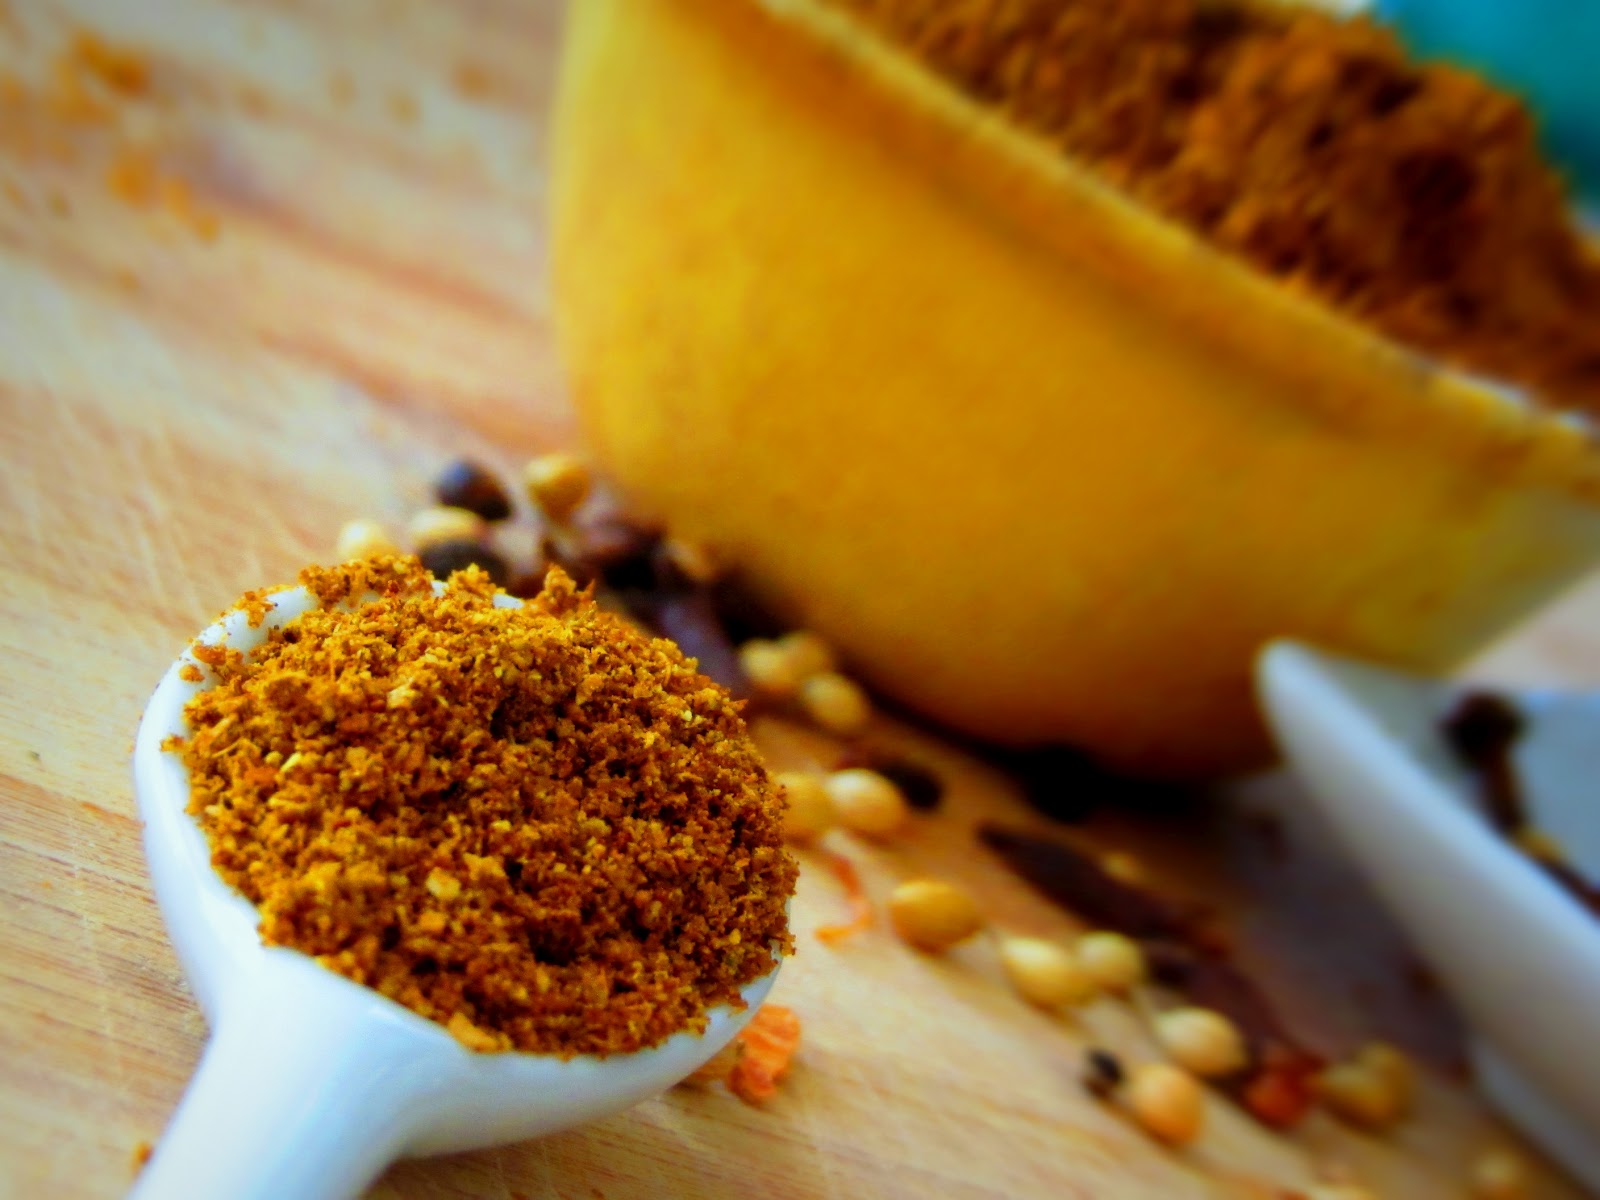
If you ask me what the quintessential of Maharashtrian cooking is, ‘Goda Masala’ would be the first thing to pop in my head. Goda Masala, aka Kala Masala, is the characteristic spice mix used in everyday Maharashtrian cooking. Like South Indians have Sambar masala that defines and distinguishes the region’s food, we have this rhapsody of nutty, earthy, almost citrusy mix of spices. This masala is mild and aromatic, toned down by toasty, sweet dry coconut; hence the name Goda - meaning Sweet - masala. It gets its other name, Kala (Black) masala, for its dark roasted, almost black color. 


Goda masala is great to add flavor to any vegetable or curry, like this; and it is what makes Maharashtrian lentil curry known as amati oh so aromatic and 'khamang' (has anyone found an equivalent to this word in English??). The masala is mild enough to use in daily cooking. Most of the dishes I prepare in my kitchen are incomplete without it. So instead of loading my bags with perishable sweets and fried snacks on my India visits, I get a big ziplock full of mom's freshly prepared Goda masala and other such goodies! Now that I can experiment right here in my kitchen under her supervision, I thought it was time to learn the art of masala-making.

Making Goda masala is an act of patience. My mom told me that each spice in the mix had different roasting time in order to get the most flavor and fragrance. You can't just put them all in one pan. The spices need to be roasted on low flame and need constant stirring. The spices are complex and you can't rush through the process; but the outcome will literally give you a sensory orgasm. 


Maharashtrian Goda Masala/Kala Masala

Ingredients:
1 Cup coriander seeds
1/2 Cup cumin seeds
1/2 Cup sesame seeds
1/2 Tspn cloves
1/2 Tspn black peppercorns 
2-3 Cardamom pod seeds
1 Inch cinnamon stick
2 Large bay leaves
1 Tspn fenugreek seeds
1/2 Tspn mustard seeds
1/2 Tspn shah jeera (Black cumin)
2-3 Dagad phool (Black Stone flower)
2-3 Badi ilaichi (Black cardamom)
1/2 Cup dry coconut (thinly sliced)
3/4 Tspn asafoetida powder
3/4 Tspn turmeric powder
1 Tspn vegetable oil
  • Heat a kadhai/pan on low-medium flame. Add shah-jeera and mustard seeds and roast until the mustard seeds start to splutter, stirring constantly. After roasting each batch of spices, add them to a one container all together.
  • Roast sesame seeds until golden brown. 
  • Then roast the coriander seeds and cumin seeds until coriander seeds become a dark brown and give off citrus-like fragrance.
  • Roast fenugreek seeds for a short while until they turn reddish brown.
  • Add a little bit of oil to the pan and roast cloves, peppercorn, cardamom, cinnamon, bay leaves, dagad phool, badi ilaichi and shah jeera in it until all the spices become aromatic. The bay leaves will turn a reddish brown, and the cloves and peppercorn will puff up. 
  • After all of these spices, roast dry coconut until it turns a beautiful brown. This is what makes the masala 'Goda' or sweet and gives a wonderful toasty flavor. 
  • Add asafoetida and turmeric powders to these whole spices and grind to a fine powder. 
  • Store in an air-tight container in a cool and dry place. 


Each person alters the measurements of spices based on his/her liking. I've grown to love the flavor of my mom's masala, which is roasted enough to get the full flavor out of the spices yet doesn't turn black and taste burned. By teaching this masala, I felt like my mom was passing down a part of our family tradition and I hope to pass it along some day in the future!

Friday, June 1, 2012

A Sweet Start - Broken Wheat Porridge


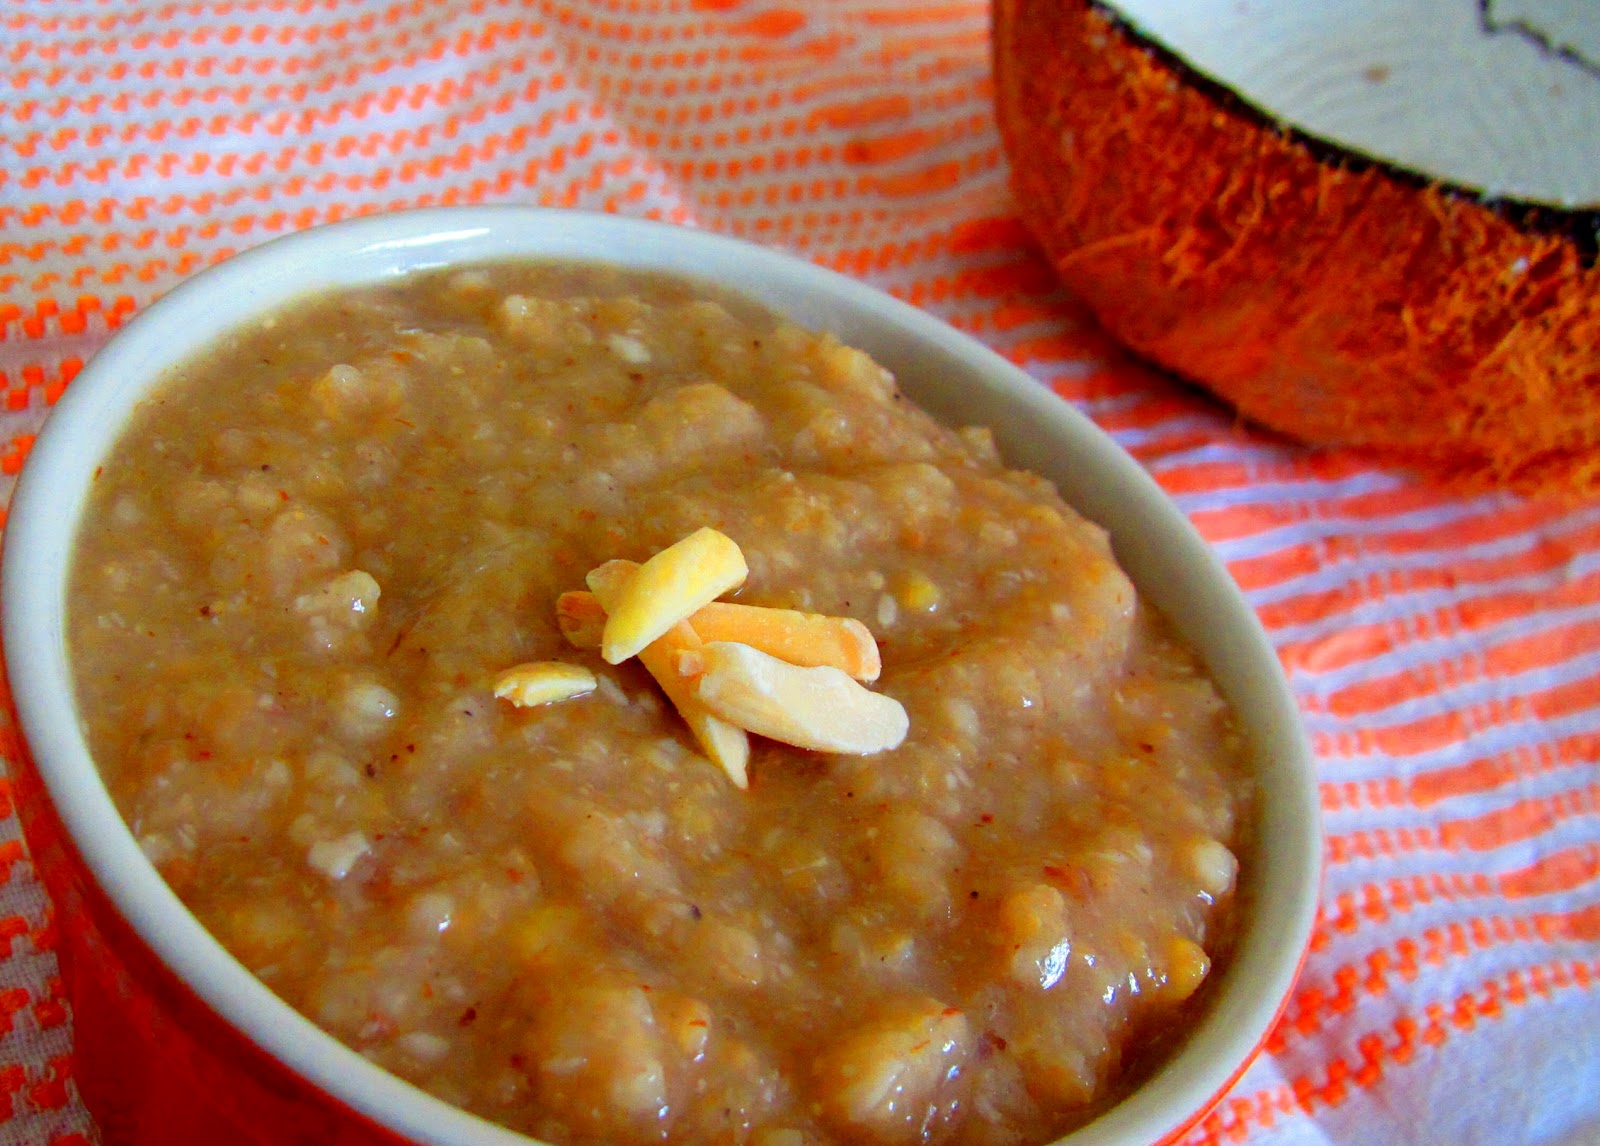
Desserts with coconut evoke nostalgic memories of some of the most exciting events in my life. We have a custom of breaking coconut at the start of any new venture or when inaugurating a new purchase (something really special - we don't break coconut before wearing a new dress, of course =D). The coconut would then be offered to God and turned into a delicious dessert - a barfi or sweet coconut rice, laddu or kheer. All these tasty treats remind me of my first bike, first computer, getting our first car and all the other milestones! The custom is symbolic of breaking all obstacles and achieving the sweet outcome. I love these small but meaningful traditions. Of course, I didn't miss out on this tradition when we entered a very big phase in our lives of home ownership recently. It's been a little under a month since we moved to our home sweet home! I've been caught in a whirlwind of activities - moving can be stressful. Hence the long absence from the blogging world. But I made sure to take pictures of the dessert I prepared from the coconut we offered while entering the house.


With my kitchen barely set up, I wanted to make something simple and went to one of my childhood favorites - Gavhachi Kheer or Broken Wheat Porridge. Gavhachi kheer is a very down-home, comforting, non-glorious yet delicious dessert. I love how it's no-fuss and simple to make. As long as you have good ingredients, there's little that can go wrong in the preparation. It's great as a dessert for any meal and one of the few Indian sweets that is great for breakfast.


Gavhachi Kheer/ Broken Wheat Porridge

Ingredients:
1 Cup broken wheat (or whole wheat)
1 Cup good jaggery - grated
A little less than 1/2 cup fresh grated coconut

1 Tablespoon Ghee/clarified butter
1 Tablespoon chopped dry fruits such as cashews or almonds

1/2 Teaspoon cardamom powder
3-4 Cups water or as needed

  • Soak broken wheat for 3-4 hours. This helps it cook fast. If you have whole wheat instead, soak it a bit longer and pulse in the food processor just enough so that it's coarse. 
  • Heat ghee in a pressure cooker and roast the dry fruits until golden. 
  • Add broken wheat and toast it for a couple of minutes. Then add jaggery, coconut, cardamom powder, and mix everything well. 
  • Add water and pressure cook with 2 whistles. The wheat almost doubles in size after cooking. There should be enough water so that you get a nice thick consistency. This kheer is not like the milk-based thin kheers. 
  • Serve with some ghee and more dry fruits on top.

Just 4 days back, my parents flew from India to visit us in the new house! Having a new 'field' to play around, I've been cooking my heart out under my mom's expert guidance. I'll make a point to post some of those recipes as time permits.

Have a good weekend, everyone!

LinkWithin

Related Posts Plugin for WordPress, Blogger...