Showing posts with label Maharashtrian Food. Show all posts

Tuesday, October 14, 2014

Diwali Faraal - Khajachi Karanji or Satyachi karanji

Diwali is just around the corner. And Fall has finally arrived in San Diego. What a glorious time it is to be frying lots of things and using ghee abundantly. Despite the hot afternoons, dense morning fog and crisp evening air convinces me of the changing season and the approaching festive times. I started my Diwali preps over the weekend on a sweet note with flaky, melt in the mouth pastry called Khajachi Karanji or Satyachi Karanji.


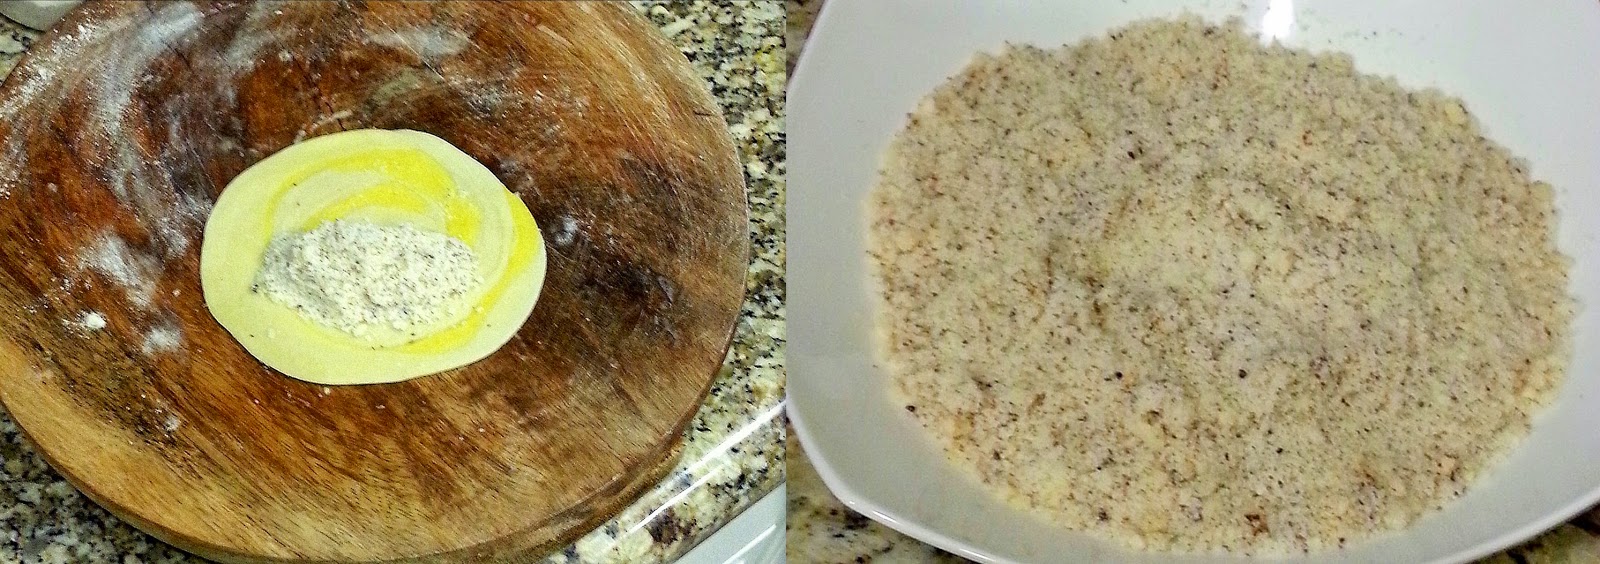
 Karanji is a fried pastry, much like empanadas, made with all purpose flour cover and some sort of sweet stuffing. Our traditional recipe has grated fresh coconut filling. My husband's side of the family makes a more fancy version of it. The cover is made by layering multiple rolled dough rotis with ghee in between. When fried, the layers separate, must like puff pastry, creating wonderfully flaky and crispy karanji. It's called Khajachi karanji for the layers resembling another sweet called Khaja. It also gets its other name, Satyachi Karanji or Karanji made with Sate, from the ghee-corn starch spread used to create layers. The spread is called Sate. This Karanji is stuffed with a fine dried coconut filling which adds to the melt-in-the-mouth quality. Some make the karanji cover using very fine rava or semolina. It needs to be pounded and requires more work. I took the easier route.



Husband specially asked me to make Karanji 'their style' since I'm making everything else using my mom's recipes. I am always up for trying something new, especially when it involves a sweet ;). I called up my mother-in-law, and got detailed instructions from her. My skills were at test, and I decided to post the recipe when husband gave me two thumbs up!

The recipe is a little tricky. And the instructions are long. But the picture tutorial should help in understanding how it's made. This elaborate preparation is worth every delicious bite!

**This recipe makes ~12 karanjis.

Khajachi Karanji/Satyachi Karanji

Ingredients:
Dough
1 Cup all purpose flour
2 Teaspoons melted hot ghee - must be absolutely hot, not warm
Couple of pinches salt
Water as needed
1 pinch saffron and 1 Tablespoon milk Or food color of choice (optional)
A little milk to seal karanji

Sate
2 Tablespoons corn starch
~ 2 Tablespoons ghee (or as much needed to create a smooth paste)

Filling
1/2 Cup dry grated coconut. If you grate an entire coconut, scrape off the black part.
2/3 Cup sugar
2 Tablespoons almonds
1/2 Teaspoon cardamom powder

To prepare the dough:

  • Mix all purpose flour, salt, and hot ghee. The ghee helps make the dough light. 
  • Add just enough water to prepare a stiff dough. It is important not to make the dough soft
  • Cover the dough under a damp cloth and let it sit for a couple of hours. 
Optional:
  • If you want to make a two-colored karanji, you can use food color. Separate 1/3 and 2/3 flour. Add one color to 1/3 of the flour, and either keep the rest white or add another color. No one in my house is a big fan of artificial food color. So I added saffron to 1/3 of the dough. I added saffron to warm milk and crushed it until the color oozed out. Then added this milk to the dough. 


To prepare sate:
  • Mix corn starch and enough ghee to make a smooth paste in a small plate/bowl. Whisk this by fingers until it's mixed well and looks creamy. 


To prepare the filling:

  • Roast coconut on low flame until toasty (~5 mins). If you have sliced coconut, roast it and then grind it to a coarse powder. You don't want pieces of coconut poking through the dough. 
  • Grind sugar and almonds to a powder. 
  • Mix coconut, almond, cardamom powder, and sugar. Adjust the amount of sugar to your liking. Remember that frying tones the flavors down. Make sure the aroma of cardamom powder is prominent. Mix the filling well by hand. 
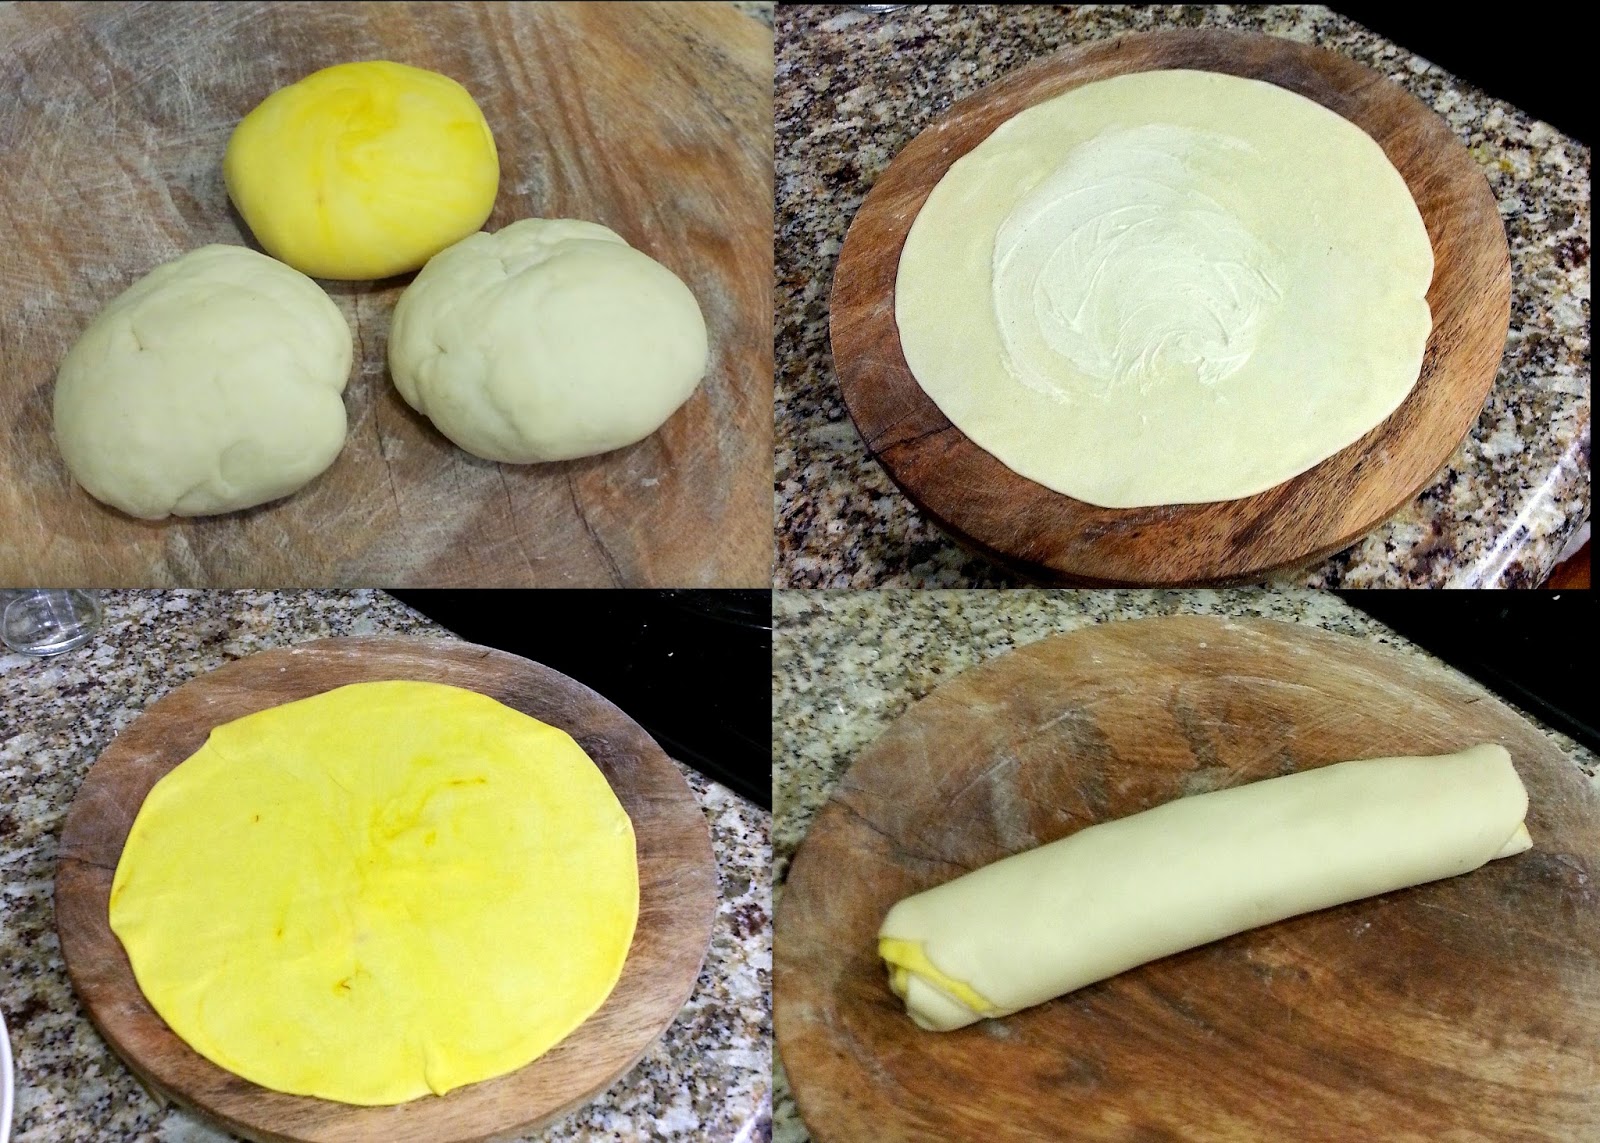


To make karanji:

  • Knead the dough well before making karanji. Make three parts of the dough.
  • Roll out each part into a roti. Keep the dough covered under damp cloth while working on each roti to ensure it doesn't dry out. 
  • Take one roti, spread the corn starch mixture or sata by hand to create a thick coat all around. Place the second roti on top of it. Apply more sata and layer the third roti. Press gently by hand. 
  • Now create a tight roll, like a Swiss roll. Pinch off the ends to close. 
  • Cut the roll in half at an angle (as shown in the pic above). Cut each piece in half again. Now cut all 4 pieces in thirds - a total of 12 pieces. Keep them covered under damp cloth. 
  • Press each of the dough pieces by hand to flatten out. You want to flatten it from the side that shows the layers. Since they are at an angle, the layers will seal when pressed. 
  • Gently roll the dough ball using corn starch or all purpose flour so it doesn't stick. Don't roll too hard or else the layers will separate before frying - this will break the karanji while frying, spilling out the filling into the oil. You want to roll the dough like a puri - not too thick not too thin. This cover is called a paari.
  • Place a large spoonful of the filling at the center of the paari. You want a decent amount of filling since the karanji will puff up after frying. Apply a little milk all around the edge of the pari, fold it in half and seal of the edges to create a boat shaped karanji. Press the ends well so that karanji doesn't open while frying. Don't leave any air iside. You can cut the excess ends using a karanji cutter, or a knife. 
  • Heat oil in a kadhai. Drop a small piece of dough. If the oil bubbles rapidly and the dough floats to the top right away, the oil is ready for frying. Lower the heat to medium and fry each karanji until golden. Don't turn the karanji too many times else it'll break. The layers in the paari should separate while frying. 
  • Take out the karanjis on a paper towel to absorb excess oil. Let them cool completely before storing. You don't want any steam remaining, else the karanjis will turn soft. 
  • Store in an airtight container once cooled. They can be stored for up to 2 weeks. 



This is one of the many sweets and snacks I plan to prepare this year. Let me know what you're making for Diwali!

Submitting this recipe to the Dish it Out - Diwali Bash event @ Cook's Joy

Saturday, August 30, 2014

Naralachi Vadi for Baal Ganesh

My most favorite time of the year is here - Ganpati Bappa arrived in our house yesterday on the occasion of Ganesh Chaturthi, and will stay with us the next 4 days. Oh, so much joy and good eats this festival brings!


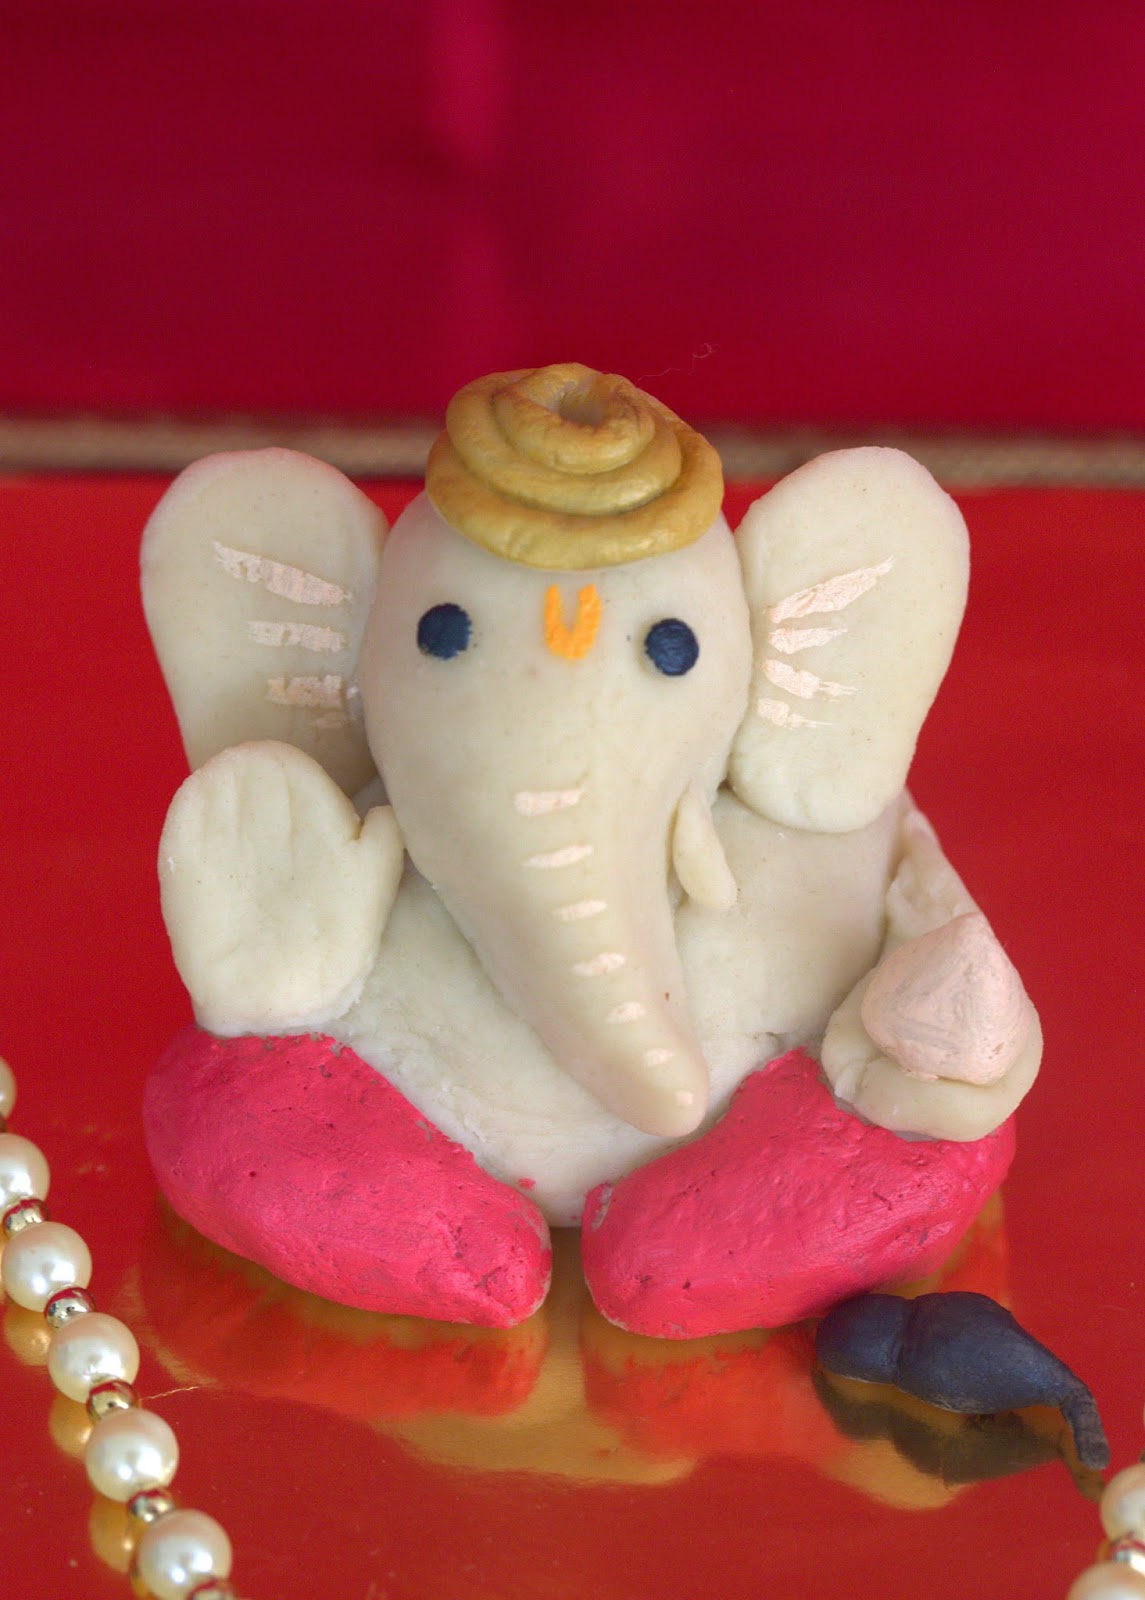
I celebrate Ganesh chaturthi with much enthusiasm and glee, while trying to stay as eco-friendly as possible. See this hand-made clay idol and decor with used cardboard boxes from last year? The celebration this year is low-key, as I hardly have time to do anything with a baby and work. But my baby's first big festival needed something to make it memorable. Keeping the tradition, I made the idol at home. As a quick and simple alternative to clay, I thought of using play dough - the perfect medium to make idol for my baby's first Ganpati! Thanks to Pinterest, I knew I could make play dough at home. I used the no-cook play dough recipe on this site, with only half the measurements. I skipped cream of tartar (used for elasticity) and glycerin (used for shine). The preparation of making the dough with all purpose flour, salt, oil, and water took  10 mins all together. The key to getting good play dough is kneading it really well. Making the idol was equally quick as I skipped adding too many details. Our Bappa looks like Baal Ganesha (Baby Ganesha), and I was quite happy with it.


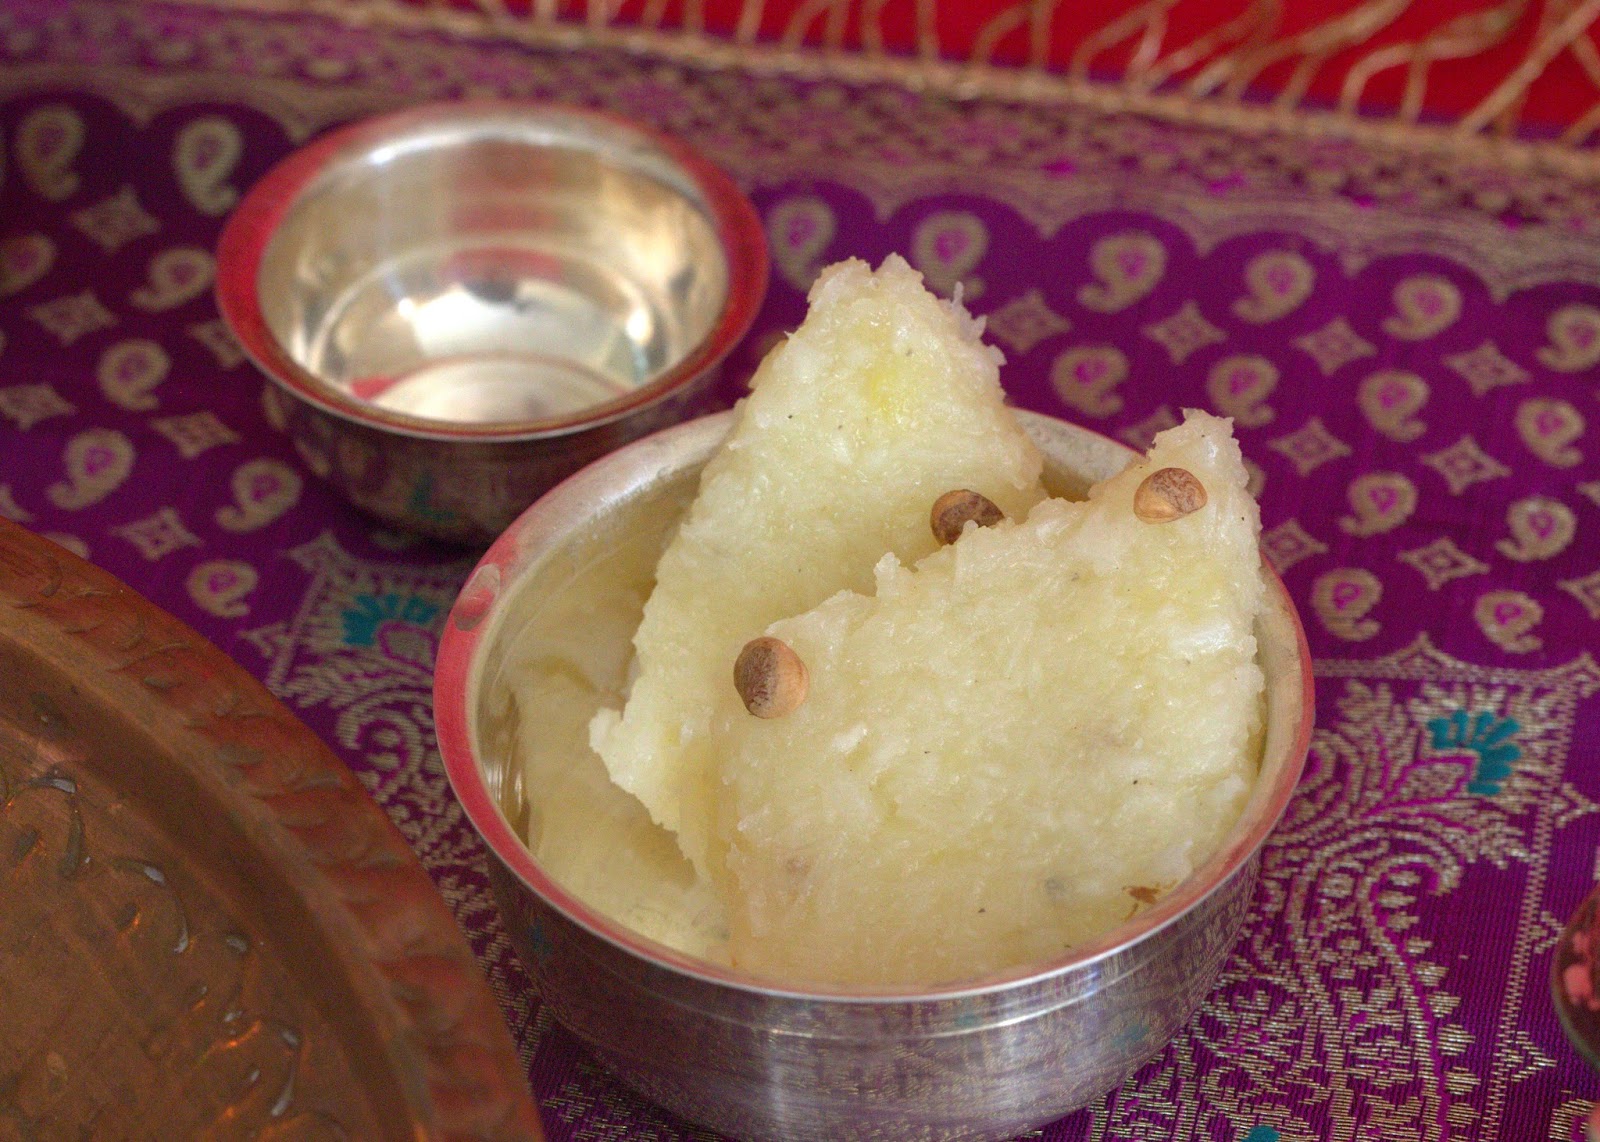
Husband asked for Modak for Naivedya. But it was too elaborate a process. I went for simple Naralachi Vadi (Coconut Barfi) instead, using one of the main ingredients from Modak. I was never a big fan of Naralachi Vadi until I tried it at one of my dad's friends' place. His wife had made the best vadi I had tried, and her secret ingredient was - potato! Who would've though?! Mashed potato gave the vadi a nice bite and chewiness. I don't like too hard, sugary and crumbly vadi, and potato added just the right texture to it. When I told the husband I was adding potato to the vadi, he thought I was joking! But he ended up loving the product, and I think Ganpati Bappa liked it too :).


Olya Naralachi Vadi/ Coconut Barfi

Ingredients:
1 Packed cup fresh/frozen grated coconut
1 Cup sugar
1/2 Cup milk
1 Small potato (~ golf ball sized) - boiled and mashed
1/2 Teaspoon cardamom powder
1 Tablespoon ghee
Dry fruits for decoration - I used Charoli. Almonds or cashews would be great.

  • Heat a pan on low flame, add ghee and grated coconut and cook for 2-3 minutes. 
  • Add sugar, milk, and mashed potato. Cook this mixture while stirring every so often. Make sure you take out all the lumps from the potato so that it's smooth. 
  • Cook the mixture down until all the sugar has dissolved and the moisture has evaporated. It should stop sticking to the pan and come together in a ball. 
  • Add cardamom powder and mix well. 
  • Grease a flat surface (plate/tray etc.) and spread the coconut mixture with a spatula into a 1/4'' cake. Sprinkle chopped dry fruits and pat gently on the cake. 
  • Once cooled slightly, cut the cake into desired sized diamonds. Let them cool completely before separating the barfi. 
Hope those of you who celebrate this festival are having a wonderful, modak-filled, celebration!

Thursday, August 7, 2014

Shravan Special - Puran Kadabu

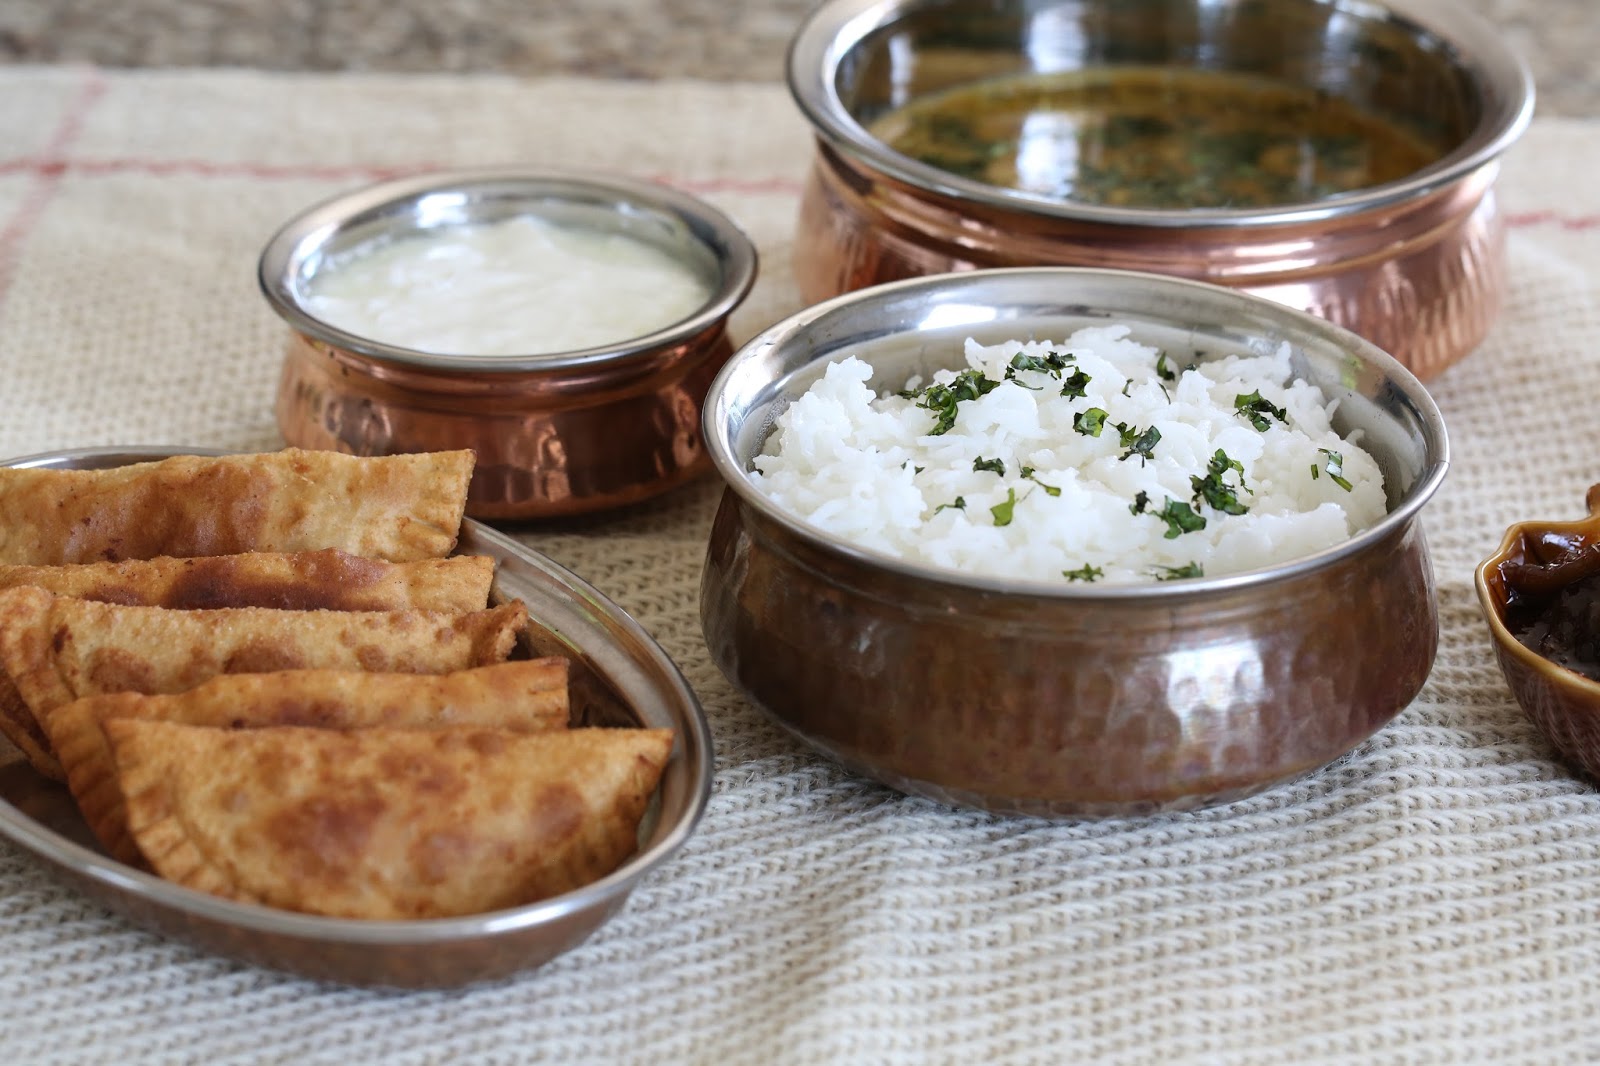
I loved the auspicious month of Shravan as a kid for various reasons. Apart from all the holidays we got, food was certainly one of the highlights. Many women in Maharashtra observe the Jivati Vrata on Shravan Fridays by worshiping Goddess Jiviti for the health and longevity of their children. I didn't know of this vrata by its particular name, but I looked forward to eating Puran-Poli on the first Friday of the month. My mom performed 'ovalane' or 'aarati utarana', for which there is no translation in English! It's a ritual performed by offerning oil lamps to a deity/person as means of worshiping or offering respect. Details apart, mom made diyas out of Puran, the sweet split chickpea/chana daal stuffing that goes into Puran-Poli, to perform the ritual. Then we got to feast on delicious polis.

This year I got to pay it forward by praying for my daughter's well-being and long life. Of course, there was puran involved. Instead of making poli though, I prepared Kadabu - Indian style whole wheat empanadas stuffed with sweet Puran. Kadabu/Kadubu are better known in South India, although the preparation is different. While puran kadabu are made with wheat flour, other versions are either made with all purpose flour or rice flour, and the stuffing is often made of grated coconut instead of chana daal. Puran Kadabu are not very well known; for that matter my husband had never eaten them. But I am quite a fan. The good thing is you don't have to strain puran through food mill to make it smooth. In fact, coarse puran with a bite tastes really good in kadabu.


I saved the chana daal broth and some daal itself to make Katachi Amati which was served with rice, ghee, sweet lime pickle, and yogurt - yes, all home made! I can't even begin to tell you how happy I am to be making fresh yogurt at home every day since last week. Our nanny got us the starter and I couldn't have been more pleased with the results. Anyway, that may warrant its own post.


Puran Kadabu/Indian Sweet Split Chickpea-filled Empanada

Ingredients:
Puran
1 Cup split chickpea/chana daal
3/4 Cup grated jaggery
1 Teaspoon cardamom powder
Couple of pinches salt

Dough
2 Cups whole wheat flour
1 Teaspoon oil
1/4 Teaspoon salt
Water as needed

Oil for frying
  • Knead the dough by combining whole wheat flour, oil, salt, and enough water to form a stiff, firm dough. Cover and keep aside.
  • One the side, pressure cook chana daal until cooked well (4-5 whistles).
  • Once the daal is cooked, remove excess water (you can save the broth to make katachi amati). Add jaggery to the daal and start cooking until most of the water evaporates, and the mixture stops sticking to the pot. Add salt and cardamom powder and mix well. Puran or the stuffing is done.
To make kadabu:
  • Make large marble sized dough ball and roll it out thinly just like you would a puri. 
  • Take a decent amount of puran, approximately a golf ball size, so that you have a handsomely stuffed kadabu. Place it one one side of the round puri and press to form a half moon. 
  • Fold the other side of puri over and press two sides gently to seal. Make sure the kadabu is sealed properly otherwise frying oil will get inside and burn puran. 
  • To make the kadabu look pretty, gently press the tip of a fork into the sealed edges, and cut any uneven ends with a knife. Alternatively, you can use a Karanji Cutter if you have one. 
  • Fry on medium heat until golden brown. Kadabu will puff up when fried. It will soften once cooled. 
Pour some warn ghee on kadabu while serving, and enjoy!

Thursday, April 17, 2014

One Month and a Change of a Lifetime

I've been on a blogging sabbatical the last two months. It might not have made a dent in the blogosphere; but my life has taken a 180 degree in that time! We welcomed our precious little girl, baby Shreya, into this world one month back. The past month has been a blur of feedings, changing diapers, calming a crying baby, and trying to function without getting much sleep. But it's all worth that gummy smile she's just started to give us!

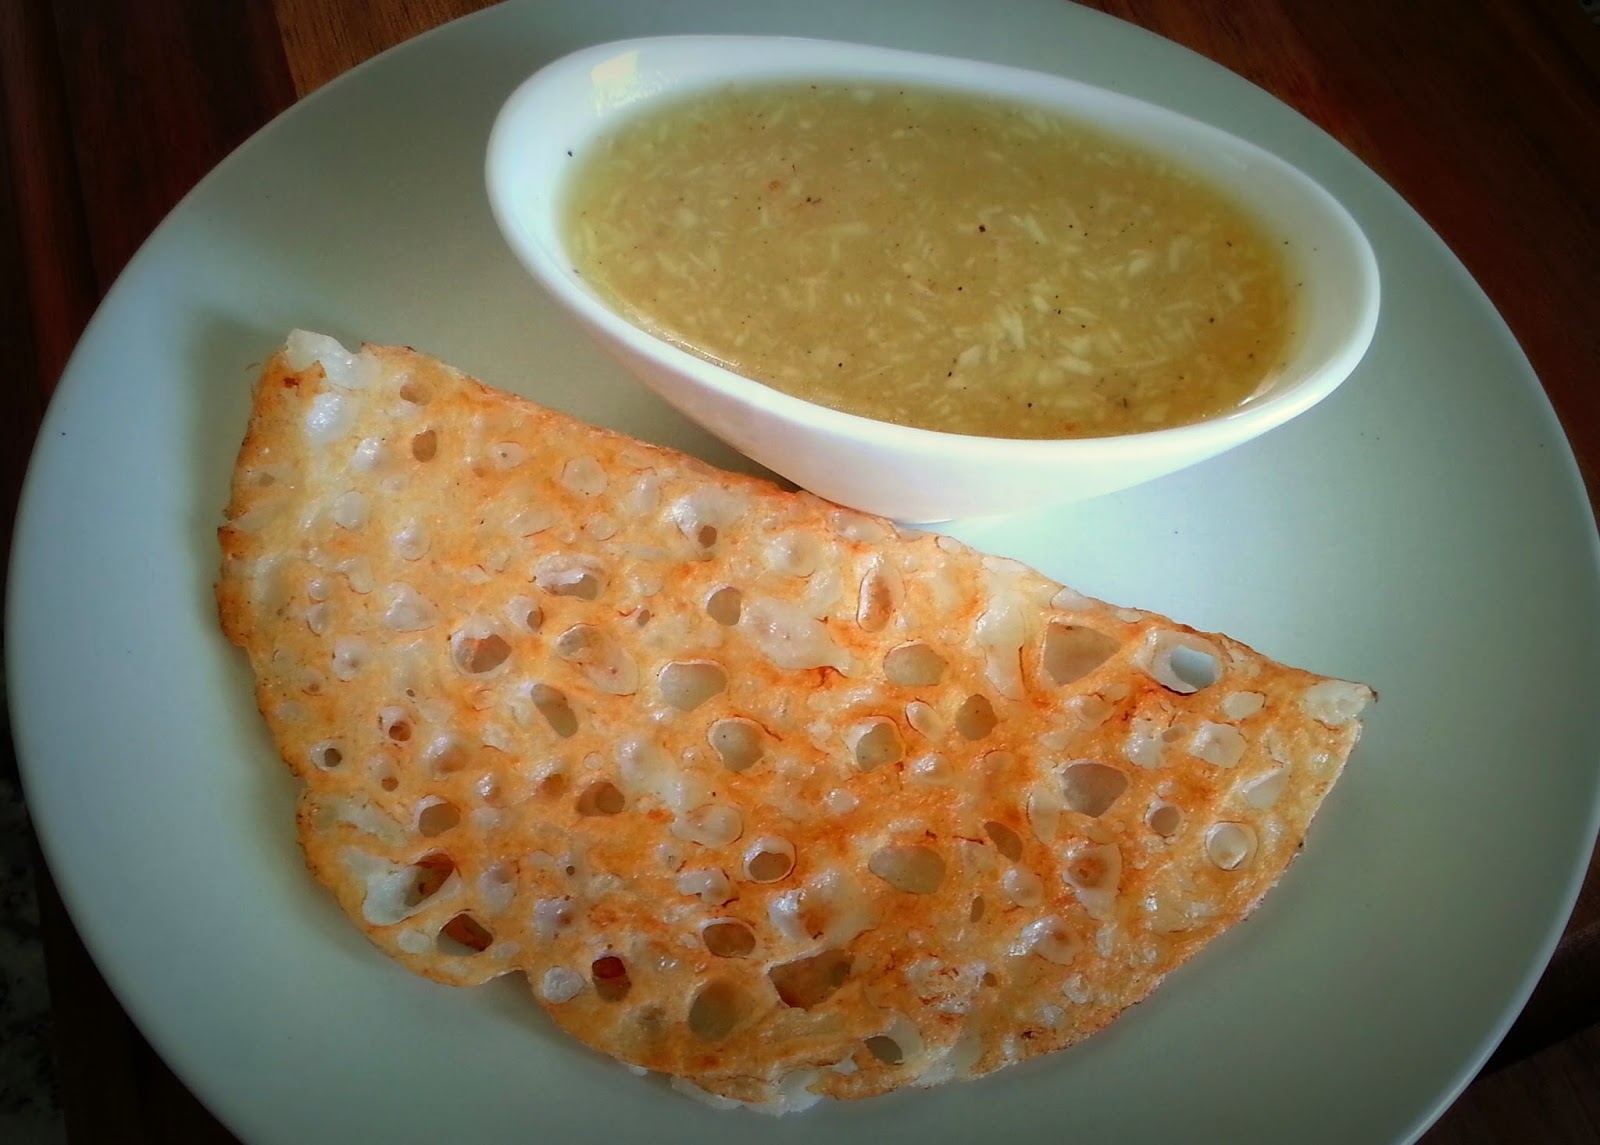
My mom, the cooking enthusiast that she is, informed me to that it's customary to make Ghavan-Ghatle on baby's one month birthday. The sweet cousin of my go-to savory meal choice. She immediately looked up the recipe in her favorite cook book Ruchira. I had planned to make a cake for the little one, but this recipe was far easier to make with a baby in tow. Ghavan is a simple rice flour crepe. Ghatle is a jaggery sweetened coconut concoction to dunk the ghavan. The crepes are soft and spongy and soak up all the sweet goodness of ghatle. I couldn't not love these - they are practically deconstructed Modak!


Ghavan Ghatle

Ghavan Ingredients
1 1/2 Cups rice flour
Water as needed
Couple of pinches salt
Ghee/clarified butter 
  • Mix enough water with rice flour to make a runny, crepe-like batter (~2-2/12 cups). Add a little salt and mix. 
  • Heat a pan on med-high heat. A non-stick pan will work the best. If you're not using a non-stick pan, grease the pan with a little bit of ghee. Make sure the pan is hot before you pour the batter in order to get a porous crepe. 
  • Spread a ladleful of batter on the pan, and let it cook till golden brown. The crepe will separate from the pan once done. Turn and cook on the other side. 

Ghatle Ingredients:
1 1/2 Cups water
3/4 Cup fresh/frozen grated coconut
1/4 Cup jaggery/per liking
1/2 Teaspoon cardamom powder
2 Teaspoons rice flour 
Couple of pinches salt

Heat water on low-med heat, and add jaggery and coconut. Let the jaggery melt. 
Mix rice flour with a little bit of water and add it to the coconut mixture. The rice flour will act as a thickener. 
Add in cardamom powder and salt. Turn off the heat when the mixture thickens slightly. 

Pour warm ghee on top of the ghavan and serve with warm ghatle!

***

I spent the last few months of my pregnancy making stuff for the baby. I couldn't wait to share pictures of some of my craft work - now seems like a good time to post them :). 

Hubby asked me to make a few colorful hats for baby pics. Here are two of my favorites:

A variation of this adorable bobble stitch hat: 


A ladybug hat for my li'l bug: 


I was looking for some ideas to make a crib mobile and stumbled upon this adorable pattern! Some inexpensive felt from recycled material (source - Michaels), cotton and scrap material to stuff, and an easy clip-on mobile crib hanger (source - Babies R Us, ~$10) was all I needed to make this mobile. I drew the patterns on paper first and traced them on felt.


I couldn't get over how cute and easy to make these little toys were and made a few furry friends as well. I used various sources for patterns, many of them pinned on my board. Aren't these guys fun? I still have lots of left-over felt which I plan to use - some day!


One of my dear friends was also due a few weeks after me. She had shared yummy home-cooked food with me in my ninth month. It was wonderful having home made meals without taking any effort on my part :). As a 'thank you', and since we never return empty containers, I stuffed one container with nutritious laddus for her and one with these fellas for her little one on the way. I looked up patterns for finger puppets on google and picked four that I liked the best. 


I hope to be able to blog as and when I can. Until next time!

Wednesday, February 19, 2014

Butternut Squash Gharge

The grocery scene in my house has been quite exciting lately. Husband I have been going to the Saturday Farmer's Market like a ritual (I know, everyone experiencing horrific winter this year will be jealous - I sympathize with you all). It makes my weekend to come home with bags full of fresh produce. We also just signed up for CSA last week. Oh, I can't wait to share the details next week when I get my second box of goodies! Anyway, trying to consume all the fresh fruits and veggies, I forgot all about a small butternut squash bought from the grocery store a few weeks back. Good thing it doesn't go bad very fast, but it was about time the squash was put to use. San Diego weather hasn't exactly been calling for soup, so I used the squash in lieu of pumpkin in two of my favorite Indian dishes - one sweet (Gharge) and one spicy/savory (Parathas). I'll share the recipe I'm partial towards - the sweet, of course :).

Gharge are traditional Maharashtrian sweet puris made with pumpkin. The puris are not cloyingly sweet or dessert like - so they can be snacked on (like I did in one go on half the batch I prepared...shhh). The recipe calls for very few simple ingredients. And these puris don't require rolling out dough with a rolling pin, which makes them easy to prepare. My mom used to make gharge for after school snacks. They store well even at room temperature, so we could enjoy them all week long. Butternut squash is a close relative of pumpkin in terms of taste and texture, so I thought why not? And the gharge turned out just fantastic! With the sweetness from jaggery and the aroma of cardamom, you couldn't tell the switch between pumpkin and butternut squash. This recipe can use any similar squash, I suppose.


Butternut Squash Gharge

Ingredients:
2 Cups grated butternut squash
1 Cup grated jaggery
2 Tablespoons ghee
1 1/4 - 1 1/2 Cups whole wheat flour
1/2 Teaspoon cardamom powder
Pinch of salt
Vegetable oil or ghee for frying

  • Combine ghee, jaggery, and butternut squash in a kadhai/work and cook on medium heat. The moisture from squash will be enough to cook it thoroughly. Cook the water down until you are left with a soft, moist mixture.
  • Stir in cardamom powder and a pinch of salt.
  • Once the mixture cools to touch, start incorporating wheat flour until you have a pliable, non-sticky dough. I used about 1 1/4 cups flour. You can add more if you need to. I liked the sweetness achieved with this much amount of flour.
  • Let the dough rest for 5-10 minutes.
  • Make small lime size dough balls. With 1 1/4 cups flour, you'll get ~20 medium size puris.
  • To make the puris, grease a thick plastic bag with a little bit of ghee. I use ziplock which works perfectly. Apply some ghee on your finger tips as well, and pat each dough ball evenly into a not too thin puri. You can lay raw puris on a plate before getting ready to fry them. They won't stick.
  • Fry them on medium heat in vegetable oil until golden brown. Take them out on a paper towel to wick away excess oil. A more decadent version of these puris would be fried in ghee. I wanted to save my precious home-made ghee for other things :). 

Gharge won't puff up like the regular puris, but they are wonderfully flaky. They will be soft straight out of the fryer, but the crust will get crispy once slightly cooled, and the inside will be soft and moist. Yum!
You can enjoy gharge right away, or store them in an air tight container for about a week.

Sunday, June 30, 2013

Summer Recipe - Pineapple Curry

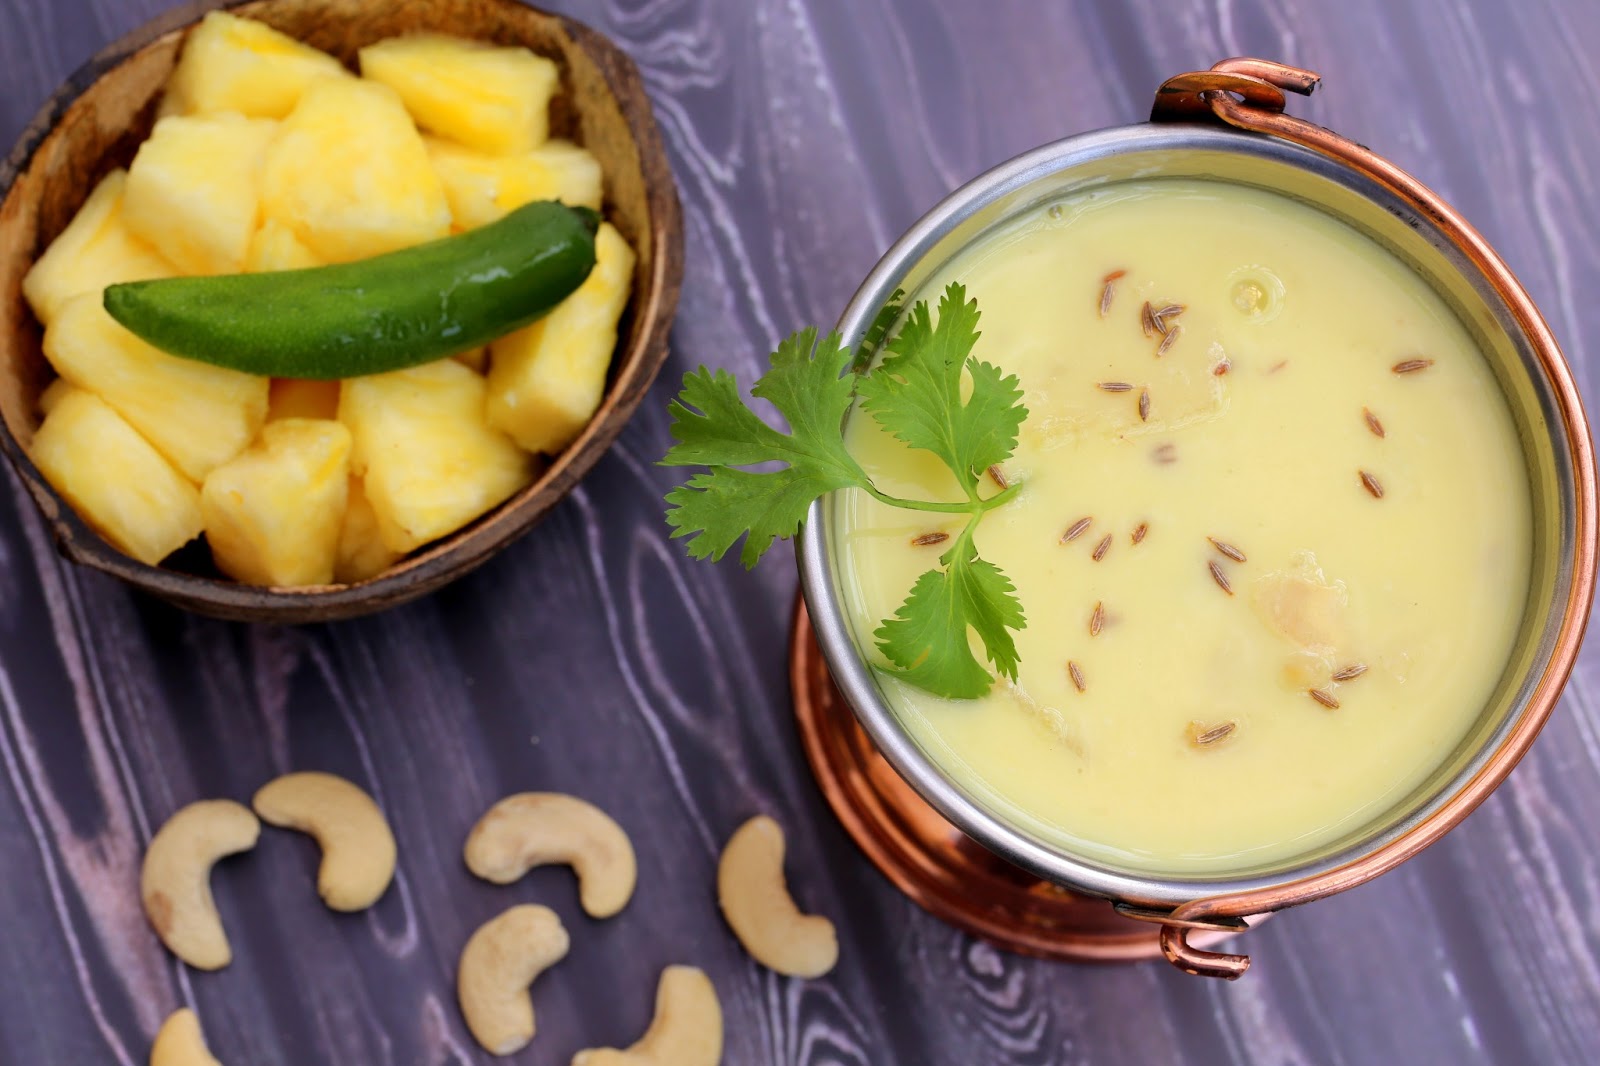
Ever since the in-laws arrived, we've been caved in trying to stay out of the 3-digit temperatures. The only solace has been walking on the beach in the evening dipping our feet in pleasantly cold waters, and eating cooling foods. It only helps that my MIL is a fantastic cook who has plenty of recipes I want to learn. We've been cooking up a storm already. As soon as she was out of jet-lag, we went and bought the ingredients to make Ananas Amti (Pineapple curry). A recipe I've wanted to learn from her first-hand ever since I got married. 


My first encounter with this tangy, sweet and sour curry was at my wedding! My MIL gave her mother's recipe to our caterer, who did a very good job making it on a large scale. If you're married, you'll know how trying it is to eat at your own wedding while greeting hundreds of guests. Yet, I remember the taste of this amti very distinctly. It was quite special. My MIL made it today, and it was even better than how I remembered it. Although it's called amti, the color, consistency and flavors are more like kadhi. It has a simple yet fragrant tempering of ghee, cumin seeds and green chili - the classic flavors of kadhi. The pineapple chunks are then cooked in a mixture of cashew paste and coconut milk to make a very smooth and creamy curry. Slurp! For all the richness, this amti is a quick fix, especially if you buy canned coconut milk and pre-cut pineapple. 


Ananas Amti - Pineapple Curry

Ingredients:
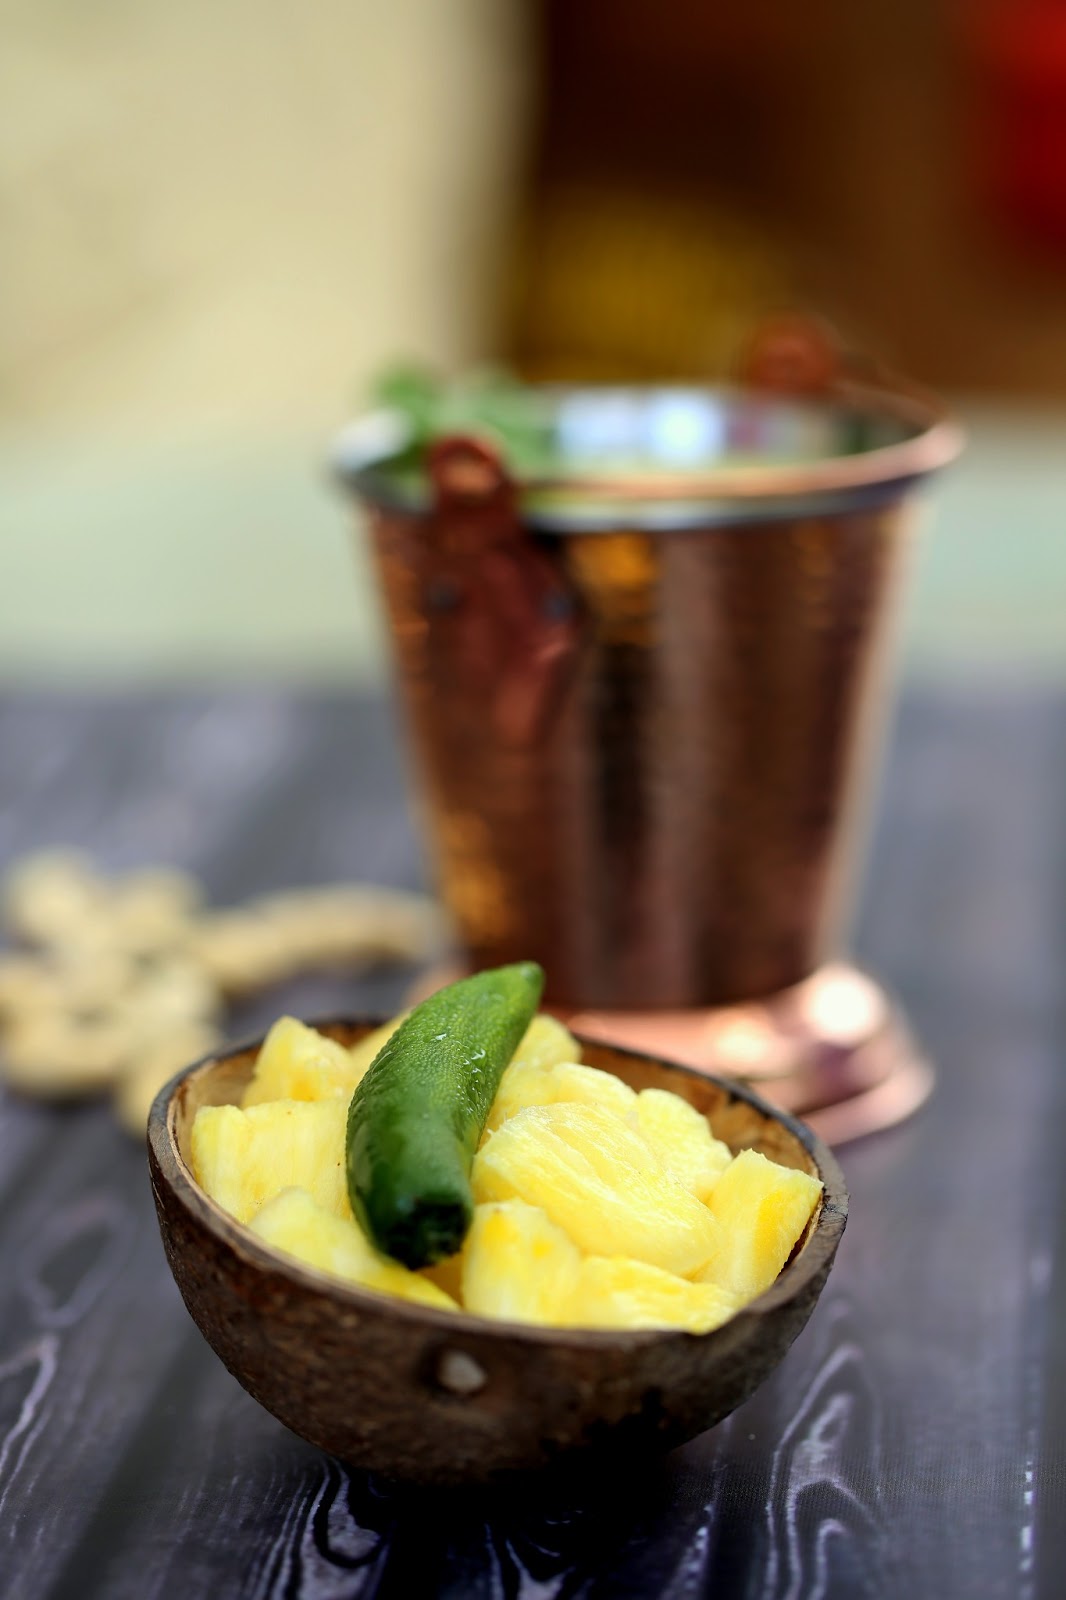
2 1/2 Cups fresh,ripe pineapple chunks - the success of this curry depends on the quality of pineapple
1/2 Cup whole cashew nuts (or halved in the center)
1 Cup coconut milk
2 Tablespoons sugar (or as required)
Salt to taste
Lime juice as required (optional)

Tempering:
2 Tablespoons ghee
1 Teaspoon cumin seeds
2 Green chilies - slit vertically in the center
1/8 Teaspoon turmeric powder

  • Cut pineapple in ~3/4 inch chunks. If the pineapple is not ripe/sweet enough, sprinkle some sugar on it and keep aside for 30 minutes. This brings out the juices and makes the pineapple taste better. You can use canned pineapple, but like anything else, fresh ones taste better. 
  • Soak cashew nuts in warm water so they soften. 
  • Once the pineapple and cashews are ready, take out 1/2 cup pineapple chunks and one third cashews and make a smooth paste. 
  • Heat ghee in a pot and add cumin seeds and green chilies. Once the cumin seeds splutter, add remaining pineapple chunks and a little bit of turmeric (only for slight color), and let the pineapple cook for a couple of minutes. 
  • Mix in pineapple-cashew paste, and the remaining cashews. Add a little bit of water if the mixture is too thick and let it boil for 4-5 minutes. 
  • Lower the heat, add coconut milk, salt to taste, and sugar you desire more sweetness. Mix everything well and turn off the heat. You don't want to cook this too long after adding coconut milk else it'll separate. 
  • Let the curry cool down a little, then sprinkle very little lime juice to add some tang. Taste and decide the balance between sweet and sour to your liking. Do not add lime juice to hot curry - it can taste bitter. 


Serve this amti with hot rotis or puris. It is heavenly with the decadence of cashew paste and coconut milk. The sweet, bursting pineapple is just perfect for a summer meal.


Wednesday, April 10, 2013

Banana Blossom

When I made Kelphul (Banana Blossom) bhaji couple of weeks back, I thought of my grandpa - or Dada as we lovingly called him - sitting inconspicuously in a corner of the kitchen, laboring over freshly picked banana blossoms from the garden. While most men in his time didn't even enter the kitchen, Dada helped with cleaning veggies, chopping them, separating stones from the grains and anything else mom or grandma needed help with. He was the designated person for the more challenging tasks of carrying heavy containers of grains to the mill, breaking and grating coconut, straining kilos and kilos of Shrikhand through food mill for aaji's home run business and such.

Although Dada was industrious even otherwise, he probably didn't mind working in the kitchen because he was a true foodie at heart. I was left aghast when I caught him gorging on mutton at his friend's once. Yes, he was married to a who woman considered even saying the word 'meat' blasphemy! Dada winked at me and said, "Don't go home announcing it to everyone", and continued feasting. But mostly, he preferred down home, rustic, wholesome foods. Some bhakri, pithala and thecha satisfied him just the same. My grandma still gets teary eyed remembering how Dada loved my cooking, especially the Bharali Wangi I had made for him when I was 14. All the years that I remember spending with him, he didn't complain once about what was cooked in the house - it must have come from the hardships he faced as a kid having to earn for his own meals. And maybe that's why he was used to working hard, always keeping himself busy with something or the other even after retirement. The house where I grew up the first 10 years of my life, the house that Dada built himself, had a beautiful garden with lots of fruit trees. He loved spending time in the garden, working like a pro on the coconut, chikoo and babana trees. When the banana trees were laden with beautiful purple blossoms, he would take them down, clean the sap, remove the flowers and ask grandma to make bhaji. It was his style of letting her know what he wanted to eat. Never demanded anything verbally. Every time I make something that he loved, like this bhaji, I miss him dearly!

Kelphul is the large vibrant colored blossom of banana plant. Each blossom contains lots of flowers. When it's fresh, the flowers are a tender pink color with yellow tips. I have never been able to find fresh kelphul here. The flowers are always black and unappetizing looking. However, I gave up looking for good kelphul and decided to make do with whatever is available. The taste and texture didn't disappoint me. The flowers don't have a very strong flavor. The core, or the heart, of kelphul is much like artichoke heart - soft and supple. If you don't have access to fresh banana blossoms, you can buy canned hearts available widely in any grocery store. Kelphul bhaji is made with some sort of beans to provide some substance. Kala vatana, which I haven't found in any grocery store yet, is my favorite option. I decided to go with vaal daal in its absence. Turned out really well.


Kelphul Bhaji (Banana Blossom Bhaji)

For tempering:
2 Teaspoons vegetable oil
1/4 Teaspoon mustard seeds
1/4 Teaspoon cumin seeds
1/4 Teaspoon turmeric powder
A pinch of asafoetida
1 Spring curry leaves
1 Teaspoon red chili powder (adjust per liking)
3/4 Teaspoon Goda Masala (adjust per liking)

Bhaji:
1 Banana blossom
3/4 Cup vaal daal (split cutlass beans) or kala vatana soaked for a few hours
1/4 Cup loosely packed grated coconut
1 Small piece of jaggery (~1 inch square)
1 Teaspoon tamarind pulp
Salt to taste


How to clean banana blossom:
  • To begin with, have a bowl of water mixed with juice from one lemon on the side. If the blossom is very fresh, there'll be a lot of sap that can stain your fingers. You can wear thin gloves or simply dip your fingers in a little oil or lemon juice while working with it. Remove the red/purple layer. You will find a bunch of banana shaped flowers inside each one. Remove these flowers from each layer - the closer you get to the heart, the smaller and more tender the flowers will get. The heart of the blossom can not be pealed any longer and is tender and white. You will only use the flowers and the heart. 
  • Soak these flowers in lemon juice-water. Alternatively, you can add tamarind pulp or sour buttermilk. The acid will stop them from turning black (too bad, the blossom I bought was already black) and remove stickiness of the sap. Keep the flowers soaked for 3-4 hours. 
  • Each flower has one large petal like cover which is closed. Once you open this cover, you'll see multiple stamens with one matchstick like stigma. There's a waxy, translucent small protective cover at the base of the stamens, right by the stem. The only edible parts of the flower are the soft stamens excluding stigma and the large outer cover if it's tender. The stigma and the protective 'petal' need to be removed from each flower. For the outer layer flowers, you may have to remove the large petals also if they are too hard and stringy. 
Making the bhaji
  • Once you have gone through the laborious part of separating the edibles from the non-edibles, chop the flowers roughly and the heart finely. Boil these in water for approximately 10 minutes. It'll cook the blossom and take away some more of that sap. Once cooked, discard all the water. 
  • On the side, cook the vaal daal until soft. Don't let the daal overcook and break else the bhaji will be mushy. 
  • Heat oil in a kadhai and add the mustard seeds and cumin seeds. Once they splutter, add turmeric powder, asafoetida, and curry leaves to the tempering. 
  • Once the tempering is fragrant, add rest of the ingredients to the kadhai - vaal daal, the spices, cooked banana blossom, jaggery, tamarind, and grated coconut and mix well. 
  • Season with salt to taste, mix well, and let it cook on medium heat for 5 minutes or so.

This bhaji goes well with roti or bhakari. 


Wednesday, April 3, 2013

Not Exactly Mango Pickle

I just returned from a blissful, week-long vacation at my sister's in NY. When we get together, it is madness. No matter how often (twice a day to be specific) we talk to each other, we never seem to run out of topics to discuss. The most important of them all being food! Even during my rushed visit, we roamed around the 24 hour Indian grocery store oohing and aahing over our favorite produce, and came back with Kelphul (banana blossom) and Ambe-Halad (mango ginnger) among other things. My sister wanted to pick the most unique ingredients available to have fun cooking together. We made our favorite lip-smackingly good spicy-tangy-salty piquant pickle with mango ginger. I'll post the more elaborate kelphul recipe later.


Mango ginger, which has nothing to do with either mango or ginger, is fresh turmeric root. It gets its name for the resemblance to the ginger root and an unmistakable mango blossom aroma. It's called Ambe Halad (Mango Turmeric) in Marathi, also for that sweet and sour fragrance and gorgeous deep mango color.  Another variety of turmeric is quite similar to ginger in color (I have some white turmeric pickle made a couple of months ago sitting in my fridge already). While fresh turmeric can fill up your house with its fragrance, the taste is quite delicate. In fact, it doesn't taste much like anything when you bite into it. But a simple, almost instant pickle made with it can pack quite a punch. The pickle uses two ingredients only as preservatives - lime/lemon juice and salt. Some green chilies are added for heat and flavor. Once the flavors penetrate the turmeric, you get this irresistible pickle that makes you wince at first and go "mmm" after when you take a bite - much like how you would react to a sour patch! Mom/grandma used to make a big jarful of Ambe Halad pickle at the start of summer. It was important to have abundant sunlight for the pickle to marinate. My grandpa did the peeling of turmeric carefully, which bled that dark orange color all over. As long as you don't get that color on your clothes, it's totally worth having orange fingertips for a couple of days - just to remind you of all the yumminess you'll eat with your meals :D.


Ambe Halad - Mirchi Lonache (Mango Ginger & Chili Pickle)

Ingredients:
2 Cups chopped ambe-halad
3/4 Cup (or more) chopped green chilies (Thai or Serrano)
8-10 Lemons/limes
Salt to taste

  • Peel the skin of ambe halad and chop into ~1/8 inch discs. If you are worried about the color, wear thin serving gloves. Chop green chilies into 1/4 inch thickness.
  • Put the chopped chilies & turmeric in an air-tight jar/bottle. Add enough lemon/lime juice to them so they are completely submerged.
  • Add lots of salt to it - a big fistful or more. The salt will act as a preservative, so it's important to add enough. The pickle should be salty when freshly made.
  • Close the jar/bottle tightly and keep it in the sunlight for two days. This helps the marination process and penetrate flavors. 
Optional:
While I make my pickle using the method above, you can add a simple tempering to it for some more flavor. Heat a tablespoon of oil and add 1 teaspoon mustard seeds. Once they splutter, add a little less than 1/2 teaspoon asafoetida and mix into the pickle. The strong flavor of asafoetida is wonderful in the pickle. 

The pickle is ready to be eaten or stored it in the fridge to enjoy later. It lasts for months and tastes better by the day. The green chilies mellow down because of the acidity and salt. Even I can eat the chilies by themselves (and everyone knows I can't eat spicy).

Btw - you can make this pickle with green chilies only or with other firm veggies/fruits like carrots, radish, green mangoes etc.

Submitting this recipe to the Celebrate Summer event hosted by Nivedhanam.


Monday, March 11, 2013

Making Everyday Meals Exciting

I was lucky to have grown up having my mom cook us fresh meals every day, twice a day! It was after I started running a kitchen of my own that I realized the challenges of keeping everyday meals exciting. I gotta love my mom for being able to whip up different and exciting meals to keep 6 tummies and tongues pleased all the time. We weren't picky about our food, but let's just say, we were spoiled by great cooks in the house :D. Mom left no room for complaints though. Even on the days we ate simple rice and daal, she would look at whatever was available in the pantry/fridge and come up with a quick side dish to dress up the plate. Like this, this, or  this

Today's recipe is one of my favorites that mom often made. A quick tomato bhaji - a wonderful concoction of sweet and sour, slightly spicy flavors. Although this bhaji looks somewhat like a chutney, it is to be consumed fresh. It doesn't store in the fridge. I love how it adds a little something to a simple dinner with minimal effort and readily available ingredients. The tomatoes of course give it a tangy taste, but two aromatic spices provide an element of surprise - cloves and cinnamon. While the dish is very simple to make, the flavors are complex and satisfy all the taste buds. For some variation, add curry leaves to the tempering, spice it up with a little bit of cumin-coriander powder or garam masala, add ground peanuts for body, or you can even top it off with thin sev for a bit of crunch! All of these versions taste great. 


Tomato Bhaji

Ingredients:
3 Plump tomatoes - roughly chopped
1 Shallot - thinly sliced
2 Garlic cloves - crushed and roughly chopped
1 Large serrano chili - chopped
4-5 cloves
1 Inch cinnamon stick
For tempering - 2 Teaspoons oil, 1/2 Teaspoon mustard seeds, 1/4 Teaspoon turmeric
Sugar to taste
Salt to taste
Red chili powder if needed
Cilantro for garnishing
  • Heat oil in a kadhai and add mustard seeds. 
  • Once the mustard seeds splutter, add turmeric, chopped garlic, shallot, chili, cloves and cinnamon. Saute for a couple of minutes. 
  • Add tomatoes, sprinkle a little bit of sugar to balance the tang of tomatoes and let the bhaji cook until the tomatoes are soft. I like the bhaji well cooked. For extra heat, add some red chili powder. It'll enhance the red color as well. 
  • Add salt to taste, mix well and turn off the heat. 
  • Garnish with some chopped cilantro. 
Tomato bhaji tastes great with rice, roti or even bread. 

Tuesday, February 26, 2013

My Favorite Kitchen Tool

When it comes to kitchen gadgets and tools, I find one-function use items quite cluttering. My kitchen is stocked with tools that get used more or less on a regular basis - a George Foreman grill, my beloved Ronald food processor and mixer, a small ice-cream maker for the hubs, and a not-so-techy stone mortar-pestle set. The last one being my ultimate favorite - as I mentioned herehere and here. If the world of technology were ever to crumble down, I would survive just fine in my kitchen with the use of my mortar and pestle (and that's about it :D).

Our ancestors have used mortar-pestles to grind and crush plant roots, leaves etc since the Vedic ages. But even with the passage of time and technological advances, we continue using them. I remember using/seeing various stone tools such as Pata-varvanta (batan) and Jaata (grain grinder) as a kid. While those are pretty obsolete now, mortar and pestle (called Khal-batta in Marathi) still get used every day to grind spices, ginger-garlic or green chilies-cilantro in my kitchen. All the women in my house wholeheartedly believe that anything ground in the mortar tastes different (and by that, I mean way better). It is true, because the pounding gets the oils in your food out in a way a mixy just can't. So even though it takes a little time and some muscle work, I prefer my good old mortar-pestle for certain things. Especially when it comes making chutneys! I love the rustic, un-even coarseness and the complete marriage of flavors mortar-pestle can achieve.

I made one of my most favorite (yes, I say that about a lot of things) chutneys the other day to go with savory Ghavan - Maharashtrian Shengdana chutney (peanut chutney). Now, there are several versions of this chutney - with or without garlic, coconut or sesame seeds. My favorite version is garlicky, slightly moist with very lightly roasted peanuts. This chutney reminds me of some of the funnest memories from childhood - mom would pack me a sandwich with generous spread of fresh butter and chutney, or roll parathas sprinkled with it, or mix some rice-batata bhaji-daal-chutney, as filling and easy to eat lunches. Shengdana chutney is extremely versatile and tastes great when mixed with some yogurt to go with roti or rice. Oh, there's nothing more comforting!


Shengdana Chutney - Maharashtrian Peanut Chutney

Ingredients:
1 Cup peanuts
3 Garlic cloves
1 Teaspoon tamarind concentrate/pulp
2 Teaspoons red chili powder (adjust according to taste)
Sugar to taste (I used ~ 1 1/2 teaspoons)
Salt to taste

  • Lightly roast peanuts in a pan on low heat. I roast them just enough to get the skin off. Let them cool and peel the skin. I find taking a handful of peanuts and rubbing them between palms the easiest way to remove the skin. Then simply fan the skin lightly to separate the nuts from the peels. 
  • Grind garlic cloves in mortar-pestle first so you don't end up with big chunks of it. 
  • Add peanuts, tamarind pulp, red chili powder and grind coarsely. 
  • Add sugar and salt and find the perfect combination of spicy-salty-tangy-sweet for you and grind slightly to mix everything well. 
The chutney will store in the fridge for 2-3 weeks.

What is your favorite kitchen tool and how do you use it?

Saturday, February 23, 2013

Back To The Kitchen

It's been 50 days to be specific since this blog saw the light of day; and my cooking has been more intermittent than ever all this while. What have I been up to? Mostly been buried under piles of work and other commitments. But things are starting to taper off (for now =/) and I'm back in the kitchen cooking hearty meals every night. Ah, it feels so good to be eating fresh meals and experimenting with different foods again!

One of the things I like to try is substituting ingredients in traditional Indian recipes with the groceries available here. We have a steady supply of zucchinis all year around and I try to use it in as many ways as I can - in parathas, cutlets (the Indian kind ;), or sambar. Zucchini lends itself to any flavor combination since it doesn't have any strong taste on its own. Yesterday, I used zucchini in a recipe that calls for cucumber - savory Ghavan. Ghavan is a Maharashtrian style instant Dosa commonly prepared in the coastal region of Konkan. It's a popular breakfast/brunch item that can be made sweet or savory. My mom always made both varieties at the same time since I preferred the sweet version while my sister liked the savory kind. But the savory ghavans are much quicker to make. They are simple crepes made with a basic batter of rice flour and yogurt/buttermilk. My grandma used to add grated cucumber for some body and texture in the savory ghavans. Zucchini seemed like a logical choice to replace cucumbers and they worked out perfectly. Plus a dose of nutritional veggies never hurts!


Zucchini Ghavan (Maharashtrian Style Instant Dosa)

Ingredients:
3/4 Cup grated zucchini
1 1/2 Cups rice flour
1 Cup buttermilk or 1/2 cup yogurt thinned with water
1 Large green chili (or more if you like) - chopped
Handful of cilantro - chopped
Salt to taste
Oil for greasing the pan

  • Combine rice flour and buttermilk well until all the lumps dissolve.
  • Add zucchini, chopped chili, chopped cilantro and salt to taste and mix well. The batter should not be too runny or too thick - somewhat like dosa batter. You can add some water to get the right consistency. Let the batter sit for 15-20 mins. 
  • Heat a pan on medium-high flame. Drizzle a little bit of oil, pour a ladleful of batter and spread in a circular motion to make a crepe slightly thicker than dosa. 
  • Cover the pan and let the ghavan cook on one side for a couple of mins until golden brown. Remove cover and cook the ghavan on the other side the same way. 


I made my favorite peanut-garlic chutney to go with these (recipe will be up soon) yummy ghavans. But a simple coconut chutney or cilantro chutney is perfect.

Monday, December 10, 2012

Pumpkin Bharta

While most blogs are exploding with sinful holiday goodies, I'm sharing a very healthy and simple side dish today. Why? Just because I thought the blogosphere needed some variety. Not really, it just makes me feel good about healthy eats before the holiday mania begins ;).

Bharta or Bharit, as we call in Marathi, is a typical Indian side dish made with mashed vegetables. Yes, the description is not very appetizing. But who doesn't like baingan bharta? Mom made a variety of bhartas in my house, all just as tasty and nutritious- doodhi/bottle gourd, green bell pepper, even okra. This particular recipe is a favorite of mine and is great since it uses the season's best. One of the reasons I love it so much, other than the taste, is because of the vibrant color it adds to the plate.


Pumpkin Bharta/Bhopalyache Bharit

Ingredients:
3 Cups pumpkin cubes (~2 Cups cooked & mashed pumpkin)
2 Teaspoons oil/ghee
1/2 Teaspoon mustard seeds
1/4 Teaspoon fenugreek/methi seeds
2 Pinches asafoetida
3-4 Dry red chilies - broken in half/2 Small green chilies - chopped
1 Sprig curry leaves
1 Cup yogurt
Salt to taste
Cilantro for garnishing

  • Steam/pressure cook pumpkin cubes. Don't worry about peeling the skin before cooking. It comes right off after the pumpkin is cooked. Just make sure you wash it before cooking.
  • Scoop out the flesh and mash it slightly with the back of the spoon or a fork. I like my bharta chunky.
  • Heat oil/ghee in a kadhai (or if you have those small tadka kadhais), add mustard and fenugreek seeds. 
  • Once they splutter, add asafoetida, curry leaves and red chilies. If you like green chilies instead, feel free to use them. I prefer the smokiness of red chilies. 
  • Add this tempering to the mashed pumpkin and mix well. 
  • Add yogurt and season with salt. 

Garnish the bharta with chopped cilantro and serve with hot roti.


Sunday, November 11, 2012

Diwali Wishes!

Wishing everyone a very happy Diwali!!! May the glow of the Diwali diyas brighten our lives and remove darkness and evil. Hope you all are enjoying the festivities with your near and dear ones, and stuffing yourselves with Diwali sweets and snacks! Let's remember the less fortunate ones this Diwali and help in any way we can.

There are lots of firsts for us this Diwali - our first time celebrating it together (since I left hubs by himself last year while I was celebrating with my family back in India), our first Diwali in the new house, my first Diwali in San Diego! Although I miss my family and friends staying far from me, I'm super excited about being 'home' with hubby this year. Yesterday, we cleaned and decorated the house together, got a bigger and better home for our pet betta fish and ended the day by making some delicious 'faraal' with friends (sweets and snacks prepared specially on Diwali are called faraal in Maharashtra). A perfect Saturday before Diwali!

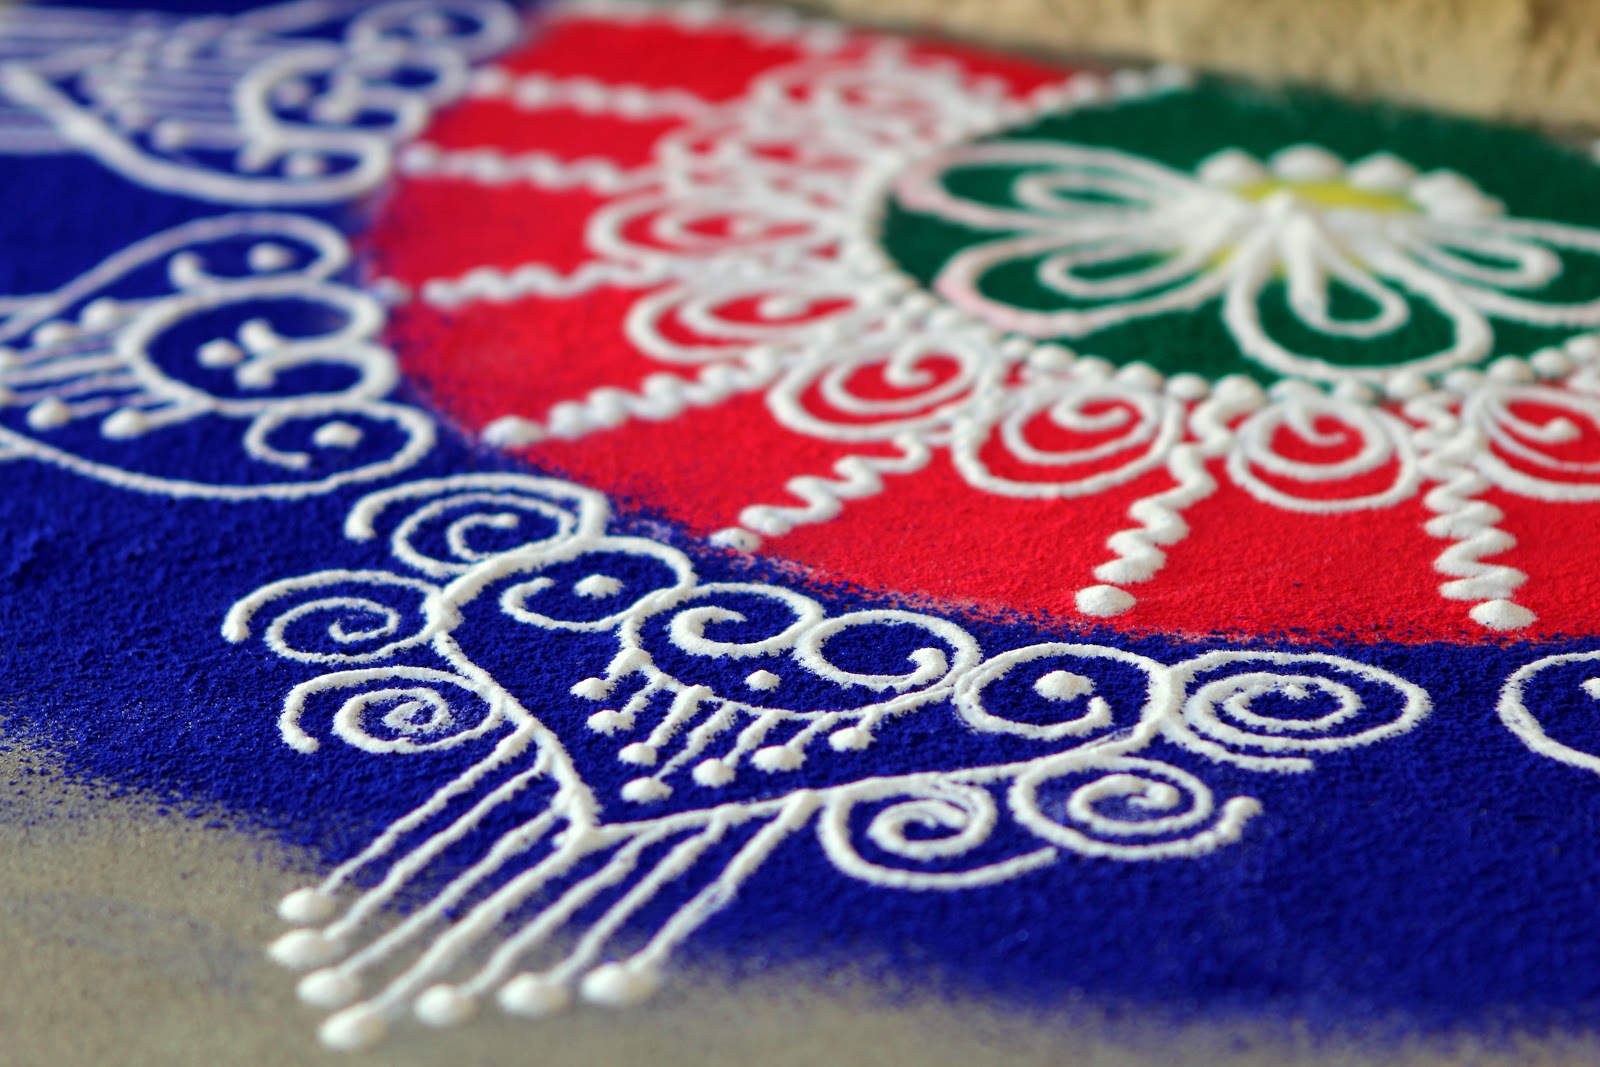
Rangoli at the doorfront
Back in India, all the ladies (with enthusiastic kids like me tagged along) would go to each other's house to help out with faraal making. The faraal was made in large quantities as it was to be shared with a big number of family members, friends and neighbors. Over here, the faraal hardly gets consumed. Honestly, I was wondering if I should even bother making anything this year. But once my friend told me how she and her husband were craving faraal, I immediately asked her to come over so we could have a 'faraal making party' :D. So last night, we gorged on fresh Shankarpali, Karanji and Garlic Shev/Sev along with a dinner of daal-rice and amrakhand (talk about gluttony). I had a moment of 'oh, I love faraal no matter how averse I'm to fried foods' and realized it isn't Diwali until the waft of ghee fills up your house!


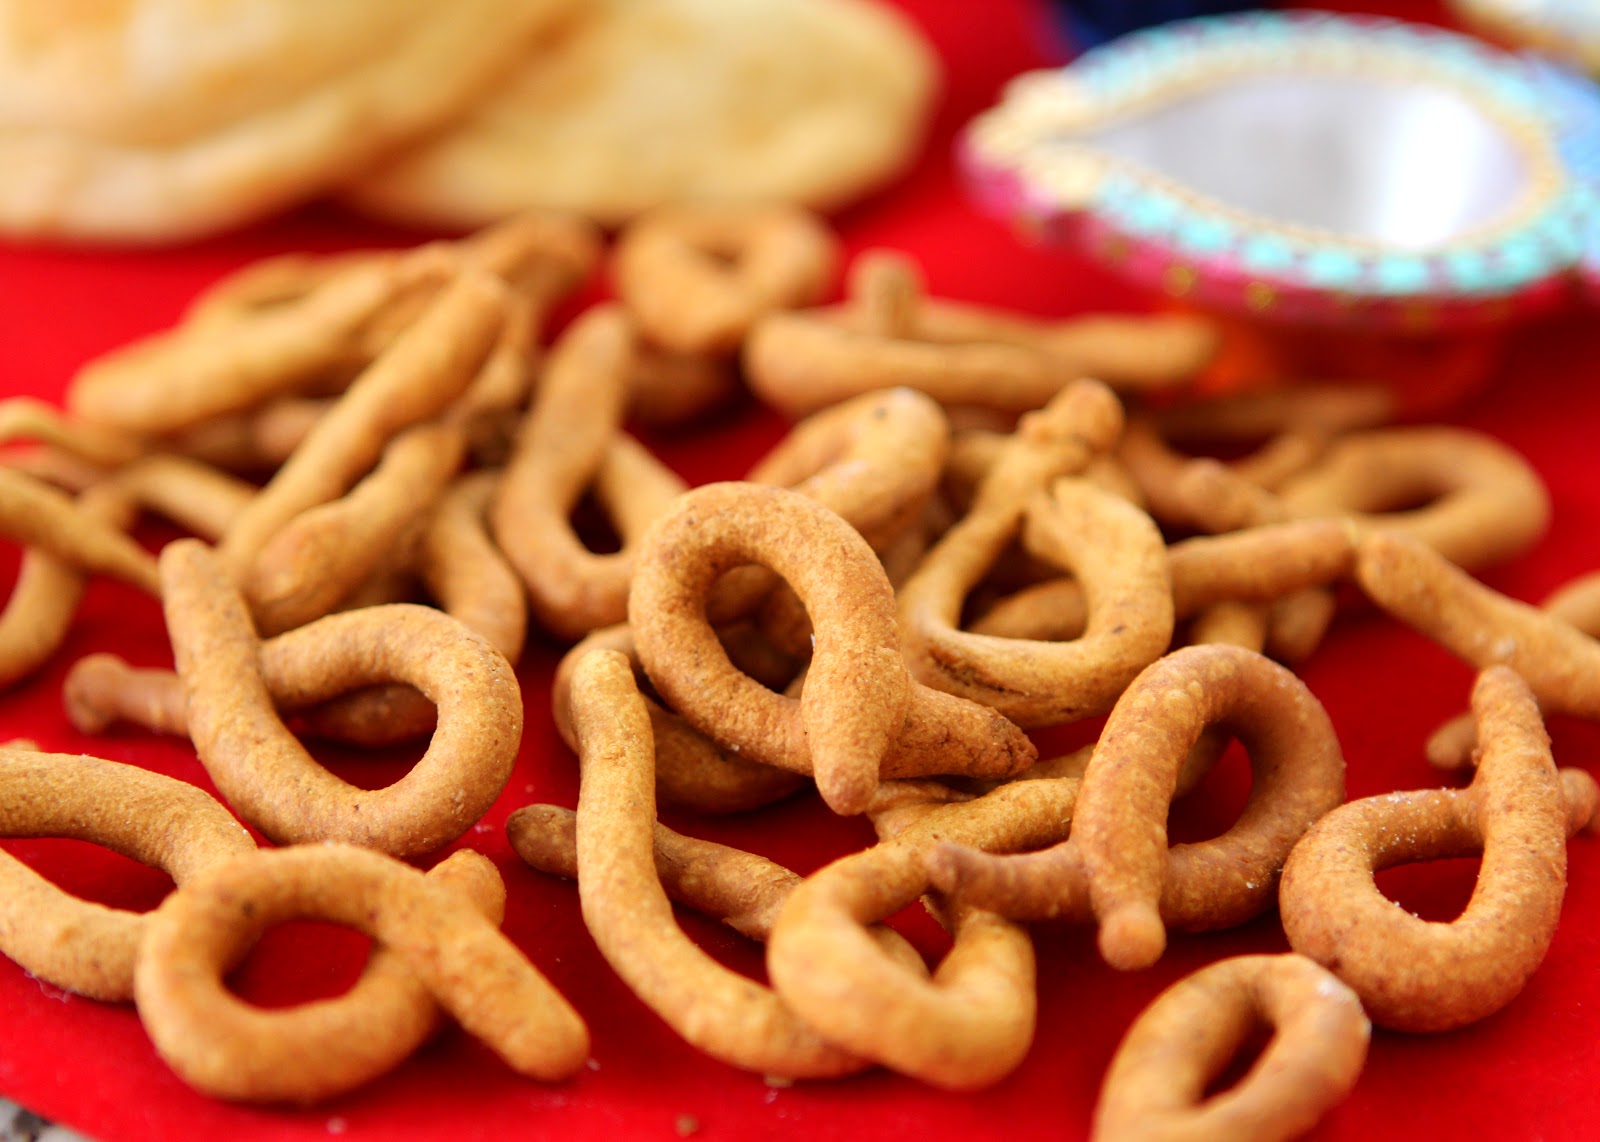
I'm sharing the recipe for Garlic Sev/Lasanachi Shev. My mom passed on this recipe from the recipe book every Marathi woman swears by - Kamalabai Ogale's Ruchira! I absolutely love this preparation. It's great to change your palate in between all the sweets. Sadly, I don't have a Sev patra (the press that you make sev with), so I shaped these like kadbole by hand. I only made a small quantity so it won't be lying around for days.


Garlic Sev/Lasanachi Shev

Ingredients:
1 Cup Besan (chickpea flour)
3 Tablespoons whole wheat flour
6-7 Large garlic cloves
1 1/2 Teaspoons red chili powder (adjust per your liking)
1 Teaspoon cumin-coriander powder
1/2 Teaspoon ajwain/ova seeds
2-3 Pinches baking soda
Salt to taste
Water as needed
Oil for frying

  • Grind garlic cloves using morta-pestle or a small grinder. Add a little bit of water to it and strain it through a fine strainer. Squeeze all the water out of the garlic. You now have a garlic concentrate! You will use this concentrate to flavor the sev so that you don't end up biting into bits of garlic! Isn't that clever? 
  • Mix both the flours, red chili powder and cumin-coriander powder together. 
  • Bruise the ajwain lightly - just take it in your palm and rub it with your thumb. This brings out the oils. 
  • Mix the ajwain, garlic concentrate, baking soda and add salt to taste (add a little extra salt than usual - frying tones down the flavors). 
  • Add water little by little to form a soft, stiff dough. If you don't have a Sev press, make the dough stiff enough so you can shape it by hand.  
  • Heat oil in a kadhai. Once the oil is hot, drop sev in it through the press and fry until yellowish-brown. Keep the flame on low-medium heat. This way, the sev will cook from inside. Otherwise it ends up burning on the outside and the center remains uncooked. 
  • Without a press, you can make small bow-like shapes by rolling out the dough thinly between your palms and pressing two ends together like shown in the picture. 

Enjoy the sinful, fried foods today, for tomorrow we may diet ;). 

Thursday, November 1, 2012

Kojagiri Cutlets!

Hi everyone! Hope you enjoyed lots of Halloween candy and baked some sweet treats. I had been looking forward to this Halloween for days - mostly because it was our chance to finally meet the neighbors, which I'm happy we did. The whole parade of kids dressed up as princesses, ninjas, ghosts, transformers and what have you, was quite a lot of fun. Hubs and I put our beach chairs in front of the house and enjoyed giving out candy to happy kids (derived mostly through their gesture since I couldn't really see many of their faces) and talking to parents who worried whether their li'l ones said "thank you"! Our first holiday season in the new neighborhood as begun on a sweet Halloween candy note!


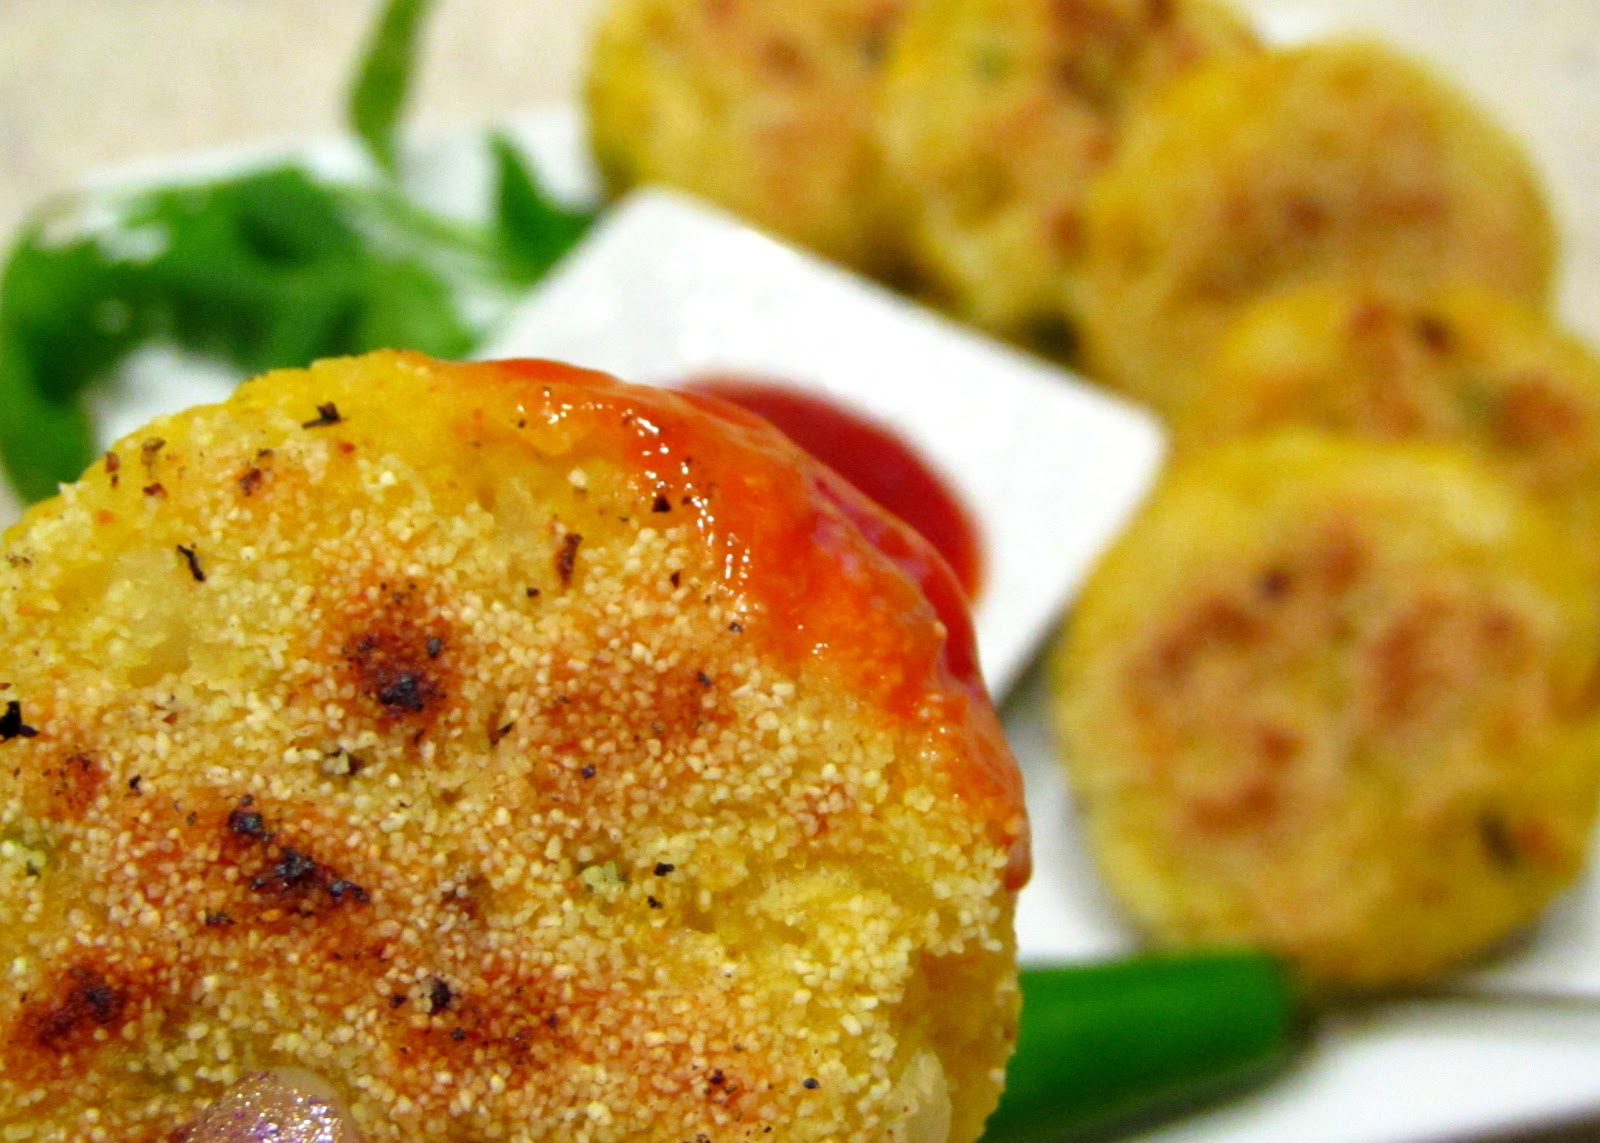
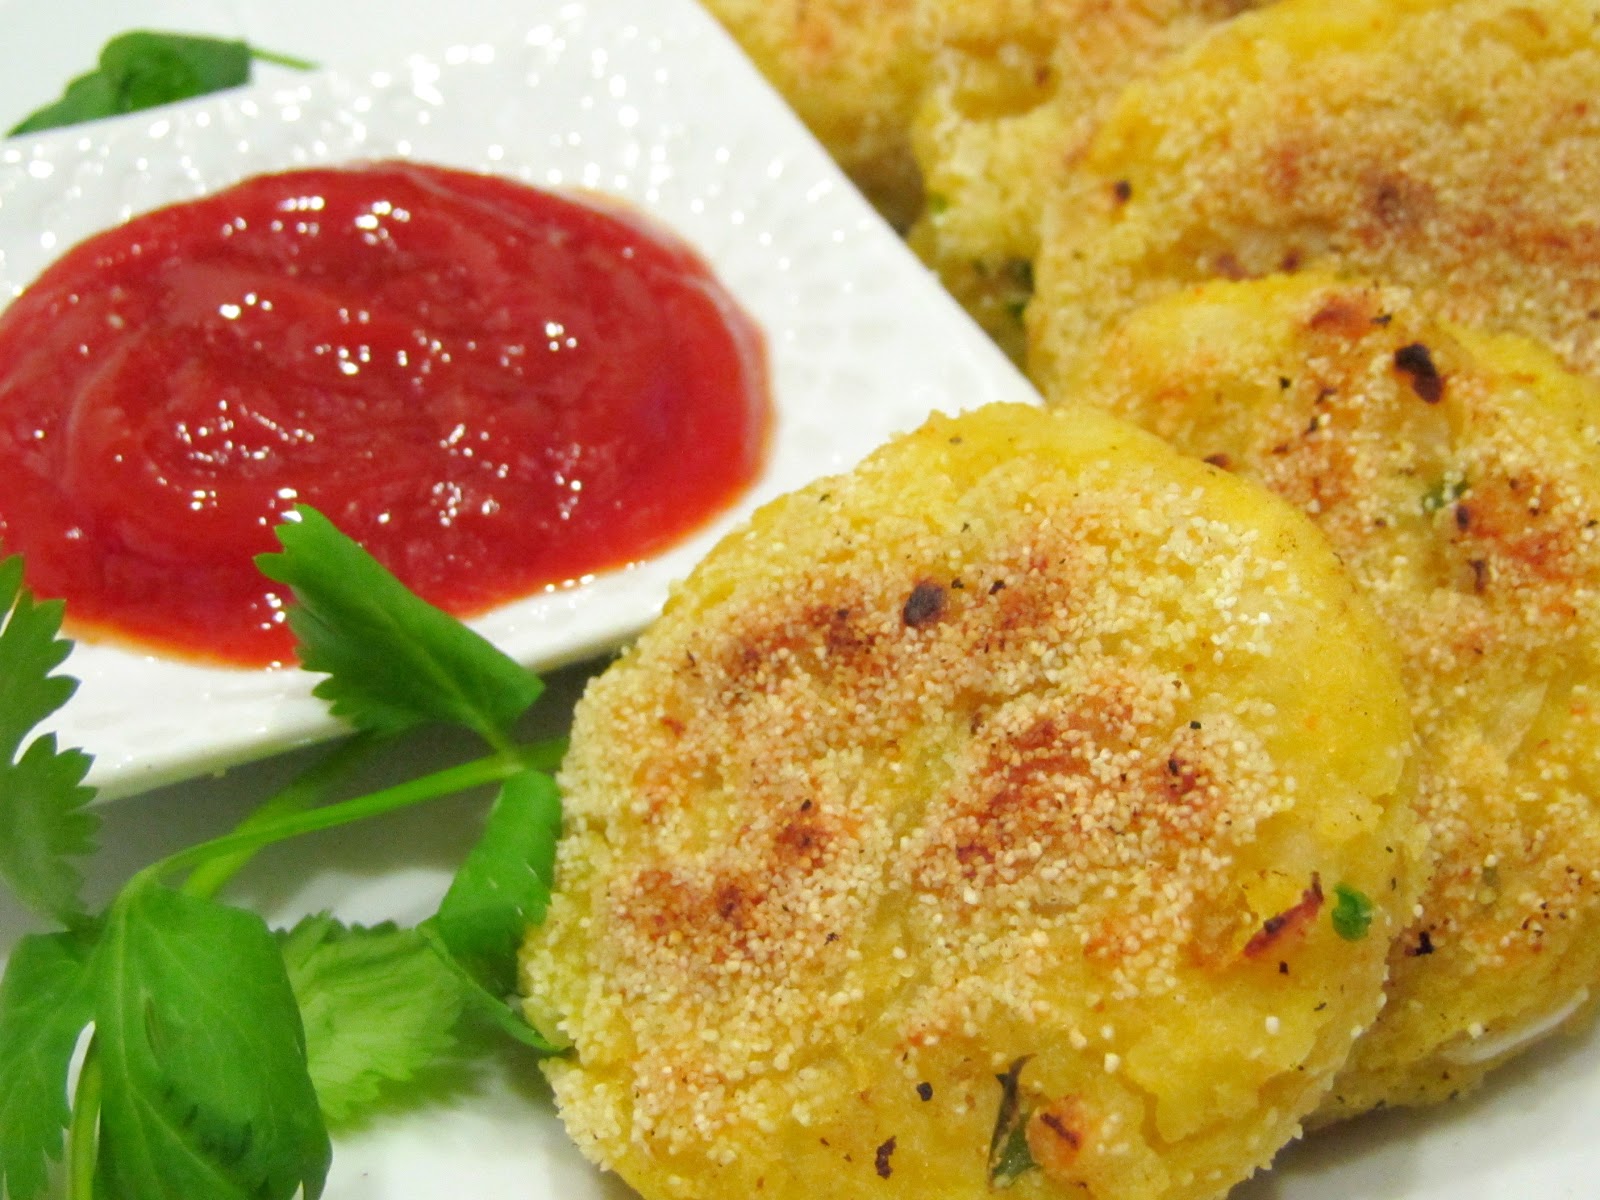
Anyway, to cut to the chase - cutlets! I made these fun snacks three days back for Kojagiri pournima (full moon night). I was hoping to post the recipe right away and get to my 100th post(!). Anyway...The story goes that Goddess Lakshmi roams the earth on this full moon night and asks "Ka: Jagarati" meaning "Who's awake" and  blesses those who observe night vigil with wealth and prosperity. People gather at night and enjoy flavored milk (masala doodh) and poha (flattened rice) after offering it to the beautiful full moon. In honor of this day, I made some tasty cutlets of poha. I remember my mom making these out of left-over Maharashtrian style kande-pohe (seasoned flattened rice). Poha is unusual to use in cutlets, but it works really well. It turns into almost rice-flour essentially, which helps in binding the cutlets and absorbing any flavors you add.  If you are making them out of kande-pohe, you already have the ginger, green chili, onion, cilantro etc. I mimicked the same flavors and made these out of plain poha. A fun snack you could make as starters for all the diwali parties you'll have lined up! These are great after-school snacks for kids as well. Of course, tone down the spiciness for them.


Poha Cutlets

Ingredients:
1 Large potato
1 1/2 Cups washed thick poha 
1/4 Medium onion - finely chopped
A few springs of cilantro - finely chopped
1 Inch ginger
2 Small green chilies
1 Teaspoon cumin-coriander powder
Salt to taste
Rava (semolina) for coating
Oil as needed. 
  • Soak thick poha (don't use the thin variety) in some water and drain right away. Let it sit for 15 minutes. 
  • Boil the potato until fork tender and peel. 
  • Grind gingner, green chilies and cumin-coriander powder together. 
  • Mix the soaked poha, potato, onion, cilantro, the space paste you made and salt and bind well until the potato and poha are mashed. Sprinkle some water if the mixture is too dry. 
  • Make small flat patties and roll them in rava, pressing lightly. This will create a nice crunchy crust on the cutlets. 
  • Heat a pan on medium-high flame and drizzle some oil. Pan fry the cutlets on each side until brown. 


The cutlets taste yummy with ketchup! 


Wednesday, October 17, 2012

Pudachi Wadi

Hi everyone! Wish you all a very happy Navratri. Hope you have your garba shoes on and are dancing the nights away :). I have a fun snack recipe for you to munch on after all that dancing. 


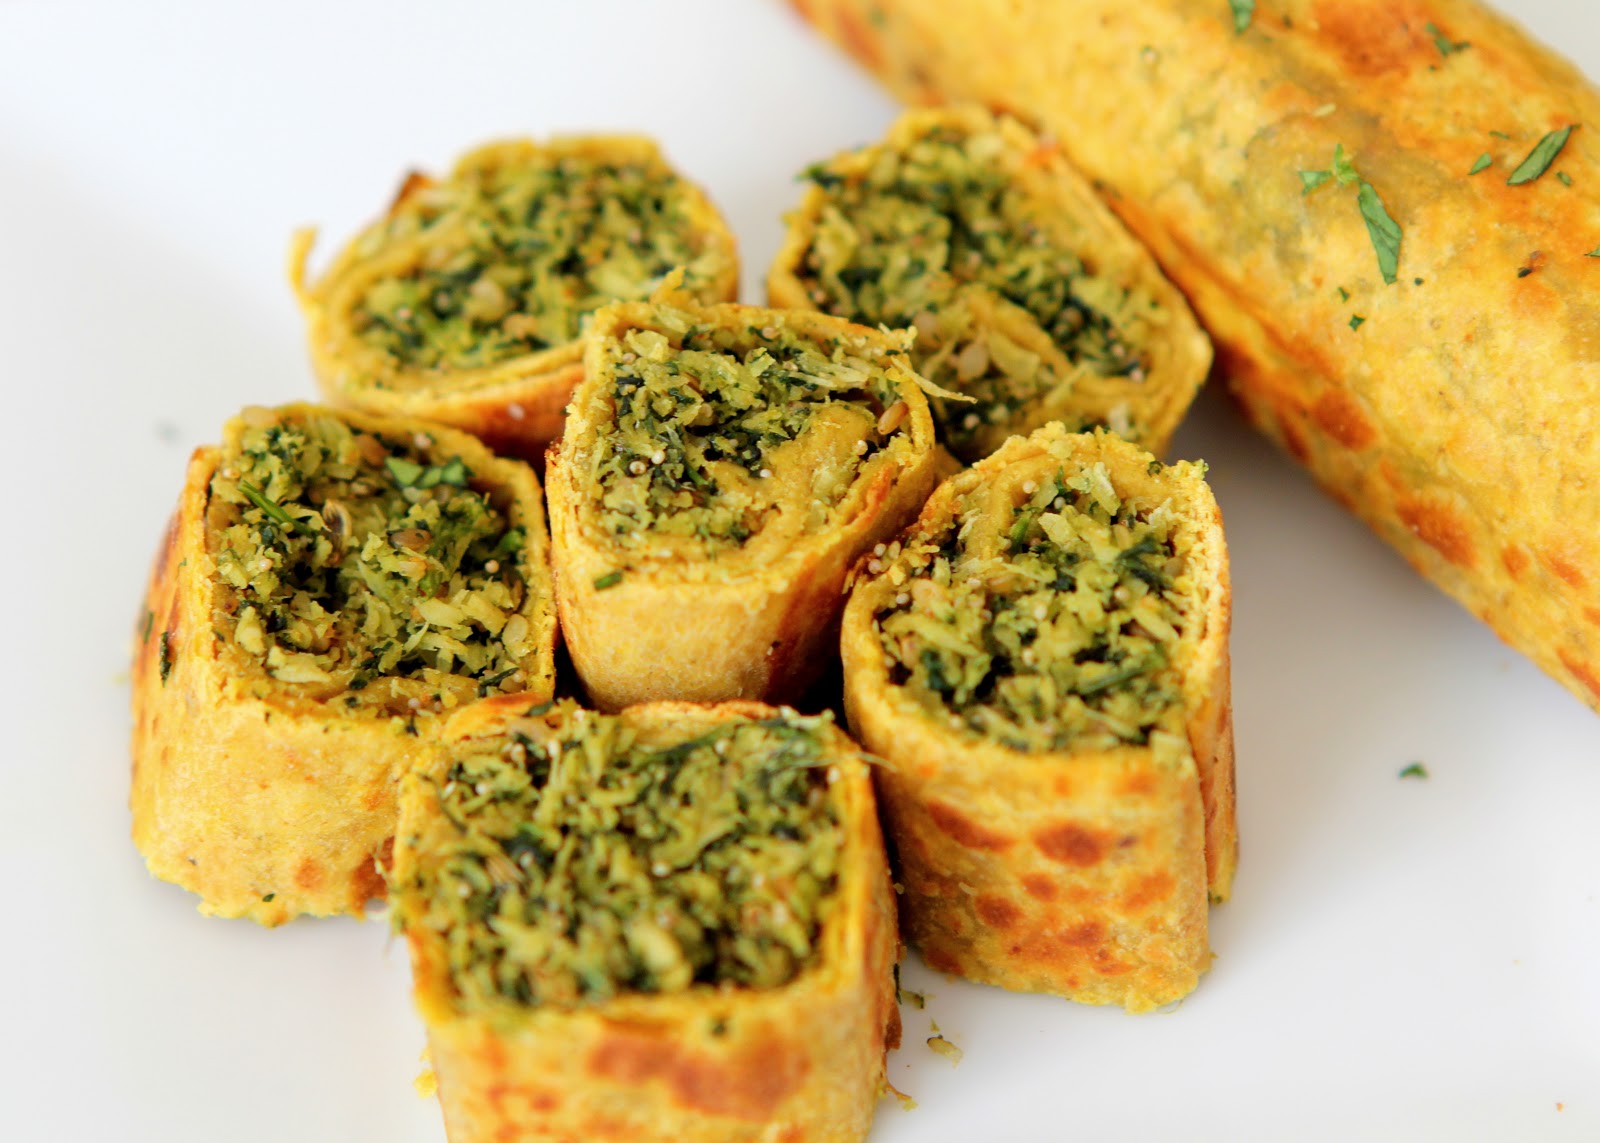
I wanted to make something different this festival season. Not the typical sweets and faral - I'll be making plenty of that for diwali. My mom as always came to my rescue with this tasty snack recipe - Pudachi Wadi. Pudachi wadi is somewhere between Bakarwadi and Kothimbir wadi. It has a lot of common ingredients with kothimbir wadi and is shaped like bakarwadi. Can't go wrong with that. I guess the name comes from the way you shape these - rolling the roti into a pudi (a small packet). I was so excited about the recipe that I started going through my pantry for the ingredients before mom was done talking to me. 


This wadi has a savory coconut-cilantro filling with toasty sesame seeds and poppy seeds. For additional flavor and taste, I added some fennel seeds. The sweet bite they provide balances the spicy-savoriness perfectly. Besan in the covering makes it very crispy and light. The original recipe calls for frying but I went with shallow-pan frying using minimal oil. I don't think there was any compromise on taste. You should just make sure that the filling is roasted well since it won't cook as much while shallow frying as in deep frying. You can deep fry the rolls before cutting if you want the real thing. I didn't try baking them, but I think they'd turn out okay that way too. The recipe will make about 20-25 pieces after cutting.  


Pudachi Wadi

Ingredients:
Filling:
1 Tablespoon sesame seeds
1 Teaspoon poppy seeds
1 Teaspoon fennel seeds
2 Teaspoons oil
1 Teaspoon garlic paste
1 Teaspoon ginger paste
1 Green chili - finely chopped
1/2 Cup packed grated coconut
1 1/2 Cup loosely filled chopped cilantro
1 Teaspoon dhana-jeera powder
1 Teaspoon goda masala/garam masala
1/4 Teaspoon red chili powder for color (optional)
Salt to taste

Cover:
1/2 Cup whole wheat flour
1/4 Cup besan/chickpea flour
1/2 Teaspoon dhana-jeera powder
1/2 Teaspoon red chili powder
Salt to taste
Water as needed

  • First, knead the dough by combining all the ingredients for the cover. Add just enough water to form a stiff dough you can roll out. 
  • For the filling, roast the sesame and poppy seeds until slightly darker and aromatic and keep aside. 
  • Heat oil in a kadhai and add ginger, garlic, green chili and roast for about a minute. Then add rest of the ingredients except the cilantro and roast, stirring constantly. 
  • Add cilantro once the coconut is roasted well and let it all come together for another minute or so. 
  • I pulsed this filling through the grinder quickly just to mix everything well. But you don't have to do that. 

To make the wadi:

  • Divide the dough as well as the filling in 4 equal parts. 
  • Roll each dough ball into a roti - not too thick. Then fill the center with the filling. Fold the small sides in so the filling doesn't come out and roll the roti into a tight roll. 
  • Heat a pan and drizzle some oil. Pan-fry the wadi rolls turning on each side until the cover is crispy. 
  • Once completely cooled, cut the rolls into small pieces and serve with some tamarind chutney. 


Monday, October 1, 2012

Chutneys and Condiments


Growing up, my house was always buzzing with guests and visitors. Like any other typical Indian family, we were used to unannounced guests dropping in for chai or staying over for dinner after mom or grandma insisted. I remember my dad inviting his friends over for dinner on many occasions with barely any warning. There was hardly any time to come up with a fancy menu. But the women of the house never worried or complained, for they were always armed with an abundant supply of condiments. All sorts of pickles, chutneys, papads and other mouthwatering stuff! Think about it, these condiments are served in the smallest quantity on a plate, and yet add the most pizzazz to a meal. The simplest potato sabji served with piquant mango pickle, some sweet lemon pickle on top of upma, green chutney spread on a sandwich, curry leaves chutney sprinkled on a roti, or an assortment of papads cumbled with warm khichadi - these condiments make up for any flavors your plate may be lacking.


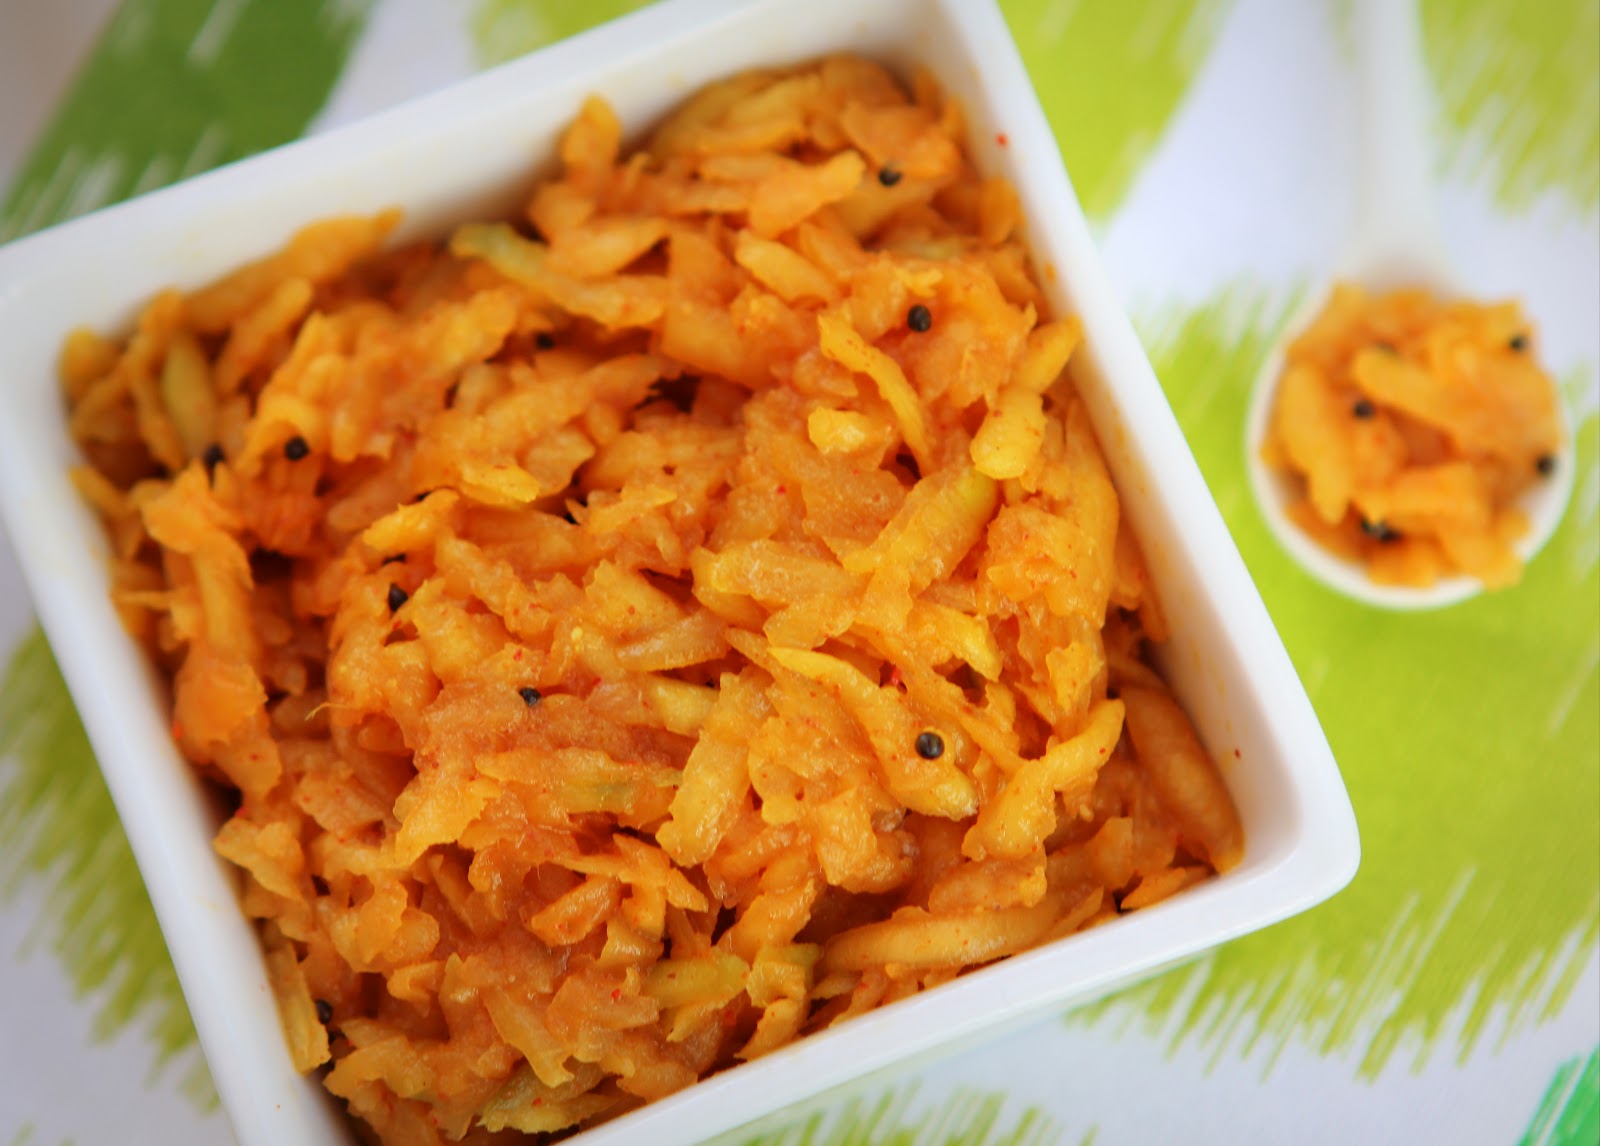
When I want a quick and easy meal, I rely on fresh chutneys or metkut (Maharashtrian style poodi chutney) to spruce up some rice and yogurt. Utterly satisfying and comforting. I made a big batch of green/raw mango chutney yesterday (the only upside to not getting alphonso is having access to Mexican mangoes most of the year). Green mango chutney is quite unique as it is complete with all the basic tastes our taste buds recognize - sourness, saltiness, sweetness, bitterness and - for all the Indianness in me - spiciness! It's one of the easiest condiments to make and boy, does it pack flavor! My mom used to add a little bit of grated onion to make this chutney extra strong, but you can't store it for long since onion starts smelling right away. Without it, the chutney lasts for 2 weeks or more. I love this chutney with roti, rice or even bread. It'll surely tickle your taste buds.


Green Mango Chutney/ Kairichi Chutney

Ingredients:
2 Green Mangoes
1 Tablespoon grated jaggery
1 Teaspoon red chili powder
1 Teaspoon mustard seeds
1/2 Teaspoon fenugreek/methi seeds powder
1/2 Teaspoon asafoetida powder
1 Tablespoon oil
Salt to taste

  • Pick firm, raw mangoes for this chutney. Peel and grate mangoes. 
  • Add jaggery and red chili powder. The exact amount of jaggery and chili powder will depend on the sourness of the mango and your preference. So make adjustments as needed. 
  • Heat oil in a kadhai, add mustard seeds and let them splutter. 
  • Turn off the heat, add asafoetida and fenugreek seeds powder (so they don't burn) and add this tempering to the grated mangoes. You want asafoetida to impart its strong pungent fragrance. 
  • Add salt to taste, mix well and let the chutney sit for about an hour so all the flavors penetrate the mango. 

There - complete with all the flavors, this chatpati chutney will make any meal special!

Wednesday, September 19, 2012

Ganesh Chaturthi Wishes

Wishing everyone a very happy Ganesh Chaturthi! May Lord Ganesh bless you with health and happiness, and remove all obstacles from your path.

My eco-friendly hand made idol with natural clay and non-toxic paint

Hope everyone is enjoying delectable modaks and other naivedya. Here are some recipes you could make
this year:


Tuesday, September 18, 2012

Haliv/Aliv Ladu

Hartalika wishes everyone! Happy fasting to those who are observing it today. Hartalika is celebrated by women in honor of Goddess Parvati on Bhadrapad tritiya (third day of the Hindu calendar month Bhadrapad). I used to observe the fast as a girl - to pray for a husband like Shiva! Now that I have found him, I skip the fasting bit of the celebration ;). Hartalika falls a day before Ganesh Chaturthi. My grandma would scurry around just before the big day trying to fill the pantry with sweets, so none of the visitors who came for Ganpati darshan left without plentiful of them. She made pedhas, barfis and all sorts of laddus. I always had my eye on the Haliv laddus, to replenish the depleted energy after a long day of fasting.


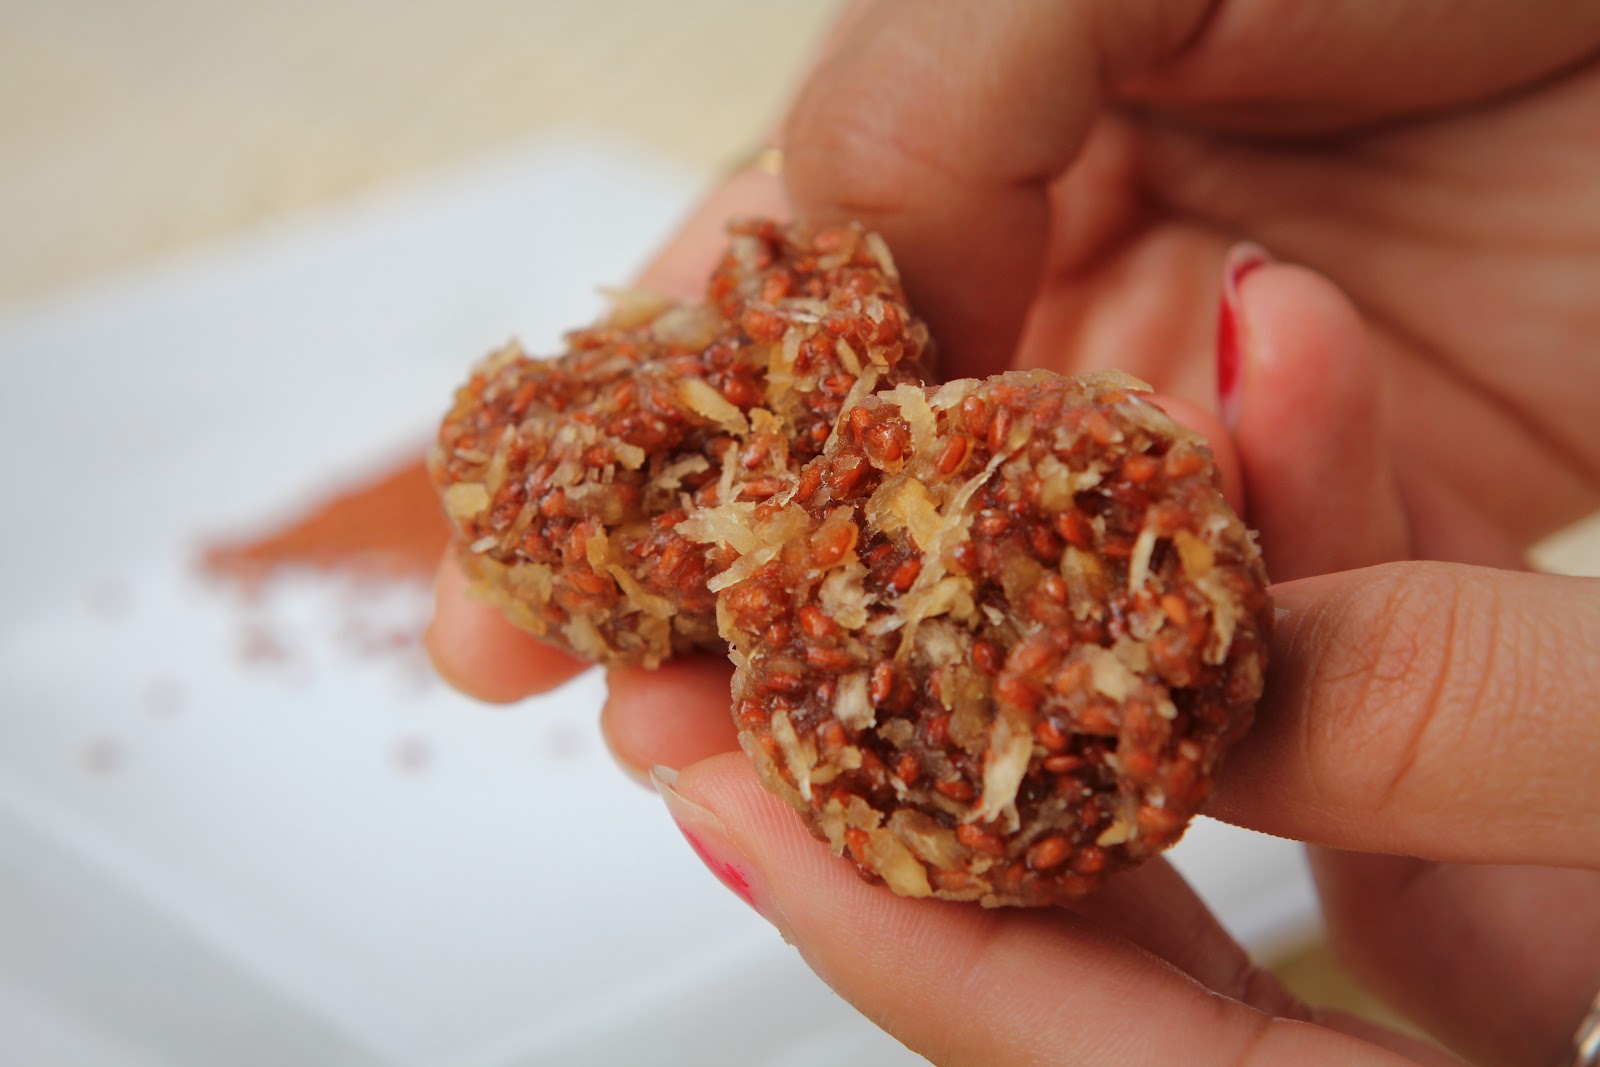
Haliv/Aliv seeds come from an herb called garden cress. They are also known as Aserio seeds. These seeds are rich in iron, calcium and protein. Grandma told us how good they were for women and said, "We didn't have all these energy tonics in my days. We ate haliv ladus or kheer for the essential nutrients." The great thing is, these laddus taste much better than any energy drink you've had! Haliv seeds swell up once soaked, just like sabja we put in faluda. They give a nice, chewy texture. The laddus are quite decadent with the generous use of coconut. The surprise element is the sweet, floral aroma from cloves. You can add some dry fruits if you like, but the laddus are quite rich on their own. Other laddu recipes, like rava and besan, require exact measurements and technique. This recipe is a lot simpler in comparison. The only tedious part is the cooking process.


 Haliv/Aliv Ladu

Ingredients:
1/2 Cup Haliv/Aliv seeds (Aserio seeds)
1 Cup coconut water (use regular water if not available)
1 Cup fresh grated coconut
3/4 Cup grated jaggery
2 Tablespoons sugar (if required)
3 Cloves
2 Teaspoons ghee (clarified butter)

  • Soak haliv seeds in coconut water for about an hour. The seeds start to puff up immediately and become slippery. They double in size once completely soaked.
  • Mix grated coconut (you can add some later if needed) and jaggery to the seeds and combine well. Let it sit for another hour. There should be equal or little more amount of coconut as the seeds. 
  • While the seeds are soaking, roast the cloves and grind them to a fine powder. 
  • Heat ghee in a kadhai and add the coconut,jaggery,haliv mixture and cloves powder and cook on low flame, stirring constantly. The seeds need to be cooked for a long time (~20-25 mins) until they become soft. 
  • Once the seeds are cooked through and the mixture comes together, turn off the heat and let it cool. 
  • Make golf ball sized laddus (you probably won't be able to eat a bigger laddu at one time since they are quite heavy). 

Notes:

  • The sweetness of jaggery depends on the quality. You can add some sugar to achieve desired sweetness. 
  • Soaking the seeds in coconut water adds more flavor. Use regular water if you don't have it. 
  • This recipe makes about 10-12 laddus.

Friday, July 27, 2012

Gongura = Ambadi!

For the longest time, I knew Gongura as the leafy green from Andhra (a south Indian state). Reddy aunty, our neighbor and family friend in NY, used to make this wonderful tangy chutney with it to go with one of her many delicious rice preparations. The Indian store here carries Gongura pretty often but I never ventured into trying it. I finally bought a couple of bunches yesterday and started looking for recipes to make that chutney. Leave the chutney aside, what do I find?? Gongura is the same vegetable we Maharashtrians love and call Ambadi! Once I got over the fact that I didn't know Gongura was my most loved Ambadi, I picked up the phone and called mom to express my joy. Mom goes, "Of course, I knew it. Don't you remember I made ambadichi bhaji in NY a few times?". I don't know why, but I don't recall it at all. The Ambadi we get in Maharashtra doesn't have stems as red as the Andhra variety, but tastes exactly the same. Sour, tangy leaves that remind you of the taste of tamarind.


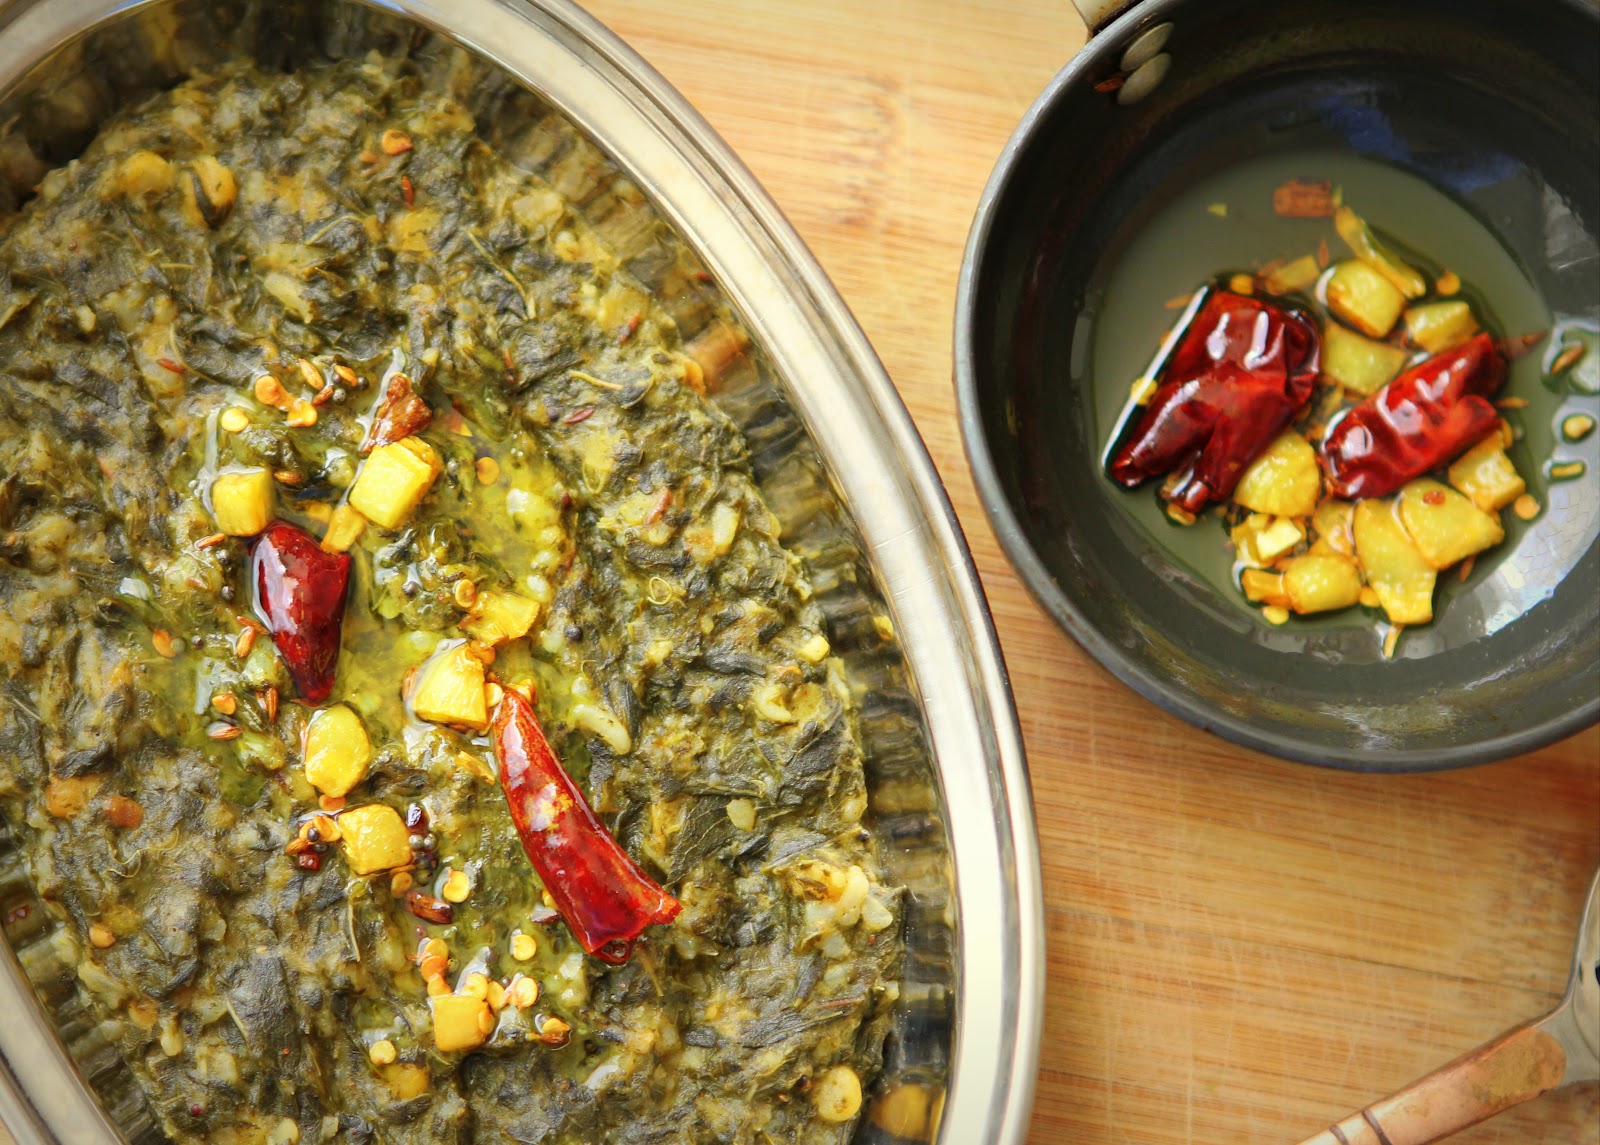
Ambadi is a popular leafy vegetable, especially in the southern part of the state where I come from. The leaves are cooked thoroughly so that they get gargatta, or almost mashed. Then they are tempered with the most fragrant combination of garlic and red chilies. There are no powdered spices, garlic providing most of the flavor and smokiness. A little bit of jaggery balances the sourness of the greens perfectly. People from my hometown Kolhapur tend to use jaggery much more than sugar since it's a prime sugarcane producer.  Ambadichi bhaji with some bhakri, raw onion, garlic chutney or spicy thecha is my kind of comfort food. It's a regular lunch combination of the farmers in Maharashtra too. All the ingredients are dry enough that they can be wrapped up in a piece of cloth and carried to the farms without worrying about containers or spills. I don't have to worry about any of that, but I could eat Ambadichi bhaji every day if I had to!
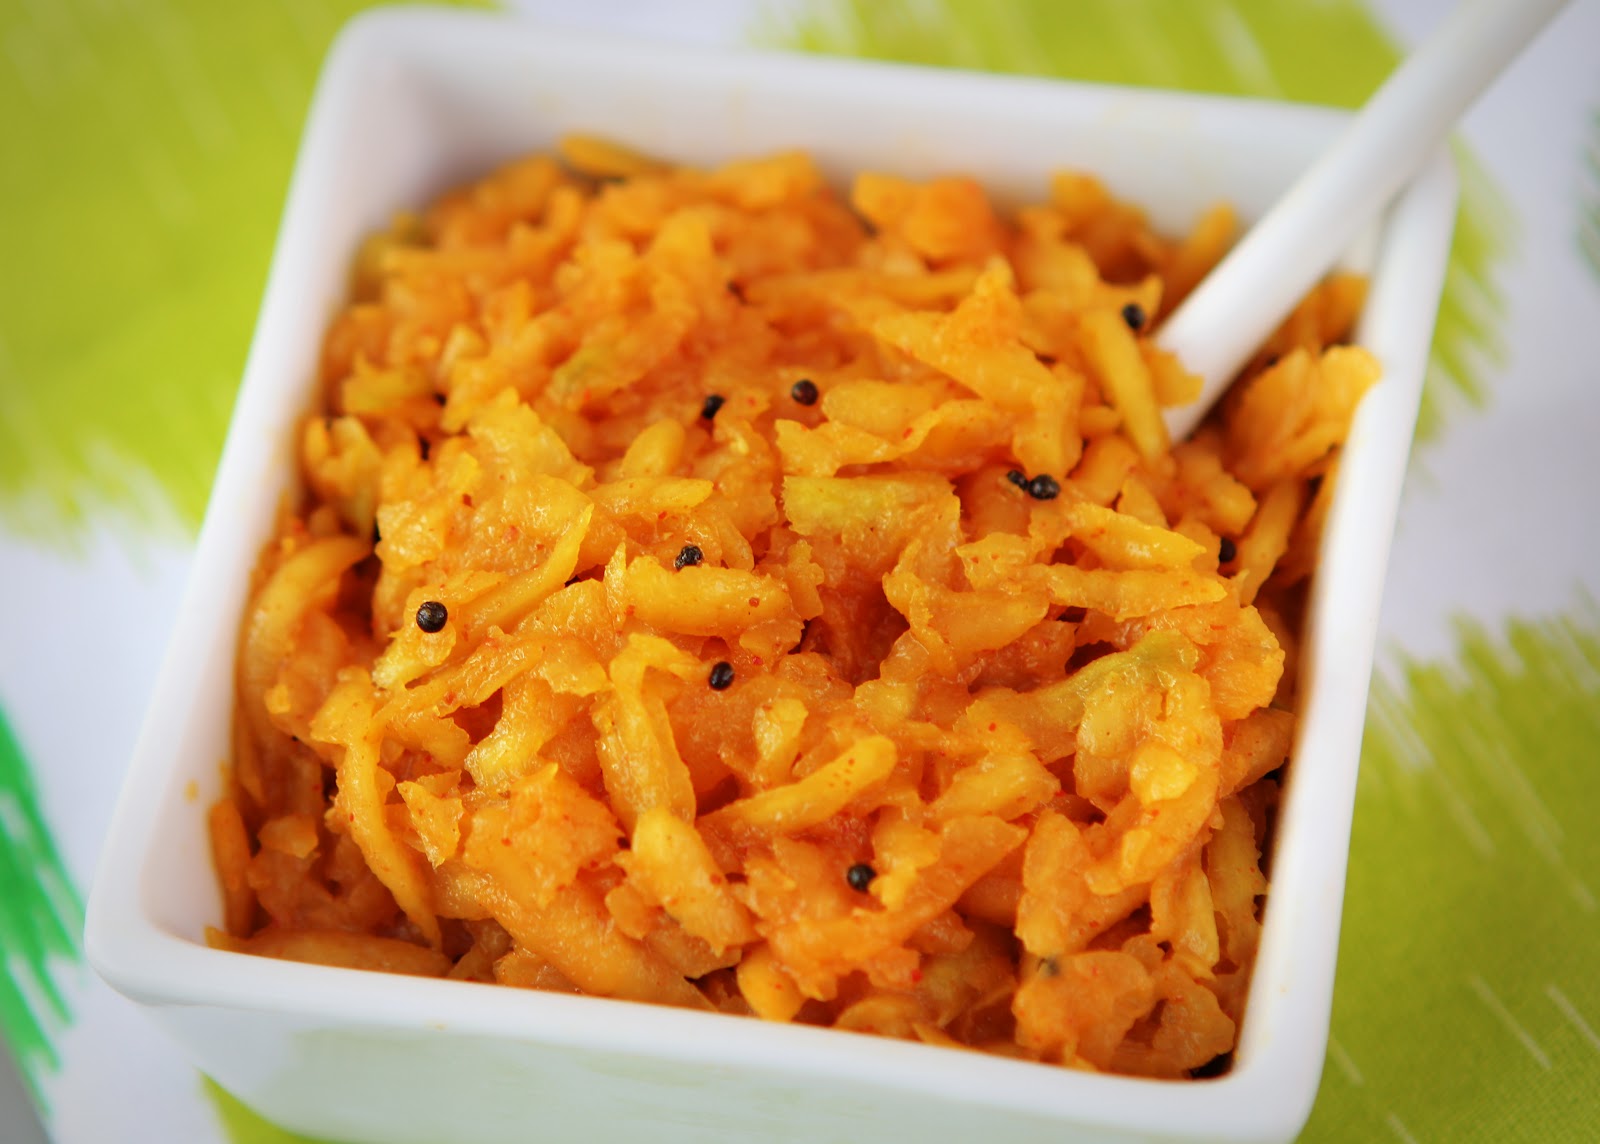


Ambadichi Bhaji

Ingredients:
2 Bunches Ambadi or Gongura
Fistful of rice, toor daal and chana daal combined
1 Small piece of jaggery (~1 teaspoon grated jaggery)
3 Tablespoons oil
1/2 Teaspoon mustard seeds
1/2 Teaspoon cumin seeds
5-6 Garlic cloves - smashed and chopped into chunky pieces
3-4 Dry red chilies
1/4 Teaspoon turmeric powder
Salt to taste

  • Discard the stems of ambadi and wash the leaves well.
  • Wash the rice, toor daal and chana daal. This is just to add some body and bite to the bhaji. A fistful of the combination is enough. Take a little more of rice than the daals. 
  • Pressure cook the leaves, rice and the daals with 3-4 whistled until soft. Discard the water that it's cooked in so it takes away some sourness out of the leaves making them more palatable.
  • In a kadhai, heat oil, add mustard and cumin seeds and let them splutter. Add garlic and fry it until golden brown. Garlic smells heavenly when fried like this and adds a lot of flavor to the bhaji. Add dry red chilies cut in half and turmeric powder at the end so they don't burn.
  • Add about a tablespoon of this tempering to the cooked leaves, add jaggery and season with salt and cook for a couple of minutes, mashing with the back of your spoon.
  • While serving, pour some of that extra garlic tempering over the bhaji and enjoy with bhakari or rice. 


LinkWithin

Related Posts Plugin for WordPress, Blogger...