Wednesday, August 29, 2012

Of White & Gold

The first day of college, I entered my class with visible nervousness, and saw her reassuring face smiling at me. It was comforting to see someone giving a friendly smile in an unfamiliar place. Only I didn't know then that P and I would go on to form a strong bond of friendship that was to last all these years and many more to come. P, my BF from college, and I shared some of the best times as classmates and later as roommates in college. While I lived away from my family, I sought the love and comfort of her home. P's loving family quickly accepted me as one of them. I spent holidays at her house, had silly slumber parties, took over the basement to practice for our dance shows, celebrated many festivals there, and most of all, enjoyed home cooked food!

P is a Keralite, or Mallu, as known popularly. It was at her house that I first had a taste of Kerala cuisine. Rich with generous use of coconut, spiced with red and green chilies and scented with curry leaves, Kerala food is full of bold flavors. Every visit to P's house was filled with a delicious breakfast of dosa and a lavish lunch spread of red matta rice, beet-root or cabbage pachadi, dry veggie fry called Thoran, rich and creamy aviyal curry with a side of inji curry (ginger pickle) or chammanthi (chutney) to spice it all up. I was treated to payasam on special occasions. Imagine that all that exotic food for a college student who survived on all sorts of rice preparations. Enjoying those delicacies with the sweetest family one can have made it all the more special. 


Today, on the occasion of Onam, I cooked two of my favorite dishes. Onam is an important festival in Kerala, almost like diwali. Women dress up in the traditional white and gold settu sarees, wear jasmine garlands in their hair, adorn the door fronts with athapoo (rangoli made with flower petals), and get together for thiruvathirakali dance. The most exciting part of the celebration is the elaborate feast called Sadya. It's some serious food business! Imagine a large banana leaf filled corner to corner with one delicious dish after another.

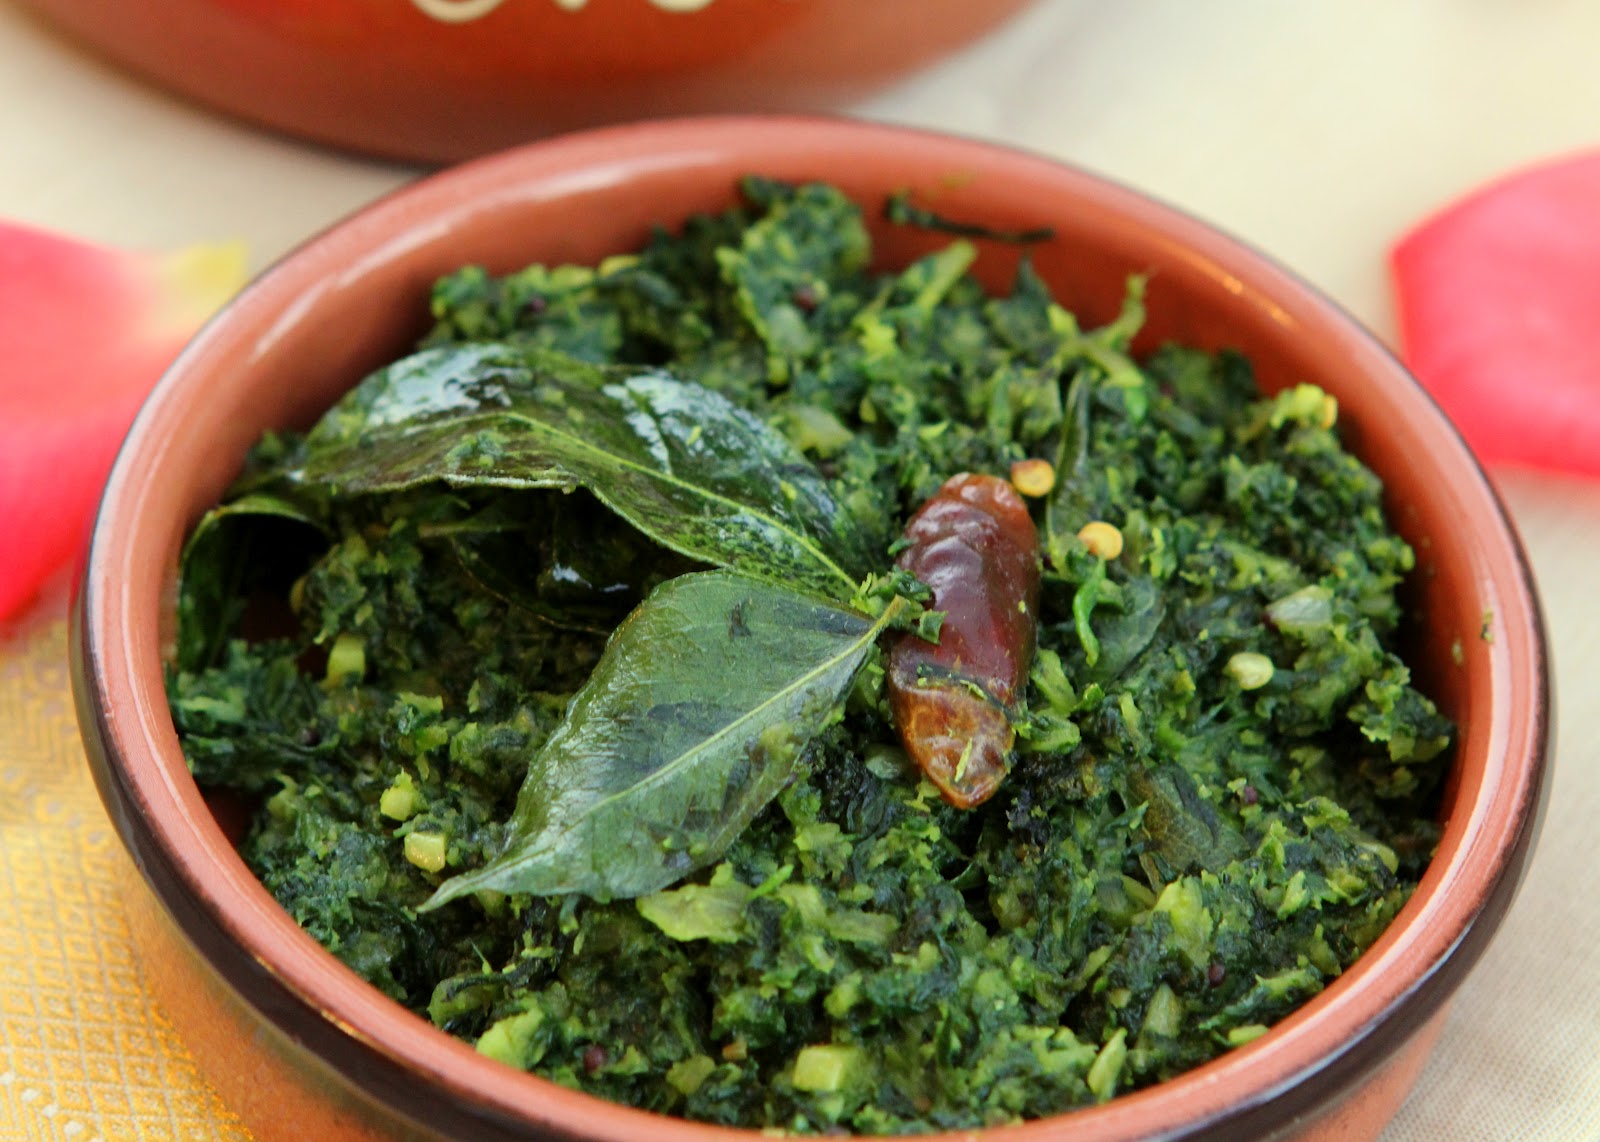
I prepared aviyal and spinach thoran today. Aviyal is a kurma like preparation made with many different root vegetables, beans, squash and raw bananas. You can throw in anything you like, as long as the vegetables are firm and don't get watery when cooked. Thoran is any dry vegetable stir fry. I used to love thoran made with beans. Today, I tried it using spinach since I already used beans in the aviyal. Neither of these dishes use overpowering spices. They are extremely fragrant and flavorful with the use of curry leaves, coconut, shallots and chilies. Husband had never tried Kerala food. All I can say is, he is converted now :).


Aviyal

Ingredients:
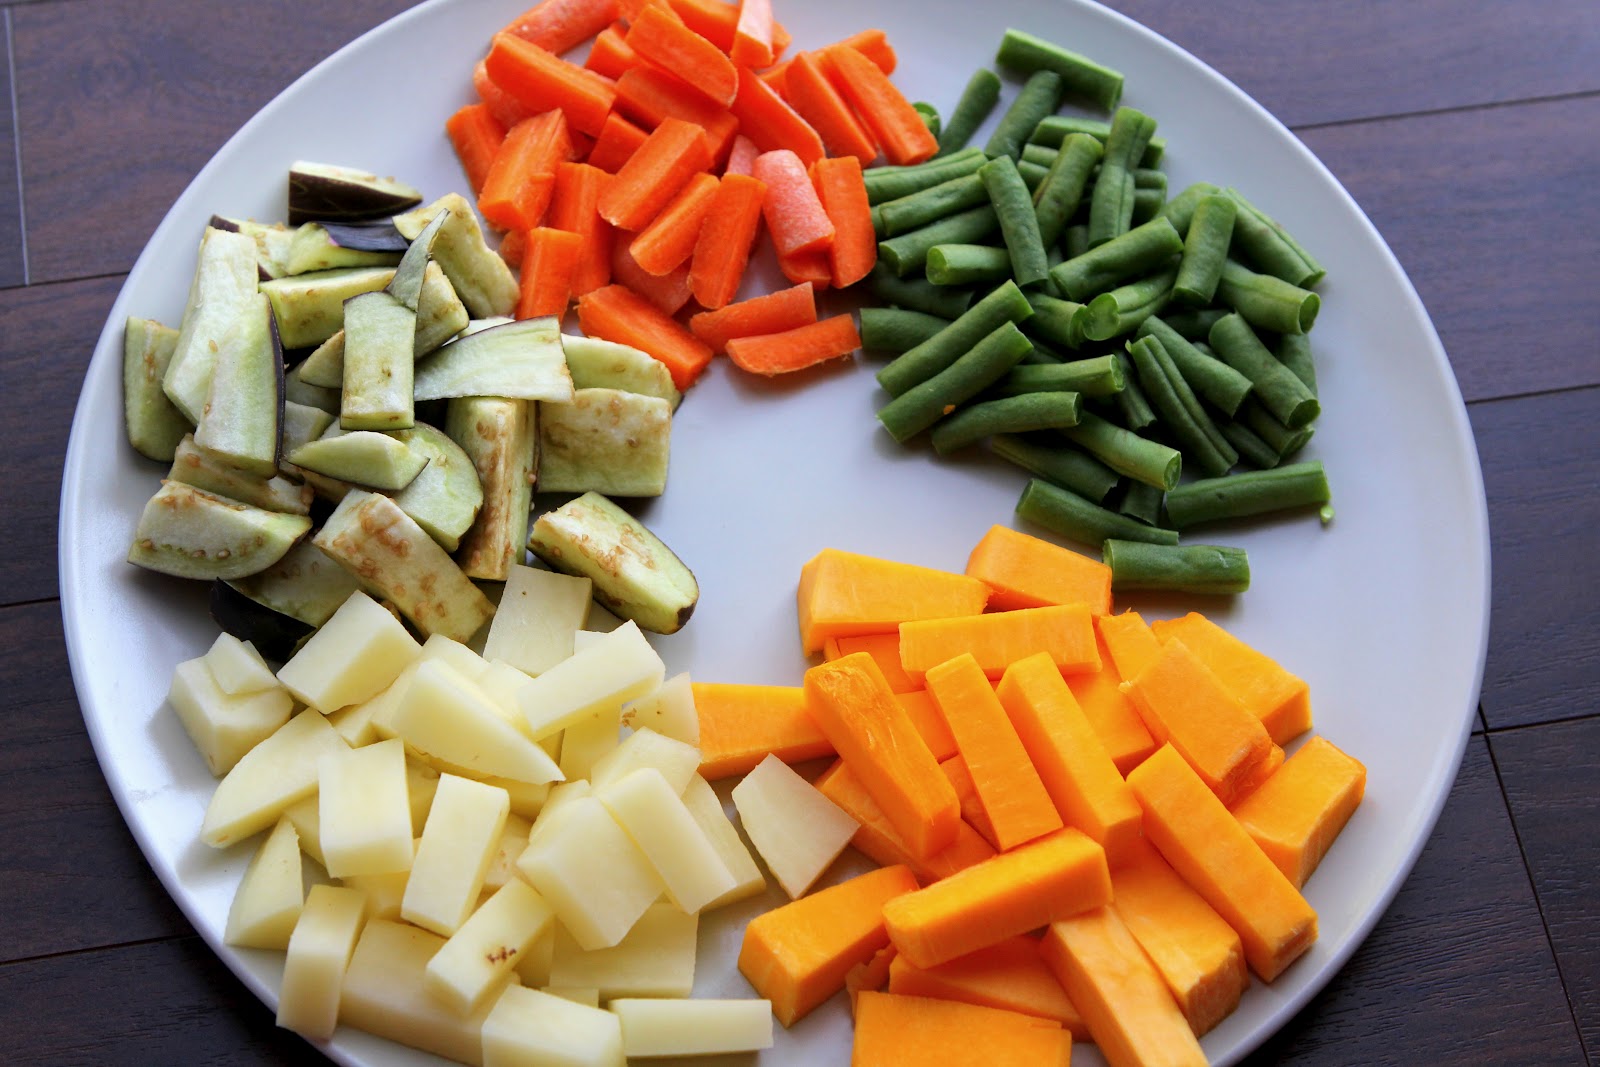
2 1/2 Cups chopped vegetables - a mix of potatoes, pumpkin, green beans, carrots and eggplant
Curry leaves from one spring
2 Small green chilies - slit lengthwise in the center
1/4 Cup grated coconut
2 Shallots
1 Teaspoon cumin seeds
1/2 Cup yogurt
1/4 Teaspoon turmeric powder
Salt to taste
Red chili powder to taste
Water as needed

  • Chop vegetables into 1 inch long pieces. You can use a variety of gourds, beans and squash or yams. Make sure you choose vegetables that are firm and won't get watery when cooked. 
  • Add the vegetables, curry leaves, green chilies, turmeric powder and a little bit of water enough to cook veggies to a pot and cook until the vegetables are tender. 
  • On the side, grind the coconut, shallots and cumin seeds coarsely in a food processor. 
  • Add the coconut mixture to the veggies, mix well and cook for a couple of minutes. 
  • Add yogurt at the end, salt and red chili powder to taste, water if necessary and simmer for a few minutes. Turn off the heat and it's ready to serve.


Spinach Thoran

Ingredients:
2 Cups packed finely chopped spinach
2 Heaping tablespoons of grated coconut
1 Large shallot
1 Green chili
1 Large garlic clove - chopped
Curry leaves from one spring
2 Dry red chilies
1/2 Teaspoon mustard seeds
1/4 Teaspoon turmeric powder
2 Teaspoons oil
Salt to taste

  • Grind coconut, shallot and green chili coarsely and keep aside. 
  • Heat oil in a pan, add mustard seeds and let them splutter. 
  • Add chopped garlic, curry leaves, red chilies and turmeric powder, and saute until fragrant. 
  • Add the coconut mixture and chopped spinach, salt to taste and cook stirring regularly. 

Serve the thoran and aviyal with some long grain rice or pooris with a side of pickle and papad.


I'm submitting these recipes to the South Indian Cooking Event started by Anu.


Thursday, August 9, 2012

Blog Hopping

The blogging community has opened up a world of culinary possibilites. I bookmark about a dozen recipes every day and at least try to use an interesting technique, a new ingredient or get inspiration from them even if I can't go through them all. There are way too many awesome recipes to try and way too many great cooks to get to know for one lifetime. But the first blogger I came across about 5 years back while looking for Imperial Cold Drink House, and quickly realized the popularity of, was Nupur of One Hot Stove. Nupur is hugely popular in the blogging community, and it is very well deserved. She always has some delicious recipes and useful tips for her readers. And there are few who can write as beautifully as she does.

Her latest post talks about the mighty machines in our kitchen - food processors. It made me fall in love with the Ronald food processor my parents gifted me all over again. I can't thank this little helper of mine enough for making my life easier. I use it to knead dough when I have a large group of people to feed, make soups, chutneys, idly-dosa batters and a zillion other things. It was time to show it some love by making Nupur's red bell pepper pesto. What a fantastic recipe! I have used roasted red bell peppers in wraps, hummus, eggplant dips etc., but have never tried pesto with it. Coincidentally, I had also picked up a bunch of red bell peppers on sale from Sprouts the other day. Nupur's post came at the right time. With whatever substitutable ingredients on my hand, I made the pesto today. There was a fresh spring of basil in the garden - totally meant for pesto. The only nuts available in my pantry were almonds. They don't have an overpowering taste and blended in just perfectly. Husbby is raving about this pesto and I'm really pleased with the outcome as well. I'll surely be making this for a potluck or a party!

Updated image : I made this pesto without tomato and I think I like this better. 
Roasted Bell Pepper - Basil Pesto

Ingredients:
2 Large red bell peppers - roasted, peeled and seeded
1/2 Tomato (optional)
2 Garlic cloves
1/2 Cup almonds (you can also use a mix of almonds and cashews)
Basil - handful of leaves
1 Teaspoon paprika or to taste
Salt to taste

  • Roast bell peppers using the technique I've mentioned here. Or simply use the bottled ones.
  • Grind all the ingredients into a fine pesto. I omitted olive oil completely. The pesto tasted just perfect without it, but go ahead and add it if you like the taste. I didn't have any jalapeno. Paprika was a good substitute for smoky heat. 

We enjoyed the pesto with some chips. I'll probably be spreading the leftovers over a slice of bread tomorrow. 

Wednesday, August 8, 2012

First Zucchini!

Finally, after fighting last year's luck and some persistent slugs, my zucchini plant has yielded its first fruit. As I mentioned earlier, I knew exactly what I was going to make with the first zucchini. Hubs and I have become huge fans of this simple recipe to make zucchini fries/chips. The original inspiration was a recipe by Veggie by Season. I had tried it in my egg-aversion days and had replaced egg with some yogurt to help the breadcrumbs stick. Sadly, I ended up with a product far from being crunchy. The yogurt made it a soggy mess. Ever since, I have resorted to the good ol', comparatively healthy technique of shallow frying. I also switched to panko bread crumbs instead of the regular ones since they provide a lot more crunch. Some tweaking to the original seasoning of simple salt and pepper makes this version quite flavorful. Today we enjoyed the chips as appetizers for dinner. One zucchini was just enough to get us started on the rest of the courses. 

The picture came out sad, only because I was too hungry to spent time on photography!
Zucchini Fries/Chips

Ingredients:
1 Zucchini
1/2 Cup yogurt - whisked
3/4 Cup panko  bread crumbs
Paprika to taste
Dash of garlic powder
Salt to taste
Oil spray/oil

  • Cut zucchini in about 1/8 inch thick disks. Don't make it too thin. 
  • Whisk some yogurt (with a few drops of water if needed) so that it's smooth. Season it with paprika, salt and a dash of garlic powder. 
  • Take the bread crumbs in a plate and season them with paprika, salt and garlic powder as well. Seasoning yogurt as well as the bread crumbs will make these chips flavorful throughout. 
  • Dip the zucchini in yogurt, then press into the bread crumbs on both sides and fry in a pan using oil spray. If you don't have oil spray, simply spread some oil on the pan. Fry on both sides until golden brown. 

You can enjoy these chips with some ranch or another creamy dip, but they taste just perfect by themselves. 

Friday, July 27, 2012

Gongura = Ambadi!

For the longest time, I knew Gongura as the leafy green from Andhra (a south Indian state). Reddy aunty, our neighbor and family friend in NY, used to make this wonderful tangy chutney with it to go with one of her many delicious rice preparations. The Indian store here carries Gongura pretty often but I never ventured into trying it. I finally bought a couple of bunches yesterday and started looking for recipes to make that chutney. Leave the chutney aside, what do I find?? Gongura is the same vegetable we Maharashtrians love and call Ambadi! Once I got over the fact that I didn't know Gongura was my most loved Ambadi, I picked up the phone and called mom to express my joy. Mom goes, "Of course, I knew it. Don't you remember I made ambadichi bhaji in NY a few times?". I don't know why, but I don't recall it at all. The Ambadi we get in Maharashtra doesn't have stems as red as the Andhra variety, but tastes exactly the same. Sour, tangy leaves that remind you of the taste of tamarind.


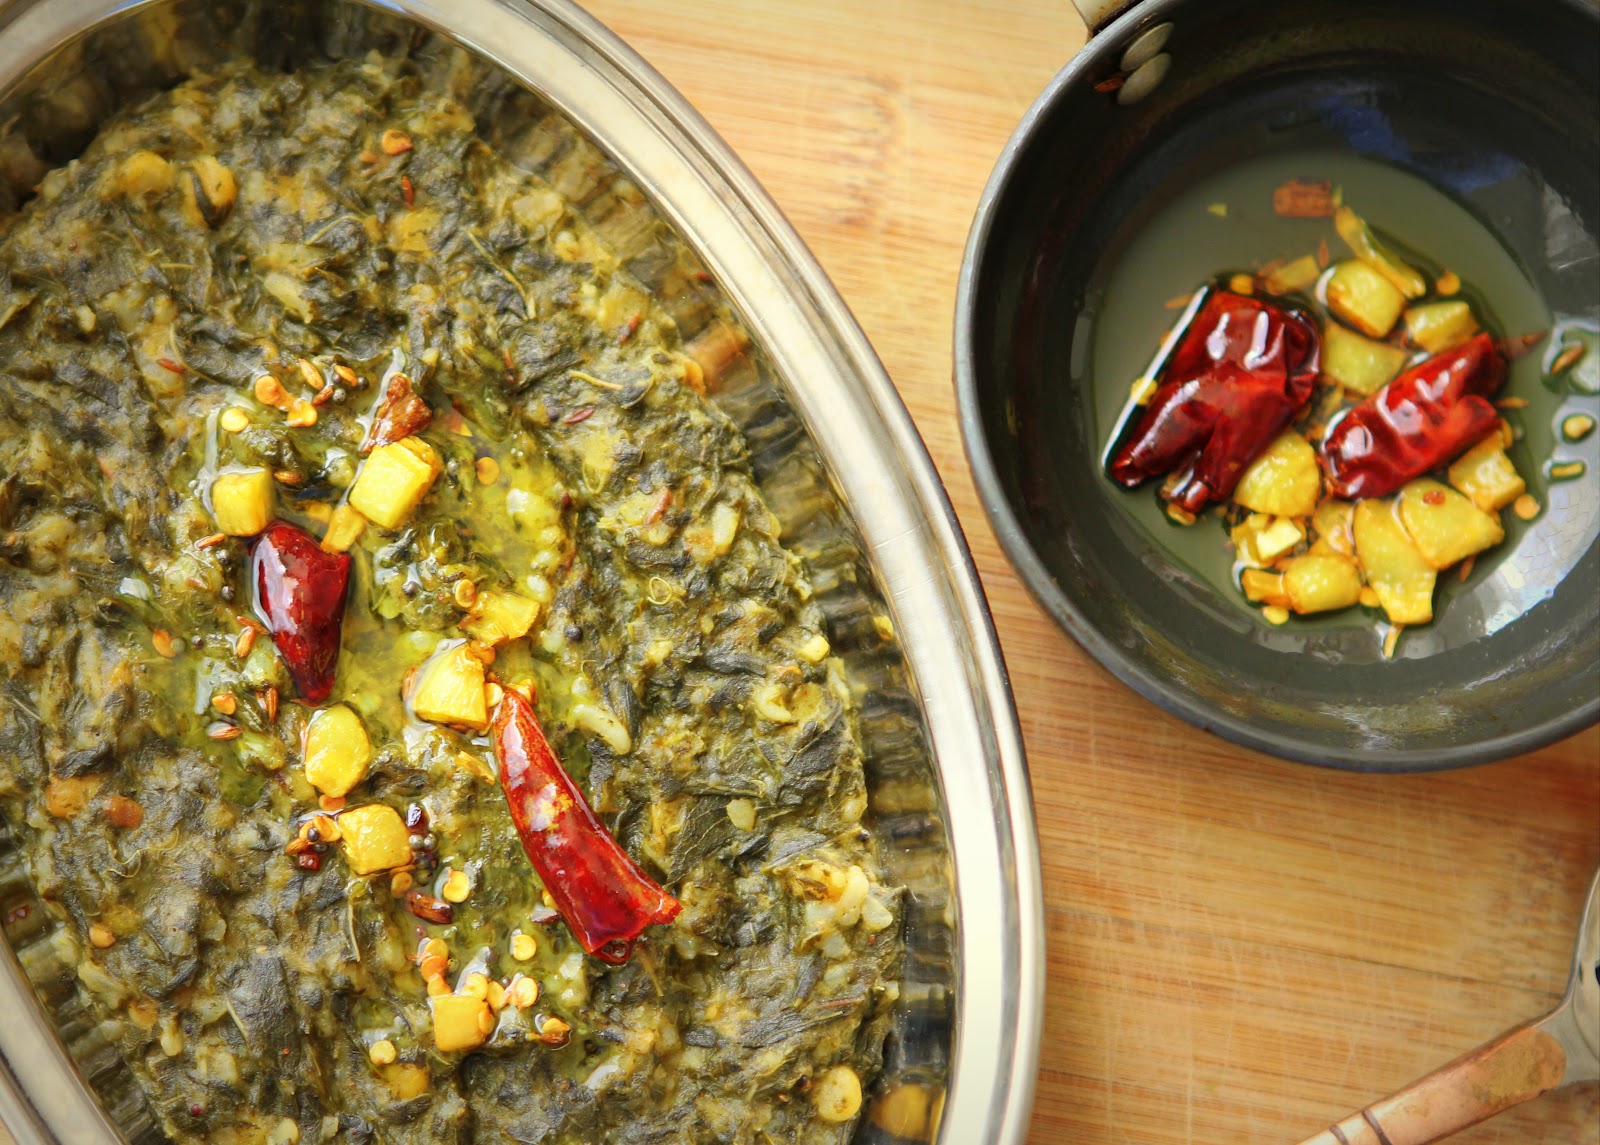
Ambadi is a popular leafy vegetable, especially in the southern part of the state where I come from. The leaves are cooked thoroughly so that they get gargatta, or almost mashed. Then they are tempered with the most fragrant combination of garlic and red chilies. There are no powdered spices, garlic providing most of the flavor and smokiness. A little bit of jaggery balances the sourness of the greens perfectly. People from my hometown Kolhapur tend to use jaggery much more than sugar since it's a prime sugarcane producer.  Ambadichi bhaji with some bhakri, raw onion, garlic chutney or spicy thecha is my kind of comfort food. It's a regular lunch combination of the farmers in Maharashtra too. All the ingredients are dry enough that they can be wrapped up in a piece of cloth and carried to the farms without worrying about containers or spills. I don't have to worry about any of that, but I could eat Ambadichi bhaji every day if I had to!


Ambadichi Bhaji

Ingredients:
2 Bunches Ambadi or Gongura
Fistful of rice, toor daal and chana daal combined
1 Small piece of jaggery (~1 teaspoon grated jaggery)
3 Tablespoons oil
1/2 Teaspoon mustard seeds
1/2 Teaspoon cumin seeds
5-6 Garlic cloves - smashed and chopped into chunky pieces
3-4 Dry red chilies
1/4 Teaspoon turmeric powder
Salt to taste

  • Discard the stems of ambadi and wash the leaves well.
  • Wash the rice, toor daal and chana daal. This is just to add some body and bite to the bhaji. A fistful of the combination is enough. Take a little more of rice than the daals. 
  • Pressure cook the leaves, rice and the daals with 3-4 whistled until soft. Discard the water that it's cooked in so it takes away some sourness out of the leaves making them more palatable.
  • In a kadhai, heat oil, add mustard and cumin seeds and let them splutter. Add garlic and fry it until golden brown. Garlic smells heavenly when fried like this and adds a lot of flavor to the bhaji. Add dry red chilies cut in half and turmeric powder at the end so they don't burn.
  • Add about a tablespoon of this tempering to the cooked leaves, add jaggery and season with salt and cook for a couple of minutes, mashing with the back of your spoon.
  • While serving, pour some of that extra garlic tempering over the bhaji and enjoy with bhakari or rice. 


Wednesday, July 25, 2012

Celebrating Shravan

Friday marked the first day of the Hindu calendar month Shravan. Shravan brings with it heavy monsoons after torturous summer heat, and the dry, deprived earth gets blanketed in lush greenery. As oceans swell and become dangerous with the onslaught of monsoon, fishing activity slows down. Everyone practices vegetarianism and gets ready to celebrate the changes in the surroundings that monsoon brings with it. Shravan is considered a holy month and probably has the most number of Hindu festivals. Many fast on Mondays to please Lord Shiva; newly married women in Maharashtra worship the Shivalinga on Tuesdays for their husband's well-being.


Shravan was my favorite time of the year for the number of school holidays we had. The days we did go to school were spent attending prayers, celebrations, and waiting for lunch breaks to attack each other’s tiffin boxes stuffed with goodies our moms prepared all through the month. We were distracted by the colorful clothes and jewelry on 'civil dress days'. Not that we didn’t dress civilly otherwise, but my school excused us from wearing school uniform every Monday and Friday of the month.  

At home, we were treated to a number of sweets and other special preparations in Shravan. My aaji (grandma) observed every fast religiously which she broke around sunset with some satvik food and sweets. Mom and the two of us sisters never fasted, but we relished the food nonetheless. Mom made fragrant ghee out of freshly churned butter to make the sweets decadent or simply poured it over warm sabudana khichadi. Among the many delicacies, Sanjyachi Poli stands out as one of my favorites. Sanja - sooji or semolina sweetened with jaggery - is stuffed inside whole wheat dough to make flaky, buttery, melt-in-the-mouth rotis, or poli as we call it. We Marathi people love our sweet rotis, like Puran poli, Gulachi poli or Khavyachi poli. Sanja poli is simpler to make compared to the others as the stuffing is not difficult to work with. It's not overwhelmingly sweet either. Some people make the stuffing with sugar, but I swear by jaggery. And as weird as this may sound, Sanjyachi poli tastes amazing with some spicy Maharashtrian style mango pickle! If you don't want to try that combination, enjoy it with some ghee or warm milk. 

**Note: The recipe below makes about 10-12 rotis depending on how big you make them. 

I'm submitting this recipe to the Celebrate Event by Jagruti, hosted by Sangeetha this month to celebrate the month of Shravan. 


Sanjyachi Poli/ Sooji Roti

Ingredients:
Sanja:
1/2 Cup Rava/Semolina
2 Tablespoons ghee/clarified butter
3/4 Cup grated jaggery
3/4 Cup water + more if needed
5-6 Cardamom pods - powdered
Couple of pinches saffron
Pinch of salt

Poli dough:
~ 1 3/4 Cups whole wheat flour
Water to knead the dough
1 Teaspoon oil
Pinch of salt
  • First, knead the dough with just enough water so you have a soft dough ball. It should be slightly softer than the usual roti dough so you can roll it with light pressure. This will ensure the stuffing doesn't get pressed out. Cover dough and keep aside. 
To make sanja
  • Add ghee to a kadhai and roast semolina on low-medium heat till it gets a reddish hue. It'll be very fragrant when roasted well. Make sure you don't over-roast it. Keep aside. 
  • Cook jaggery with water to help it melt, then add the roasted semolina, cardamom powder, saffron and a pinch of salt and cook down until the semolina is soft. Add a little warm water and cook down if the sanja is not cooked through. The stuffing should not be watery or else you'll have a hard time rolling rotis. 
  • Take a golf ball size dough and stuff sanja the size of a lime. The more stuffing you have the better. Roll the rotis gently making the sides thinner than the center. Apply a little ghee to each side while roasting. 


Sunday, July 15, 2012

Celebrating Ice-Cream!

Did you know it was National Ice-Cream day today? How cool is that?? I discovered just today that the third Sunday every July is dedicated to this frozen dessert we all love and adore. Here are some fun facts for you. I made some ice-cream to celebrate this day (duh!). The kind of ice-cream I grew up eating - simple and elegant flavors with all natural ingredients. No corn syrup, corn starch, milk powder or hydrogenated oil. Milk, cream, sugar and natural flavors - that's all you need to make some good ice-cream. 
  

I chose two of my favorite ingredients for flavoring - Kesar (saffron) and Ilaichi (cardamom). These two ingredients are ubiquitous in Indian desserts, providing sweet aroma and richness. I love the floral notes and touch of golden orange color saffron adds. My sister works for a food distributing company and gets me some of the best saffron available. Cardamom takes any dessert to a whole new level. I always make fresh cardamom powder from pods. Good quality ingredients make a world of a difference. A little bit of vanilla essence elevated those wonderful flavors in the ice-cream.


Creamy Kesar-Ilaichi ice-cream is India in a dessert bowl. This ice-cream is great by itself, fantastic with some warm gajar halwa or gulab jamun or goes great with some mango pulp, even better fresh mango. 


Kesar Ilaichi (Saffron Cardamom) Ice-Cream

Ingredients:
2 Cups whipping cream
2 Cups milk
3/4 - 1 Cup sugar (depending on how sweet you like it)
1 Teaspoon cardamom powder
1/2 Teaspoon saffron strands
1/2 Teaspoon vanilla essence
Chopped fruits for garnishing - pistachio or almonds

  • Warm 3-4 tablespoon of milk in the microwave. Add the saffron strands to warm milk to extract color and flavor. 
  • Now mix all the ingredients together, including the saffron milk and whisk it until the mixture is frothy and aerated. If using a hand mixy, whip it on low for about a minute. 
  • Chill the mixture for about an hour then churn in an ice-cream maker. 
  • When serving, garnish with some chopped dry fruits. Alternatively, you can add them to your ice-cream while making it. 

Sunday, July 8, 2012

Citrus Salad

Cleaning, cooking, grocery shopping, crafting, reading and studying. That's a Saturday well spent. In between all the chores (and a big scoop of Fro-Yo), I totally skipped my lunch yesterday. When the hunger finally hit, I threw together a quick salad for..umm..Luncher(Lunch cum Dinner=?) or Linner! Salad was the perfect choice for a meal on a hot day like the one we had yesterday.


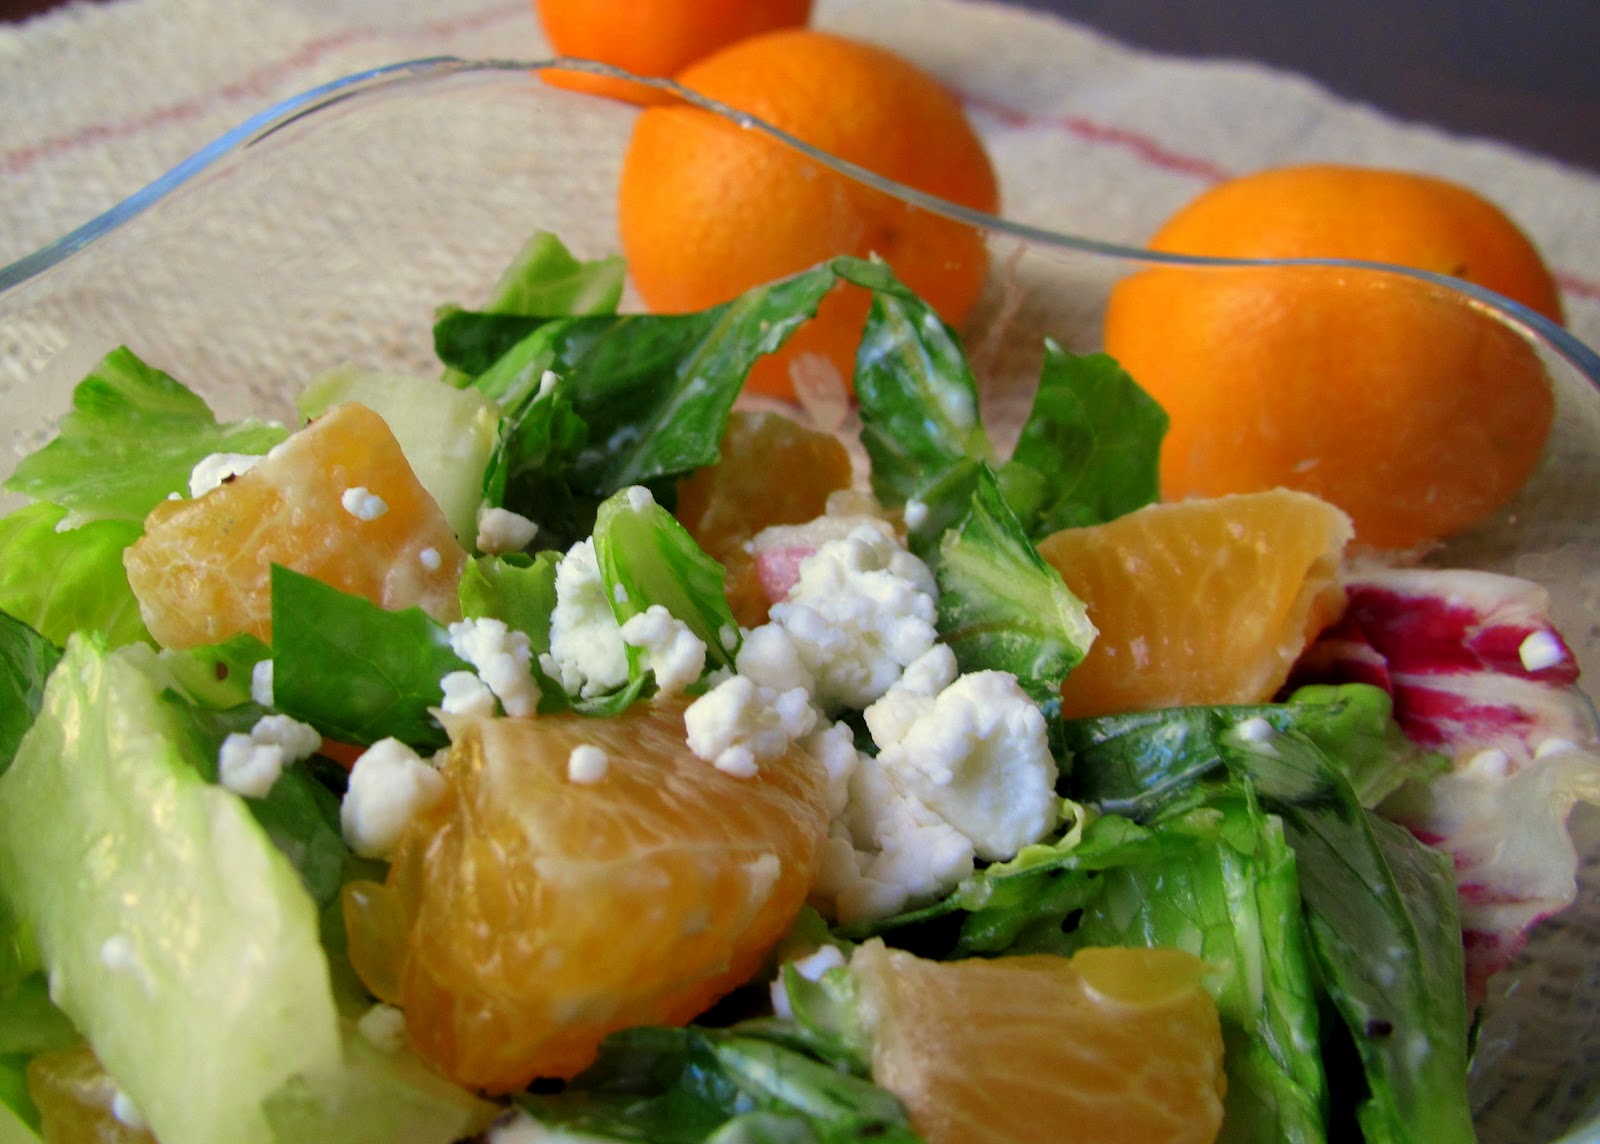
I talked about this deh-licious salad my friend made for Thanksgiving dinner. I love love love fruits in salads, which you can tell from here, here and here. I didn't have the original dressing recipe, but I knew all the important ingredients that made up the salad. It wasn't really meant to end up on the blog. The salad was so darn tasty though, that I couldn't resist posting the recipe (hence the crappy photography). This citrus-goat cheese salad with honey dressing is just perfect for a summer afternoon. The goat cheese gives it plenty of creaminess and slight pungent earthiness. And what can be more refreshing than citrus? I used tangerines - perfectly citrusy, easy to peel and separate the wedges, and full of bursting juices. The dressing comprising of two ingredients altogether couldn't have been simpler. 


Citrus-Goat Cheese Salad with Honey Dressing


To make this 'too simple to post a step-by-step recipe' salad, simply toss together chopped lettuce mix (Italian salad mix is the best), tangerine wedges cut in half and crumbled goat cheese. For the dressing, whisk together honey and red wine vinegar in almost equal parts (a little less vinegar than the honey, adjust the flavor to your liking), salt & pepper for seasoning and drizzle over the salad. 


With as little as 3 main ingredients, you have a salad bursting with flavors, textures and colors. 

LinkWithin

Related Posts Plugin for WordPress, Blogger...